Forked from apartridge/OppositeRenderer
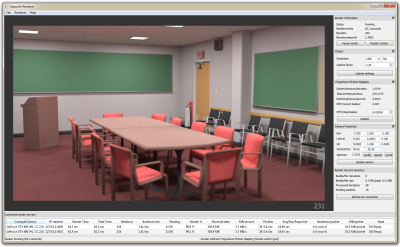
In short Opposite Renderer is a GPU Photon Mapping Rendering Tool implemented in CUDA using OptiX library. It allows importing Collada scenes files and then render them to an image using Progressive Photon Mapping.
This fork is intended to extend the original project to help solving Rendering Problem. See this paper for more info on the topic.
This program was done in the context of my final thesis (in spanish). RPSolver solves Rendering Problems, defined in an XML file, finding the best configuration that meets certain Lighting Intentions.
If this is your first time hearing about Opposite Renderer, we recommend you start with the original website: http://apartridge.github.io/OppositeRenderer/.
This project is a part of Stian Pedersen's master's thesis project at NTNU. This demo renderer contains a GPU implementation of the Progressive Photon Mapping algorithm. It is written in C++ using CUDA and OptiX. The renderer has a GUI and can load scenes from the well known Collada (.dae) scene format. It has a client-server architecture allowing multi-GPU (distributed) rendering with any number of GPUs. It has been tested with up to six GPUs via Gigabit ethernet with very good speedup.
- Visual Studio 2015
- CUDA v8.0
- OptiX v4.1
- Note: You must register first by completing a form. Then download information is emailed to you.
- Qt Open Source 5.9 for Windows
- Specifically the version
msvc2015for 5.9
- Specifically the version
- FreeGlut MSVC Package
- GLEW - OpenGL Extension Wrangler Library
- Open Asset Import Library
- A CUDA compatible GPU 2.0 or greater.
- Almost all recent GeForce GPUs support CUDA.
- This is a run only dependency, as the project can be built if the system doesn't have a CUDA compatible card.
- Windows 10 or newer, running on 64 bits.
Notes:
- This project may work with with Qt 5.2, CUDA 5.5, Visual Studio 2012 and OptiX 3.5. But require slight dependency changes.
The project needs some environment variables to be set so it can build. If you don't define them you will get missing files errors while compiling.
-
Define the following environment variables:
QTDIRshould point to your QT instalation dir.GLEW_PATHpoint to where you extracted GLEW.ASSIMP_PATHshould point to Asset Import installation dirFREEGLUT_PATHshould point to where you extracted FreeGlut.OPTIX_PATHpoints to OptiX installation directory
For example
QTDIR=C:\Qt\5.9\msvc2015 GLEW_PATH=C:\Program Files\Common Files\glew ASSIMP_PATH=C:\Program Files\Assimp FREEGLUT_PATH=C:\Program Files\Common Files\freeglut OPTIX_PATH=C:\ProgramData\NVIDIA Corporation\OptiX SDK 4.1.1 -
Open the Visual Studio Solution
OppositeRenderer.slnand build.
This can be done inside Visual Studio. There are tested *.dae scenes on the OppositeRenderer\RPSolver\examples folder
- Select
Standaloneas the primary project. This is the renderer. - Hit on Debug. Compilation can take several minutes.
- Wait for the GUI program to open, and go to File, Open
- Select any of the example files
- Enjoy!
If you really want, you can try to solve a sample RP, using the RPSolver library.
- Select
RPSolveras the primary project. - Hit on Debug. Compilation can take several minutes.
- Wait for the command line program to finish. It may take a minute or two depending on the CUDA core count of the running GPU
- Go to the folder
OppositeRenderer\RPSolver\examples\outputand there you will see the output of the runsolutions.csvwith the optimal configurations- A collection of images for the optimal results
- Changing the Rendering Method (Photon Mapping, Progressive Photon Mapping, etc.) makes the program to crash due to OptiX Context reallocation errors.
- Sometimes the program crash while exiting due to OptiX Context destruction errors.
