-
Notifications
You must be signed in to change notification settings - Fork 668
Understanding Renderer & Context
This guide is a deep dive into how VexFlow draws music onto a webpage. If you want to get music symbols on your webpage quickly, you could instead read the code in the unit tests, which contain good examples of how to use the VexFlow API.
VexFlow projects usually start with the same five lines of code.
const { Renderer, Stave } = Vex.Flow;
const div = document.getElementById("output")
const renderer = new Renderer(div, Renderer.Backends.SVG);
renderer.resize(500, 250);
const context = renderer.getContext();
These five lines set up the space where we'll render the music, and create the context object that will do the drawing. Let's take a deep dive into them to really start to understand how VexFlow's rendering mechanism works.
First, we import the Renderer and Stave classes from the Vex.Flow namespace. This approach is simpler than typing Vex.Flow.Renderer and Vex.Flow.Stave every time you need them.
const { Renderer, Stave } = Vex.Flow;The next line gets a reference to the DIV that will hold our SVG, where the music will be rendered. This assumes our JS is running on a webpage that has a <div id="output></div>:
const div = document.getElementById("output")Up next is where the magic starts to happen. We make a renderer.
A renderer in VexFlow creates a context, which you'll soon see is the most important character in this story. The renderer also creates a few shared methods to make it possible for the two different types of contexts (SVG & Canvas) to use the same API. But once you've created a renderer and set up a size for your music, you'll rarely reference it again.
The renderer creates the context and sizes the available drawing space.
We pass the new Renderer(...) class constructor two arguments.
- The DIV in which we'll render our SVG.
- A constant representing the kind of
contextwe want to create:Renderer.Backends.SVGandRenderer.Backends.CANVAS.
const renderer = new Renderer(div, Renderer.Backends.SVG);Yay! We have a renderer. We'll do two things with it:
First, we tell it how big we want our SVG to be:
renderer.resize(500 /* width */, 250 /* height */);Then we ask it to give us the context it created so that we can use it when we need to draw things:
const context = renderer.getContext();Tada! That was the real goal of these five lines of code. Let's take a second to note that our context is an instance of SVGContext:
console.log(`Context is an instance of: ` + context.constructor.name);
// => "Context is an instance of: SVGContext"
And its code can be found in svgcontext.ts.
A VexFlow context is the class that you use to draw the music.
You can either do it on an HTML Canvas using VexFlow's CanvasContext. Or you can do it on an SVG element using VexFlow's SVGContext. Everything that needs to draw in VexFlow uses one of these contexts. You'll see things like voice.draw(context, stave) or stave.setContext(context).draw() sprinkled throughout the codebase.
An SVGContext or CanvasContext contains all of the classic drawing tools. Methods for drawing lines, rectangles, circles, polygons, text, etc.... It does the heavy lifting of translating shapes into SVG code (or HTML Canvas pixels) for us.
If you've followed this far, we're ready to explore drawing with context which, in addition to giving you an idea of how everything in VexFlow is drawn, turns out to be really fun. (It's basically LOGO for adults.)
These next steps can be followed in this example.
The basic paradigm of a context is to move a pen from point to point, creating a path. We can then either trace the outline of the path with a stroke(), or if we've created an enclosed space (say, a polygon) with our path, we can fill() it. These drawing commands are chainable.
First, we have to tell our context to start recording our moves, by beginning a path. Let's draw and fill a triangle to get started:
context.beginPath() // start recording our pen's moves.
  .moveTo(0, 0)     // pick up the pen and set it down at x=0, y=0 (top/left corner of the context).
  .lineTo(50, 0)    // add a line toward the right (0, 0) => (50, 0).
  .lineTo(25, 50)   // add a line to the left and down (50, 0) => (25, 50).
  .closePath()      // add a line back to where the path started (0, 0) closing the triangle.
  .fill({ fill: 'yellow' }); // fill our triangle in yellow.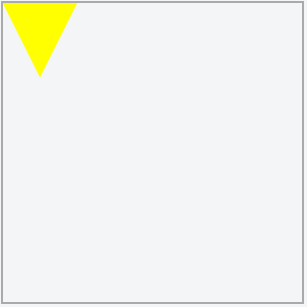
Cool, right?
If you take a look at the code in svgcontext.ts, you'll see that these human-readable instructions are being translated to a more arcane set of instructions that will go in the SVG. (In this case M0 0L50 0L25 50Z.)
Now let's draw a circle, but not fill it:
context.beginPath()
  //  ( x,        y,   radius, startAngle,   endAngle, counterclockwise)
  .arc(50,       50,       25,          0,  2*Math.PI,            false)
  .stroke();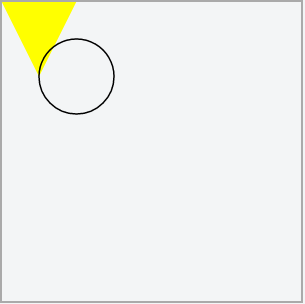
What if we wanted it to be more colorful? Let's delete it. An SVG shares many of the methods and properties that any other HTMLElement has, including 'removeChild' and 'lastChild'. Our svg element is at context.svg:
context.svg.removeChild(context.svg.lastChild);We don't have to give context instructions for the circle again. It will remember the path we were working on until we call beginPath() again. So, let's make our circle thicker & more colorful, like a Halloween donut. Then we just call stroke() again.
context.save();    // save the prior style so we can come back to it.
context.setStrokeStyle('orange');
context.setLineWidth(20);
context.stroke();
context.restore(); // restore the prior style, so our stave's lines aren't thick and orange. 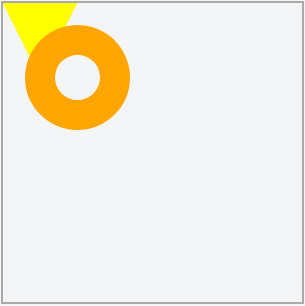
The two rectangle methods, rect() and fillRect(), are special. They will draw directly to the canvas without your having to call stroke() or fill().
//          ( x,  y,  w,  h, attributes )
context.rect(85, 50, 50, 50, { fill: 'lightgreen' });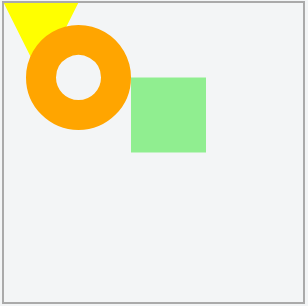
How does this all play out with musical notation? VexFlow has objects representing almost all of the elements of notation. When we construct an element, we give it the information it needs to know to be able to render. Later its parent element shares a context with it, so that it can draw itself.
The easiest example of this to understand is a Stave. All it needs to know is, where it goes and how wide it should be:
const stave = new Stave(110 /* x */, 60 /* y */, 90 /* width */);Perfect, let's draw it!
stave.draw(); // [RuntimeError] NoContext: No rendering context attached to instance.Whoops! Why couldn't the stave draw itself? Because it didn't have access to all of the wonderful drawing methods that a context provides. Let's give it what it needs, and try that again:
stave.setContext(context).draw();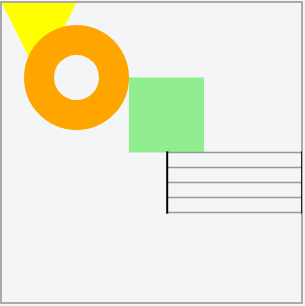
Excellent, the design for our children's piano method book is coming along nicely.
Though you may never need to directly call the methods on a context, from now on, when you see renderer, context, and draw(), you'll know what's really happening behind the scenes!
[ VexFlow.com ] [ API ] [ GitHub Repo ] [ Contributors ]