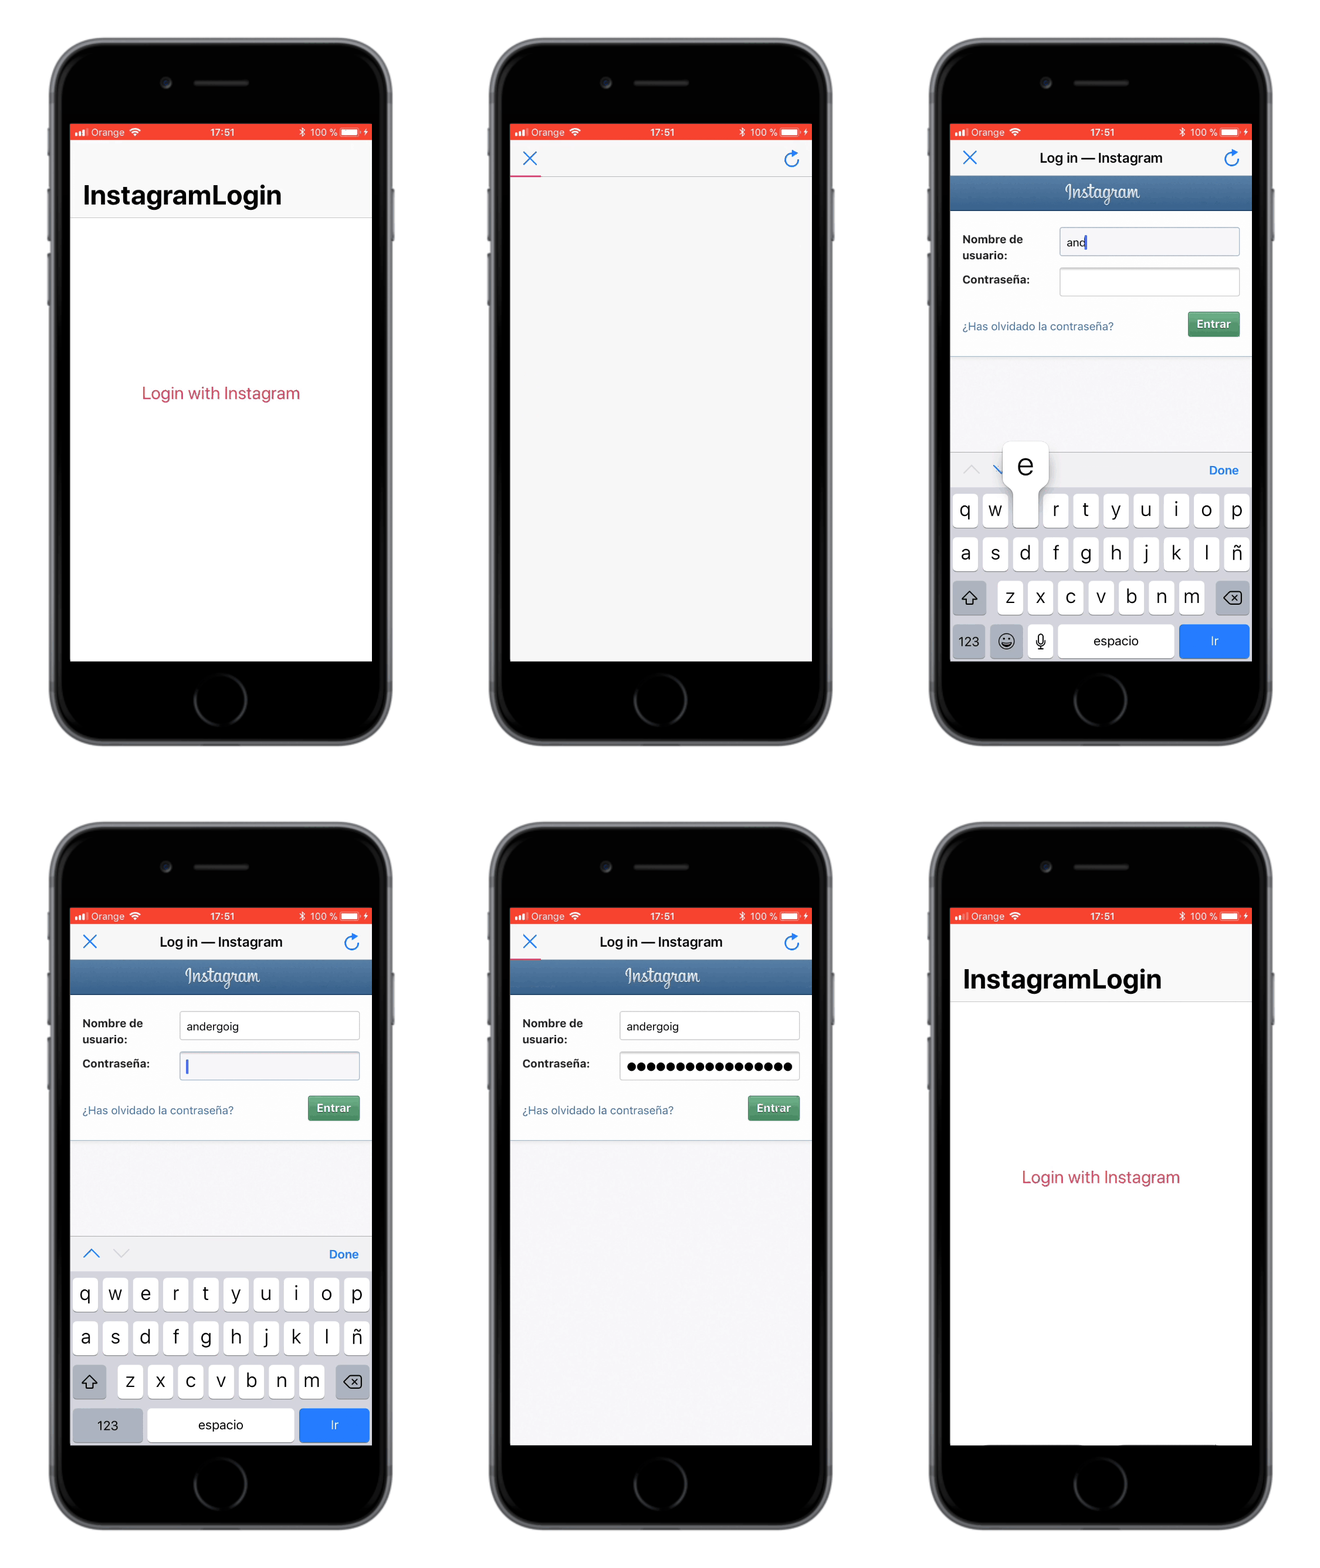
InstagramLogin allows iOS developers to authenticate users by their Instagram accounts.
InstagramLogin handles all the Instagram authentication process by showing a custom UIViewController with the login page and returning an access token that can be used to request data from Instagram.
Inspired by projects like InstagramAuthViewController and InstagramSimpleOAuth, because of the need for a simple and easy way to authenticate Instagram users.
To run the example project, clone the repo, and run pod install from the Example directory first.
Second, go to your Instagram's developer portal, click on Manage your client, and uncheck the option "Disable implicit OAuth" from the Security tab.
Third, edit the Constants.swift file with your client info from Instagram's developer portal:
static let clientId = "<YOUR CLIENT ID GOES HERE>"
static let redirectUri = "<YOUR REDIRECT URI GOES HERE>"
Fourth, go ahead and test it! 🚀
- iOS 9.0+
- Xcode 9.0+
- Swift 4.0+
InstagramLogin is available through CocoaPods. To install
it, simply add the following line to your Podfile:
pod 'InstagramLogin'Carthage is a decentralized dependency manager that builds your dependencies and provides you with binary frameworks.
To integrate InstagramLogin into your Xcode project using Carthage, specify it in your Cartfile:
github "AnderGoig/InstagramLogin"
Follow the detailed guidelines here.
Simply copy all the Swift files from the InstagramLogin/Classes folder into your Xcode project.
First of all, go to your Instagram's developer portal, click on Manage your client, and uncheck the option "Disable implicit OAuth" from the Security tab.
import InstagramLogin // <-- VERY IMPORTANT! ;)

class YourViewController: UIViewController {

    var instagramLogin: InstagramLoginViewController!

    // 1. Set your client info from Instagram's developer portal (https://www.instagram.com/developer/clients/manage)
    let clientId = "<YOUR CLIENT ID GOES HERE>"
    let redirectUri = "<YOUR REDIRECT URI GOES HERE>"

    func loginWithInstagram() {

        // 2. Initialize your 'InstagramLoginViewController' and set your 'ViewController' to delegate it
        instagramLogin = InstagramLoginViewController(clientId: clientId, redirectUri: redirectUri)
        instagramLogin.delegate = self

        // 3. Customize it
        instagramLogin.scopes = [.basic, .publicContent] // [.basic] by default; [.all] to set all permissions
        instagramLogin.title = "Instagram" // If you don't specify it, the website title will be showed
        instagramLogin.progressViewTintColor = .blue // #E1306C by default

        // If you want a .stop (or other) UIBarButtonItem on the left of the view controller
        instagramLogin.navigationItem.leftBarButtonItem = UIBarButtonItem(barButtonSystemItem: .stop, target: self, action: #selector(dismissLoginViewController))

        // You could also add a refresh UIBarButtonItem on the right
        instagramLogin.navigationItem.rightBarButtonItem = UIBarButtonItem(barButtonSystemItem: .refresh, target: self, action: #selector(refreshPage))

        // 4. Present it inside a UINavigationController (for example)
        present(UINavigationController(rootViewController: instagramLogin), animated: true)
    }

    @objc func dismissLoginViewController() {
        instagramLogin.dismiss(animated: true)
    }

    @objc func refreshPage() {
        instagramLogin.reloadPage()
    }

    // ...
}

// MARK: - InstagramLoginViewControllerDelegate

extension YourViewController: InstagramLoginViewControllerDelegate {

    func instagramLoginDidFinish(accessToken: String?, error: InstagramError?) {

        // Whatever you want to do ...

        // And don't forget to dismiss the 'InstagramLoginViewController'
        instagramLogin.dismiss(animated: true)
    }
}If you have feature requests or bug reports, feel free to help out by sending pull requests or by creating new issues. Please take a moment to review the guidelines written by Nicolas Gallagher:
InstagramLogin is available under the MIT license. See the LICENSE file for more info.
InstagramLogin is brought to you by Ander Goig and contributors to the project. If you're using InstagramLogin in your project, attribution would be very appreciated.
Ander Goig, goig.ander@gmail.com


