Create and manage Isolated Virtual Environments for Golang.
Why a tool to generate and manage virtual environments in Go?. Well, sometimes programmers need to work in or maintain a project that requires a specific version of Go or use specific versions of 3rd party libraries that maybe depend themselves on some specific Go version.
There are already tools like godep to vendoring dependencies and make the programmer able to build a package in
consistent way reproducing the exact package ecosystem that was used when it was developed and Go versions managers
like gvm that helps the programmer to install and use different Go versions. But there is no a tool that can do
both and in an easy and familiar way.
VenGO is able to install as many Go versions from as many sources that programmers want and to create as many isolated
environments as they need using one or more Go versions. The programmers can then export and import VenGO environments
from and to machines using the export and import commands.
VenGO works and is actively maintained in POSIX platforms, it requires go1.2 or higher to be compiled
| Platform | Status | Maintainer |
|---|---|---|
| GNU/Linux | Stable | @damnwidget |
| FreeBSD | Stable | |
| OS X | Stable | @damnwidget |
| Windows | Garbage |
note: Support for Windows is planned
VenGO can be installed following two simple steps
Install VenGO and it's dependencies
wget --no-check-certificate https://raw.github.com/DamnWidget/VenGO/master/install.sh -O - | bash
curl -L https://raw.github.com/DamnWidget/VenGO/master/install.sh | bash
Finally the command below will enable the vengo command in your system
$ source $HOME/.VenGO/bin/vengo
If you want to enable vengo in permanent basis in your system, you can add it to your .bashrc, .zshrc or .profile
files like
echo "source $HOME/.VenGO/bin/vengo" >> $HOME/.bashrc
If you are a fish user, you will probably copy and paste the code below to make your vengo installation work.
note: copy one or another depending of which tool (curl or wget) do you want to use
mkdir -p ~/.config/fish/functions; curl https://raw.githubusercontent.com/DamnWidget/VenGO/master/tools/fish/vengo.fish > ~/.config/fish/functions/vengo.fish; curl https://raw.githubusercontent.com/DamnWidget/VenGO/master/tools/fish/vengo_activate.fish > ~/.config/fish/functions/vengo_activate.fish
mkdir -p ~/.config/fish/functions; wget --no-check-certificate https://raw.githubusercontent.com/DamnWidget/VenGO/master/tools/fish/vengo.fish -O ~/.config/fish/functions/vengo.fish; wget --no-check-certificate https://raw.githubusercontent.com/DamnWidget/VenGO/master/tools/fish/vengo_activate.fish -O ~/.config/fish/functions/vengo_activate.fish
Fish users should use the command vengo_activate instead of vengo activate to activate environments.
VenGO is quite similar to Python's virtualenvwrapper tool, if you execute just vengo with no arguments you will get
a list of available commands. The most basic usage is install a Go version
note: VenGO is not able to use Go installations that has not been made with VenGO itself
The following command will install Go 1.2.2 from the mercurial repository:
$ vengo install go1.2.2
This install the go1.2.2 version into the VenGO's cache and generates a manifest that guarantee the installation integrity, now the programmer can create a new environment using the just installed Go version
note: VenGO supports installation of go1.5 and superior using the -bootstrap (or -x) flag and a valid go1.4 vengo root)
$ vengo mkenv -g go1.2.2 MyEnv
This will create a new isolated environment that uses go1.2.2 and uses $VENGO_HOME/MyEnv as GOPATH
To activate this new environment thw programmer just have to use vengo activate with the name of the recently created
environment
$ vengo activate MyEnv
Now, whatever is installed using go get will be installed in the new isolated virtual go environment. It's GOPATH bin
will be already added to the programmer PATH so new applications should be available in the command line after installation.
To stop using the active environment just execute
$ deactivate
VenGO comes with ten different commands that will be used trough the vengo command line application
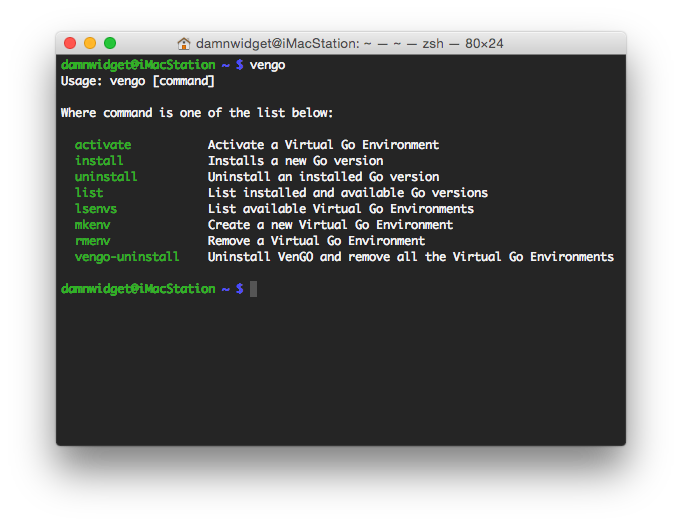
Vengo install is used to install new versions of Go, it can install them directly from the official mercurial repository, from a tar.gz packed source or directly in binary format in case that the user doesn't want to compile it.
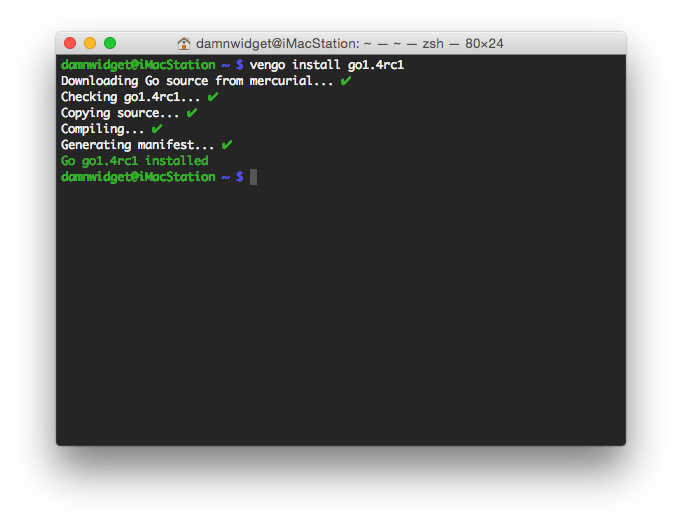
Install will download the sources from the official mercurial repository by default, then check and copy the specific version into a directory (in the VenGO cache directory) named as the version itself, compile it and generate a manifest for the installation. To download from a packaged tar.gz source use the -s or --source flag like in:
$ vengo install -s 1.3.3
In similar way, to download from a binary source use the -b or --binary flag like in:
$ vengo install -b 1.3.3
Vengo list is used to show a list of installed Go versions, available Go versions or both. If the list command detects that a installed Go version integrity is compromised, it will display a red ✖ mark, a green ✔ mark if not
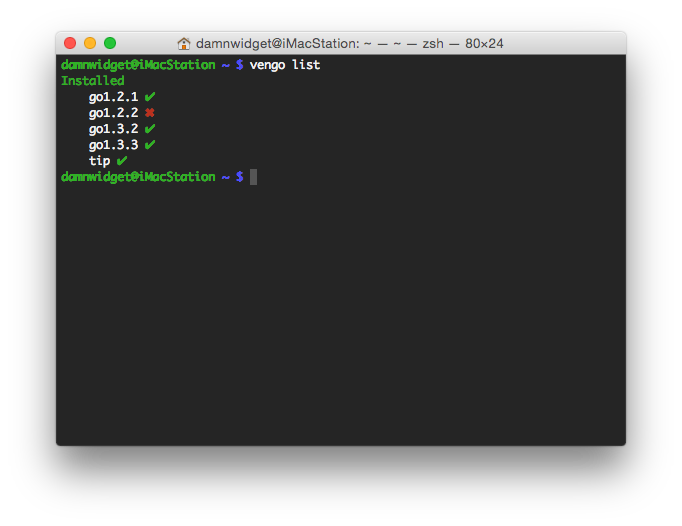
If the -n or --non-installed flag is passed to the list command, a complete list of available sources is returned back to the user ordered by binary, mercurial and tar.gz packed versions.
Versions that are prefixed like 1.2.2.<platform>-<arch> are binaries, note that is not neccesary to add the platform and architecture to the install command to donwload the version so for example if the list command return to us that the version 1.3.3.darwin-amd64-osx10.8 is available, we will write just:
$ vengo install --binary 1.3.3
The install command is smart enough to know that we are using a 64bits OS X and it's version, it will work in the exact same way on GNU/Linux and Windows
note: Windows support is not complete yet
Versions prefixed with go or release like go1.1 or release.r56 come from the official mercurial repository, the install command doesn't need any special flag to use it as it's the default download option, note that is not needed to add the go prefix neither but is a good practice to use it just to avoid confusion.
Finally, all the versions that doesn't have any prefix or suffix are tar.gz packaged versions of the source, just pass the --source flag to the install command in other to download them.
Vengo uninstall is used to uninstall a Go installed version, it doesn't remove any Virtual Go Environment that has been created using the deleted version but it will be shown by the lsenvs command as integrity compromised.
Vengo mkenv is used to create new Isolated Virtual Go Environments, the Go version to use must be specified as argument for the parameter -g or --go, if no version is pased, tip is tried to be used automatically.
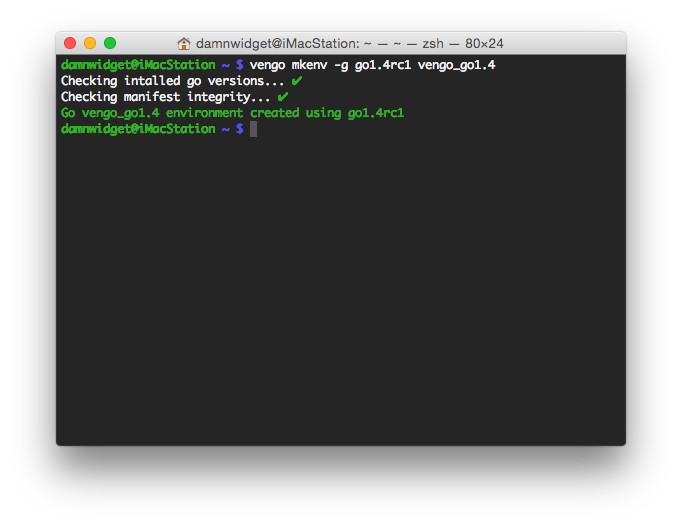
Vengo mkenv will use the name of the environment as prefix of the terminal prompt when the user switch to an environment using vengo activate but the users can specify whatever other prompt that they like passing a string to the parameter -p or --prompt so for exmample:
$ vengo mkenv -p "(VenGO [go1.4rc1])" -g go1.4rc1 vengo_go14rc1
Will give you a prompt like this one when you switch to it, (VenGO [go1.4rc1]) damnwidget@iMacStation ~ $
You can also force the environment reinstallation passing the flag -f or --force in case that the environment already exists
Vengo lsenvs is used to list Isolated Virtual Go Environments in your system. Integrity compromised environments will be shown with a red ✖ mark, a green ✔ mark will be shown otherwise
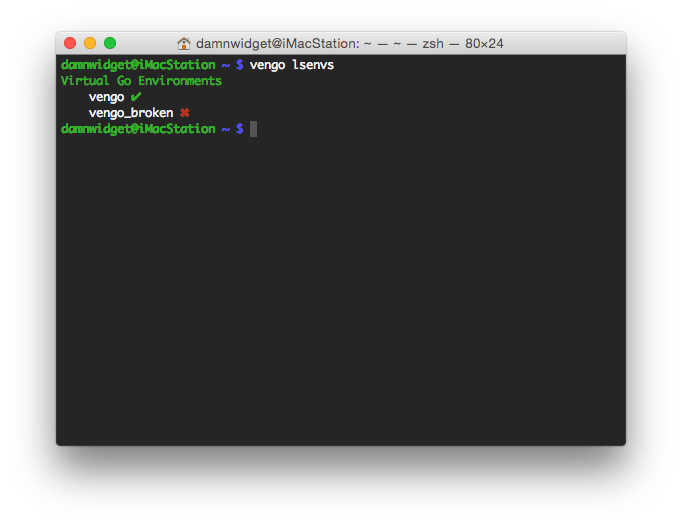
Vengo rmenv is used to delete Virtual Go Environments, delete an environment doesn't affect the Go version used to install the environment or other environments using that Go version
Vengo export is used to export VenGO environments into vengo manifest files in JSON format that can be used later by the vengo import command to recreate a previously exported VenGO environment. VenGO generates a JSON
file that contains all the packages that have been installed into the active VenGO environment GOPATH using go get (that means git, mercurial, bazaar or subversion had been used to install those packages previously)
capturing the specific revisions used when the package was installed.
This manifest can be then used by anyone that has access to it with the command vengo import to generate the exact same environment in their own. VenGO will clone the packages in the manifest in the exact specific
version in the newly import VenGO environment GOPATH. This is similar to what godep does but for the whole GOPATH and without packing the code in a sub-directory or rewritting import paths.
note: probably
godepis still a more secure option as VenGO import still depends on network access and remote VCS systems.
Vengo import is ised to recreate environments previously exported with the command vengo export
Vengo vengo-uninstall will delete all the environments, Go versions and VenGO installation itself.
## License
This Source is released under the terms of the General Public License (GPLv2)
Copyright (C) 2014  Oscar Campos <oscar.campos@member.fsf.org>

This program is free software; you can redistribute it and/or modify
it under the terms of the GNU General Public License as published by
the Free Software Foundation; either version 2 of the License, or
(at your option) any later version.

This program is distributed in the hope that it will be useful,
but WITHOUT ANY WARRANTY; without even the implied warranty of
MERCHANTABILITY or FITNESS FOR A PARTICULAR PURPOSE.  See the
GNU General Public License for more details.

You should have received a copy of the GNU General Public License along
with this program; if not, write to the Free Software Foundation, Inc.,
51 Franklin Street, Fifth Floor, Boston, MA 02110-1301 USA.

See LICENSE file for more details.
