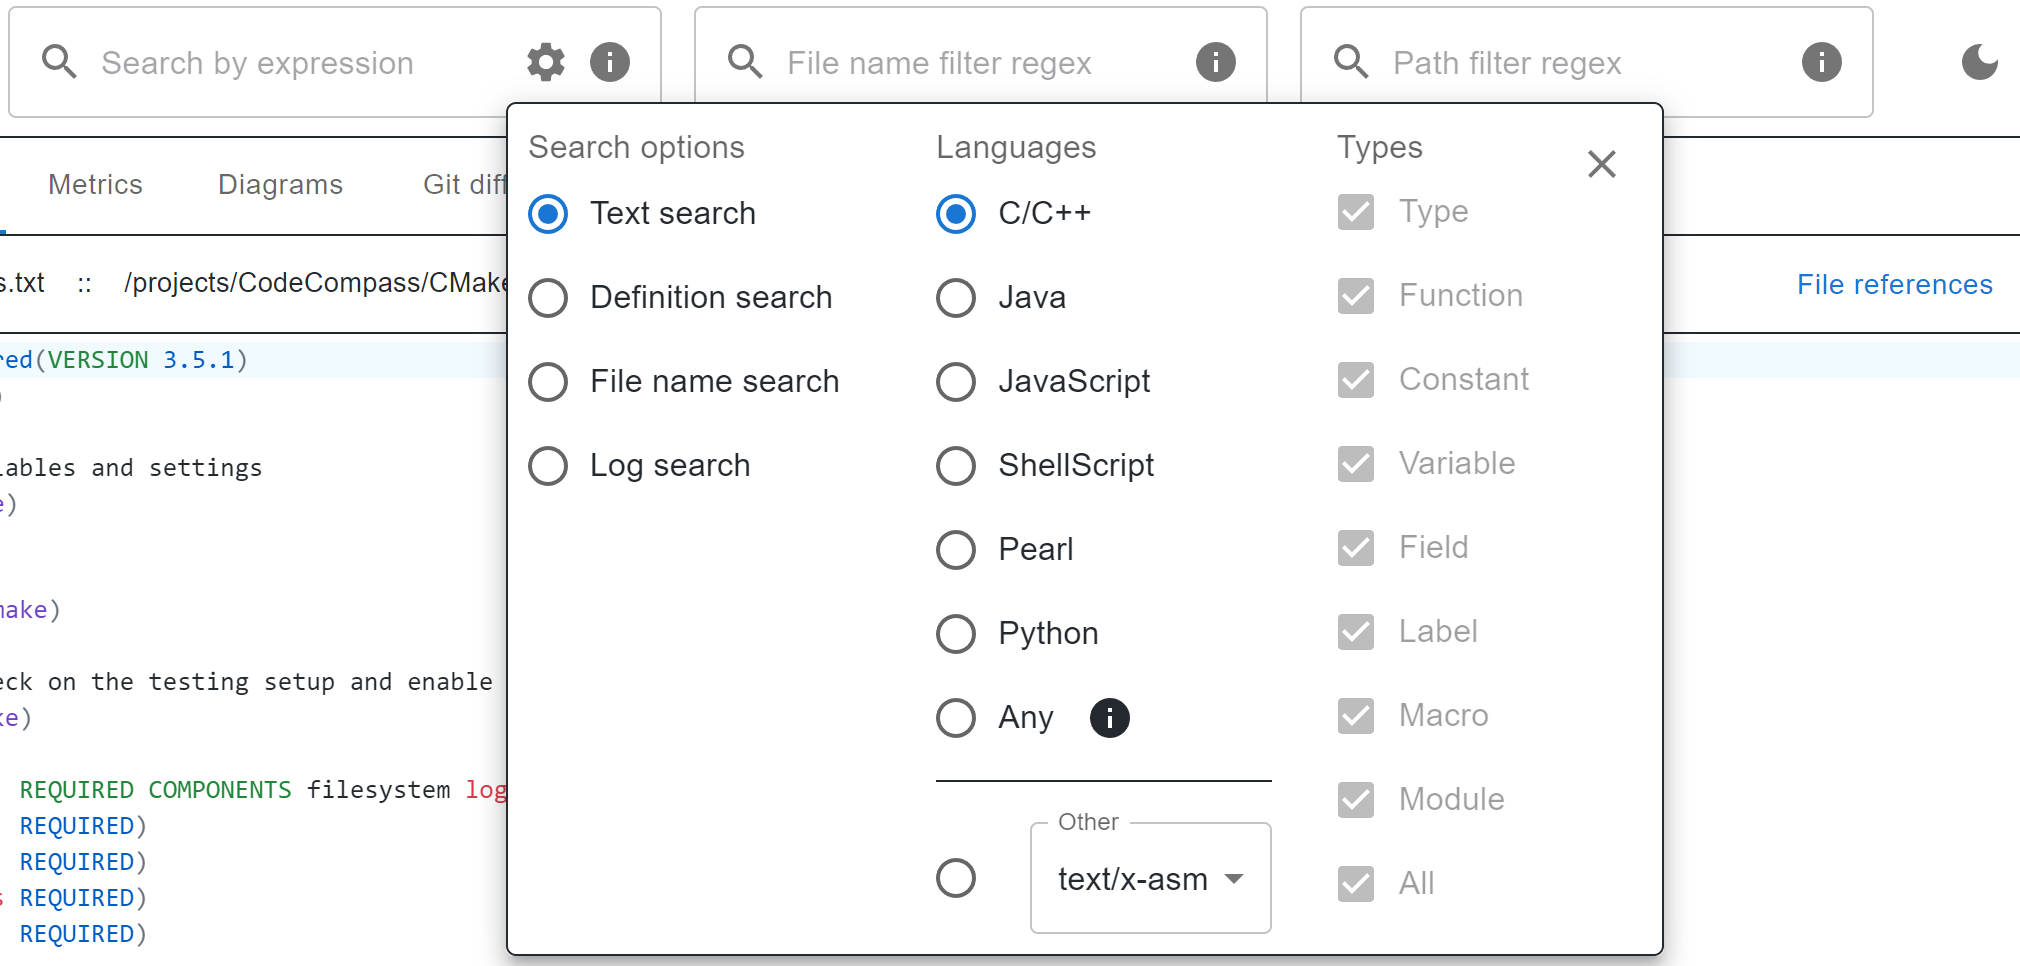
The settings menu that provides various search types can be opened by clicking the Gear icon next to the first search box. The application also supports dark mode. To switch between light and dark mode, click the Sun or Moon icon in the top right corner of the header.
You can switch between projects by using the select menu in the header. The accordion menu on the left contains the same options as before: File manager, Search results, Info tree and Revision control navigator. The tab menu contains the following menu points: Welcome, Code, Metrics, Diagrams, Git diff, User guide and Credits
- The Welcome tab contains an introduction to CodeCompass and its features.
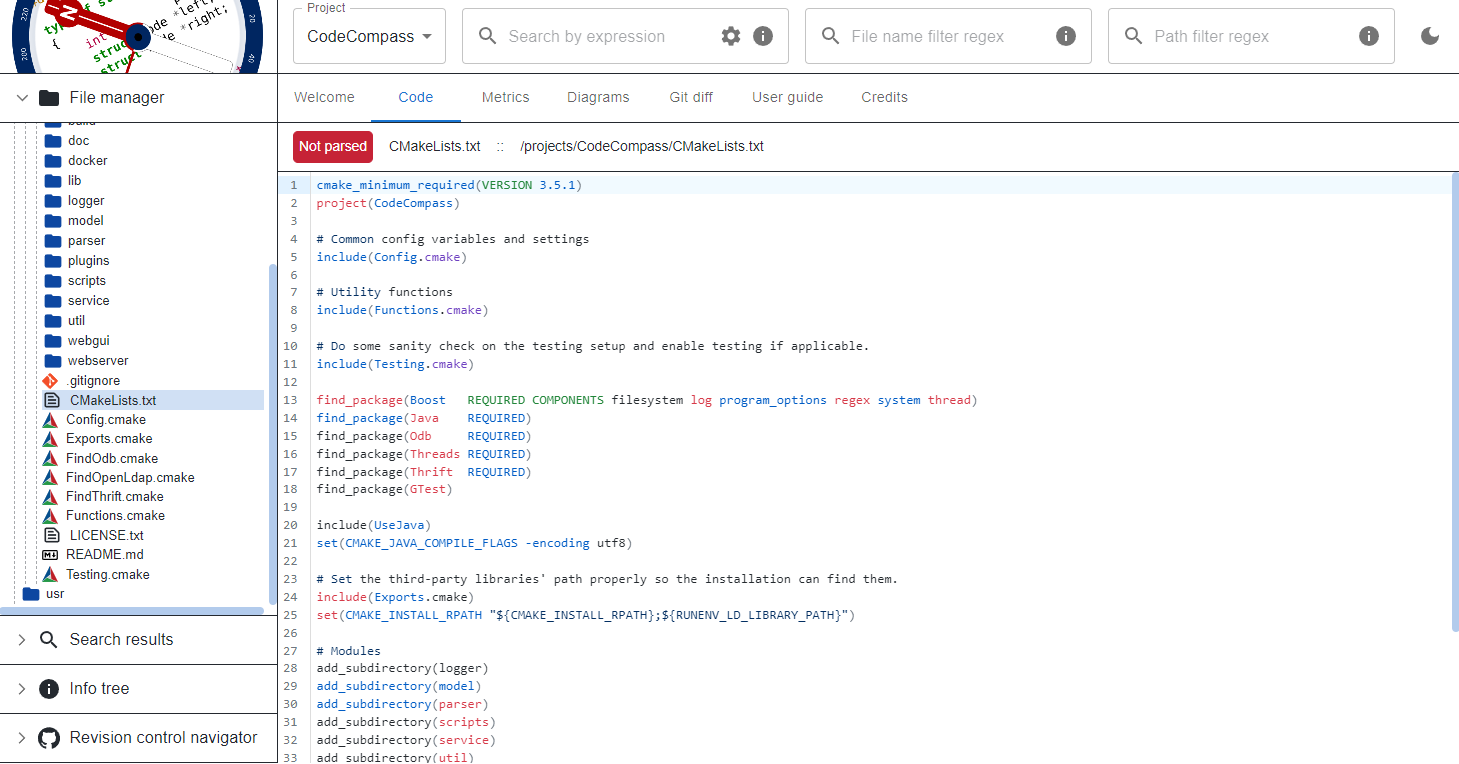
- The Code tab displays the parse status, name, path and contents of the currently selected file.
- The Metrics tab shows the generated metrics of a directory.
- The Diagrams tab is used to display and inspect the generated diagrams.
- The Git diff tab displays detailed commit information, diffs and file changes.
- The Credits tab shows the members of the project and their contribution.
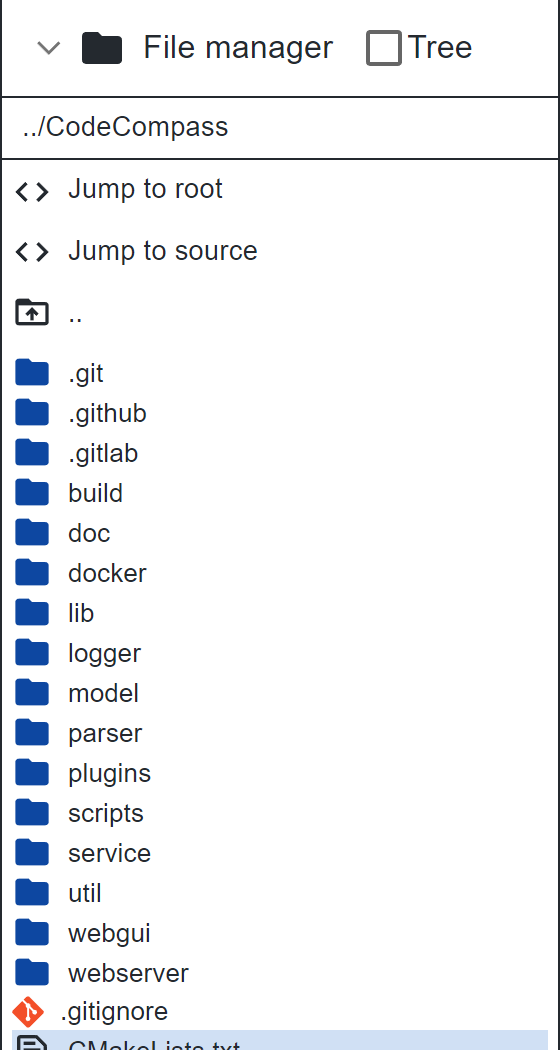
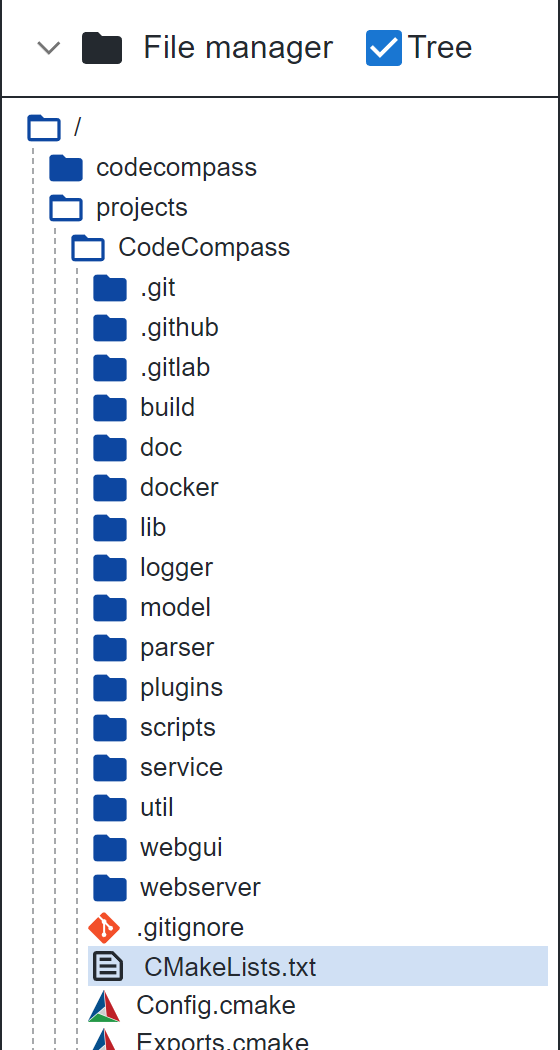
The file manager supports a tree view and an explorer view. You can switch between these views using the Tree checkbox. All files and folders from the current project can be found here, represented by different icons. To make navigation easier, the explorer view provides a Jump to root and Jump to source button which can be used to navigate to the root and source directories respectively.
The names of the files are color-coded based on their parse status: green if fully parsed, orange if partially parsed, and no color if the file has not been parsed. If you click on a file, its contents will be displayed in the Code tab.
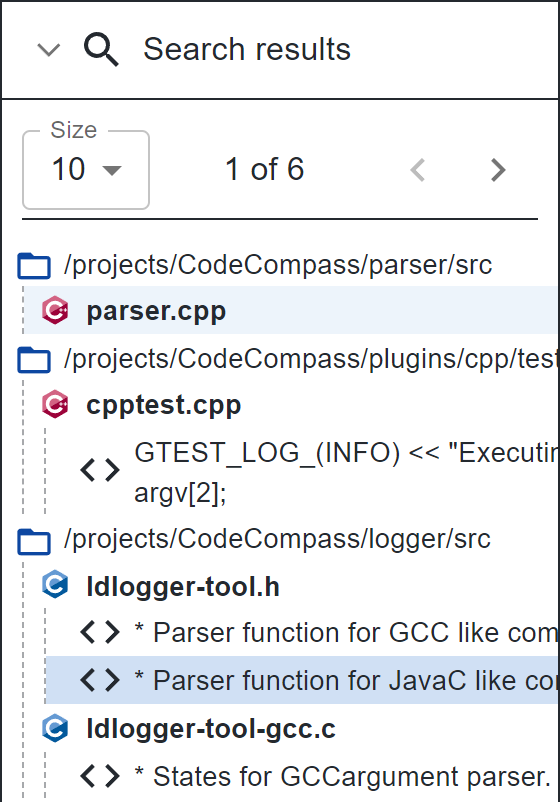
For searching through the code base, you can use the three search boxes in the header. It is mandatory to provide an input for the first search box, as it is a regular search query. The file and path filters can be used to narrow your search results down.
Additionally, clicking the Gear icon next to the first box will show the settings menu with more search options. Selecting Text search or Definition search will allow you to also choose a specific language for your search. Furthermore, at Definition search you can also filter the types of definitions you want to search for. The Info icons next to the search boxes display additional information about each type of search if you hover over them.
After setting the desired options and search queries, hit the Enter key to display the results in the Search results accordion. The results are grouped by directories and files. You can change the number of results shown at a time with the Size select menu. To navigate to another search page, use the arrows buttons. Clicking on a search result will navigate you to its location in the code.
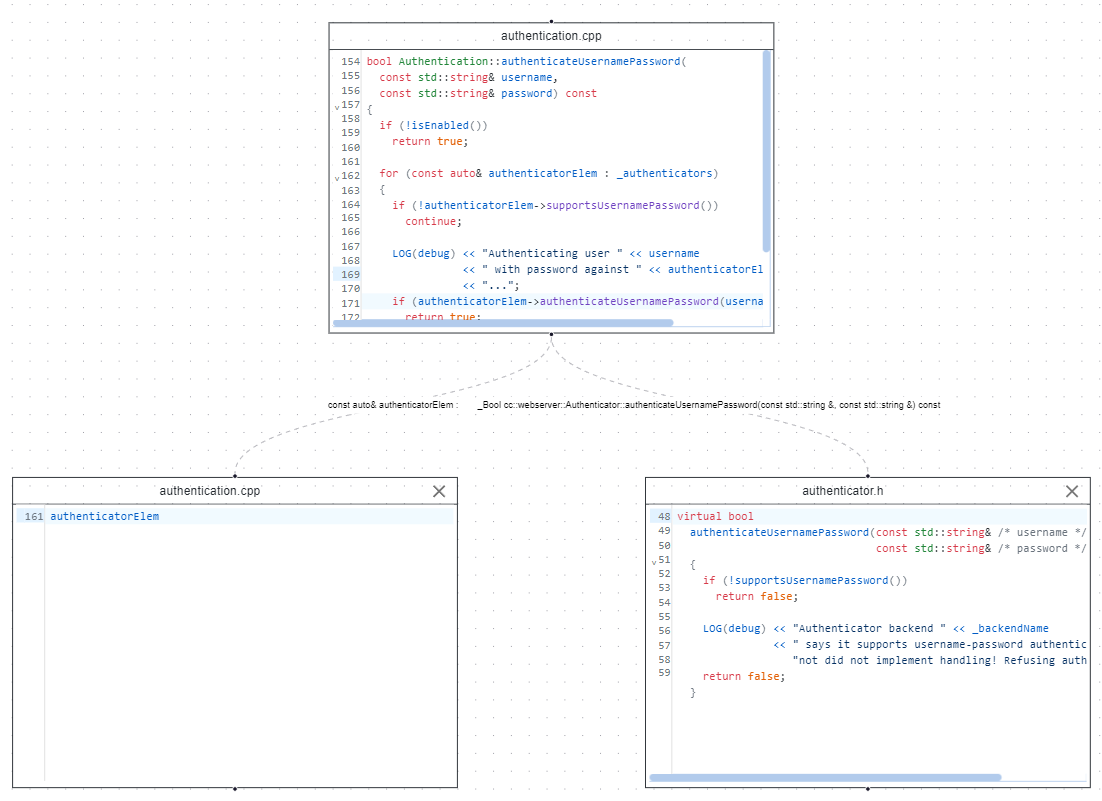
You can generate diagrams for folders, files, and a selection of source elements. Right click on a file or folder in the file manager or a source element in the code, and hover over the Diagrams option for the available diagrams. After clicking on a diagram, the result will be visible in the Diagrams tab.
At the diagrams tab, you can click on a diagram node to generate a new diagram for the entity represented by the node. This will also navigate you to its location in the code or file manager, depending if it was a file, folder or source element. The options at the bottom of the screen can be used to view the diagram legend, export the diagram SVG or download it as an image. The diagram can be zoomed in/out and panned, both using the cursor and the +, Reset and - buttons at the bottom right of the screen.
For visualizing source elements there is an additional type of diagram, called CodeBites, which can be used to connect the various source elements together in the code using their definition. Click on a new source element, e.g. variable or function, to expand the diagram and connect its definition. Note that exporting or downloading the diagram is not supported for CodeBites.

Metrics generation is available for directories. Right click on a directory in the file manager and select Metrics. This will navigate you to the Metrics tab where a tree map will be drawn representing the number of code lines with color-coded rectangles. Hovering over the rectangles will show you how many lines of code that file or directory has in total - the larger the number, the darker the rectangle.
You can regenerate the tree map by selecting different options using the select menus and clicking Draw metrics. To generate a new tree map for a directory, either click on it inside the tree map or in the directory path displayed above the tree map.

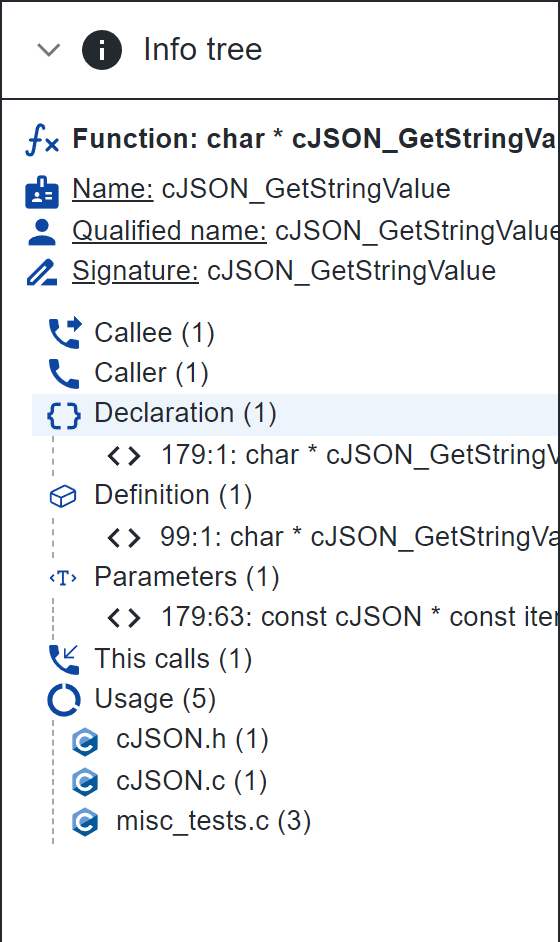
The info tree is used to inspect source elements, such as functions, variables or macros, and see their references in the project, like usages. To select a source element, click on it inside the code displayed in the Code tab, and its references will be visible in the Info tree accordion. Click on a reference to jump to its location in the code or click on the name of the current source element at the top of the info tree to navigate back to it. After navigating to a reference, you can click on it again in the code to view its info tree.
You can also inspect the references of each file, e.g. functions, using the File references menu next to the file name and path, which is visible in the Code and Diagrams tabs. Click on a reference to jump to its location.
Additionally, you can right click on a source element in the code to jump to its definition, inspect it as HTML, view its documentation or copy its selection link.
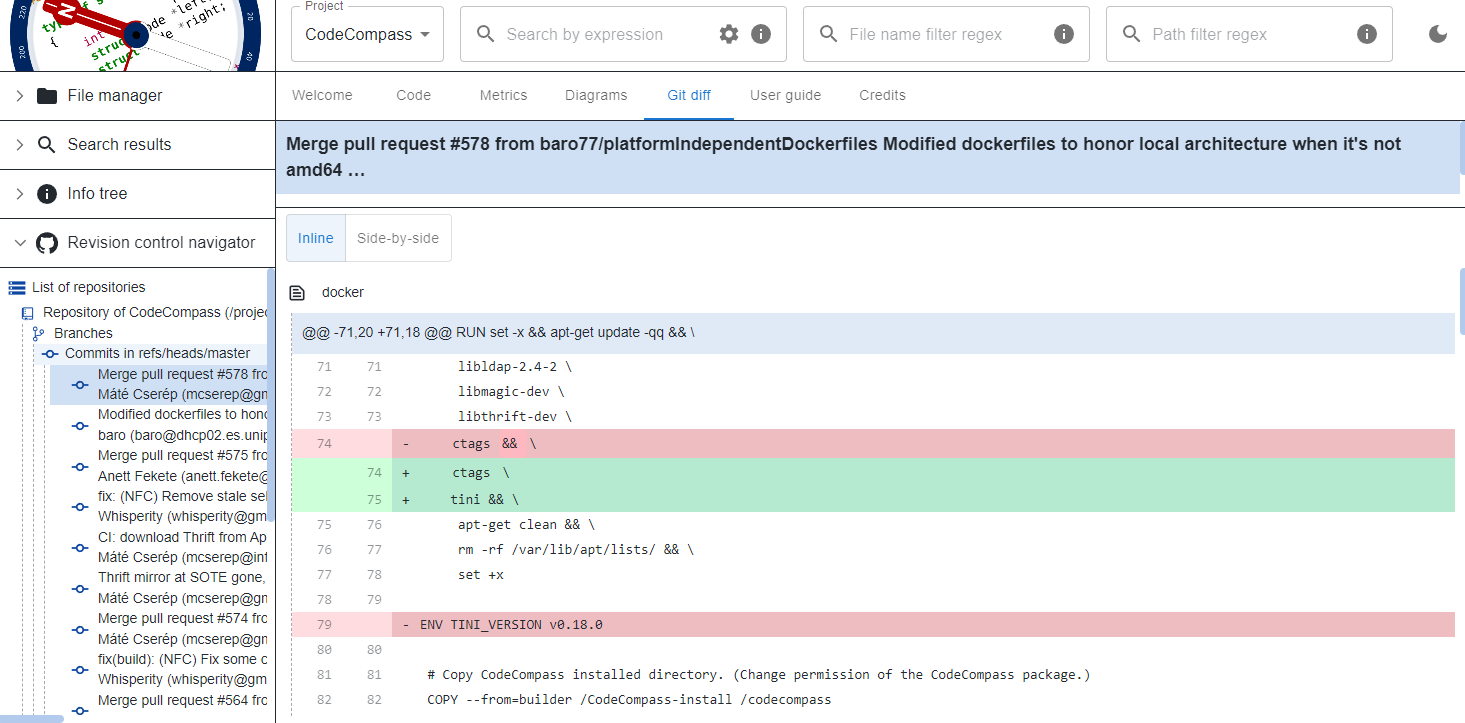
With the revision control navigator, you are able to browse through the git repositories, branches, tags and commits of the project. Hover over the Commit icon next to each commit label to display a detailed commit information.
Clicking on the commit will display the diff and file changes related to that commit in the Git diff tab, where you can use an inline or side-by-side view to inspect the changes.
Furthermore, right clicking on a file, folder or source element will allow you to display the Git blame view, to see which commit is responsible for that change. You can close this view by clicking Hide git blame above the code. Click on a commit in the git blame view to display it in the Git diff tab.