目前支持的协议有:
QQ 协议端举例:
- go-cqhttp(基于 MiraiGo)
- cqhttp-mirai-embedded
- Mirai+ cqhttp-mirai
- Mirai+ Mirai Native+ CQHTTP
- OICQ-http-api(基于 OICQ)
本插件主要以 go-cqhttp 为主要适配对象,其他协议端存在兼容性问题,不保证可用性!
-
下载
go-cqhttp对应平台的 release 文件,建议使用v1.0.0-beta8-fix2点此前往 -
运行
go-cqhttp.exe或者使用./go-cqhttp启动 -
选择
反向 WS方式连接,生成配置文件config.yml并按修改以下几行内容account: # 账号相关 uin: 1233456 # 修改为 QQ 账号 # 连接服务列表 servers: # 反向WS设置 - ws-reverse: # 反向WS Universal 地址 universal: ws://127.0.0.1:8080/onebot/v11/ws/
其中
ws://127.0.0.1:8080/onebot/v11/ws/中的127.0.0.1和8080应分别对应 nonebot2 配置文件的HOST和PORT -
运行
go-cqhttp.exe或者使用./go-cqhttp启动,扫码登陆
注意:推荐 Python 3.8.3+ 版本
Windows版安装包下载地址:https://www.python.org/ftp/python/3.8.3/python-3.8.3-amd64.exe
-
下载代码到本地
-
运行
pip install -r requirements.txt或者 运行pip install . -
复制
.env.dev文件,并改名为.env.prod,按照注释修改配置cp .env.dev .env.prod
注意配置
COMMAND_START=["","/"] # 配置命令起始字符
"" 和 "/" 分别对应指令前不需要前缀和前缀是 "/" ,也就是 "add" 和 "/add" 的区别。 #382
-
运行
nb run -
收到机器人发送的启动成功消息
-
安装
nb-clipip install nb-cli
-
使用
nb-cli新建工程nb create
-
选择
OneBot V11适配器创建工程 -
切换到工程目录,安装
ELF-RSSnb plugin install ELF-RSS
-
复制本仓库中
.env.dev文件内容到工程目录下的.env.prod文件,并根据注释修改
-
下载
src/plugins/ELF_RSS2文件夹 到你部署好了的机器人plugins目录 -
下载
requirements.txt文件,并运行pip install -r requirements.txt -
同
第一次部署一样,修改配置文件 -
运行
nb run -
收到机器人发送的启动成功消息
注意:go-cqhttp 的配置需要有所变动!,
config.yml务必按照下方样式修改!# yml 注意缩进!!! - ws-reverse: # 是否禁用当前反向WS服务 disabled: false # 反向WS Universal 地址 universal: ws://127.0.0.1:8080/onebot/v11/ws/
-
卸载 nonebot1
pip uninstall nonebot
-
运行
pip install -r requirements.txt
-
参照
第一次部署
下载并安装 qbittorrent
设置 qbittorrent
说明:由于Linux各发行版本软件包管理器差异较大,这里以ubuntu2004和centos7.9为例,其他发行版方法大同小异。如想体验最新版qbittorrent或找不到软件源,可以参考官方教程进行编译安装
对于centos,可以使用epel软件源安装qbittorrent-nox
yum -y install epel-release
yum -y install qbittorrent-nox.x86_64
- 对于ubuntu,建议使用qbittorrent官方ppa安装qbittorrent-nox
sudo add-apt-repository ppa:qbittorrent-team/qbittorrent-stable
sudo apt -y install qbittorrent-nox
- 设置qbittorrent
安装完成后,运行
qbittorrent-nox此时 qbittorrent-nox 会显示“Legal Notice”(法律通告),告诉你使用 qbittorrent 会上传数据,需要自己承担责任。
输入y表示接受
接下来的会显示一段信息:
******** Information ********
To control qBittorrent, access the Web UI at http://localhost:8080
The Web UI administrator user name is: admin
The Web UI administrator password is still the default one: adminadmin
This is a security risk, please consider changing your password from program preferences.
此时qBittorrent Web UI就已经在8080端口运行了
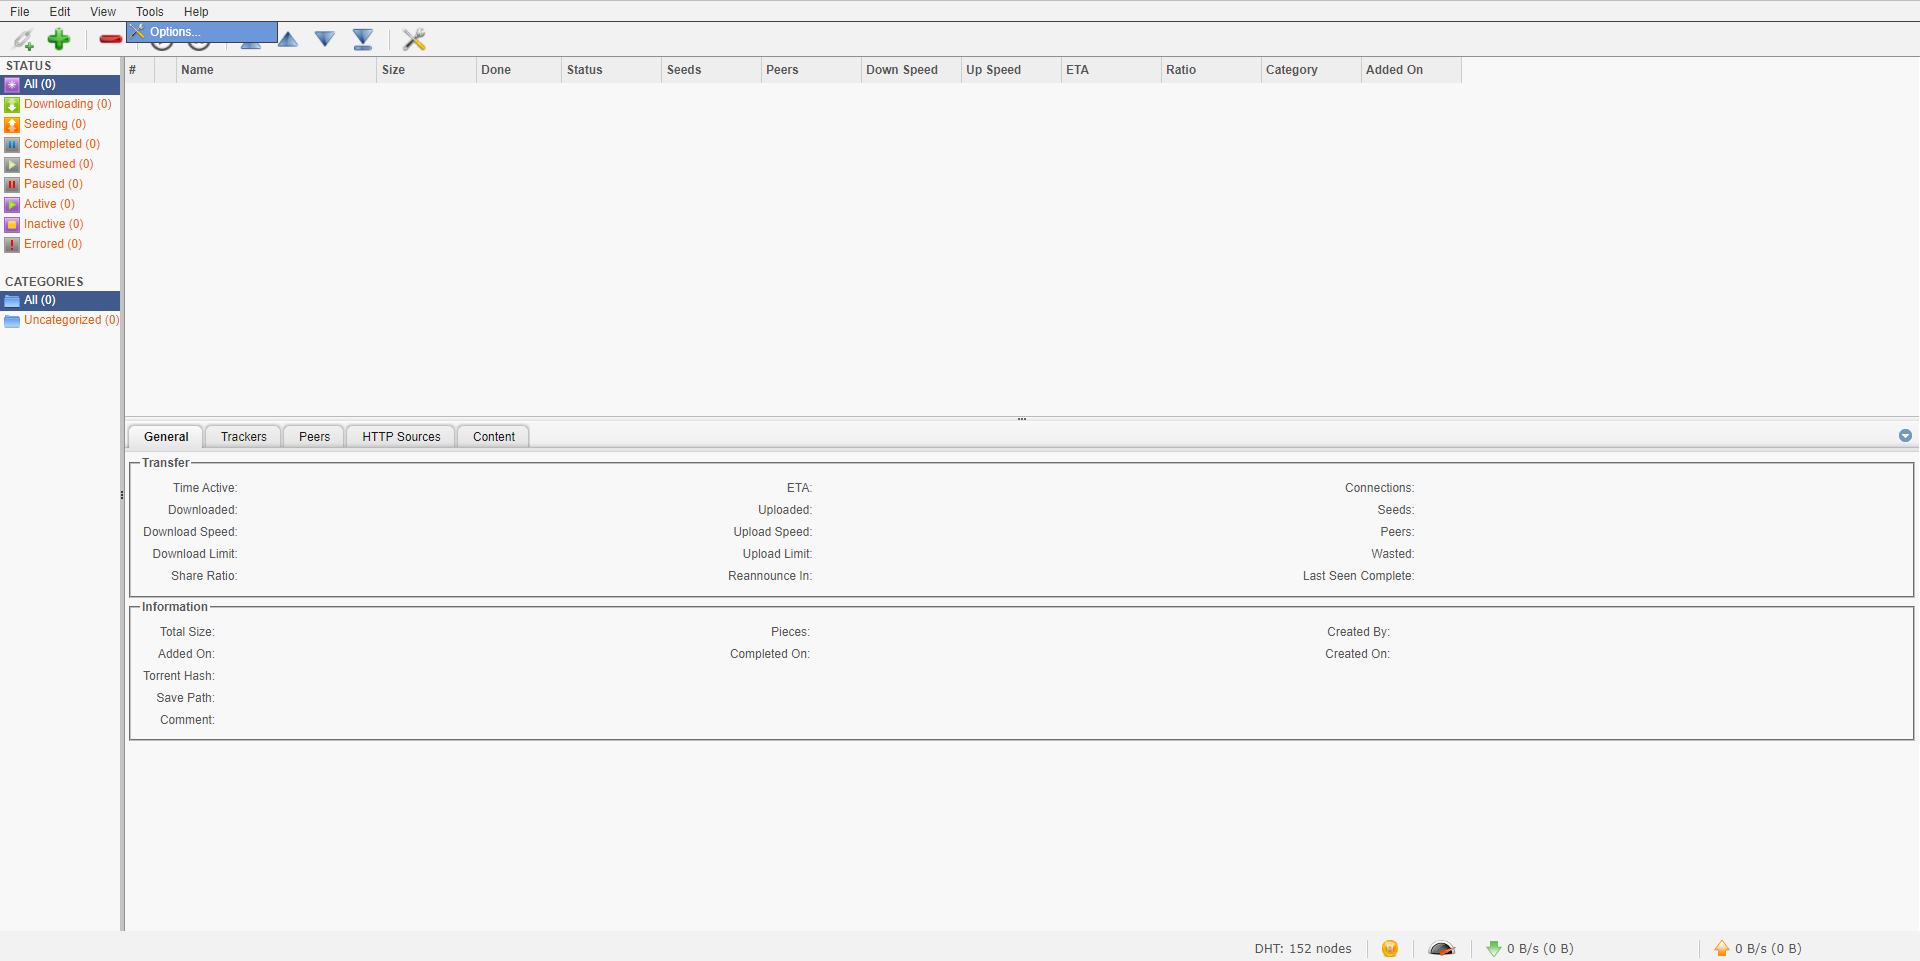
访问面板,打开Tools>Options
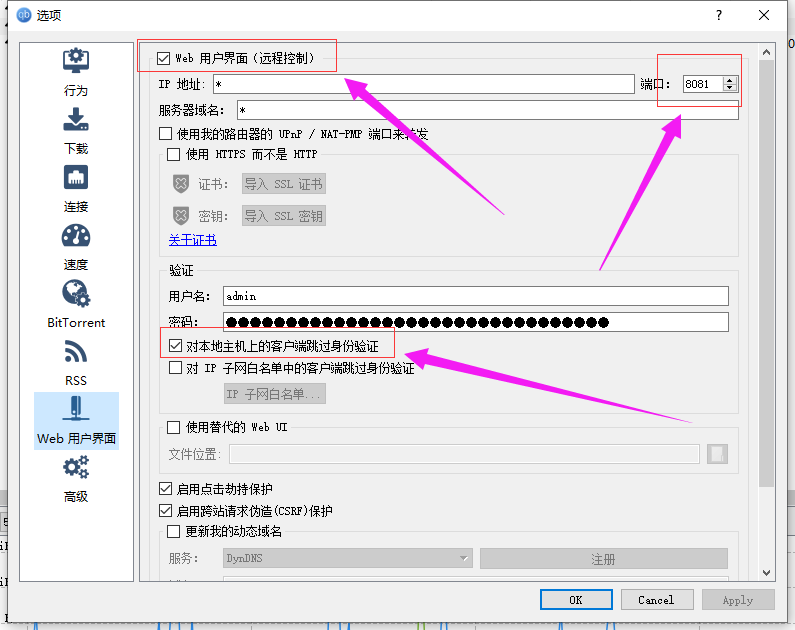
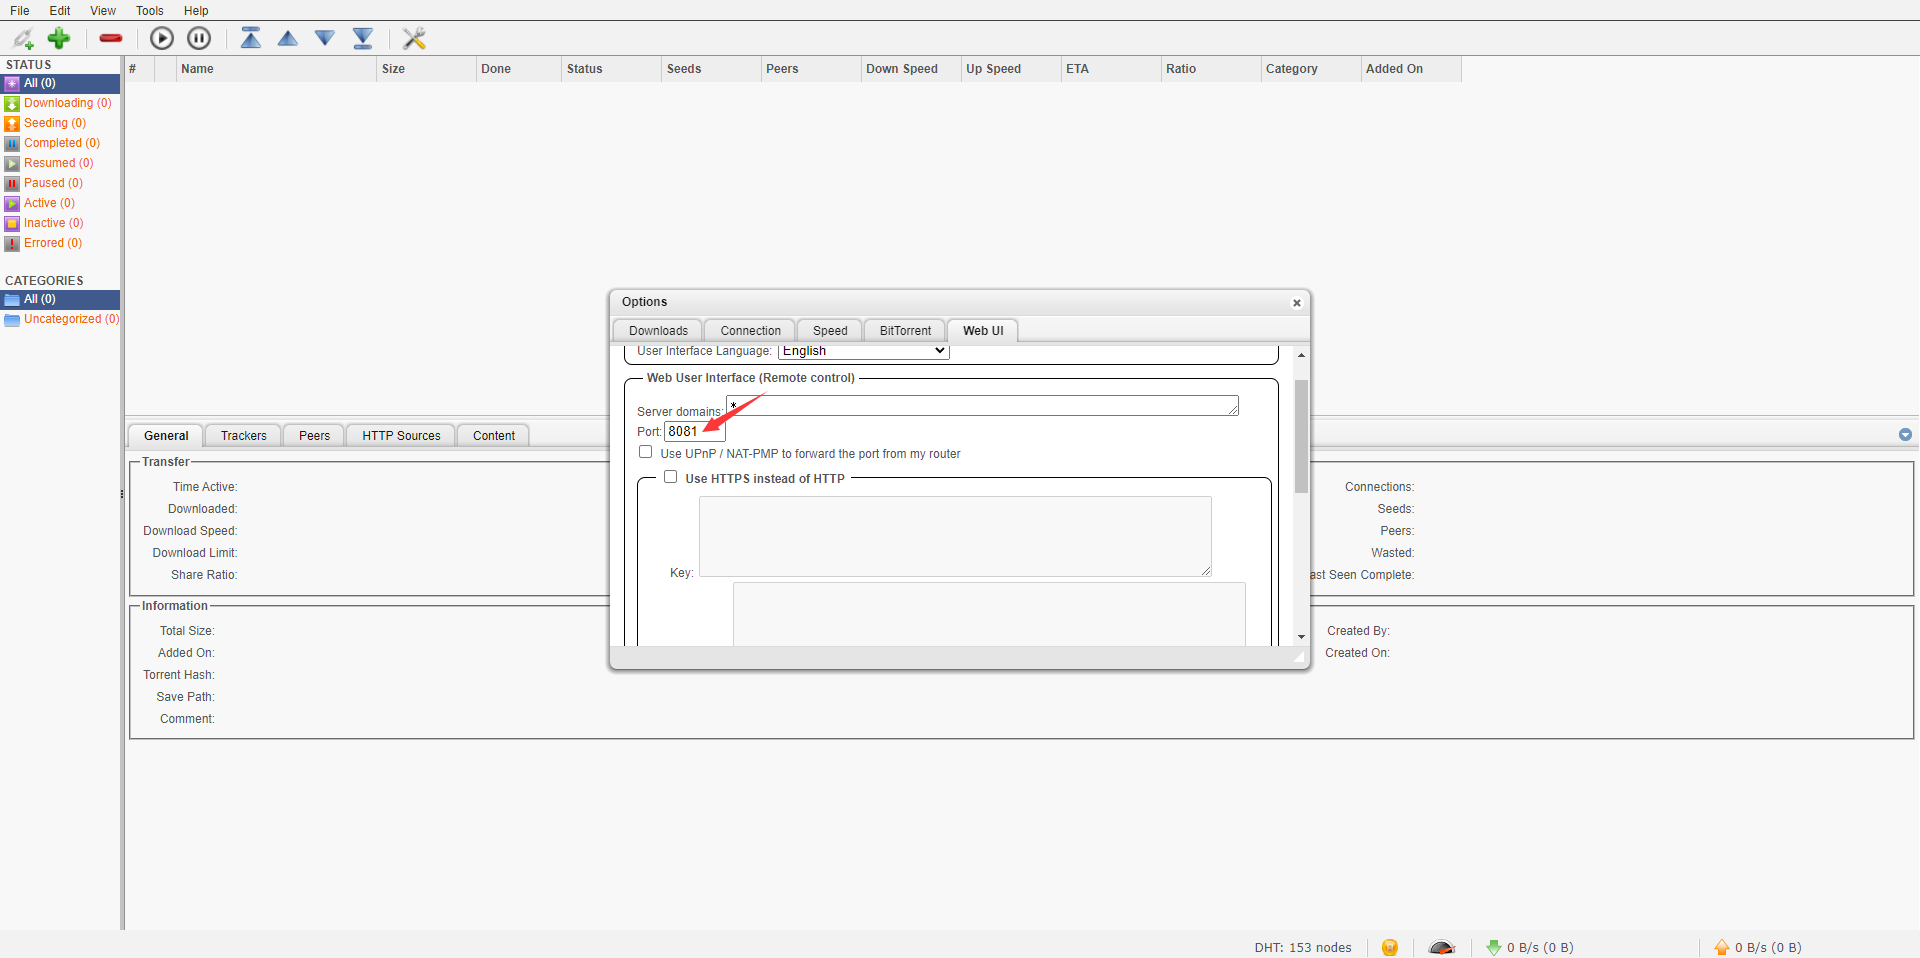
选择Web UI,在Port里修改为8081
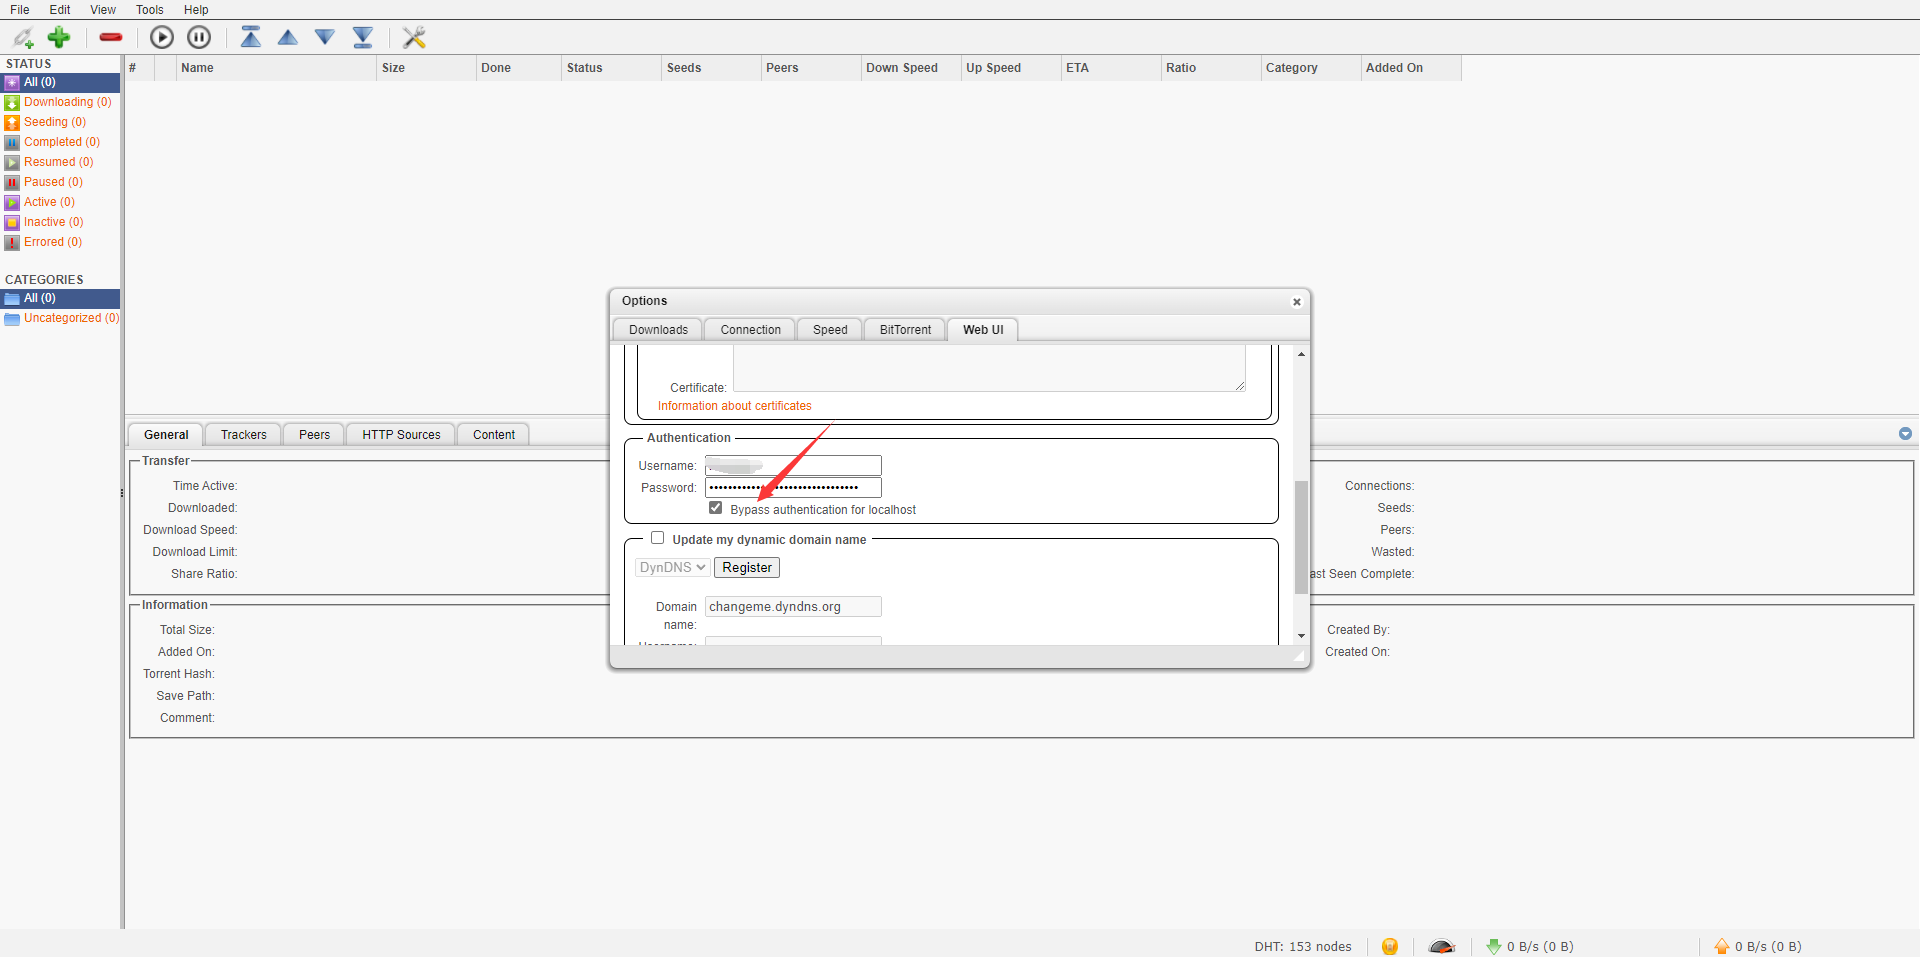
下滑,修改用户名和密码(可选),勾选Bypass authentication for localhost
下滑,点击save保存,设置完成
- qbittorrent-nox默认没有开机启动,建议通过systemctl配置开机启动
在配置文件中新增 以下配置
API_TIMEOUT=3600 # 超时,单位 s,建议根据你上传带宽灵活配置注意:
如果是容器部署qbittorrent,请将其下载路径挂载到宿主机,以及确保go-cqhttp能访问到下载的文件
要么保证挂载路径与容器内路径一致,要么配置 qb_down_path 配置项为挂载路径
- python3.8+
-
安装有关依赖
# 国内
pip3 install -r requirements.txt -i https://pypi.tuna.tsinghua.edu.cn/simple

# 国外服务器
# pip3 install -r requirements.txt

# 如果pip3安装不了,将pip换成pip再全部重新安装
# 建议使用pip3
-
下载插件文件 ELF_RSS 项目地址
-
修改配置文件 解压打开后修改
config.py文件,以记事本打开就行
from nonebot.default_config import *

HOST = '0.0.0.0'
PORT = 8080

NICKNAME = {'ELF', 'elf'}

COMMAND_START = {'', '/', '!', '/', '!'}

SUPERUSERS = {123456789} # 管理员(你)的QQ号

API_ROOT = 'http://127.0.0.1:5700'     #
RSS_PROXY = '127.0.0.1:7890'    # 代理地址
ROOTUSER=[123456]    # 管理员qq,支持多管理员,逗号分隔 如 [1,2,3] 注意,启动消息只发送给第一个管理员
DEBUG = False
RSSHUB='https://rsshub.app'     # rsshub订阅地址
DELCACHE=3     #缓存删除间隔 天
修改完后记得保存
shift+右键打开powershell或命令行输入
hypercorn run:app -b 0.0.0.0:8080

# 或者使用(不推荐) python bot.py
# 或者 python3 bot.py
运行后qq会收到消息
第一次运行要先添加订阅 不要关闭窗口 CTRL+C可以结束运行 如果某次运行无法使用命令,请多次按CTRL+C
git pull
或者下载代码覆盖


