-
Notifications
You must be signed in to change notification settings - Fork 2
Data Migrator
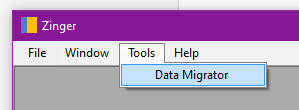
Use the Data Migrator feature to copy and transform data from one SQL Server database to another. This uses my SqlMigrator component to perform "deep copy" or data cloning operations that involve many steps and foreign key mapping. Data Migrator makes it possible to execute complex migrations, offering robust error handling, retry and resume capability, along with detailed diagnostics. Access the feature under the Tools menu:
The first thing you do is indicate the source and destination connections for your migration. The connections come from your saved list.
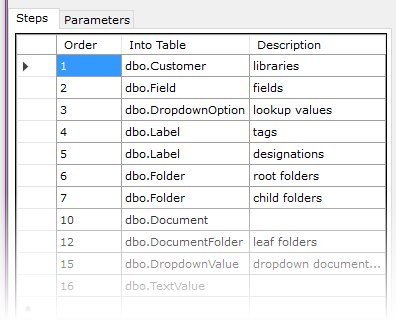
Next, you create one or more Steps. A Step contains the parts of an INSERT...SELECT statement that defines the rows you want to copy. When creating a step, you indicate what table in your destination database you're inserting into.
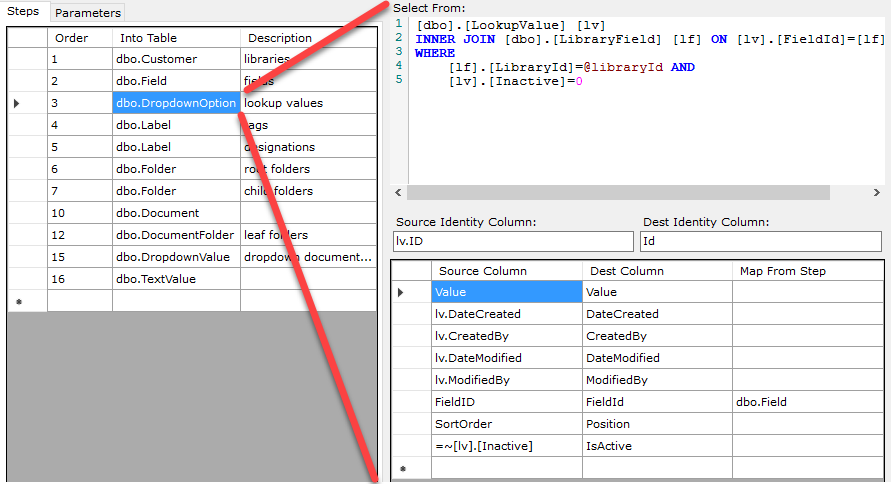
For each Step, you indicate what source data you're selecting FROM along with the column mappings. You must specify the identity columns in the source data as well as the target table. This is what enables SqlMigrator to guarantee that it copies every row exactly once. Your FROM clause can be any valid SQL. Your column mappings may use alias prefixes. For expression columns, prefix the source column with an equal sign as in this example in the IsActive column. For mapped columns -- that is, foreign key columns that get a new value as part of the migration -- fill in the Map From Step column with the name of the table from a prior Step.
Note that your Step FROM clauses may use parameters. In the example above, note that I'm using @libraryId as a parameter. You must declare parameters on the Parameters tab, as shown, and provide a value. This is intended for migrating multi-tenant systems where you need to migrate one tenant at a time.
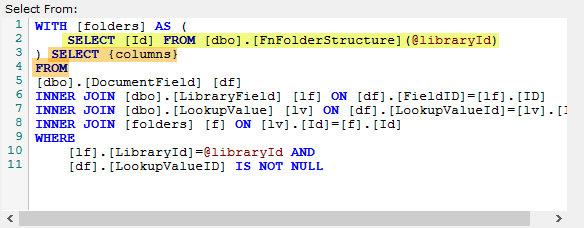
Typically, you specify just the FROM and WHERE clause in your Steps, but sometimes you may need a CTE or two. This requires you to use a complete SELECT statement. To make this work in Data Migrator, you must use SELECT {columns} FROM somewhere in your statement. The {columns} token tells Data Migrator where to inject the Step's column names. You can then use any WITH block that your Step relies on.
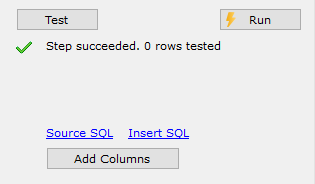
In the course of a large migration, you will likely try and troubleshoot many SQL insert variations. You can safely test any Step using the Test button. This will attempt to copy 10 rows not tested previously within a transaction that is always rolled back. Any SQL errors will show up, and give you chance to alter your mappings or FROM source as needed. When you're ready to perform an actual copy, use the Run button. To access the underlying SELECT and INSERT statements used, click the respective "Source SQL" and "Insert SQL" links. You can then paste those into your query window of choice to inspect and run as you need to.
Because migrations can take a long time, and errors may lead to frequent interruptions, you can stop a migration at any time. When you start it again, it will automatically skip previously migrated rows.
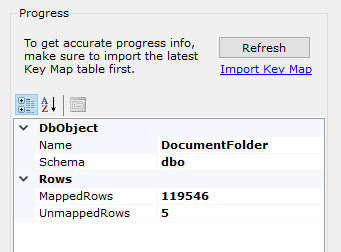
Moreover, because you'll likely start and stop Steps many times in the course of a large migration, it can help to see the overall progress in terms of the total and remaining (unmapped) number of rows. Use the Progress area in the lower right.
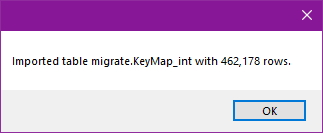
The Key Map table referred to above is what records every source row identity value along with its corresponding identity value in the target database. Normally, this table lives in the target database. The SqlMigrator creates and manages this table internally. However, for diagnostic capability from the source database, we have to copy the Key Map table to the source database periodically. So, if you've done several migration Steps or parts of Steps, click the Import Key Map link. Beware it can take a few seconds because it can have a lot of rows. (If I do say so, it is pretty fast even so because it uses BulkInsert, also from my SqlServerUtil library.)
-
I started on SqlMigrator a while back, but I did only a very simple example at the time without schema transformation. I kept scope under control by implementing the very lowest level of functionality only, which is the CopyRowsAsync method. I knew that to use in a realistic scenario, there would need to be custom tooling to make it safe and easy to use trial-and-error over migrations with perhaps dozens of steps and lots of foreign key mappings. One great thing I learned here was about using Source Link. Since
SqlMigratoris part of a NuGet package, there are hoops to jump through to debug code within a package. I've made NuGet packages for a long time, and sometimes I run into debugging difficulties. Source Link goes a long way to making NuGet development more debug-friendly, and it was a real life-saver to me in this situation. -
Speaking of debugging, it was hard to predict the perfect error response behavior for exceptions, so I made exception handlers into public delegates so that my downstream tooling could provide tailor-made exception handlers that I figured out as I went along. A similar approach would have been to declare these as virtual methods, and then override them later. The advantage of
Funcdelegates is that I don't need to subclassSqlMigrator, although that doesn't mean a lot. It does mean I can instead "inject" a method onto my delegate, for example OnInsertException and OnMappingException. Note that OnProgress delegate uses the inlinedelegatesyntax that you might not see very much. This is how I update the status bar in the app during a migration: the migrator calls theOnProgresshandler, which in turn raises a Progress event. The form object then handles that event. -
Between the WinForm UI frmMigrationBuilder and the low-level
SqlMigratorservice sits a middle-man of sorts: DataMigrator. The reason for this is that I don't want my UI to "know" anything about the low-level service. If I ever transplant this functionality to a web app or WPF, I want the easiest transition possible. So,DataMigratorprovides functionality like stopping, starting, validating, and analyzing progress of a migration without any particular UI assumptions. It has methods like RunStepAsync and ValidateStepAsync. Notice that these method take things likeDataMigrationandDataMigration.Stepas arguments. (I'll clarify these in a moment.) In this way, they know only what they need to -- not what kind of UI widget is displaying them. Note also there are some private, low-level "workhorse" methods like ExecuteWithConnectionsAsync. This general-purpose method opens the source and destination connections, and lets me pass the desired task as a delegate. Another reason forDataMigratoris to enable things like adding columns to a Step based on column names that match between the source and destination. Productivity helpers like that work well for a class like this -- they help the UI without depending on it, and they're too sophisticated for the low-levelSqlMigratorservice, which has no knowledge of the tooling experience a user might expect. -
The migration steps and columns have a model class DataMigration. This gets read and written as json within the main form. The json is handled by my JsonSDI thingy, which is part of my WinForms Library. The json is subsequently saved in source control as part of the repo where I'm working on a real migration.
