| title | date | author | tags | keywords | categories | reward | reward_title | reward_wechat | reward_alipay | source_url | translator | translator_url |
|---|---|---|---|---|---|---|---|---|---|---|---|---|
Working with Kotlin in Android Studio |
2013-08-26 11:49:00 -0700 |
Hadi Hariri |
官方动态 |
false |
Have a nice Kotlin! |
With the release of M6, we announced support for Android Studio . Let’s take a deeper look at how to get up and running with Android Studio and Kotlin.
Much like with IntelliJ IDEA, to install the Kotlin plugin you need to click on Preferences (Settings) and select the Plugins entry. Easiest way is to just start typing pluginas soon as the dialog pops up.
{% raw %}
{% endraw %}Although we can download the plugin and install from disk, the easiest way is to click on the *Install JetBrains plugin…*and select Kotlin from the list. Right-click and choose Download and Install
{% raw %}
{% endraw %}Follow the instructions to restart the IDE.
Android Studio uses Gradle as its build system and part of the effort involved in supporting this environment was adding Gradle support for Kotlin.
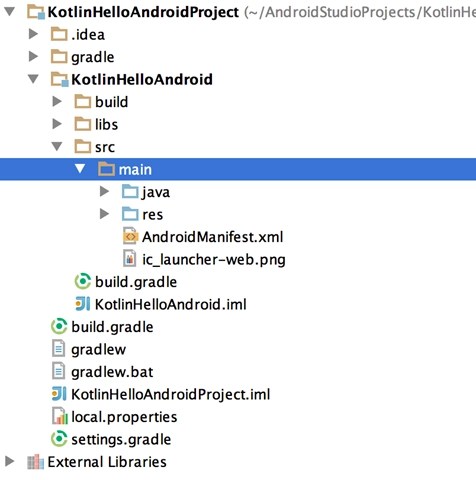
A typical Android Project has the following layout
{% raw %}
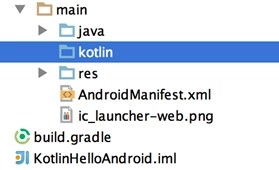
{% endraw %}where the source code for the project is located under the foldermain/java. Since we want to use Kotlin (we can mix and match both Java and Kotlin the same project), we need to create a new folder under main, named *kotlin.*In the Gradle script we’ll later define this folder as a source root.
{% raw %}
{% endraw %}{% raw %}
{% endraw %}
We need to set up some dependencies and source folders in the Gradle configuration. Open the build.gradle file and copy the following
{% raw %}
{% endraw %}buildscript {
repositories {
mavenCentral()
}
dependencies {
**classpath 'org.jetbrains.kotlin:kotlin-gradle-plugin:0.6.+'**
classpath 'com.android.tools.build:gradle:0.5.+'
}
}
apply plugin: 'android'
**apply plugin: 'kotlin-android'**
repositories {
mavenCentral()
}
dependencies {
**compile 'org.jetbrains.kotlin:kotlin-stdlib:0.6.+'**
}
android {
compileSdkVersion 17
buildToolsVersion "17.0.0"
defaultConfig {
minSdkVersion 7
targetSdkVersion 16
}
**sourceSets {
main.java.srcDirs += 'src/main/kotlin'
}**
}{% raw %}
{% endraw %}Update: Replace “0.6.+” with the version of Kotlin plugin you have installed. The parts relative to Kotlin are highlighted in bold:
- Select the Kotlin plugin for Gradle and the version we’re using. The M6 release corresponds to 0.6.69.
- Apply the kotlin-android plugin
- Import the Kotlin’s standard library
- Specifiy where the source code files are located
Specifying the sourceSetwill automatically mark the folder we created previously (main/kotlin) as a Source Root in Android Studio. Once we have the Gradle file updated, we should be able to successfully build Android project written in Kotlin.
The easiest way to try out Kotlin with Android is to create a default Android project and convert the code to Kotlin, which the IDE can do for us.
- Create a new Android Project (we’ll omit the steps for creating new Android projects).


