The ember-qunit test isolation validation feature allows you to opt-in to enabling automatic detection of async execution that extends beyond when the test is considered complete. This can be a particularly difficult problem to detect in your tests, and can contribute to non-deterministic test execution.
The test isolation validation functionality is available on ember-qunit version 4.2.0 or higher.
ember install ember-qunitIn order to enable test isolation validation, you'll need to configure the option, setupTestIsolationValidation: true in ember-qunit's start function, which starts your application or addon's test run.
// tests/test-helper.js

import Application from '../app';
import config from '../config/environment';
import { setApplication } from '@ember/test-helpers';
import { start } from 'ember-qunit';

setApplication(Application.create(config.APP));

start({
  setupTestIsolationValidation: true
});Once a test run is started with test isolation validation turned on, analysis will occur on a test-by-test basis. Once a failure is detected, a new assertion will be added that will fail the test, indicating that the test is not isolated.
As indicated by the assertion message, important (and more useful) information is printed to the console.
As you can see, the following information is provided for each test that fails isolation validation:
- The test module and test name
- The category of failure, one of
- Pending AJAX requests
- Pending test waiters
- Scheduled async
- Scheduled autorun
- The stack trace of the code that caused the isolation failure (Scheduled async or Scheduled autoruns only)
In the case of pending AJAX requests and test waiters, we see those categorizations of the failures. In the case of scheduled async or scheduled autoruns, we get a bit more information - stack traces that point to the code that scheduled the async call.
By viewing this information output to the console, we can traverse the stack from top to bottom, clicking the associated file/line number to get a more detailed view of the callee.
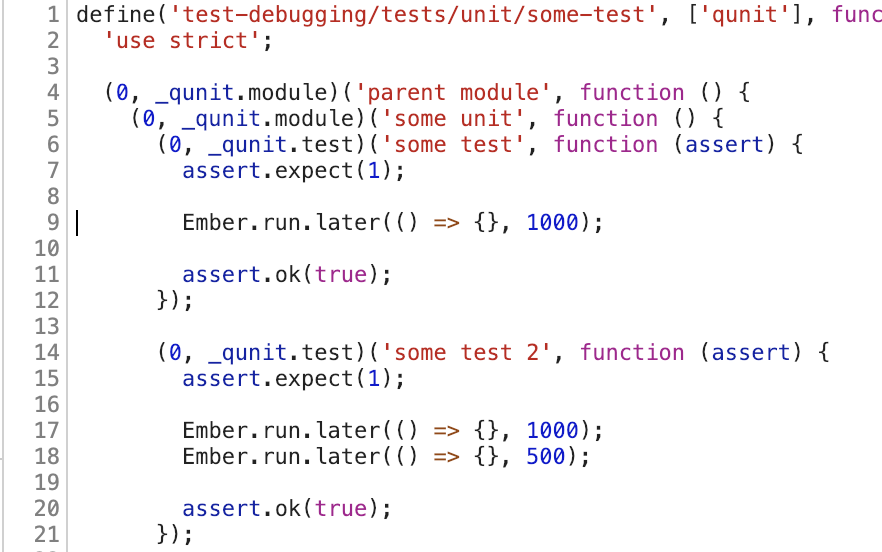
In line 9 below, we can see that an async call was scheduled via Ember.run.later:
Having this information will enable you to evaluate the best way to address the particular case of async leakage detected.


