This contains HashiCorp code to do the following:
- Packer template to build an Ubuntu 18.04 image consisting of 'HashiStack', which is Consul, Nomad and Vault
- Terraform code to provision the HashiStack in 2-3 separate AWS regions with peering
- Automated cluster formation of Consul and Nomad in each region
- Automated cluster formation of Vault in each region
- Automated WAN joining of Consul and Nomad
- Automated replication configuration of Vault clusters in each region
- Packer and Terraform are available on local machine
- Vault Enterprise linux binary available locally (Consul Enterprise and Nomad Enterpise are optional)
- User possesses AWS account and credentials
This is most likely optional as Terraform will automatically pull the latest hashi-stack AMIs from our account.
- change to the packer directory
packer/ - Download Consul, Nomad, and Vault binaries locally (Vault enterprise required, Consul and Nomad Enterprise )
- Copy packer/vars.json.example to packer/vars.json
- Configure variables local path to those binaries in packer/vars.json
- Ensure AWS credentials are exposed as environment variables
- Expose AWS environment variables to avoid AMI copy timeouts.
export AWS_MAX_ATTEMPTS=60 && export AWS_POLL_DELAY_SECONDS=60 - Execute Packer build
cd packer
# Download enterprise binaries and add variables to vars.json (copied from vars.json.example)
# CentOS 7(default)
packer build -var-file=vars.json -only=amazon-ebs-centos-7 packer.json
# RHEL 7.5 - Additional licensing costs
packer build -var-file=vars.json -only=amazon-ebs-rhel-7.5-systemd packer.json
TFE URL. This setup assumes you have a TFE SaaS account and a VCS connection setup. You could also push the code up via the enhanced remote backend, TFE-CLI, or API.
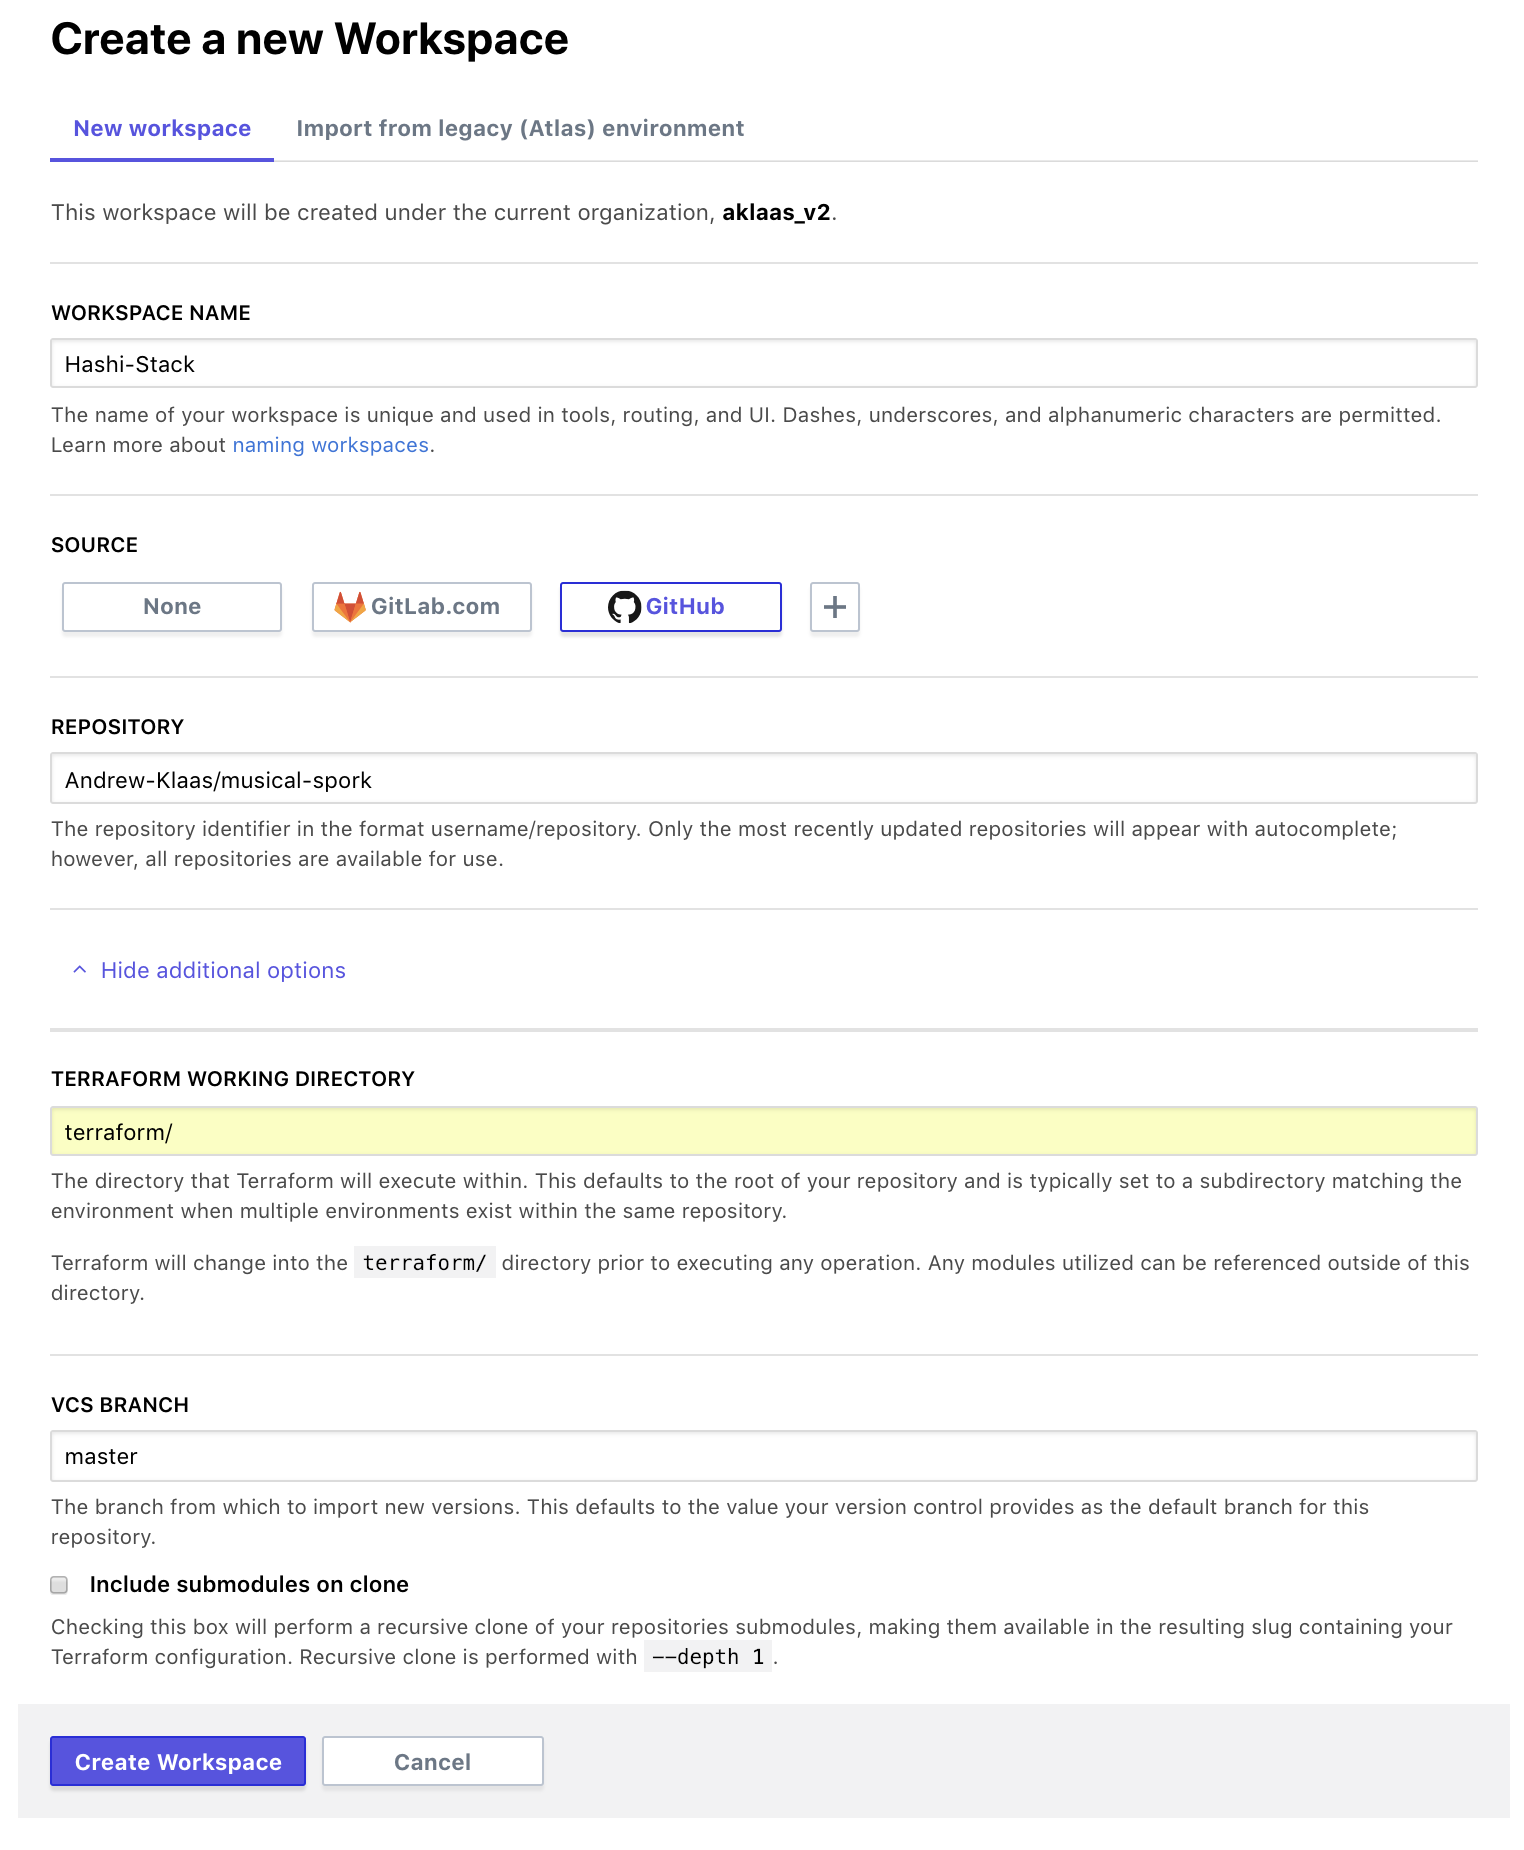
- Create a workspace in TFE for musical-spork. I'm calling it the "Hashi-Stack" here for demo purposes. (Note the workspace settings from the below image)
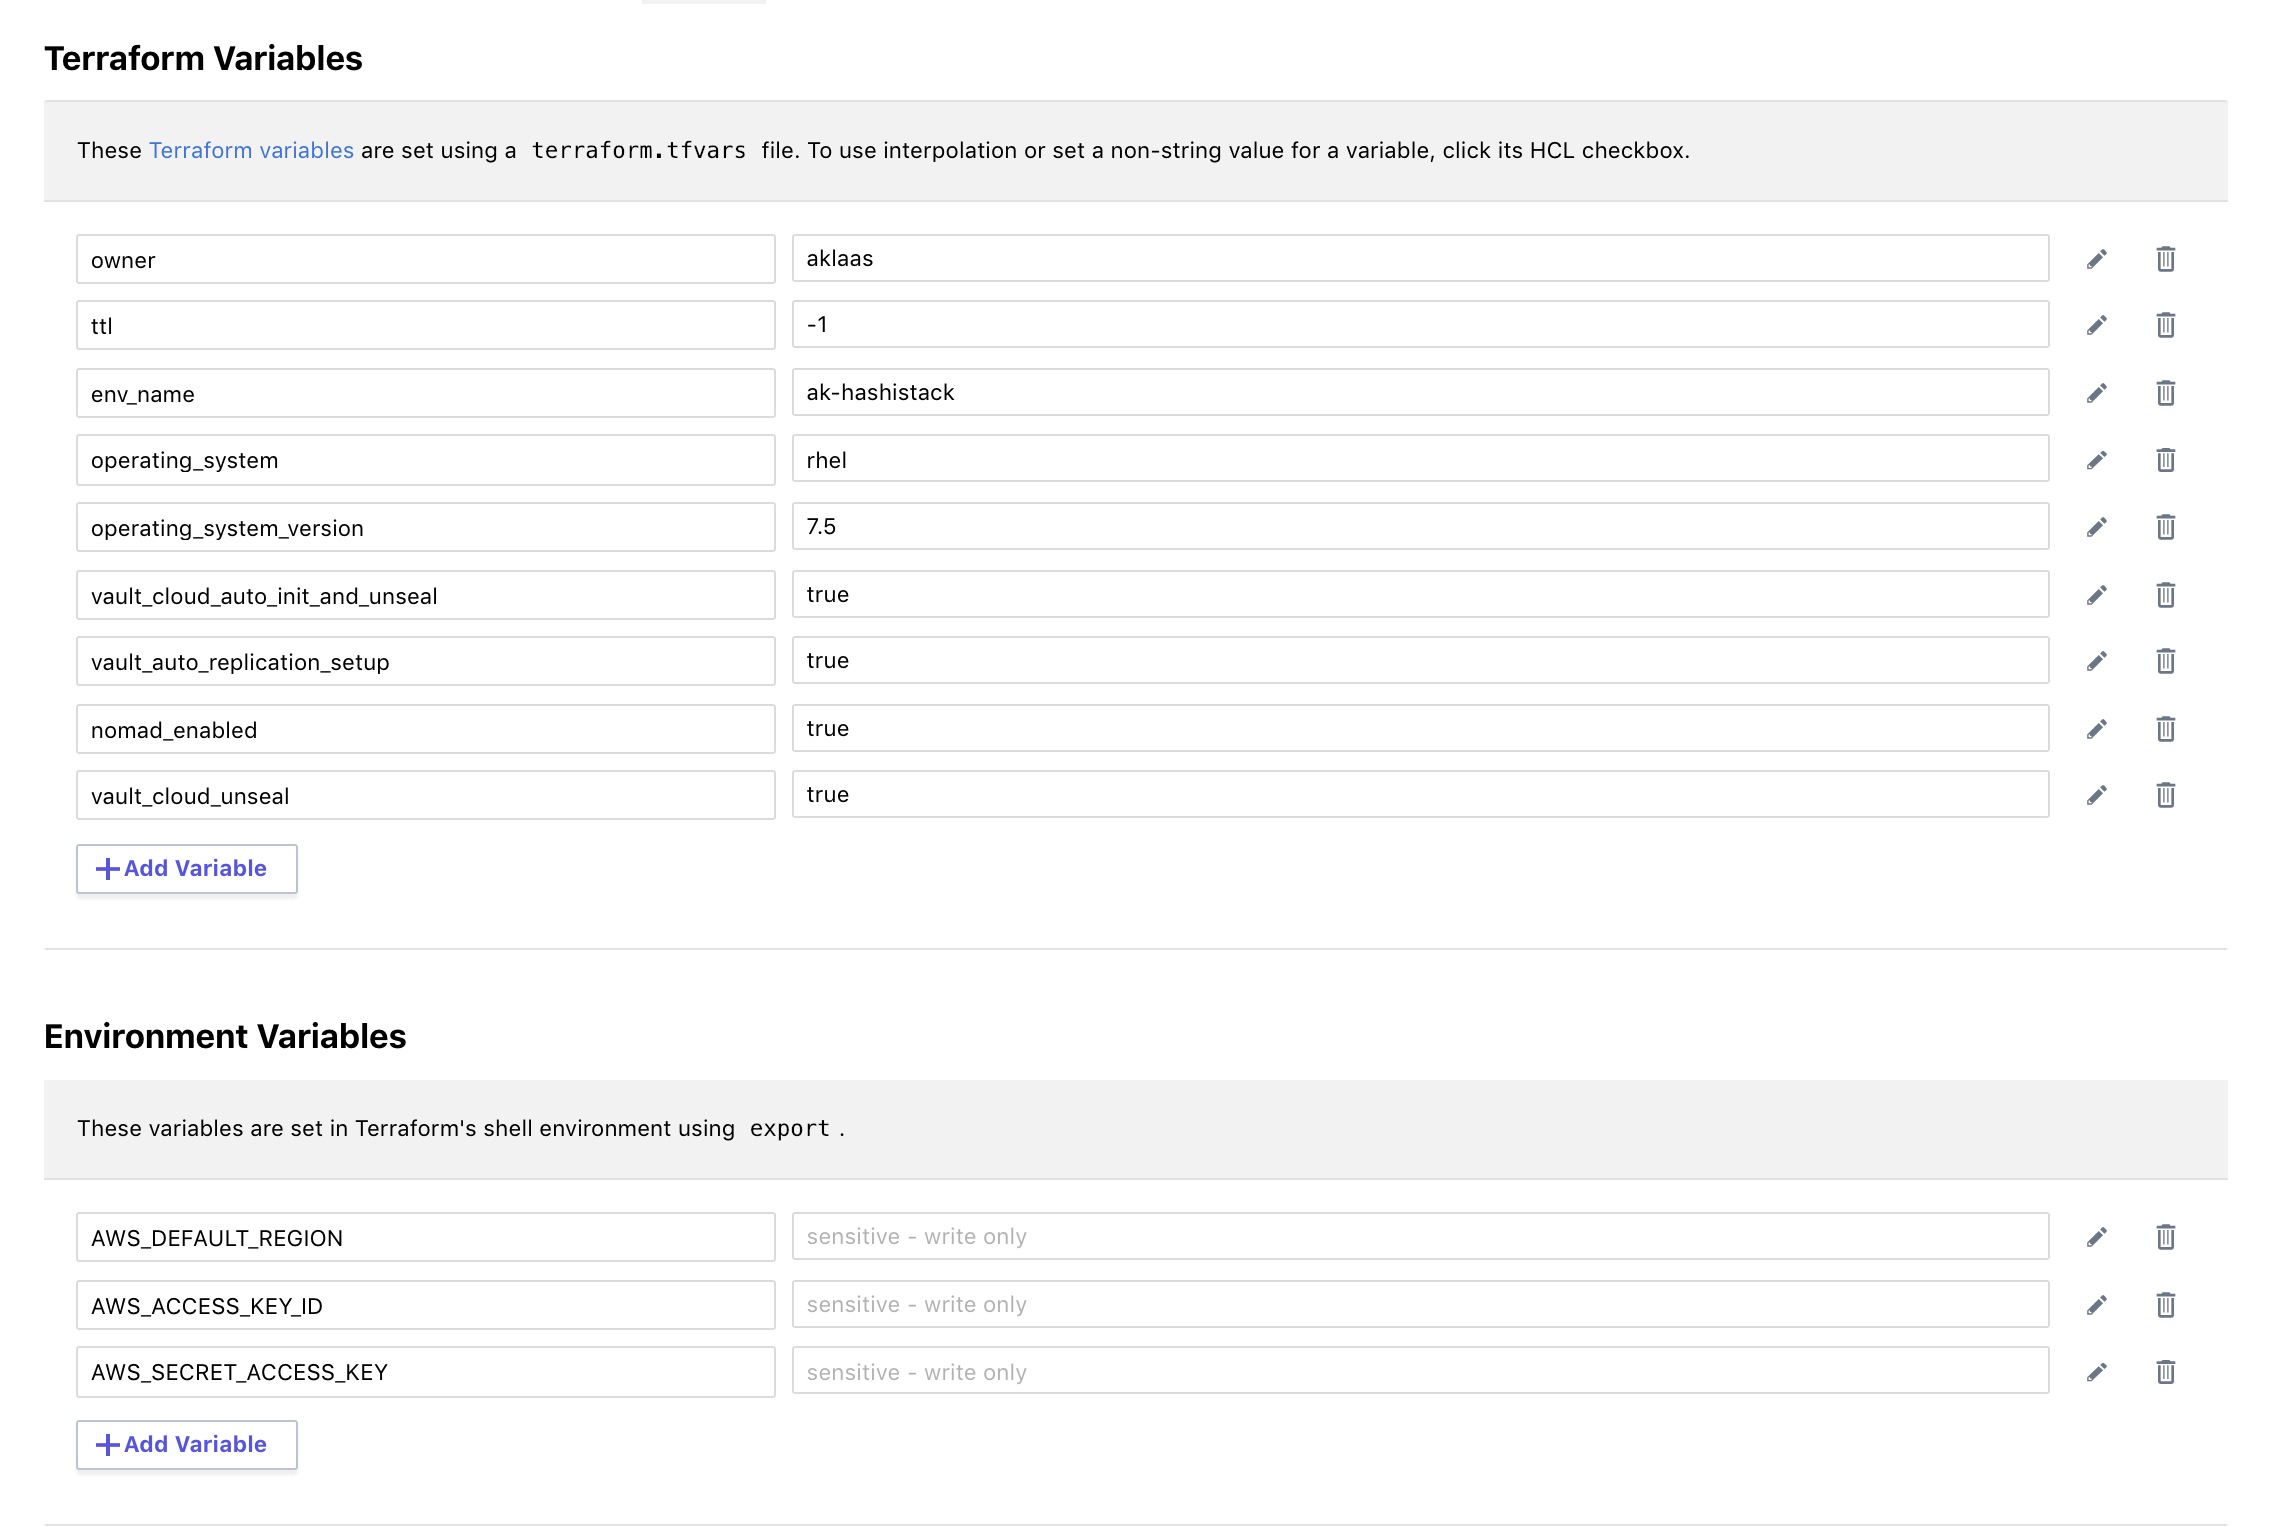
- Configure variables
for the workspace. I'm doing it via the GUI here. Note: add the
CONFIRM_DESTROY = 1environment variable as well so you can destroy the workspace.
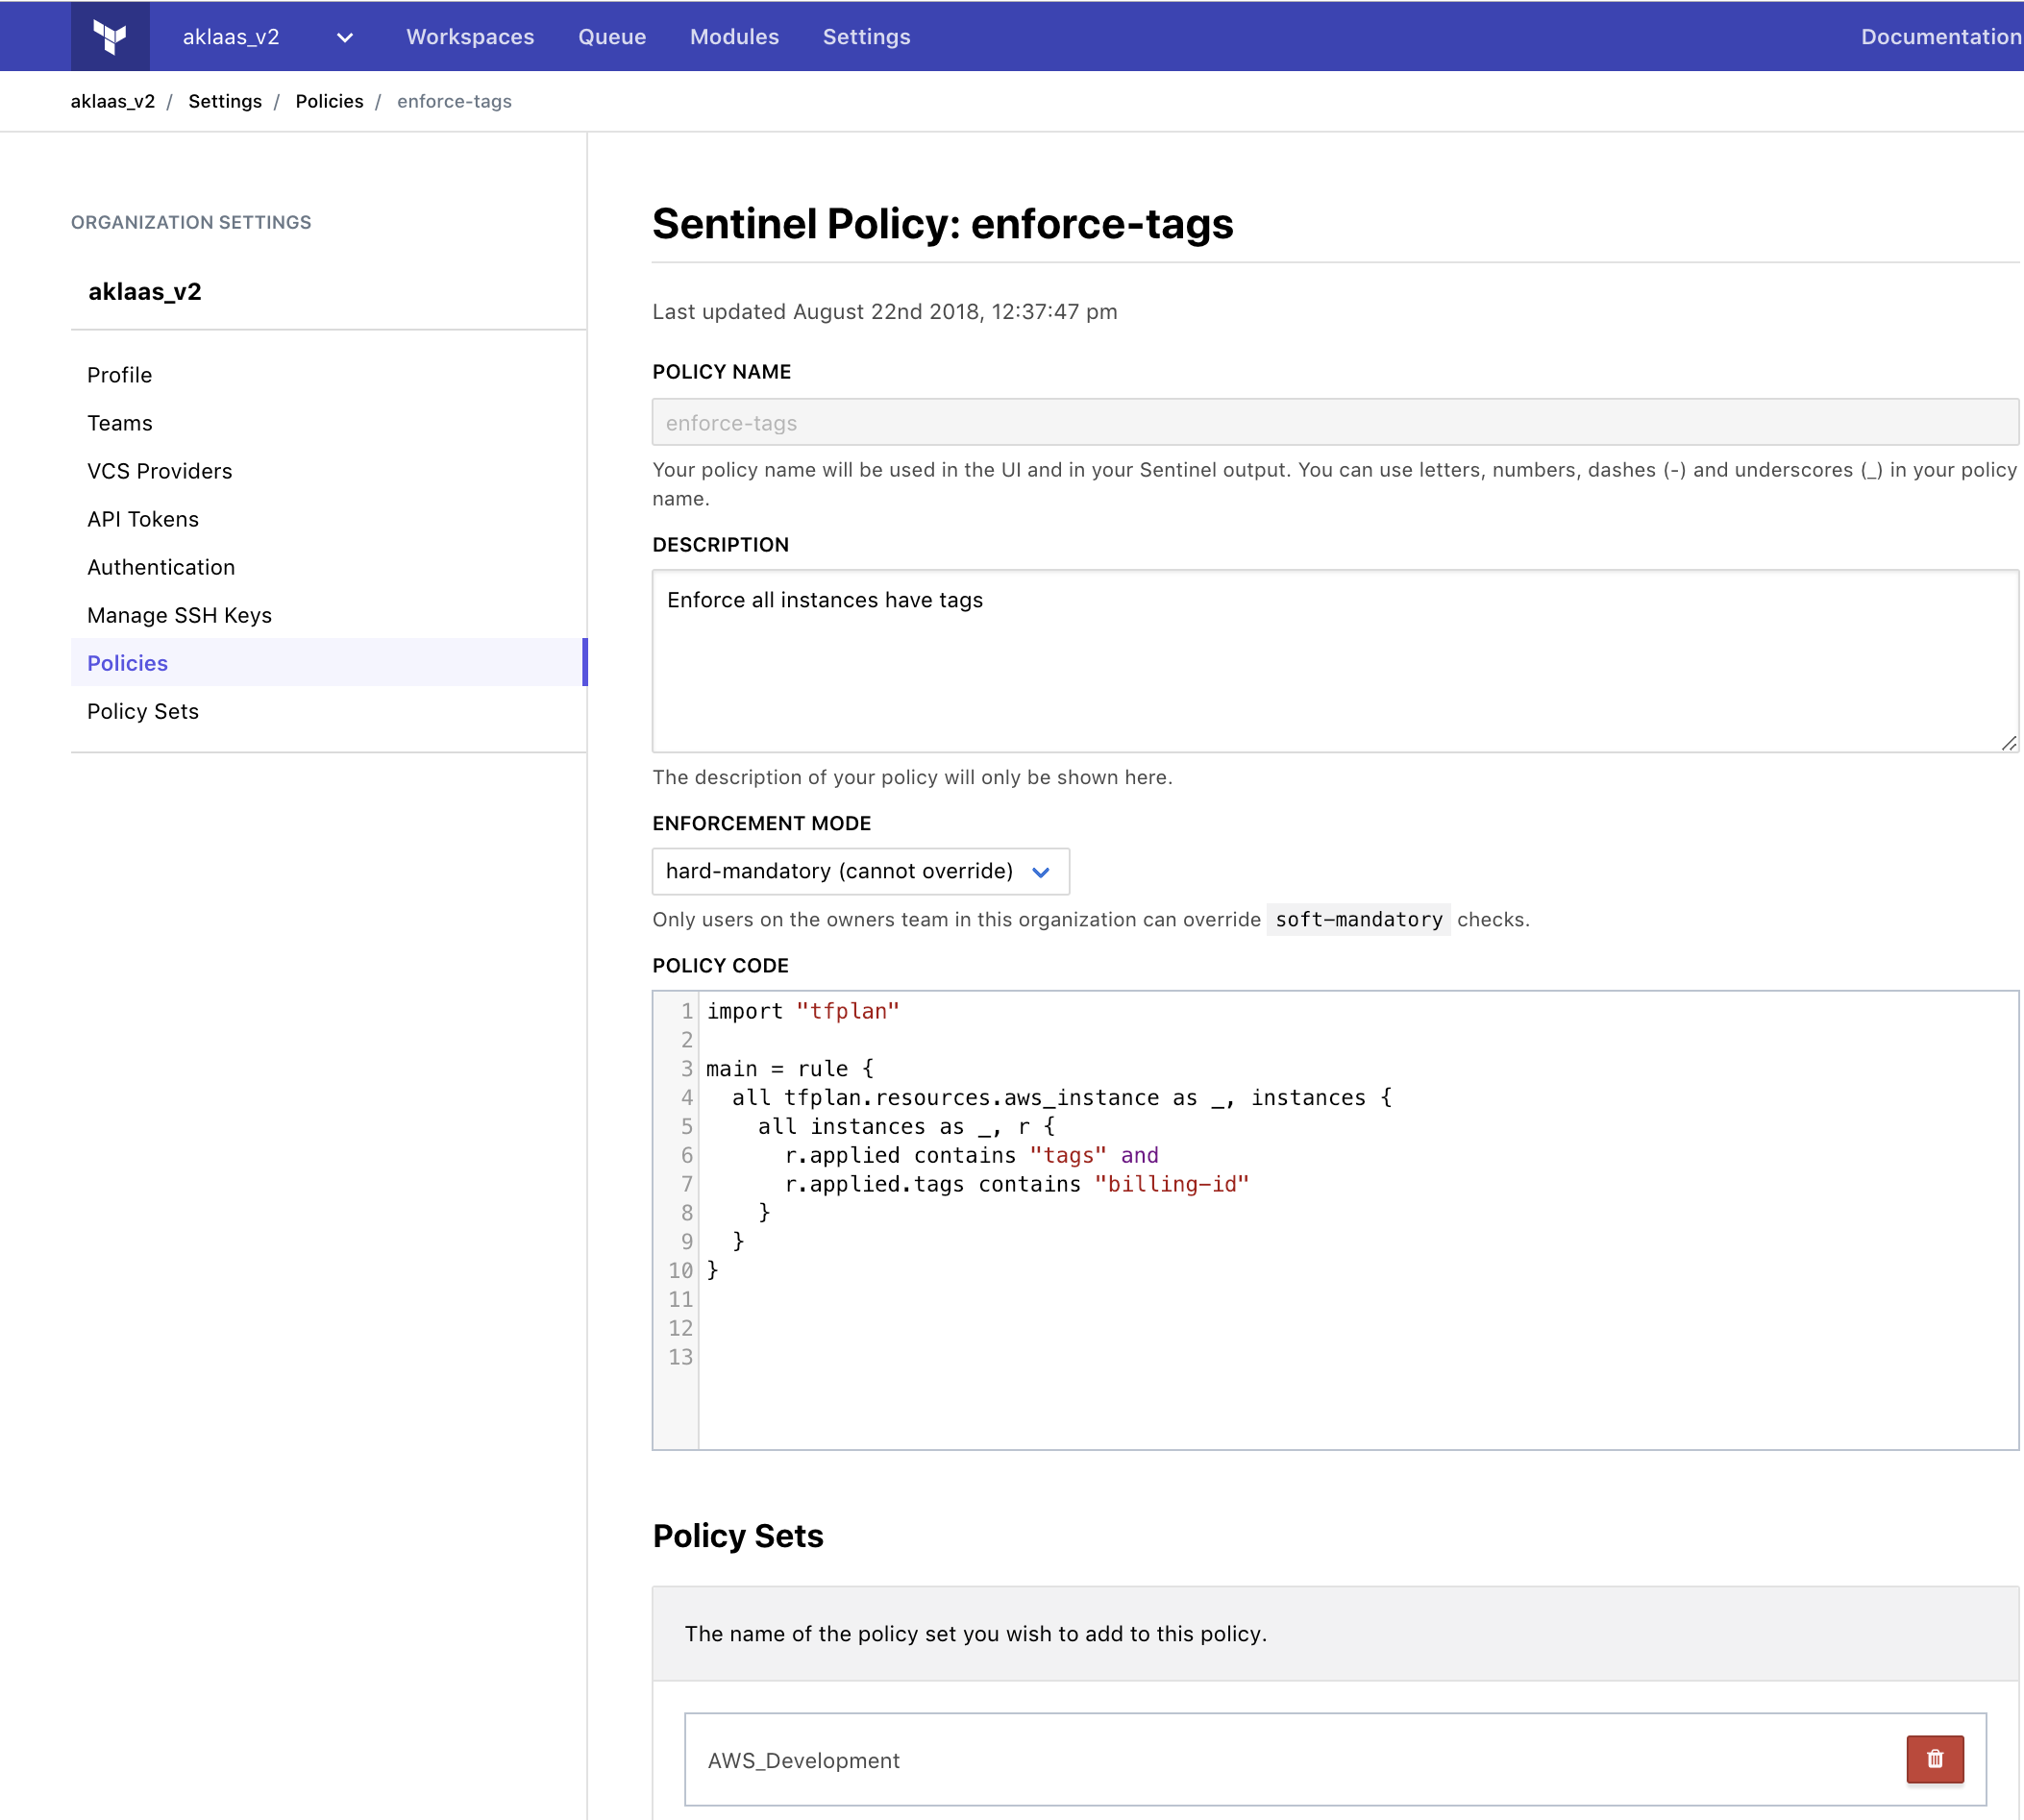
- (Optional, but highly recommended) Add some Sentinel Policies to your TFE workspace. Examples
- Queue a terraform plan. Show plan and policy check results. The demo is around 140 resources at the time of writing. Your policy checks will most likely differ :).
- Run Apply
TODO LINK. You will use the terraform output from this workspace for your demos.
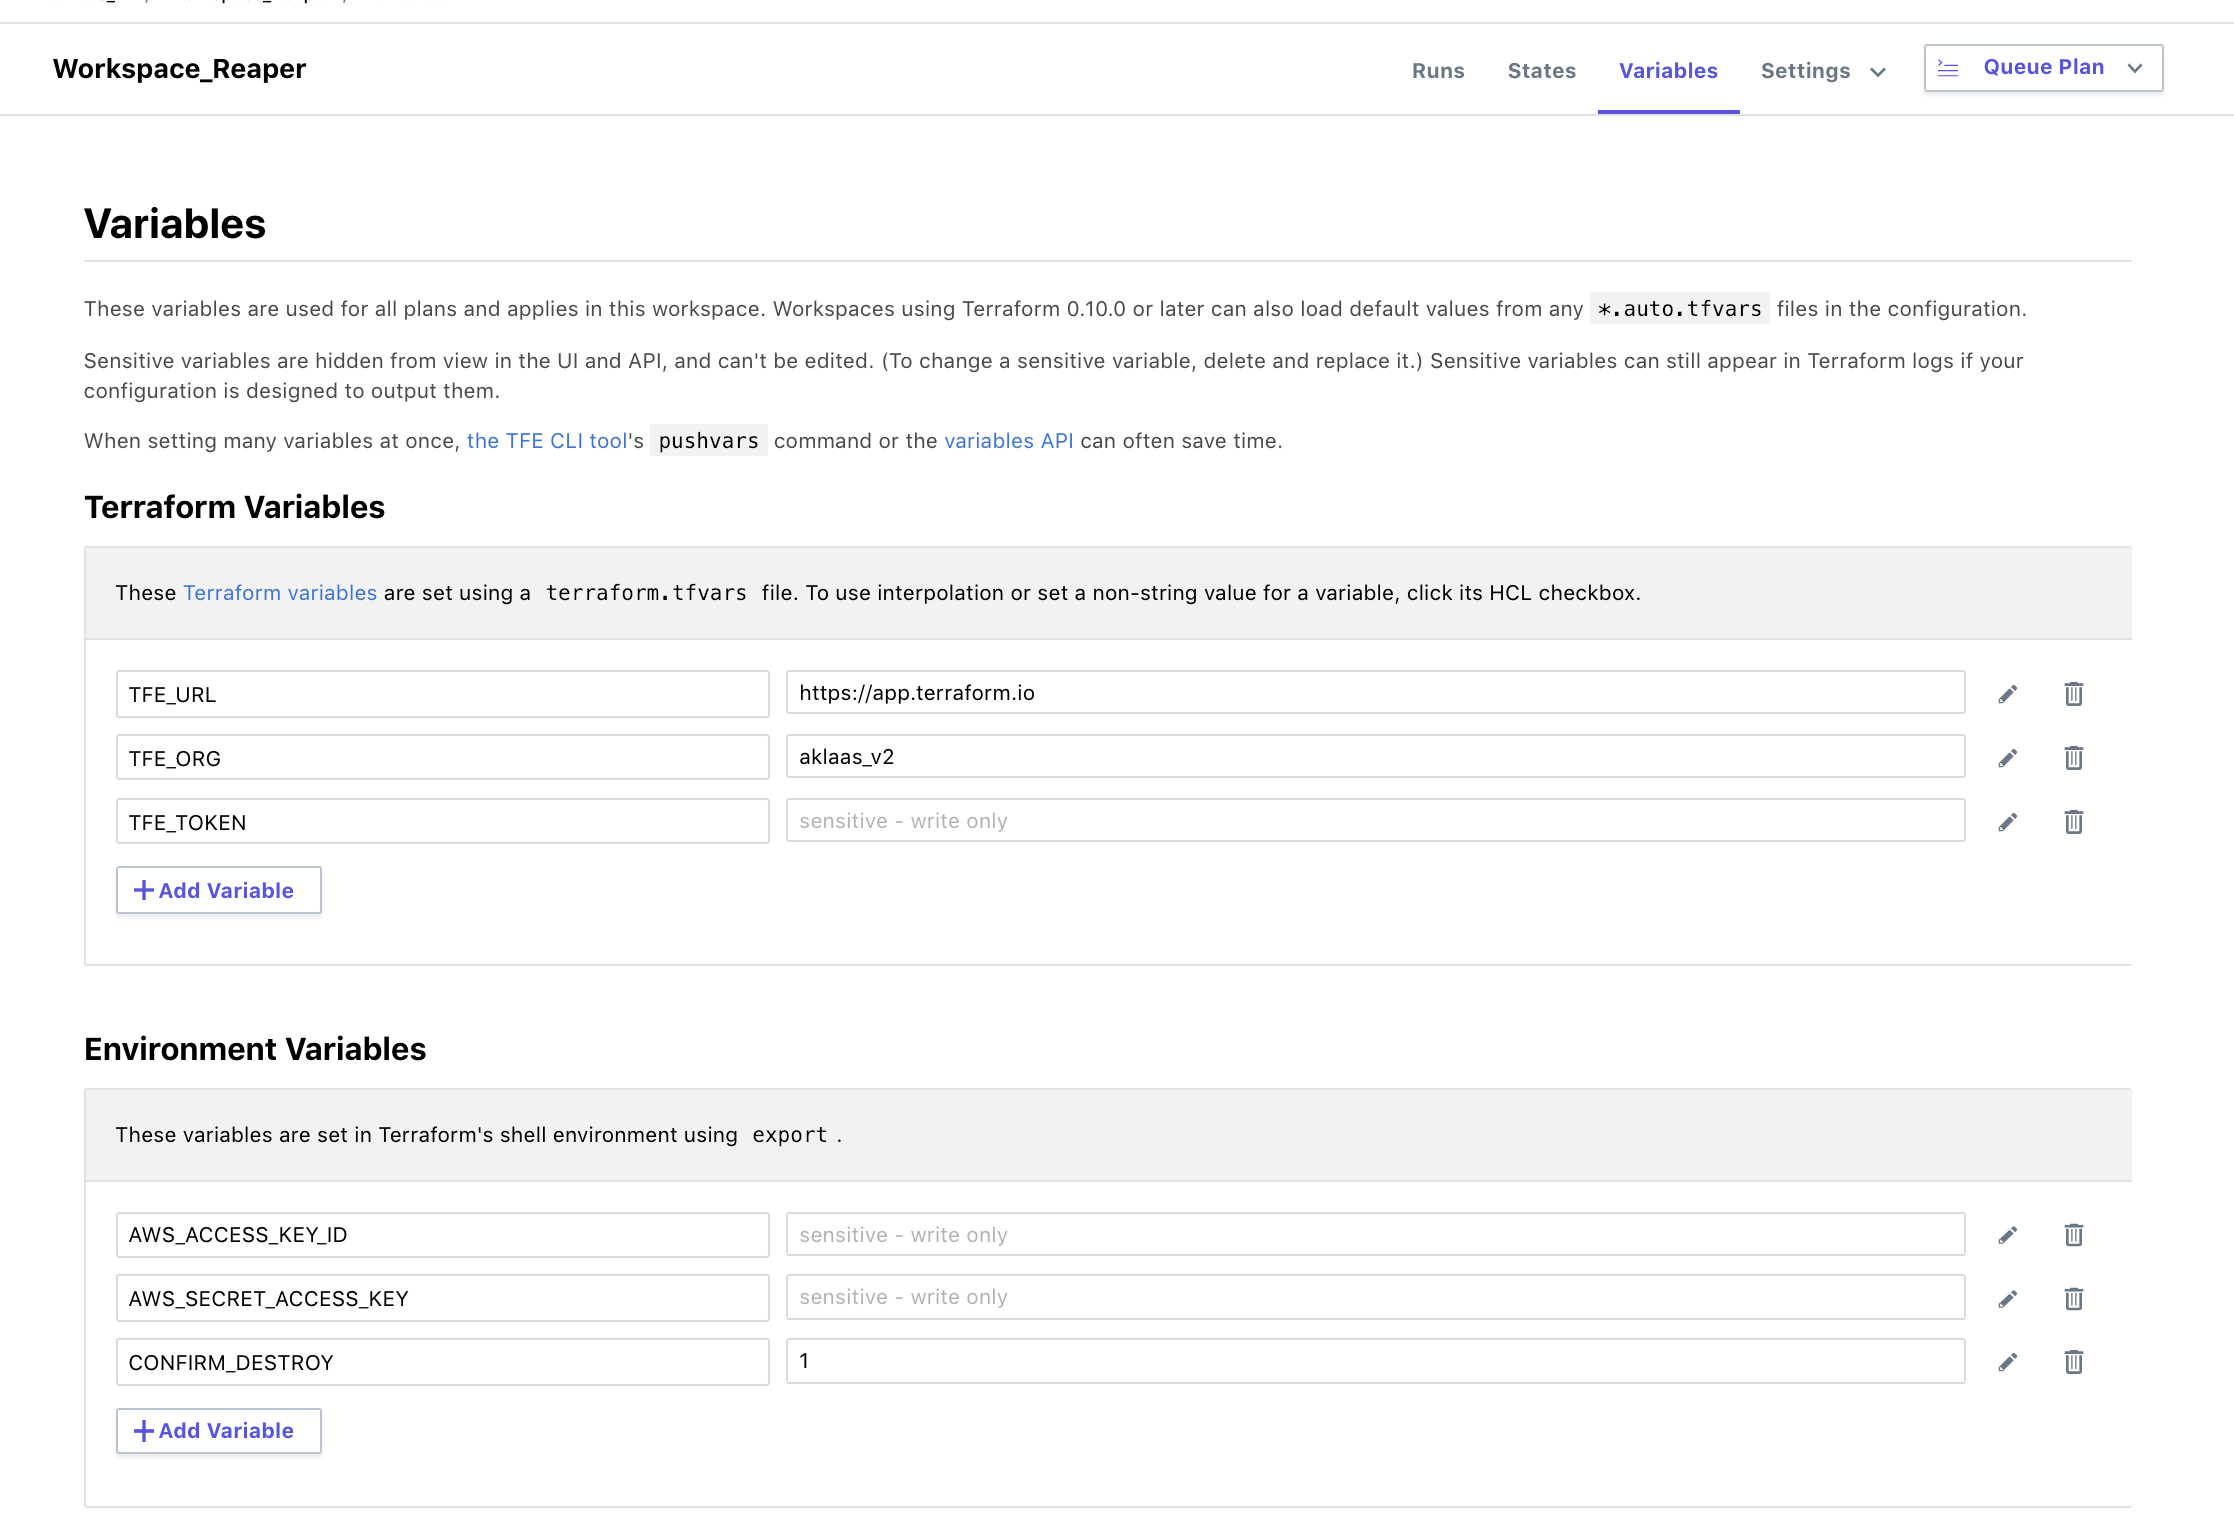
Finally, automate the automatic deltion of your demo environment via Adam's TFE Workspace Reaper.
- Fork the above repo
- Create a workspace in TFE linked to said repo
- Populate proper envionment variables (Use TFE Team or proper User API Token)
- For the TFE workspaces you want reaped, set "WORKSPACE_TTL" environment variable to an integer (in minutes) time to live.
Configure Terraform variables
cp terraform.tfvars.example terraform.tfvars
# edit terraform.tfvars
Initialize Terraform
cd terraform
terraform init
Terraform plan execution with summary of changes
terraform plan
Terraform apply to create infrastructure
terraform apply

# apply execution without prompt
# terraform apply -auto-approve
Tear down infrastructure using Terraform destroy
terraform destroy -force


