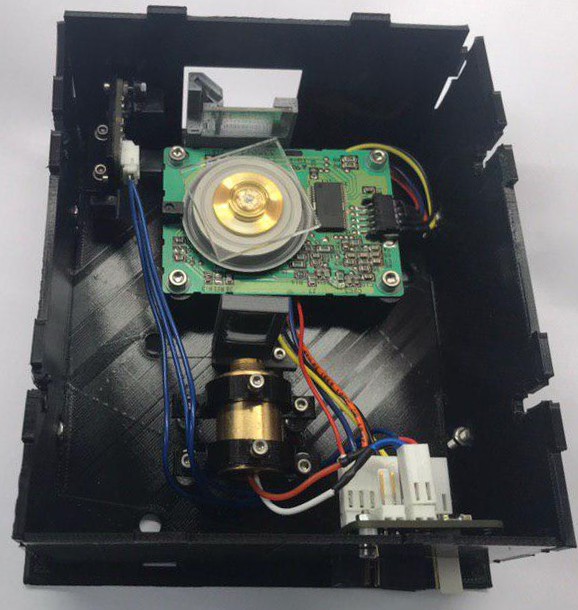
Beaglebone is no longer supported, activity has been moved to the FPGA branch.
A process known as Laser Direct Imaging.
The bill of materials (BOM) and links to FreeCad and PCB designs can be found on Hackaday.
It is possible to reach a phase-locked loop with the Hexastorm and sent lines to the scanner. A resolution below 100 micrometers can be obtained. The stepper motors can be moved and homed via the limit switches. The power of the laser can be set via a digital potentiometer. An exposure requires the following code, see test.py.
import numpy as np
from machine import Machine
from time import sleep

FILENAME = 'test.bin'
FACETS_IN_LANE = 5377
LANEWIDTH = 8.34751
BYTES_IN_LINE = 790
MULTIPLIER = 1

prototype = Machine()
print("Homing x")
prototype.home('x')
print("Homing y")
prototype.home('y')
print("Moving to start")
prototype.move([prototype.position[0], prototype.position[1]+70, 0])
print("Reading binary")
data = np.fromfile(FILENAME, dtype = np.uint8)
bytes_inlane = FACETS_IN_LANE * BYTES_IN_LINE
prototype.enable_scanhead()
for lane in range(1, round(len(data)/(bytes_inlane))):
    print("Exposing lane {}".format(lane))
    if lane > 0:
        print("Moving in x-direction for next lane")
        prototype.move([prototype.position[0]+LANEWIDTH, prototype.position[1], 0])
    if lane % 2 == 1:
        direction = False
        print("Start exposing forward lane")
    else:
        direction = True
        print("Start exposing back lane")
    line_data = data[lane*bytes_inlane:(lane+1)*bytes_inlane]
    # reverse, as exposure is inversed
    line_data = line_data[::-1]
    prototype.expose(line_data, direction, MULTIPLIER, move=True)
prototype.disable_scanhead()
print("Finished exposure")
The binary with laserdata can be created from an image with interpolator.py. The binary can not be created on the beaglebone as the script requires a lot of memory.
- if you enable the scan head, you give it an additional 4 seconds stabilization time. Ideally, add a counter so it has to pass the threshold multiple times
- there is no way to determines the scanhead missed the photodiode during exposure
- use asyncio loop for stabilizer
- check the speed of polygon in hertz; this might explain why different polygon vendors have such different behavior
The following image was used https://rcn-ee.net/rootfs/bb.org/testing/2019-09-08/stretch-iot/bone-debian-9.10-iot-armhf-2019-09-08-4gb.img.xz
Check wether the uio_pruss driver is loaded.
lsmod | grep uio
There should be something called uio_pruss. If it is not loaded load the module and check again.
sudo modprobe uio_pruss
To enable the uio_pruss module on each boot add it to /etc/modules-load.d/modules.conf by adding the line uio_pruss. An alternative is to load the PRU via the Python module. Check if you have /dev/uio1 /dev/uio2 etc.
ls /dev/uio*
If not modify /boot/uEnv.txt, comment the proc line
uboot_overlay_pru=/lib/firmware/AM335X-PRU-RPROC-4-4-TI-00A0.dtbo
uncomment pruss line
uboot_overlay_pru=/lib/firmware/AM335X-PRU-UIO-00A0.dtbo .
Reboot and check again. You can get an overview of your beaglebone configuration via
sudo /opt/scripts/tools/version.sh .
If this doesn't change, your old bootloader in the eMMC might be blocking u-boot overlays, you can fix it via:
sudo dd if=/dev/zero of=/dev/mmcblk1 bs=1M count=10
Install wheel, numpy, Adafruit_BBIO, Adafruit_GPIO and bidict.
pip3 install wheel numpy Adafruit_BBIO Adafruit_GPIO bidict
Clone py-uio and copy uio-pruss.rules file to /etc/udev/rules.d/ and reboot.
pip3 install --src . -e 'git+https://github.com/mvduin/py-uio.git#egg=py-uio'
Install the python library for the stepper motors, see TMC2130Stepper.
Optionally, install zmq for interaction with a remote camera
sudo apt install python3-zmq
Install the PRU assembler and prussdrv library as follows:
cd ~
git clone https://github.com/beagleboard/am335x_pru_package
cd am335x_pru_package
make
make install
Hexastorm works with cape universal. Ensure you allow overlays at /boot/uEnv.txt and have cape universal enabled. The pins are configured by applying the file hexastorm.bbio from the config-pin directory.
config-pin -f hexastorm.bbio
The interpolator cannot be run on the beaglebone and requires imagemagick.
sudo apt install imagemagick
If you want to create a slicer for 3D models. I would recommend the python bindings for VTK. You should find examples for it if you look in the git history. It has been removed for now.
The status of a pin can be obtained via
config-pin -q 9.91
A good pinout view of the beagle bone is available here:
P8 header
P9 header
