Install
npm install @builder.io/angular
Add the module
import { BuilderModule } from '@builder.io/angular';

@NgModule({
  ...
  imports: [ BuilderModule.forRoot('YOUR_API_KEY') ],
  ...
})
export class MyAppModule { }
And then add the component wherever you like
<!-- The model input can be any model of yours -->
<builder-component model="page" (load)="contentLoaded($event)" (error)="contentError($event)">
  <!-- Default content inside the tag shows while the builder content is fetching -->
  <div class="spinner"></div>
</builder-component>
Then, update your model's preview URL to enable on-site editing like in this guide, and you are done!
Next, see the below info for more advanced usage, as well as this guide for creating custom models,
and this guide for SEO optimizing your content (for angular use the data from the load output to get the custom field data)
Simply replace your 404 component with something like the below to allow creating new pages in Builder easily
<!-- The model input can be any model of yours -->
<builder-component
  *ngIf="!noBuilderPageForUrl"
  model="page"
  (load)="noBuilderPageForUrl = $event ? false : true"
  (error)="noBuilderPageForUrl = true"
>
  <!-- Default content inside the tag shows while the builder content is fetching -->
  <div class="spinner"></div>
</builder-component>
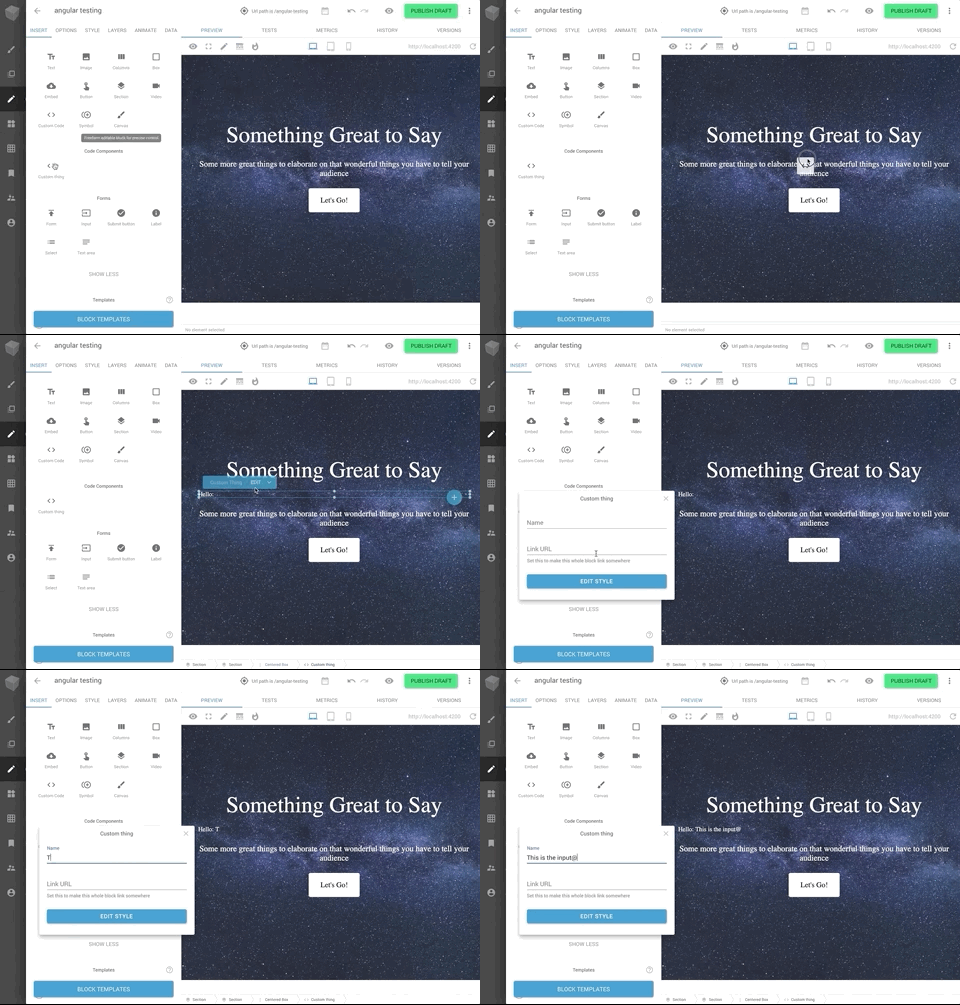
<my-404-component *ngIf="noBuilderPageForUrl"> </my-404-component>You can drag and drop to add your angular components in the Builder editor with a simple tag like below:
import { BuilderBlock } from '@builder.io/angular';
import { Component, Input } from '@angular/core';

@BuilderBlock({
  tag: 'custom-thing',
  name: 'Custom thing',
  inputs: [
    {
      name: 'name',
      type: 'string',
    },
  ],
})
@Component({
  selector: 'custom-thing',
  template: 'Hello: {{name}}',
})
export class CustomThing {
  @Input()
  name = '';
}
See here for full detail on input types available.
Use the data input for the Builder component tag to pass down data and actions to be used in the Builder editor.
See this guide for usage of your data and actions in the editor UI in Builder.
@Component({
  selector: 'my-page',
  template: '<builder-component model="page" [data]="data"></builder-component>',
})
export class MyPage {
  data = {
    someStateProperty: 'foo',
    someMethod: () => /* do something */,
    myService: this.myService
  }

  constructor(public myService: MyService) {

  }
}Custom fields are a powerful feature when using custom models, for all sorts of customization, such as SEO optimization of your content
<builder-component model="page" (load)="contentLoaded($event)">
  <!-- Default content inside the tag shows while the builder content is fetching -->
  <div class="spinner"></div>
</builder-component>contentLoaded(data) {
// Data object (via the output $event) includes your custom fields, e.g. if you have a custom field named
// "title"
document.title = data.data.title
}With component models you can also use Builder.io components in/around existing pages (aka it doesn't have to control the whole page). See info on making custom models for this here
<!-- The first part of your page -->
<builder-component model="my-section">Loading..</builder-component>
<!-- the rest of your page -->
You can then use queries and targeting to customize what content loads where
To see a full example integration see here for a simple Angular + Builder.io example project, or here for an Angular universal example
