The following instructions and sample data help to install
To begin with you can deploy the Microsoft Sentinel prerequisites for collecting T-Pot’s data. You will send the events into a custom log using a Data Collection Rule (DCR) and a Data Collection Endpoint (DCE). The following steps below are derived from the following documentation regarding Logstash and DCR.
-
Create a Azure AD Application Registration, copy the appid, tenant id, and generate a key secret and copy them for later usage.
-
Create a Data Collection Endpoint by going to Azure Monitor and Data Collection Endpoints blade and adding a new DCE provide a name, in this example I called it tpotdce and deployed the DCE into a resource group where Log Analytics is also deployed. Very important after deployment go to the DCE Overview and copy the Log Ingestion uri , you will need this later in setup.
-
Create a new custom table that is DCR based. Provide a table name in this example tpot
-
As part of the setup create a new data collection rule. In this example using a name tpotdcr and choose the DCE created in Step 2
-
Next, on Schema and transformation download the sample data file for tpot here: and Upload sample file.
-
Click on Transformation Editor and add the following, run and apply
source | extend TimeGenerated = todatetime(timestamp) | project-rename tpothostname = ['t-pot_hostname'], tpotextipaddr = ['t-pot_ip_ext'], tpotintipaddr = ['t-pot_ip_int'], tpottime = ['time'], tpotid = ['id'], tpotuuid = ['uuid'], honeypotType = type -
Click next and then create.
-
Go to Azure Monitor and the Data Collection Rules blade and select tpotdcr and click the JSON View in top right corner and copy the immutableid
-
Copy the streamDeclarations json object name
-
On the DCR, click on Access Control (IAM) and add the Application Registration name from Step 1 earlier as a ‘Monitoring Metrics Publisher’ role, click review + assign.
The next steps will involve updating Azure VM T-Pot to install_microsoft-sentinel-logstash-output-plugin_ and configure the logstash.conf file for the new plugin to send data to Microsoft Sentinel.
-
Log into CockPit service via https://AzTPotPublicIP:64294/system/terminal
-
Click on the terminal tab and
sudo su -
Run the following bash commands to enter Logstash docker bash, copy logstash.conf to /data mount on T-Pot VM and exit Logstash docker bash:
docker exec -it logstash bash cd /etc/logstash/ cp logstash.conf /data/elk/logstash.conf exit -
Stop tpot service:
systemctl stop tpot -
modify the /data/elk/logstash.conf by scrolling close to the end and adding a second Output configuration for Microsoft Sentinel. Be sure to fill in the information collected from previous steps. an overall sample file can be found here: logstash.conf
microsoft-sentinel-logstash-output-plugin {client_app_Id => ""client_app_secret => ""tenant_id => ""data_collection_endpoint => ""dcr_immutable_id => ""dcr_stream_name => "Custom-tpot_CL"compress_data => falsecreate_sample_file=> falsesample_file_path => "/data/temp"} -
WARNING !!!! Still Figuring this out Modificatio may result in no logs sent to Sentinel !!! modify the /data/elk/logstash.conf by scrolling in a few sections making changes via remarks below. # CitrixHoneypot an overall sample file can be found here: logstash.conf
if [type] == "CitrixHoneypot" { grok { match => { "message" => ["\A\(%{IPV4:src_ip:string}:%{INT:src_port:integer}\): %{JAVAMETHOD:http.http_method:string}%{SPACE}%{CISCO_REASON:fileinfo.state:string}: %{UNIXPATH:fileinfo.filename:string}", "\A\(%{IPV4:src_ip:string}:%{INT:src_port:integer}\): %{JAVAMETHOD:http.http_method:string}%{SPACE}%{CISCO_REASON:fileinfo.state:string}: %{GREEDYDATA:payload:string}", "\A\(%{IPV4:src_ip:string}:%{INT:src_port:integer}\): %{S3_REQUEST_LINE:msg:string} %{CISCO_REASON:fileinfo.state:string}: %{GREEDYDATA:payload:string:string}", "\A\(%{IPV4:src_ip:string}:%{INT:src_port:integer}\): %{GREEDYDATA:msg:string}" ] } } date { match => ["asctime", "ISO8601"] remove_field => ["asctime"] remove_field => ["message"] } mutate { add_field => { "dest_port" => "443" } rename => { "levelname" => "level" "http.http_method" => "httpmethod" # Rename - ? , Grok earlier possible make change there. "fileinfo.filename" => "fileinfoname" # Rename - ? , Grok earlier possible make change there. "fileinfo.state" => "fileinfostate" # Rename - ? , Grok earlier possible make change there. } } } -
WARNING !!!! Still Figuring this out Modificatio may result in no logs sent to Sentinel !!! modify the /data/elk/logstash.conf by scrolling in a few sections and Remarking out via below. # ElasticPot, # Ipphoney, an overall sample file can be found here: logstash.conf
if [type] == "ElasticPot" {
	date {
		match => ["timestamp", "ISO8601"]
	}
	mutate {
		rename => {
			# "content_type" => "http.http_content_type"
			"dst_port" => "dest_port"
			"dst_ip" => "dest_ip"
			"message" => "event_type"
			"request" => "request_method"
			"user_agent" => "http_user_agent"
			# "url" => "http.url"
		}
	}
}
if [type] == "Ipphoney" {
	date {
		match => ["timestamp", "ISO8601"]
	}
	mutate {
		rename => {
			"query" => "ipp_query"
			# "content_type" => "http.http_content_type"
			"dst_port" => "dest_port"
			"dst_ip" => "dest_ip"
			"request" => "request_method"
			"operation" => "data"
			"user_agent" => "http_user_agent"
			# "url" => "http.url"
		}
	}
}
- Save the file and run the following to modify permissions to allow T-Pot service access.
    chmod 760 /data/elk/logstash.conf
    chown tpot:tpot /data/elk/logstash.conf
-
In this next step you will now modify tpot.yml service file to install the Microsoft Sentinel plugin. with your editor edit the following file: /opt/tpot/etc/tpot.yml
-
Scroll towrds bottom and remark # out the image and add the following lines with proper indents (two spaces). This will allow on next T-Pot service start to force a new image build using this information rather than pull the image from docker hub. It will also grab and use the copied and modified logstash.conf in /data you brought over and edited in the beginning of steps to use a Output plugin for Microsoft Sentinel.
  logstash:
    build:
      context: /opt/tpot/docker/elk/logstash
      dockerfile: ./Dockerfile
    container_name: logstash
    restart: always
    environment:
     - LS_JAVA_OPTS=-Xms1024m -Xmx1024m
    depends_on:
      elasticsearch:
        condition: service_healthy
    env_file:
     - /opt/tpot/etc/compose/elk_environment
    mem_limit: 2g
    #image: "dtagdevsec/logstash:2204"
    volumes:
     - /data:/data
     - /data/elk/logstash.conf:/etc/logstash/logstash.conf
-
Save the file and Next you will modify a Dockerfile for logstash at: /opt/tpot/docker/elk/logstash/Dockerfile ,
-
Insert the following line of code below the bin/logstash-plugin update
bin/logstash-plugin install microsoft-sentinel-logstash-output-plugin && \
-
Save the file and then run:
systemctl start tpot -
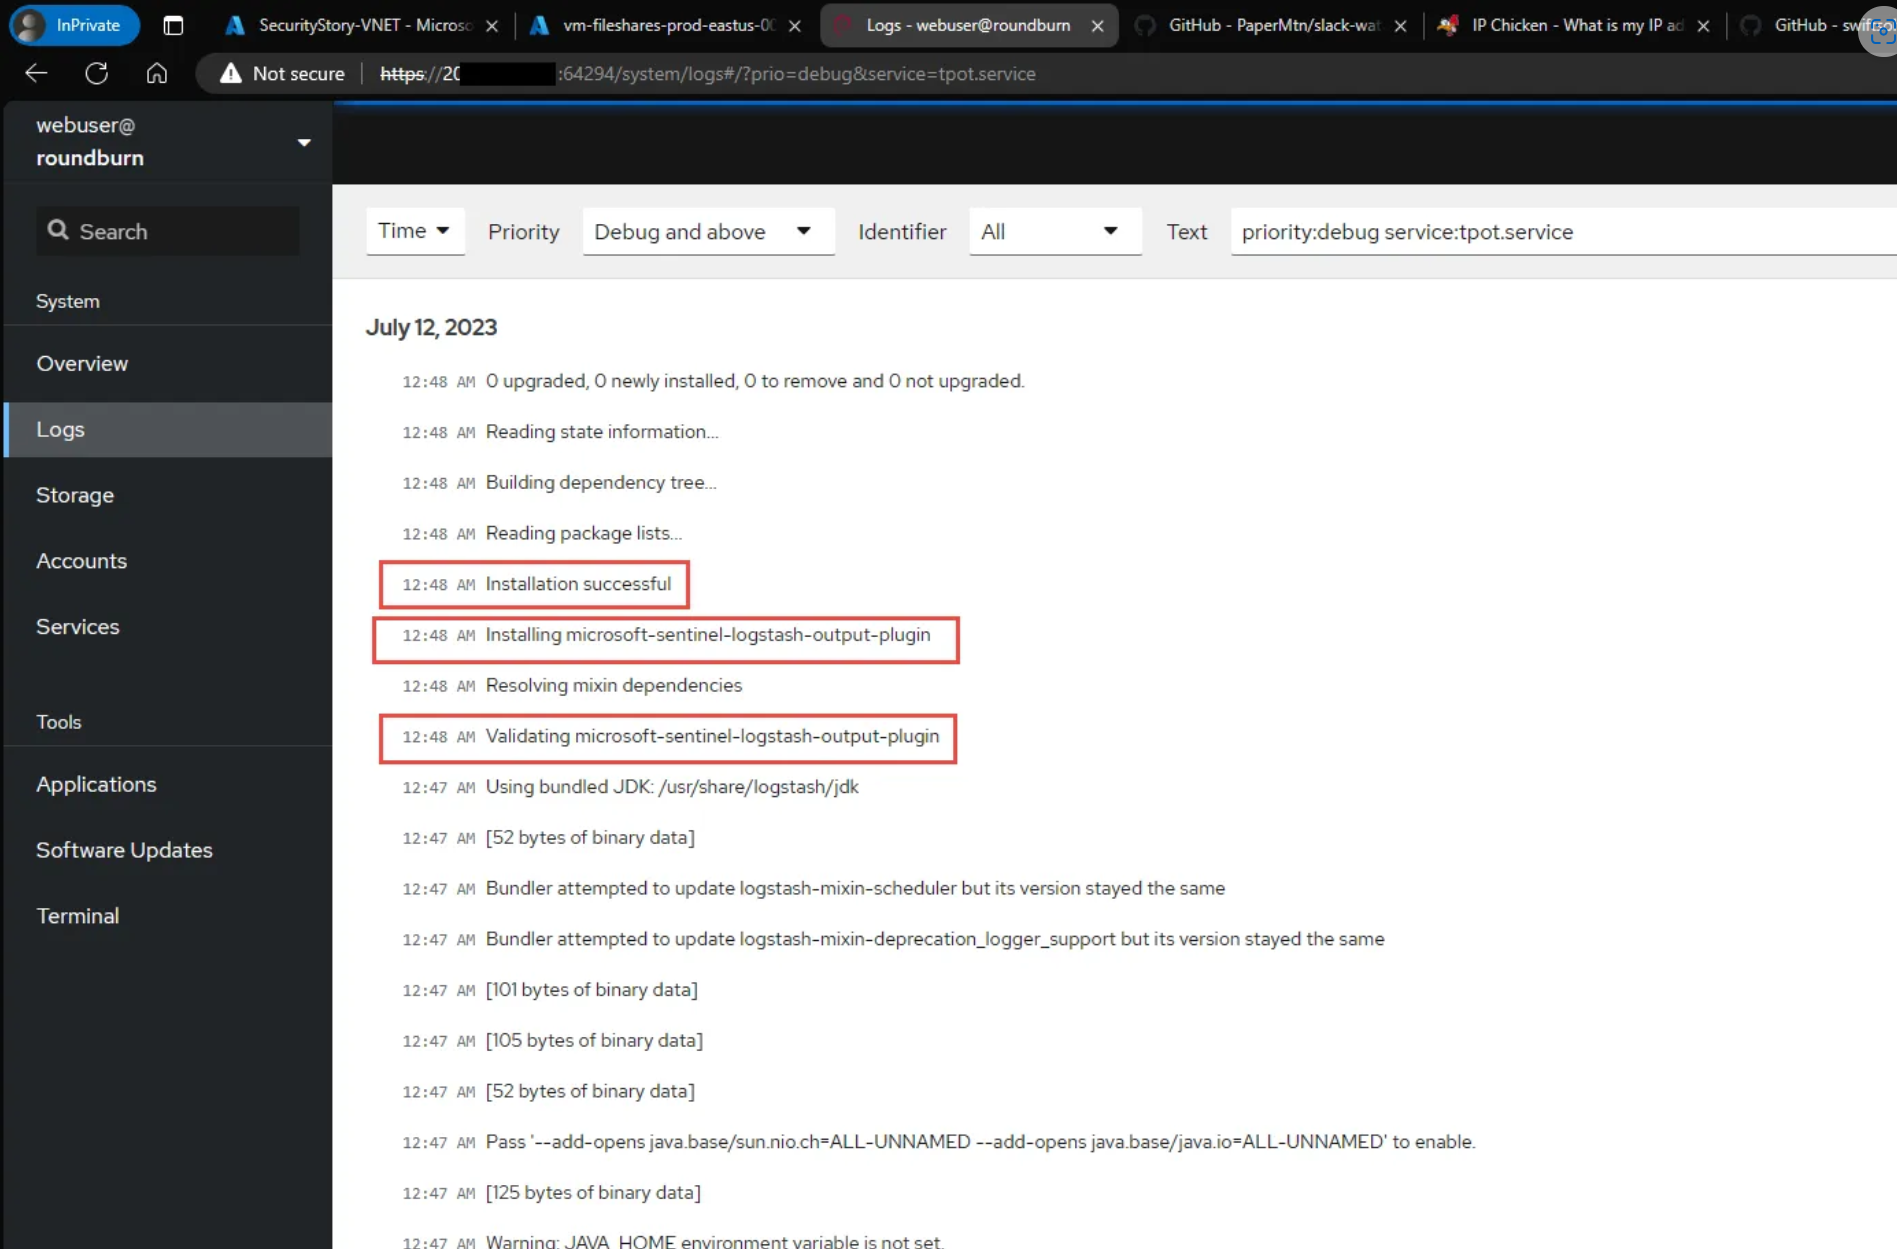
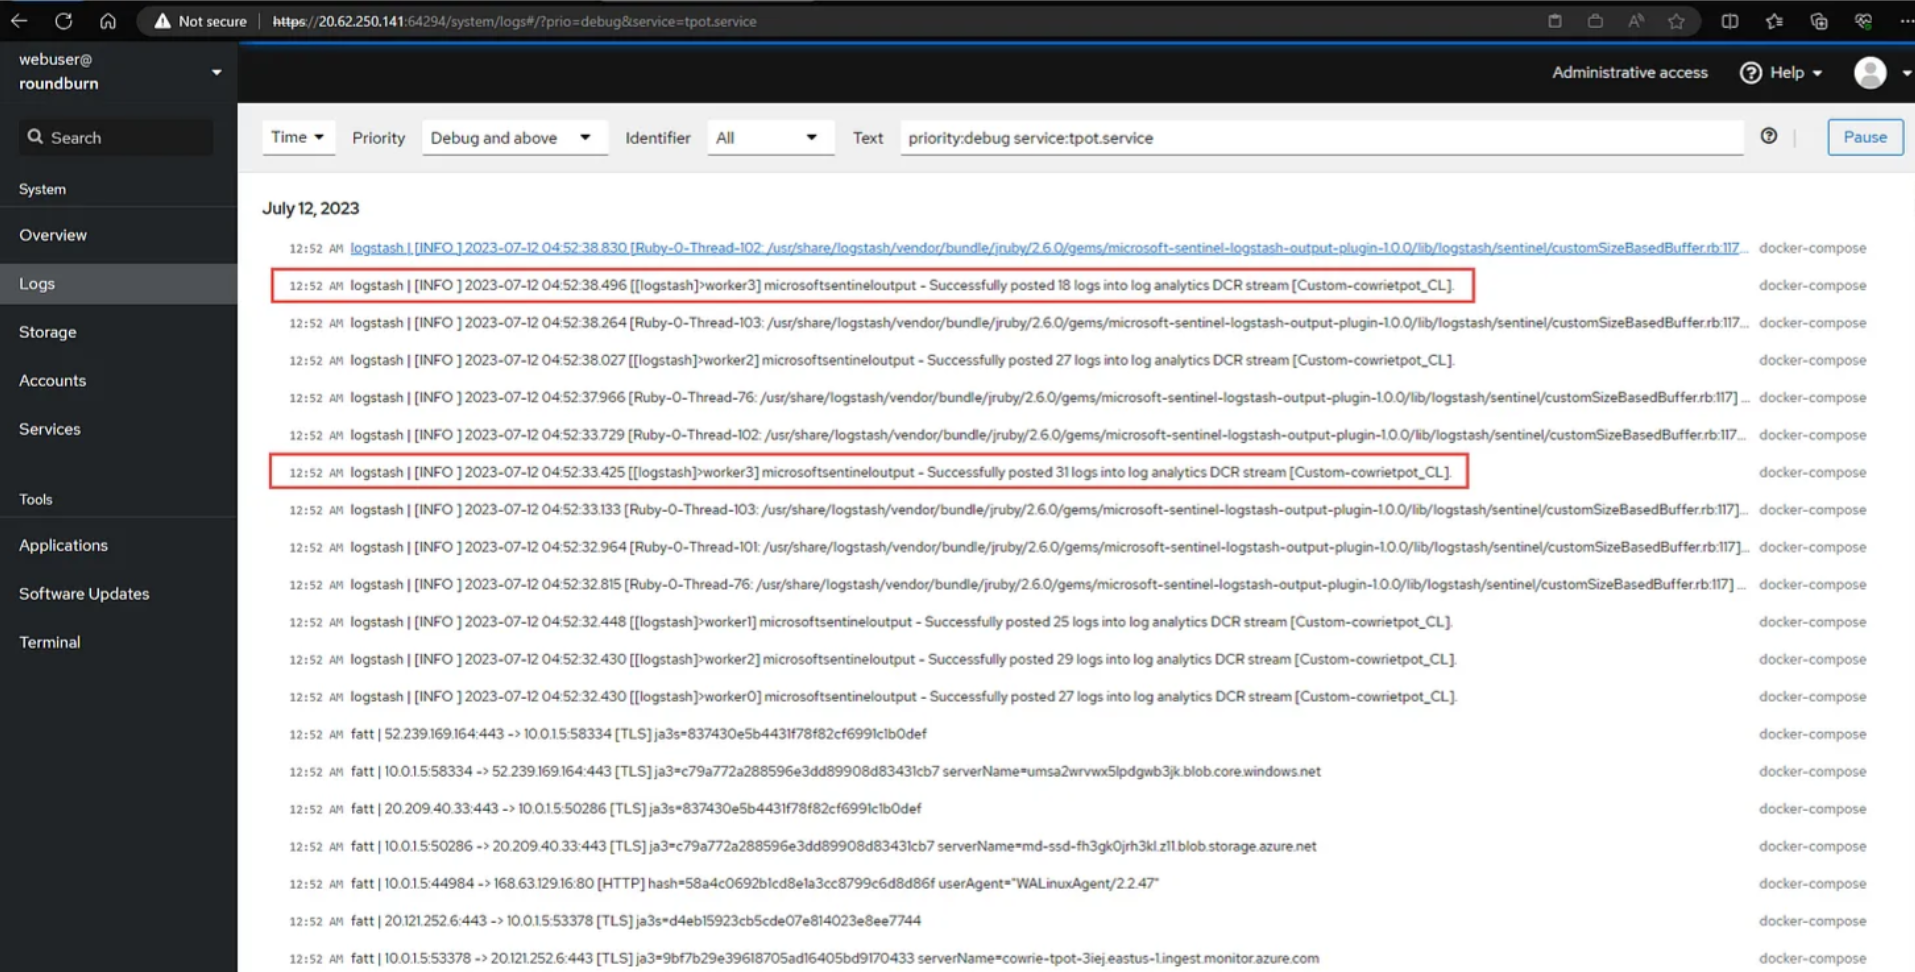
In the CockPit service go to Services and scroll down to tpot service and goto All Logs - ensure the tpot service launches correctly without obvious errors on LogStash docker container. below are some signs of successful launch with new modifications

