This document assumes:
- you have read Moulti's README file;
- you have a vague idea of what Moulti is and how it could become useful to you;
- you are comfortable with the command line on Unix and/or Unix-like operating systems.
Moulti requires:
- Linux, BSD or MacOS
- Python ≥ 3.10
- Textual 0.86.3
Moulti is available as a Python package on PyPI and can thus be installed using pip or, more conveniently, pipx:
pipx install moulti
pipx ensurepath
Distribution packages are of course welcome.
Moulti is compatible with argcomplete global completion. This means that, depending on your system and installed packages, shell completion for Moulti may work out of the box. This should be true for:
- Debian (bash, but also zsh)
- Fedora (bash only)
... as long as packages bash-completion and python3-argcomplete are installed.
Otherwise, refer to the argcomplete documentation.
Limitation: shell completion will help typing subcommands and options but is technically unable to suggest existing step names.
-
Open two terminals on the same machine/host/VM/container.
-
In the first terminal, launch the Moulti instance, i.e. the Terminal User Interface (TUI) itself:
TERM=xterm-256color moulti init
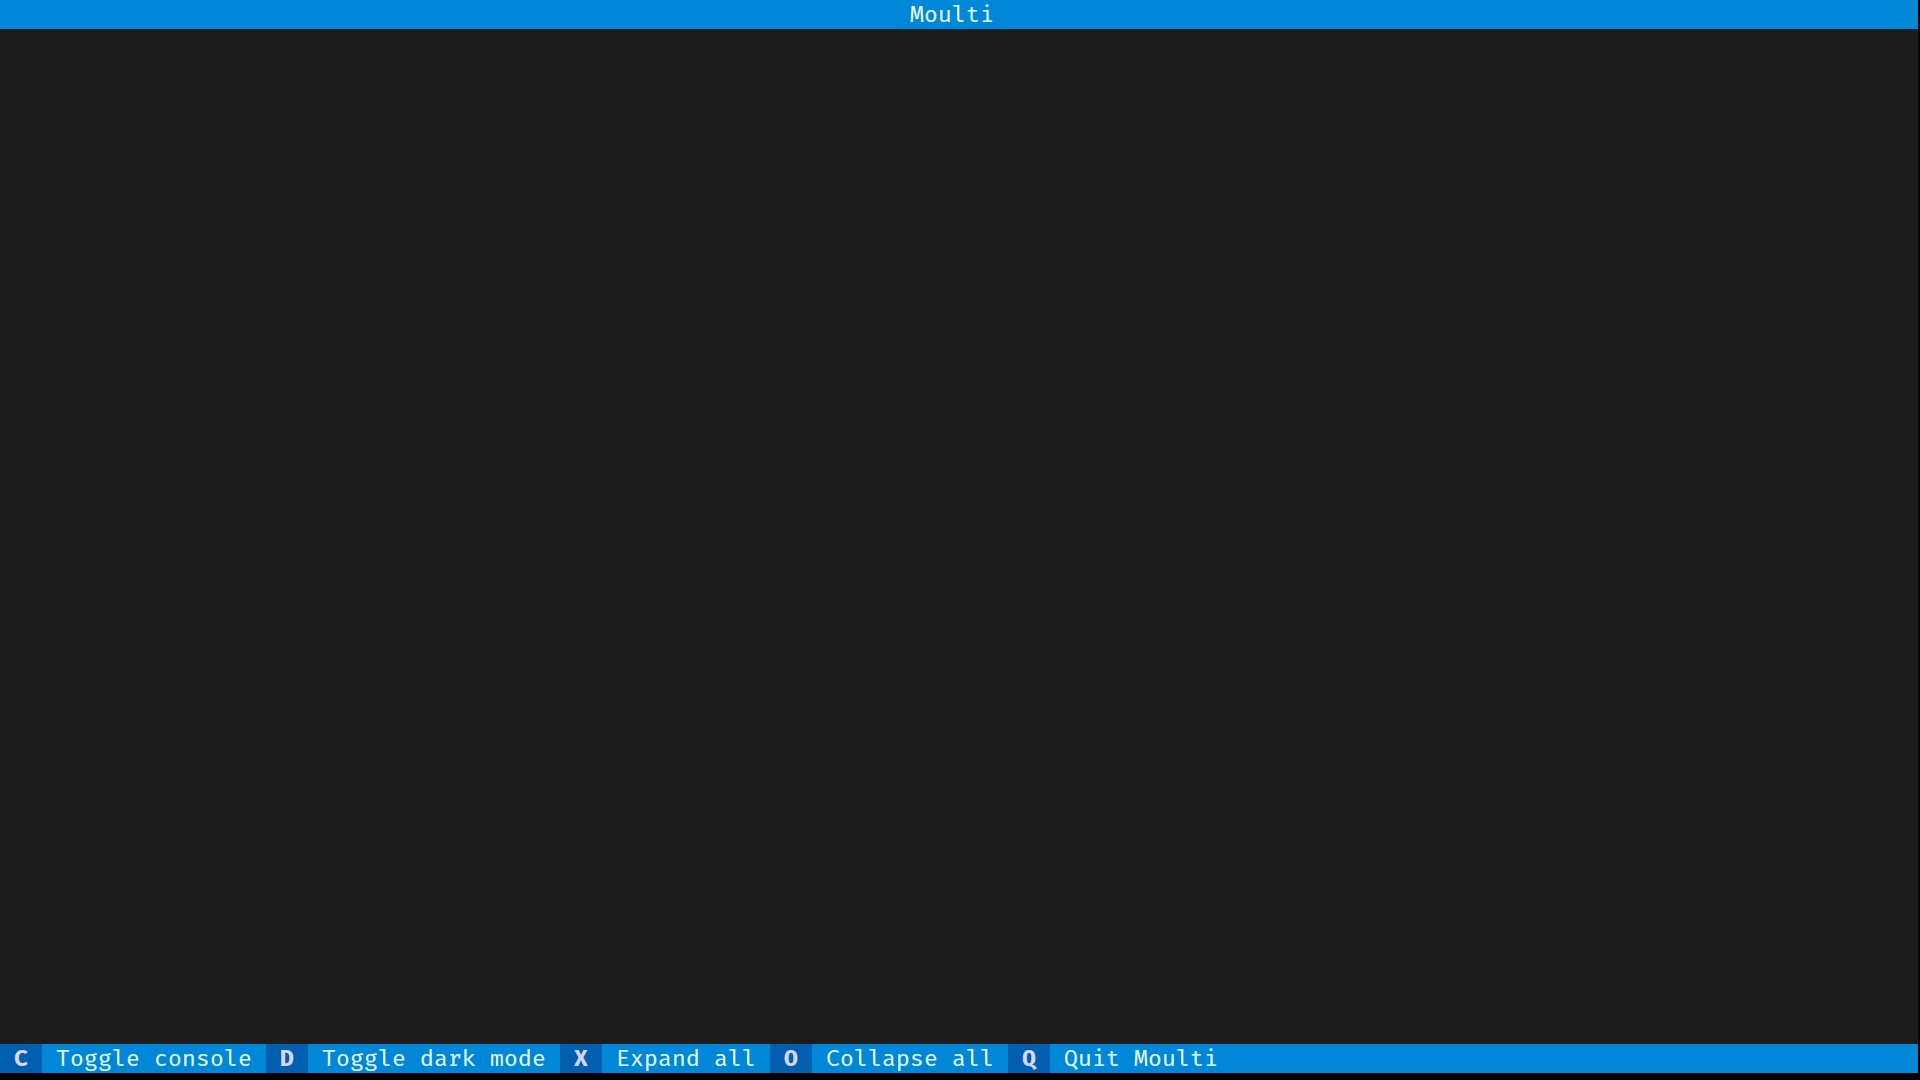
Upon startup, Moulti is empty: it shows nothing beyond a title bar and a footer:
-
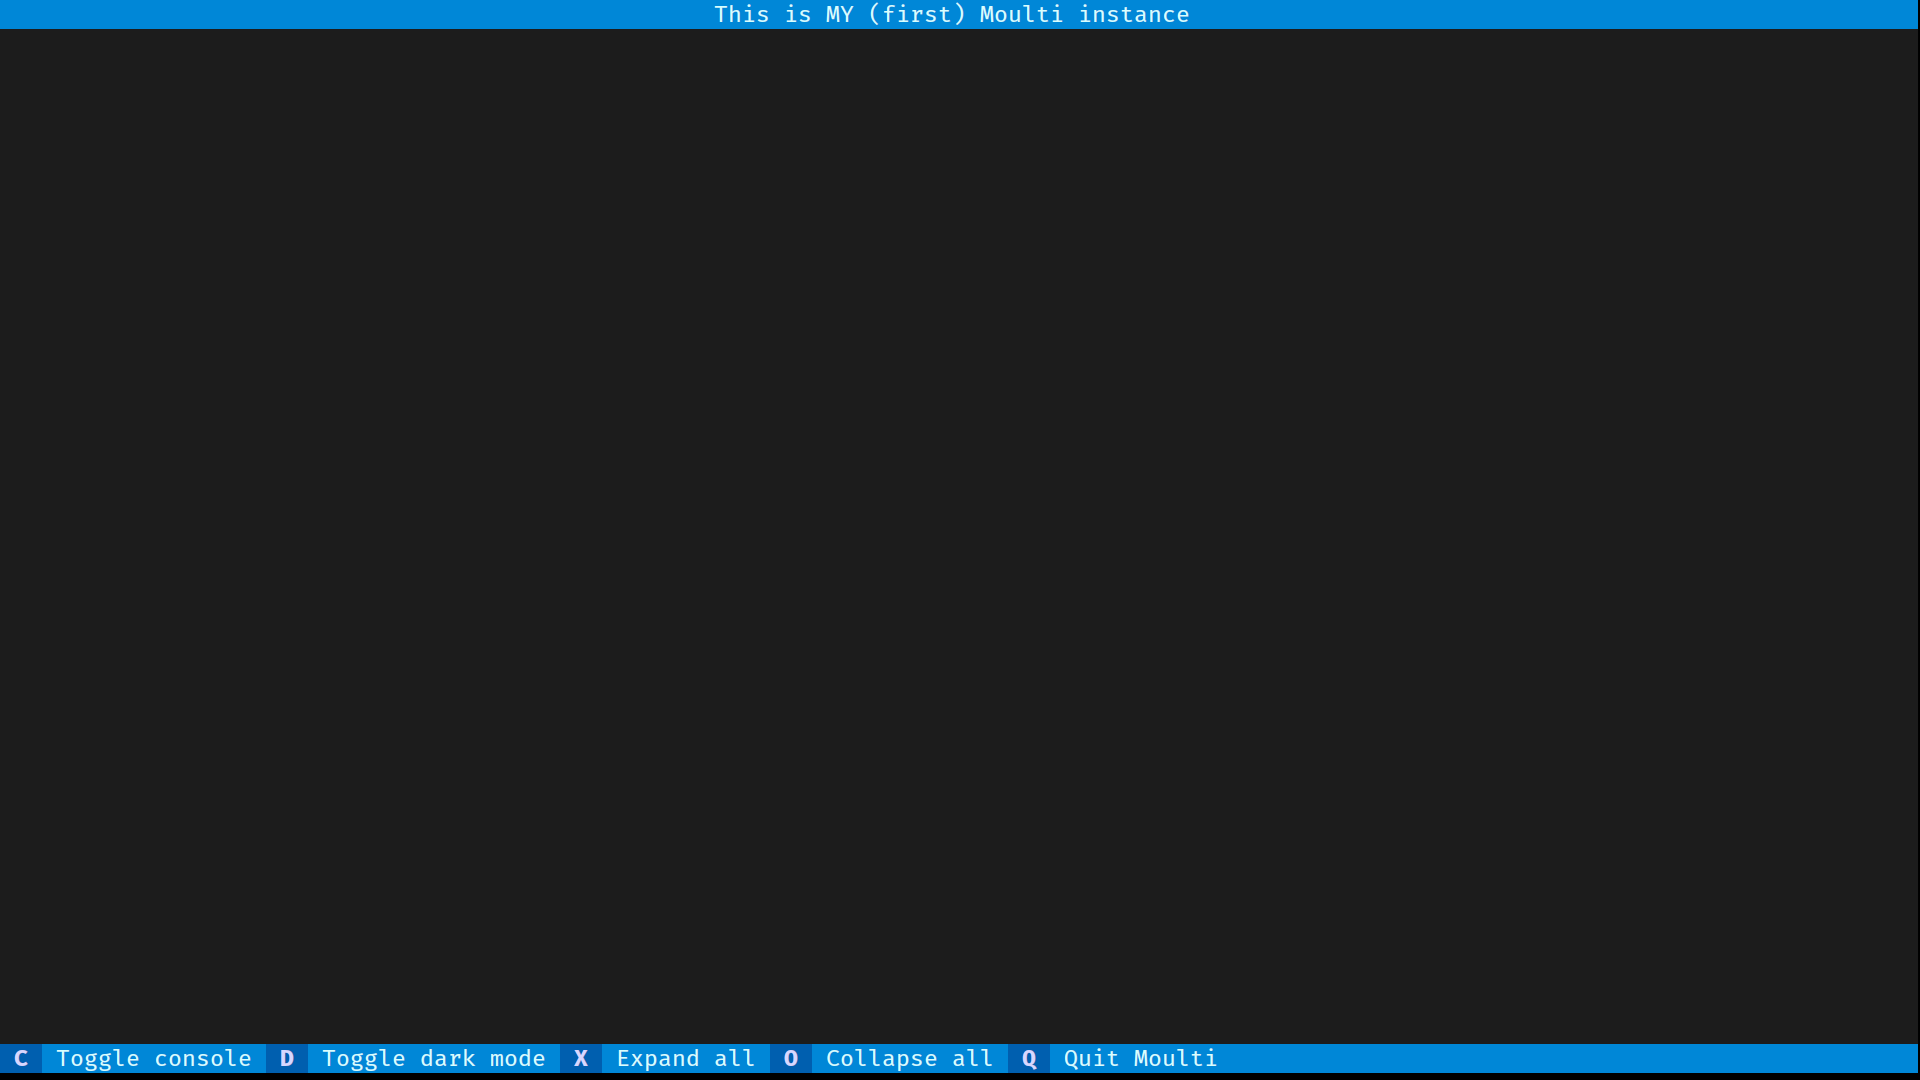
From now on, we will use the second terminal to issue commands to the Moulti instance through the Command-Line Interface (CLI) client. First, make yourself at home by setting its title:
moulti set --title='This is MY (first) Moulti instance'
-
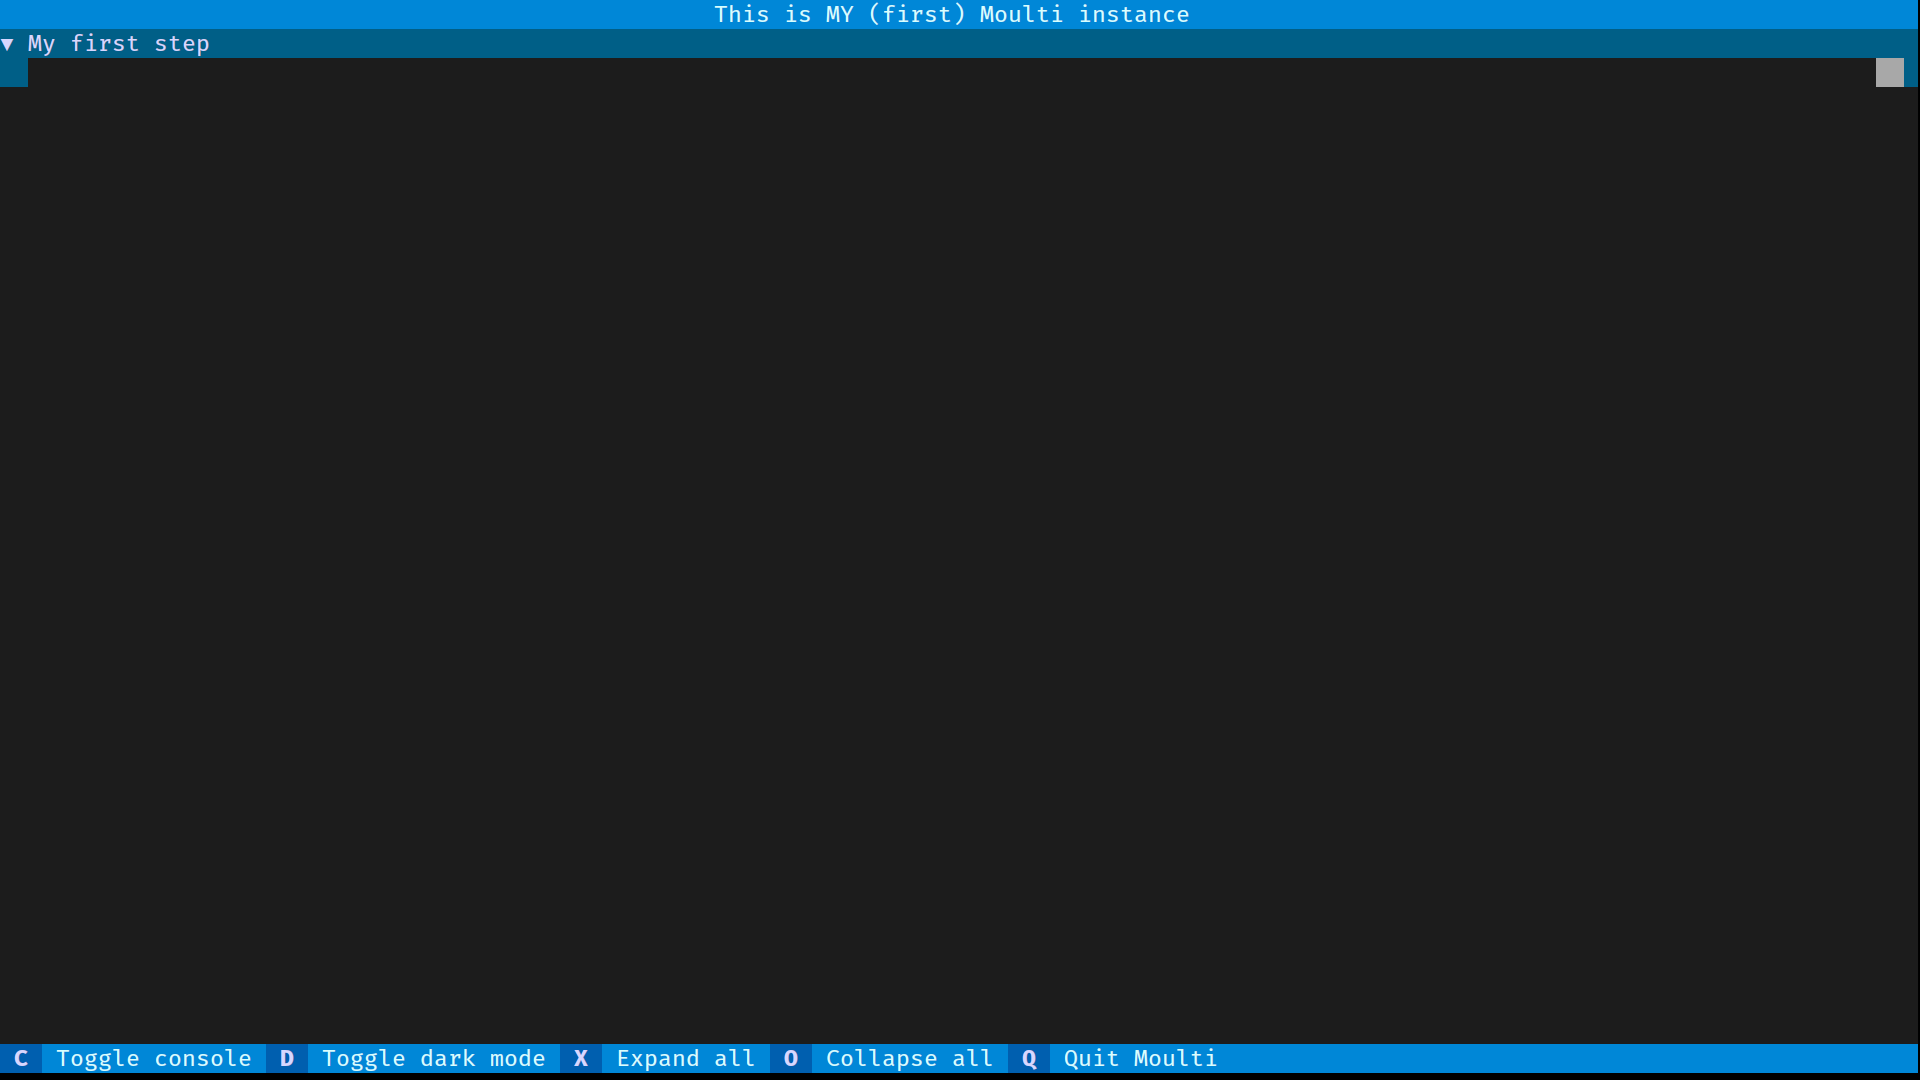
Create your first Moulti step with step id "my_step":
moulti step add my_step --title='My first step' -
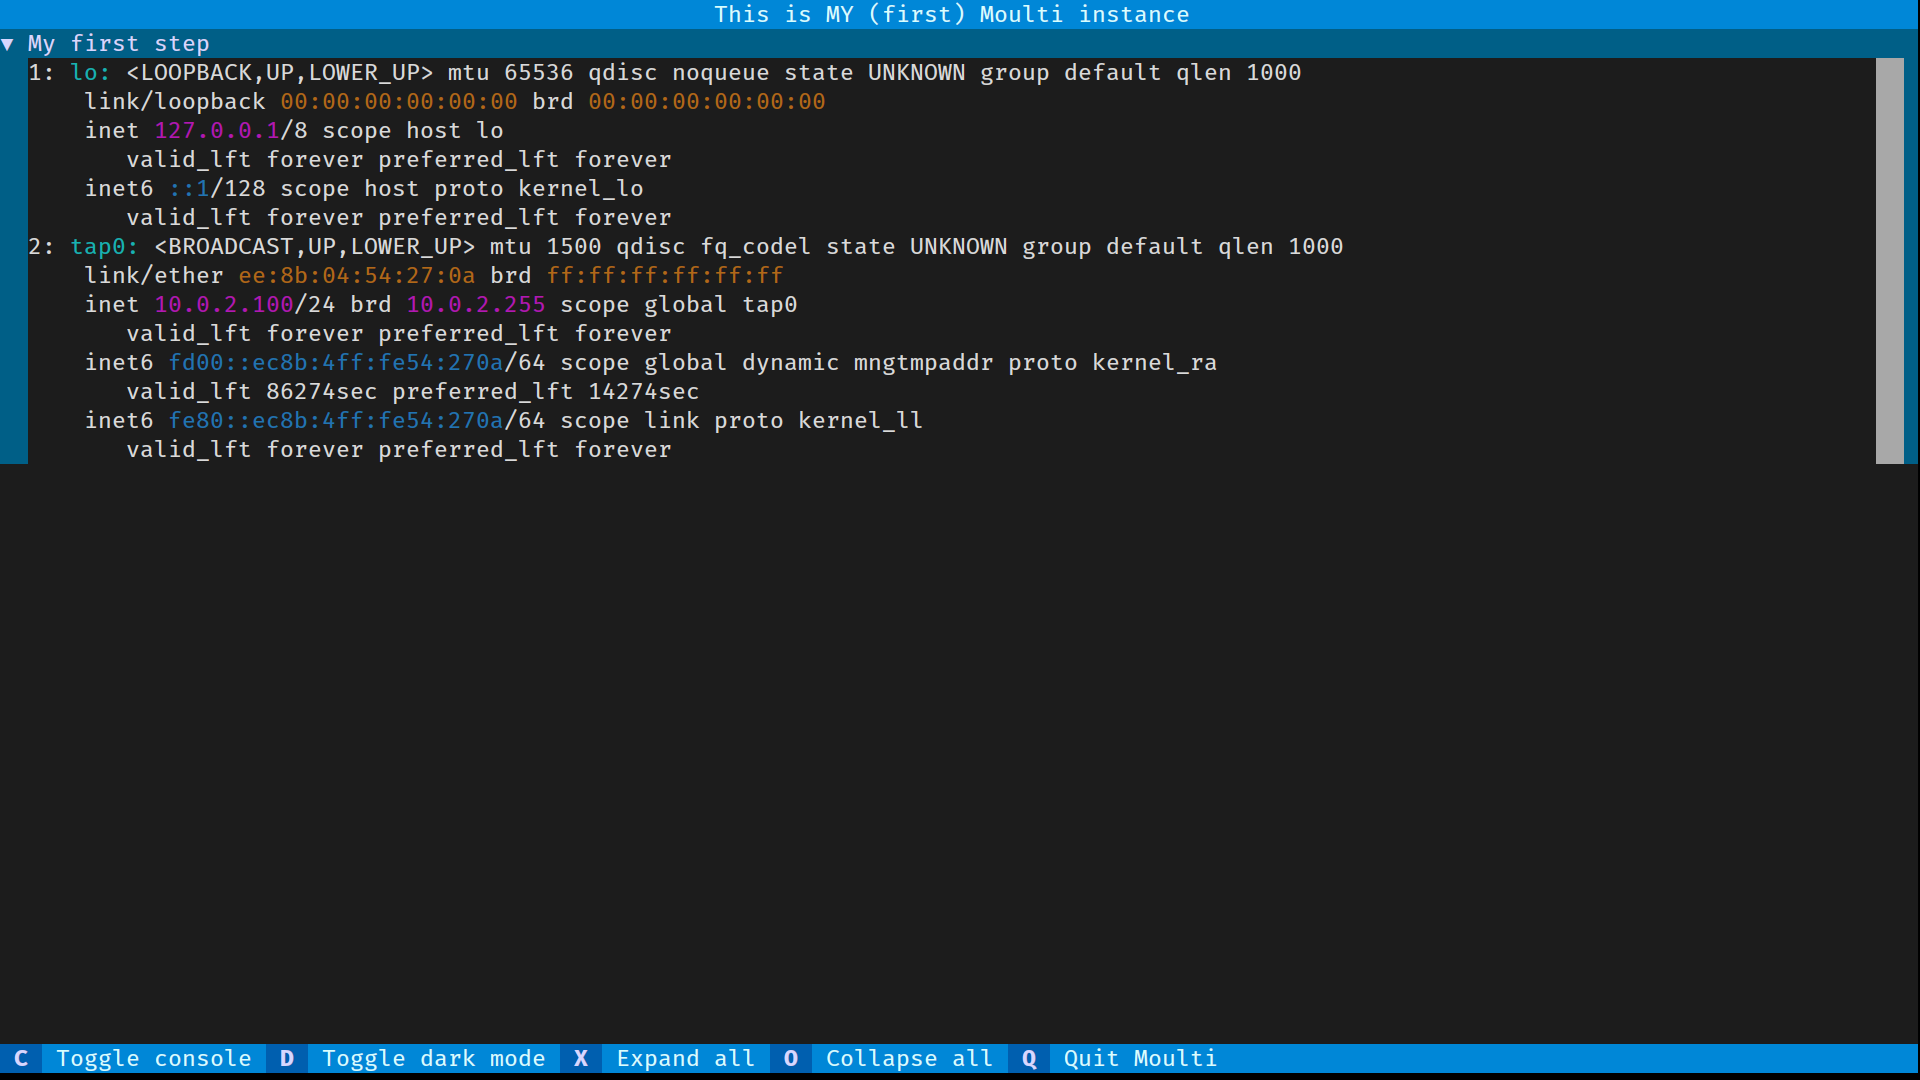
Now, fill the "log" part of your step with some content:
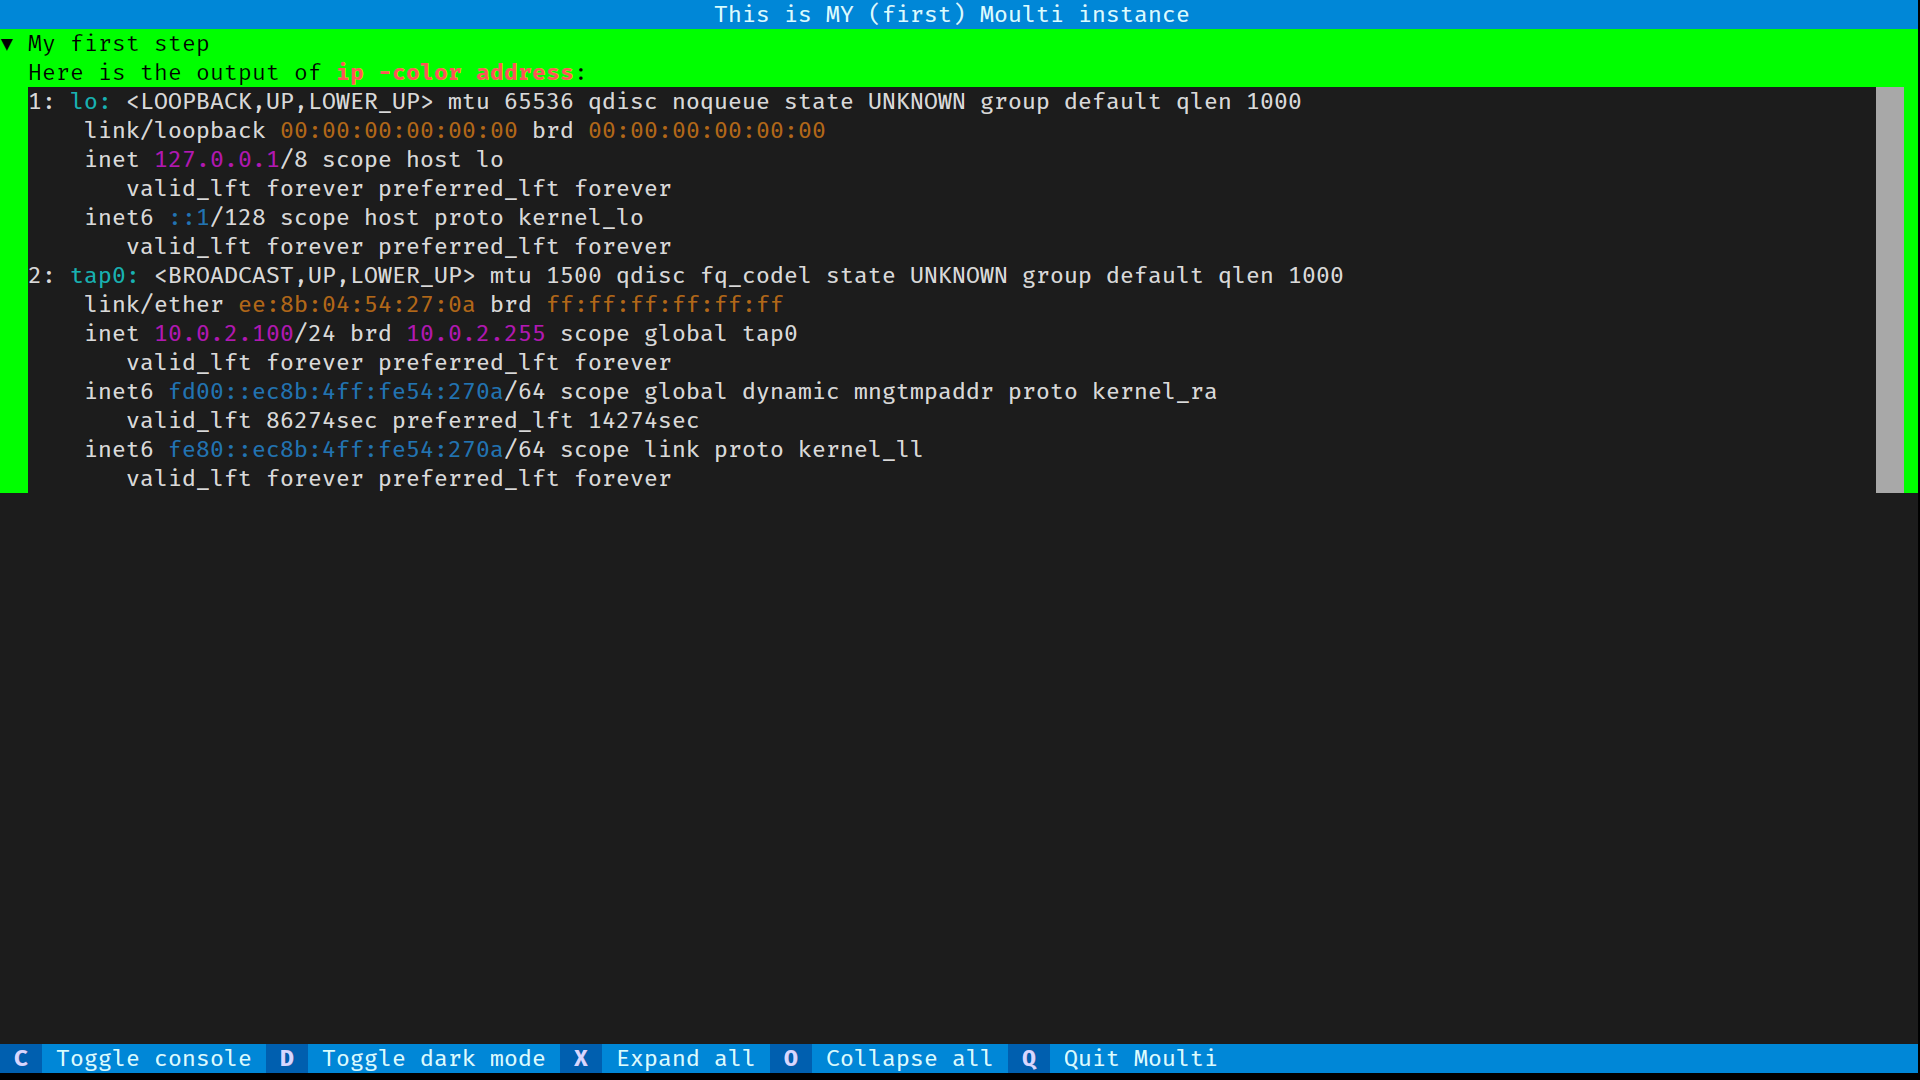
ip -c a | moulti pass my_stepAgain, the effect should be immediate in the first terminal:
-
Back to the second terminal, adjust your step:
moulti step update my_step --classes='success'
moulti step update my_step --top-text='Here is the output of [red bold]ip -color address[/]:'
-
That syntax we used to turn the command red is called "Rich markup"; its BBcode-like syntax is described here, the list of available colors is there and styles that typically work fine in a modern terminal emulator are:
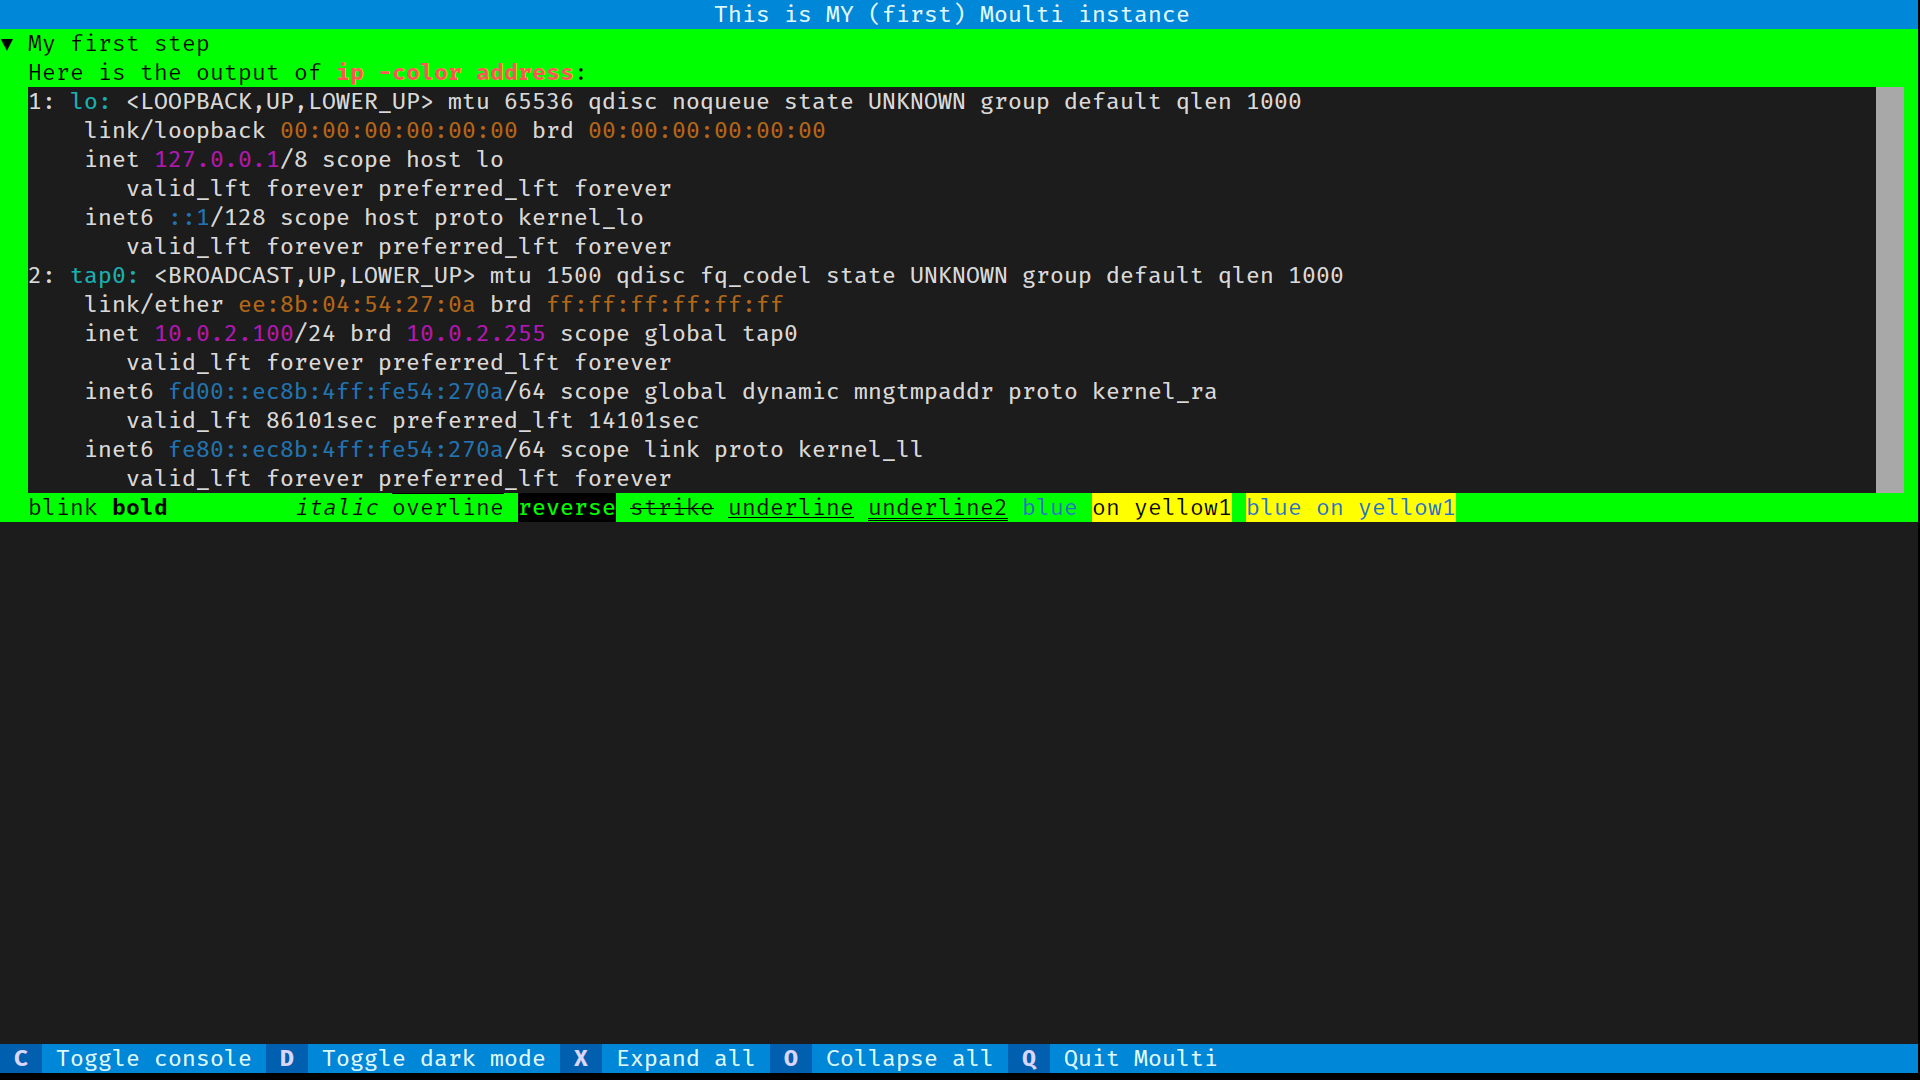
blinkboldconcealitalicoverlinereversestrikeunderlineunderline2. Try them all at once:moulti step update my_step --bottom-text='[blink]blink[/] [bold]bold[/] [conceal]conceal[/] [italic]italic[/] [overline]overline[/] [reverse]reverse[/] [strike]strike[/] [underline]underline[/] [underline2]underline2[/] [blue]blue[/] [on yellow1]on yellow1[/] [blue on yellow1]blue on yellow1[/]'Refer to the output of
moulti step add --helpfor more options.Important: Rich markup cannot be used in the log part of a step.
-
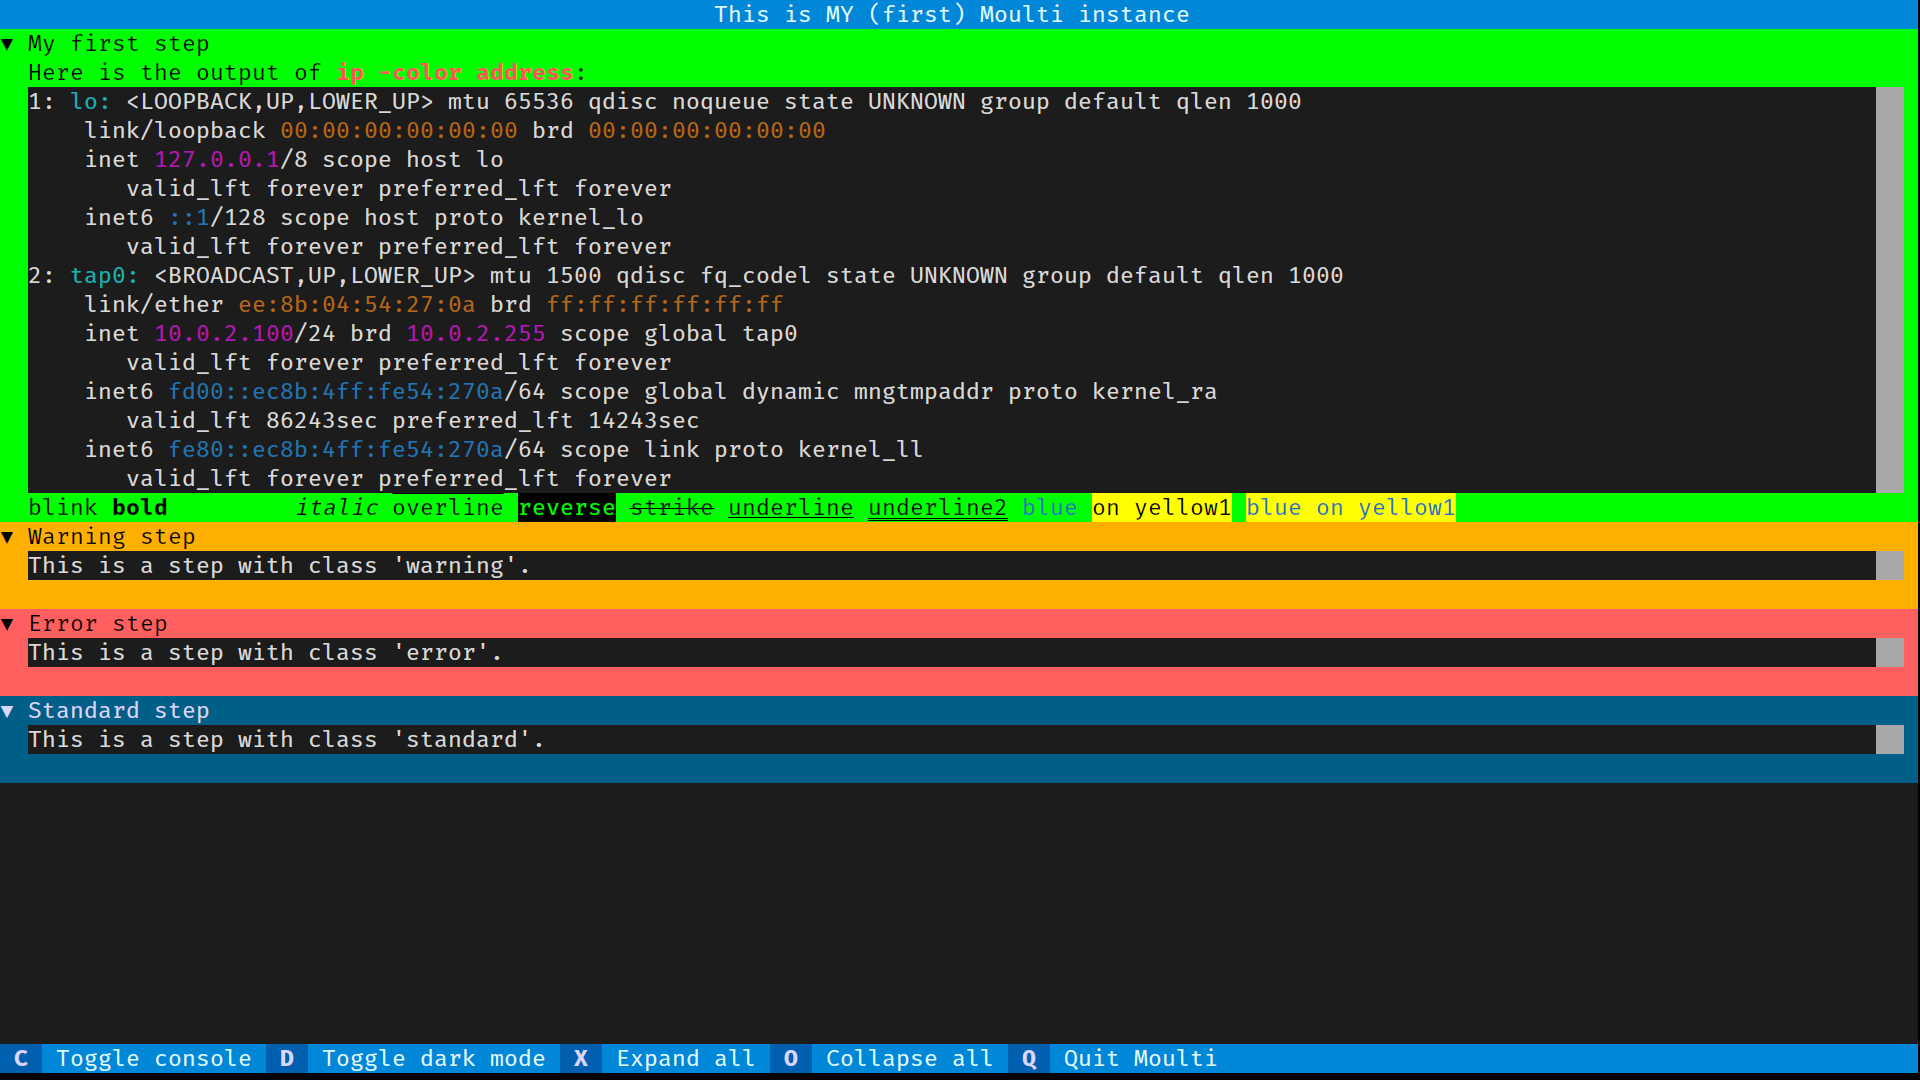
And of course, you can add multiple such steps:
for class in warning error inactive standard; do
    moulti step add "${class}_example" \
        --classes="${class}" \
        --title="${class^} step" \
        --text="This is a step with class '${class}'." \
        --bottom-text=' '
done
Just keep this constraint in mind: step ids (e.g. "my_step") must remain unique in a Moulti instance.
-
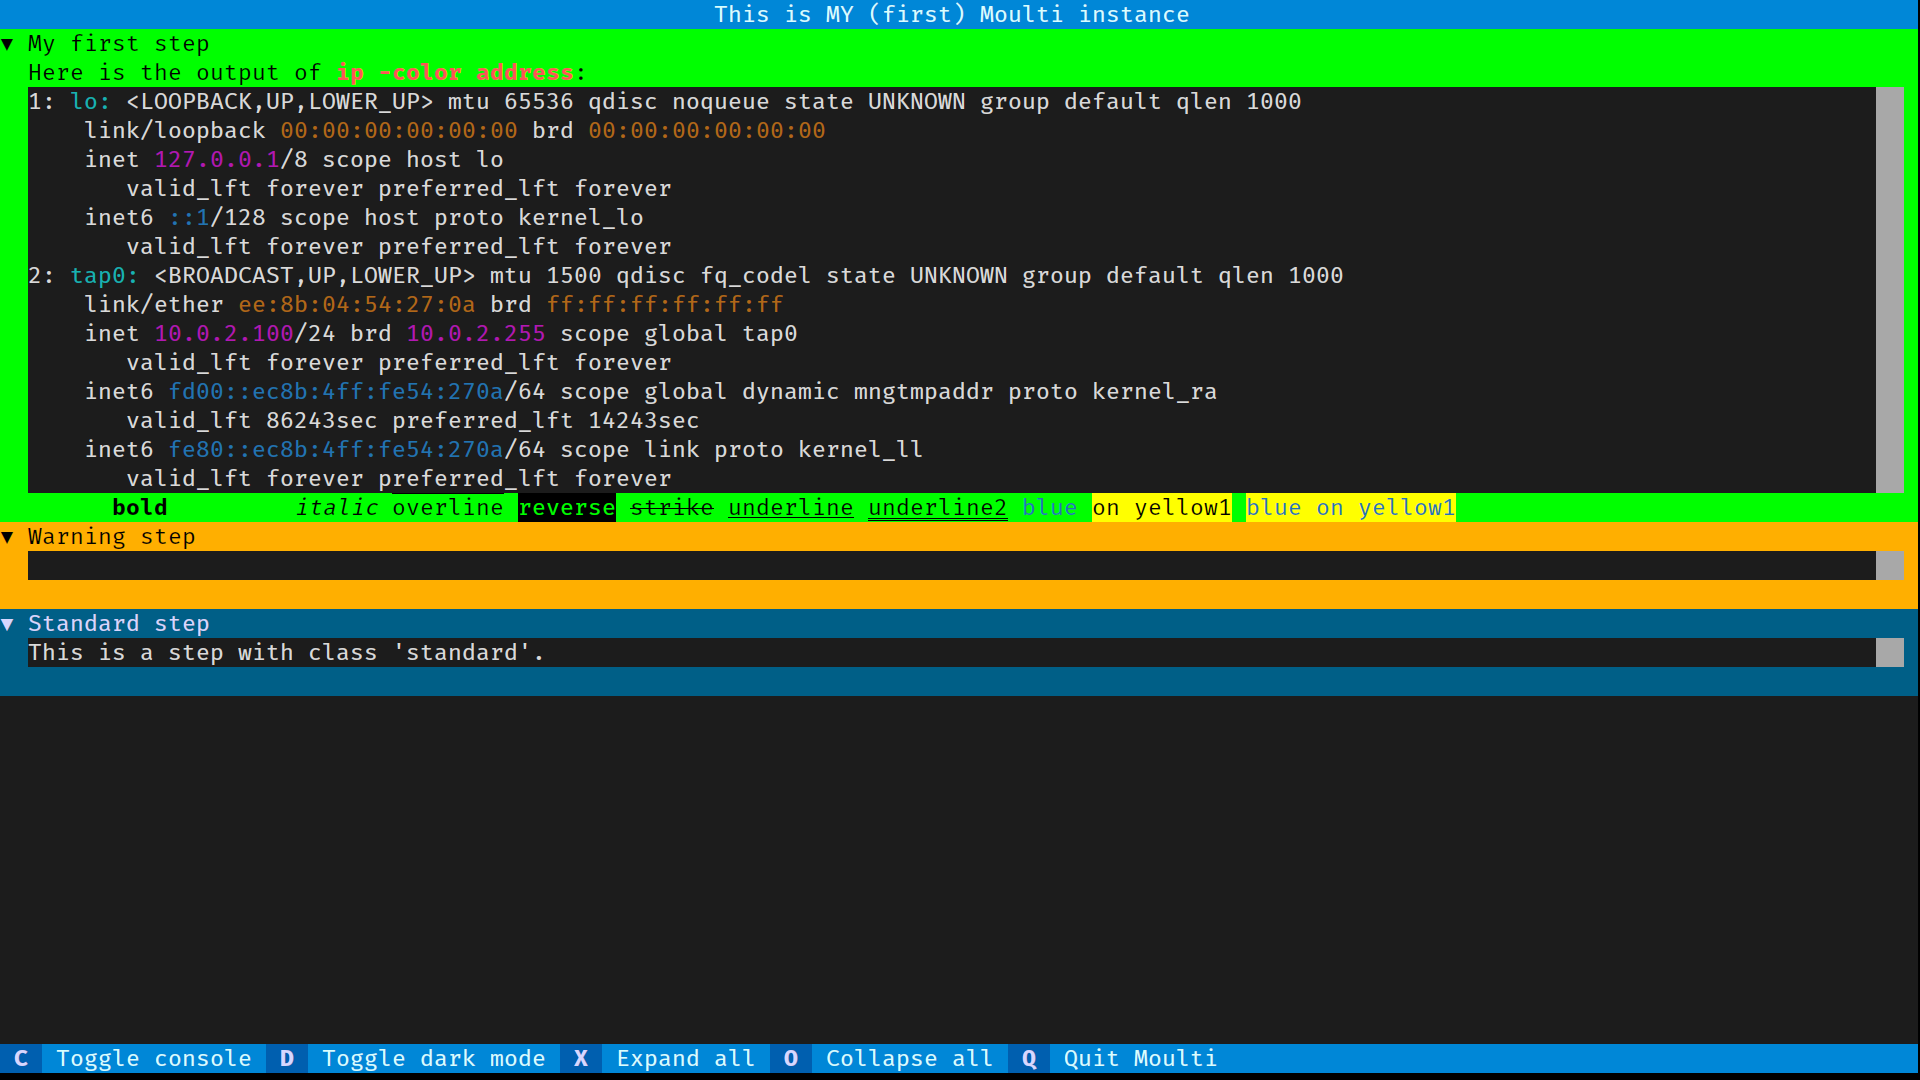
If necessary, you can also clear (i.e. empty) a step:
moulti step clear warning_example
or simply delete it:
moulti step delete error_example
The key takeaway from the previous section is that Moulti starts as an empty shell that is meant to be controlled and filled through the moulti CLI tool.
A simple Moulti-based bash script makes use of two new commands:
moulti run: same asmoulti initbut runs a command right after the startup phasemoulti wait: tries connecting to the Moulti instance; think "ping for moulti"
... and looks like this:
#!/usr/bin/env bash

# Name the Moulti instance to prevent conflicts:
export MOULTI_INSTANCE='my-first-script-with-moulti'
# If not done already, start a Moulti instance and have it re-execute this script:
[ "${MOULTI_RUN}" ] || exec moulti run -- "$0" "$@"
# Ensure the Moulti instance is reachable:
moulti wait
moulti step add step_1 --title='First step'
{
   echo "$(date --iso-8601=ns) Starting combobulating things and stuff..."
   # your stuff here
} 2>&1 | moulti pass step_1
moulti step add step_2 --title='Second step'
{
   echo "$(date --iso-8601=ns) Ensure things and stuff were properly combobulated..."
   # more stuff there
} 2>&1 | moulti pass step_2
In practice, it makes sense to heavily leverage shell functions, such as those available in moulti-functions.bash.
The previous section explained how to write new scripts that spawn and drive a Moulti instance. But what about pre-existing scripts? Theoretically, it is always possible to rewrite an existing script so it leverages Moulti. But in practice, rewriting can be time-consuming, error-prone and, overall, expensive. In that case, another approach is to write a wrapper that runs the existing script, creates Moulti steps on the fly and dispatches its output.
To this end, moulti-functions.bash provides a bash function named moulti_process_lines that:
- reads lines from the standard input
- matches these lines against the pattern found in variable
$MOULTI_NEW_STEP_PATTERN - creates a new Moulti step by calling
moulti_make_step()each time it stumbles upon this pattern - sends all lines to the latest created step by calling
moulti_inspect_line().
Example: first-lines is an existing tool that no one wants to modify.
Its output is:
$ first-lines dickens --limit=3
==== A Christmas Carol ====

Marley was dead: to begin with. There is no doubt whatever about that. The
register of his burial was signed by the clergyman, the clerk, the undertaker,
and the chief mourner. Scrooge signed it: and Scrooge's name was good upon
'Change, for anything he chose to put his hand to. Old Marley was as dead as a
door-nail.

==== A Tale of Two Cities ====

It was the best of times, it was the worst of times, it was the age of wisdom,
it was the age of foolishness, it was the epoch of belief, it was the epoch of
incredulity, it was the season of Light, it was the season of Darkness, it was
the spring of hope, it was the winter of despair, we had everything before us,
we had nothing before us, we were all going direct to Heaven, we were all
going direct the other way—in short, the period was so far like the present
period, that some of its noisiest authorities insisted on its being received,
for good or for evil, in the superlative degree of comparison only.

==== David Copperfield ====

Whether I shall turn out to be the hero of my own life, or whether that station
will be held by anybody else, these pages must show. To begin my life with the
beginning of my life, I record that I was born (as I have been informed and
believe) on a Friday, at twelve o’clock at night. It was remarked that the
clock began to strike, and I began to cry, simultaneously.
To interface first-lines with Moulti, one can write moulti-first-lines:
#!/usr/bin/env bash

# Optional precaution: instruct the Moulti instance to harvest any output not
# explicitly assigned to a step:
export MOULTI_RUN_OUTPUT=harvest

# If not done already, start a Moulti instance and have it re-execute this script:
export MOULTI_INSTANCE="moulti-first-lines"
[ "${MOULTI_RUN}" ] || exec moulti run -- "$0" "$@"

source /path/to/moulti-functions.bash
# custom parsing goes here

# Instance title:
moulti set --title="First lines: $*"

# Run "first-lines" and pipe its output to moulti_process_lines():
first-lines "$@" 2>&1 | moulti_process_lines
Running ./moulti-first-lines dickens --limit=3 yields this:
This is a pretty good start, thanks to the default value of $MOULTI_NEW_STEP_PATTERN matching ==== title ====.
Although it is not strictly necessary here, it is possible to override this variable to match only that kind of titles:
MOULTI_NEW_STEP_PATTERN='^==== (.+) ====$'Important: this is a bash regex, i.e. a POSIX extended regex.
The situation can be improved by getting rid of those = signs in step titles. That can be achieved by overriding moulti_make_step():
function moulti_make_step {
	# $2 is a suggested id for the new step.
	# $5 is the first group captured by MOULTI_NEW_STEP_PATTERN: use it as title:
	moulti step add "$2" --title="$5" --bottom-text=' ' && echo "$2"
}
Note that moulti_make_step is expected to output the id of the step it created, hence && echo "$2".
Refer to the original moulti_make_step function in moulti-functions.bash for a complete list of arguments passed to moulti_make_step()
Another issue is that title lines end up duplicated inside steps. Additionally, there are empty lines between them and actual contents.
To fix these issues, one can override moulti_inspect_line().
moulti_inspect_line() receives a single line as first argument. It is expected to inspect it, optionally alter it and output it.
function moulti_inspect_line {
	# $1 is the line about to be passed to the current step.
	[ "${1}" ] || return # Skip empty lines
	[[ "${1}" =~ $MOULTI_NEW_STEP_PATTERN ]] && return # Do not pass title lines
	printf '%s\n' "${1}" # Pass all other lines
}
After these changes, we get a perfect result:
Of course, not every output can be interfaced with Moulti by merely defining a regex and two bash functions.
But hopefully, moulti_process_lines() should help with most use cases.
By default, scripts launched through "moulti run":
- have their standard input (stdin, file descriptor #0) redirected to
/dev/null; - inherit the standard and error outputs (stdout and stderr, file descriptors #1 and #2) from Moulti (e.g.
/dev/pts/42); - should not try to
readfrom stdin; - should either refrain from writing to stdout/stderr or...
- should redirect stdout/stderr to a suitable destination.
Possible approaches in bash:
# Discard stdout and stderr entirely:
exec > /dev/null 2>&1

# Log stdout and stderr to a custom log file:
exec > custom.log 2>&1

# Pass stdout and stderr to a dedicated Moulti step:
moulti step add main_script_output
exec > >(moulti pass main_script_output) 2>&1

# Pass stdout and stderr to a dedicated Moulti step but keep a copy in a custom log file:
moulti step add main_script_output
exec > >(tee --append custom.log | moulti pass main_script_output) 2>&1
If, for some reason, the recommendations above cannot be applied, the environment variable MOULTI_RUN_OUTPUT should help:
MOULTI_RUN_OUTPUT=discardredirects stdout and stderr to /dev/null, thus discarding any unexpected output;MOULTI_RUN_OUTPUT=harvestharvests stdout and stderr lines and passes them to themoulti_run_outputstep;- any other value leads to the default behaviour: stdout and stderr are left untouched and their output is liable to degrade Moulti's visual display.
The moulti_run_output step is special in that it is created upon reception of the first byte of output if it does not exist already.
It can be created beforehand, can be updated or cleared at any time and cannot be deleted while the script is running.
SSH clients and SSH-based tools (e.g. Ansible) sometimes need user input, e.g. to accept a new host key or enter a passphrase/password. By default, these interactions happen not over stdin but rather over the current TTY... resulting in a messy conflict with Moulti.
This issue is usually addressed by configuring SSH clients so they use a separate "askpass" program for user interactions.
Moulti provides such a program: moulti-askpass.
Try out moulti-askpass on its own:
# First terminal:
MOULTI_INSTANCE=trying-moulti-askpass moulti init

# Second terminal:
export MOULTI_INSTANCE=trying-moulti-askpass
moulti-askpass 'Tell me a secret:'
MOULTI_ASKPASS_DEFAULT_PROMPT='Tell me another secret' moulti-askpass
SSH_ASKPASS_PROMPT=confirm moulti-askpass 'If you can read this, then moulti-askpass works fine'
SSH_ASKPASS_PROMPT=none moulti-askpass 'If you can read this, then moulti-askpass works fine'
The OpenSSH client can be configured to use moulti-askpass by setting two environment variables:
export SSH_ASKPASS=moulti-askpass
export SSH_ASKPASS_REQUIRE=force
moulti run automatically sets these variables IF SSH_ASKPASS is not set already.
Consequently, SSH clients and SSH-based tools should work out of the box with moulti run.
Like SSH, Git may require user input.
Fortunately, it uses SSH_ASKPASS to do so.
Consequently, Git should work out of the box with moulti run.
If necessary, explicitly set GIT_ASKPASS in your scripts to bypass the core.askPass configuration variable:
export GIT_ASKPASS="${SSH_ASKPASS}"Like SSH, sudo may require user input. Like SSH, sudo supports askpass programs: it requires:
- running
sudo -Aorsudo --askpassinstead ofsudo - setting a single environment variable:
export SUDO_ASKPASS=$(which moulti-askpass)
Note that sudo does not perform $PATH lookup, so SUDO_ASKPASS must be a path (either absolute or relative).
moulti run automatically sets SUDO_ASKPASS IF it is not set already AND moulti-askpass exists in $PATH.
Consequently, sudo should work out of the box with moulti run.
According to their homepage, Ansible is "an IT automation engine that automates provisioning, configuration management, application deployment, orchestration, and many other IT processes".
In practice, Ansible users run ansible-playbook commands that output a succession of results grouped by task.
Ansible uses a plugin architecture to enable a rich, flexible and expandable feature set so Moulti provides an stdout callback plugin.
When loaded and executed by ansible-playbook, this plugin runs moulti commands that display the results of each Ansible task in a separate Moulti step.
This plugin is known to work with ansible-core 2.16 and 2.17.
In practice, combining Ansible with Moulti is as simple as:
moulti run -- ansible-playbook your-playbook.yamlUnder the hood, moulti run performs some magic. It sets three environment variables:
ANSIBLE_STDOUT_CALLBACK: id of the stdout callback plugin to use:moultiANSIBLE_CALLBACK_PLUGINS: colon-separated list of paths that Ansible searches for callback plugins. If this environment variable is set already, moulti simply appends its own plugin path to it.ANSIBLE_FORCE_COLOR=yes: generate colors in "PLAY RECAP" and diff (-Dcommand-line option)
However, unlike SSH and sudo, this integration is not always desirable so moulti run relies on the following heuristics:
- If the environment variable
MOULTI_ANSIBLEis set toforce, it systematically sets both environment variables. - If the environment variable
MOULTI_ANSIBLEis set tono, it sets neither. - Otherwise, it sets both environment variables if the name of the executed program contains
ansibleANDANSIBLE_STDOUT_CALLBACKis not set already.
If you feel confused, experiment with moulti run --print-env:
- Forbid Ansible-Moulti integration:
$ MOULTI_ANSIBLE=no moulti run --print-env -- ansible-playbook your-playbook.yaml | grep ^ANSIBLE
$- Enforce Ansible-Moulti integration:
$ MOULTI_ANSIBLE=force moulti run --print-env -- your-script.sh | grep ^ANSIBLE
ANSIBLE_CALLBACK_PLUGINS=/path/to/python/package/moulti/ansible
ANSIBLE_STDOUT_CALLBACK=moulti
ANSIBLE_FORCE_COLOR=yes
$- Leverage the heuristics:
$ moulti run --print-env -- ansible-playbook your-playbook.yaml | grep ^ANSIBLE
ANSIBLE_CALLBACK_PLUGINS=/path/to/python/package/moulti/ansible
ANSIBLE_STDOUT_CALLBACK=moulti
ANSIBLE_FORCE_COLOR=yes
$ moulti run --print-env -- your-ansible-wrapper.sh | grep ^ANSIBLE
ANSIBLE_CALLBACK_PLUGINS=/path/to/python/package/moulti/ansible
ANSIBLE_STDOUT_CALLBACK=moulti
ANSIBLE_FORCE_COLOR=yes
$ moulti run --print-env -- your-script.sh | grep ^ANSIBLE
$
Tips:
- Depending on its verbosity level (from
-vto-vvvvv), Ansible is liable to output lines before Moulti's stdout callback plugin is invoked. Therefore, it is recommended to setMOULTI_RUN_OUTPUT=harvest. - By default, the callback plugin changes the title of the Moulti instance; set the environment variable
MOULTI_ANSIBLE_NO_TITLEto any value to prevent that. - By default, all widgets appear expanded; set the environment variable
MOULTI_ANSIBLE_COLLAPSE=taskto collapse tasks from the start.
Python scripting may be achieved by importing the moulti.protocol module and getting some inspiration from the moulti.cli module.
Example 1: create and fill a new step from a string through two separate connections:
from moulti.protocol import send_to_moulti
add_step_msg = {'command': 'step', 'action': 'add', 'id': 'python', 'title': 'Step created from Python', 'collapsed': False}
send_to_moulti(add_step_msg)
generated_text = '\n'.join(['Python made this: ' + chr(i)*62 for i in range(33, 127)])
set_text_msg = {'command': 'step', 'action': 'update', 'id': 'python', 'text': generated_text}
send_to_moulti(set_text_msg)
Example 2: create and fill a new step through a single connection:
from moulti.protocol import moulti_connect, send_json_message, recv_json_message
filepath = '/etc/passwd'
with moulti_connect() as moulti_socket:
    add_step_msg = {'command': 'step', 'action': 'add', 'id': 'python', 'title': f'{filepath}:', 'collapsed': False}
    send_json_message(moulti_socket, add_step_msg)
    recv_json_message(moulti_socket)
    with open(filepath) as filedesc:
        pass_fd_msg = {'command': 'pass', 'id': 'python'}
        send_json_message(moulti_socket, pass_fd_msg, [filedesc.fileno()])
        recv_json_message(moulti_socket)
Warning: Moulti is a young project and currently offers no guarantee whatsoever regarding the stability and availability of Python modules and functions.
As you probably noticed already, there are multiple ways to fill a Moulti step:
moulti pass my_stepis the recommended way as, unlike other methods, it is not limited by the maximum amount of text you can pass through command-line argumentsmoulti step add my_step --text=$'line1\nline2\nline3'is suitable to fill steps as soon as they appear in Moultimoulti step update my_step --text=$'line1\nline2\nline3'is the same but applies to existing stepsmoulti step append my_step 'line1' 'line2' 'line3'complementsadd --textandupdate --text, which both imply to provide the output as a single argument; note: it may be necessary tostep clearbeforehand.
All methods above share one common limitation: it is not possible to append partial lines to Moulti steps.
Conversely, lines will not show up in Moulti until they are terminated with a line feed (LF / \n) character.
By default, Moulti displays steps at the top of the screen and adds new steps below existing steps.
This behavior can be changed through moulti set:
moulti set --step-position=bottomdisplays steps at the bottom of the screenmoulti set --step-position=topdisplays steps at the top of the screenmoulti set --step-direction=updisplays steps from last to first (new steps are added above existing steps)moulti set --step-direction=downdisplays steps from first to last (new steps are added below existing steps)
Sometimes, it is necessary to prompt the user for a confirmation, a value or an option. Since Moulti occupies the entirety of the terminal and its standard input, it is no longer possible to use shell features such as read.
This is why Moulti provides questions. Questions are special steps the sole purpose of which is to display interactive components such as buttons or input fields.
Here is how to use them:
-
Creating a question is not very different from creating a regular step:
moulti inputquestion add my_first_question \ --title='My first question with Moulti' \ --text='What is your name?' \ --bottom-text='We want information... information... information!' \ --placeholder='Please enter your name in this input field' -
Getting the answer is straightforward:
$ moulti inputquestion get-answer my_first_question --wait
Alice
$
Notes:
- Once the answer is submitted, the question's interactive components are disabled. This prevents users from submitting multiple answers for a single question.
- Feel free to read
moulti inputquestion add --helpto get more control on what users can type in the input field.
-
Moulti also supports buttons through
buttonquestionsteps.moulti buttonquestion add my_second_question \ --title='My second question with Moulti' \ --text='What is your name?' \ --bottom-text='What a mess: https://en.wikipedia.org/wiki/Alice_and_Bob' \ --button alice success Alice \ --button bob primary Bob \ --button craig default Craig \ --button mallory error Mallory \ --button oscar warning OscarEach button is defined by exactly three items:
- value: the value returned by
get-answer - style: default, primary, error, warning, or success
- label: what the button should display
Known limitations:
- Buttons cannot be changed through
moulti buttonquestion update.
- value: the value returned by
-
Again, getting the answer is straightforward:
$ moulti buttonquestion get-answer my_second_question --wait
craig
$
-
questioncombines the abilities ofbuttonquestionandinputquestion:moulti question add my_third_question \ --title='My third question with Moulti' \ --text='What is your name?' \ --bottom-text='I live on the second floor' \ --placeholder='Enter your name in this input field, or click a button' \ --button 'My name is Alice' default Alice \ --button 'My name is Bob' default Bob \ --button 'My name is {input}' success 'Neither, use input'{input}is an optional placeholder that gets replaced with the input field value. -
That makes it possible to return a value that reflects both the input field value and the button that was clicked:
$ moulti question get-answer my_third_question --wait
My name is Luka
$
The table below offers a summary of "question" widgets and their features:
| widget \ feature | input field | buttons |
|---|---|---|
| inputquestion | yes | no |
| buttonquestion | no | at least 1 |
| question | Yes | at least 1 |
Dividers are simplistic steps that exist solely for cosmetic purposes, like displaying static text or acting as visual separator between two groups of steps (hence the name). Unlike other steps, they are not collapsible.
moulti divider add my_first_divider --title=$'This text is simply displayed.\nMulti-line is possible. So is [i]rich formatting[/]'
moulti divider update my_first_divider --classes=warning
moulti divider delete my_first_dividerMoulti offers an optional progress bar, which appears at the bottom of the screen, just above the footer (and above the console if it is visible). Like everything else in Moulti, the progress bar is strictly CLI-driven, which means Moulti will never set, move, update, or configure the progress bar by itself.
Moulti's progress bar being entirely optional, it is hidden by default:
# Show the progress bar:
moulti set --progress-bar
# Hide the progress bar:
moulti set --no-progress-bar
The progress bar displays a percentage on its right side. That percentage is computed based on progress and progress-target values. For instance, this command results in a "20%" progress bar:
moulti set --progress=1138 --progress-target=5555However, by default, none of these values are set and Moulti shows an "indeterminate" progress bar until progress-target is set. It is possible to force the display of such a progress bar by setting a negative or zero progress-target:
moulti set --progress-target=0
moulti set --progress-target=-1
moulti set --progress-target=-2.718281828459045
When updating the progress bar, it is possible to use either absolute or relative values:
moulti set --progress 80
moulti set --progress +1
moulti set --progress +20
# Going backward is allowed:
moulti set --progress -5
Refer to moulti-progressbar.bash for a demonstration of the typical use case.
Click Save or hit s in Moulti to export (almost) all shown contents to text files.
Specifically, Moulti creates a new directory named after the instance (MOULTI_INSTANCE environment variable) and the current date and time.
This export directory is created in the directory specified by the MOULTI_SAVE_PATH environment variable or, alternatively, in Moulti's current working directory.
The format is straightforward:
- each step is exported as a JSON file reflecting its properties and a log file reflecting its contents;
- an extra JSON file stores instance properties.
$ ls -al social-preview-2024-02-23T18-52-10.883600/
-rw-r--r-- 1 user group   61 2024-02-23 18:52:10 0-instance.properties.json
-rw-r--r-- 1 user group 1.8K 2024-02-23 18:52:10 1-title.contents.log
-rw-r--r-- 1 user group  394 2024-02-23 18:52:10 1-title.properties.json
-rw-r--r-- 1 user group  554 2024-02-23 18:52:10 2-step_ping.contents.log
-rw-r--r-- 1 user group  376 2024-02-23 18:52:10 2-step_ping.properties.json
-rw-r--r-- 1 user group   34 2024-02-23 18:52:10 3-collapsed.contents.log
-rw-r--r-- 1 user group  310 2024-02-23 18:52:10 3-collapsed.properties.json
-rw-r--r-- 1 user group 9.3K 2024-02-23 18:52:10 4-script.contents.log
-rw-r--r-- 1 user group  273 2024-02-23 18:52:10 4-script.properties.json
-rw-r--r-- 1 user group  567 2024-02-23 18:52:10 5-poll.properties.json
Limitations:
- if an
inputquestionwas configured with--password, then its export will contain a series of*characters instead of its actual value. - Moulti does not tinker with file permissions; therefore, the resulting files have default ownership and permissions; if necessary, use e.g.
umaskornewgrpto alter its behavior.
Hit c to copy the contents of the currently focused step to the clipboard. Hit w to do the same while preserving styles and colors (as ANSI escape codes).
Moulti emits a notification reflecting whether the copy operation succeeded.
Copy operations typically fail due to environment-related causes. The pyperclip documentation states most of the technical requirements:
- https://pyperclip.readthedocs.io/en/latest/#not-implemented-error
- https://pypi.org/project/pyperclip/
If pyperclip fails, Moulti tries again using OSC 52, a special escape sequence terminals understand as "please push these data into the local clipboard". This has the side-effect of making copy work over SSH but your terminal may or may not support OSC 52.
This behavior can be controlled through environment variable MOULTI_CLIPBOARD_COPY:
MOULTI_CLIPBOARD_COPY=pyperclip: Moulti shall use only pyperclip;MOULTI_CLIPBOARD_COPY=terminal-osc-52: Moulti shall use only OSC 52;- any other value: Moulti first tries pyperclip; if it fails, it tries OSC 52.
Here is the typical way to restore a Moulti instance:
MOULTI_INSTANCE=social-preview-restored moulti run moulti load social-preview-2024-02-23T18-52-10.883600/Explanations: moulti run moulti load is NOT a typo. The command above:
- starts a new Moulti instance named "social-preview-restored" -- the naming is optional but prevents clashes with any other instance;
runasks the instance to run a command; here, this command is not a script but...moulti load path/to/saved/directory, i.e. a Moulti CLI command that reads the contents of the given directory and loads it into the Moulti instance.
moulti diff is a variant of moulti load specialized in loading diff files into Moulti.
Important: moulti diff only supports the unified diff format.
Here is how to use it:
# Terminal #1: launch a Moulti instance
moulti init

# Terminal #2:
#  Example 1: load a diff file:
moulti diff parse /path/to/example.diff

# Example #2: get diff data from an external command through a pipe:
diff -u /etc/passwd /etc/passwd- | moulti diff parse /dev/stdin

#  Example #3: the same without a pipe:
moulti diff run -- diff -u /etc/passwd /etc/passwd-
Like moulti load, moulti diff can be combined with moulti run:
# Load a diff file:
moulti run -- moulti diff parse /path/to/examples.diff

#  Example #3: the same without a pipe:
moulti run -- moulti diff run -- git -C /path/to/git/working/directory showBy default, moulti diff reads diff data as UTF-8 text; this encoding can be
changed by setting the environment variable MOULTI_DIFF_ENCODING, e.g.
export MOULTI_DIFF_ENCODING=iso-8859-1.
By default, moulti diff changes the title of the Moulti instance; set the
environment variable MOULTI_DIFF_NO_TITLE to any value to prevent that.
By default, moulti diff tries to pass diff data to delta, specifically delta --color-only.
This provides:
- language-specific syntax highlighting (e.g. C, Python, etc.);
- within-line difference highlighting.
If this fails (e.g. because delta is not available on the system), Moulti resorts to simpler colors: red for removed lines, green for added lines.
If that attempt to run delta --color-only somehow proves undesirable, set the environment variable MOULTI_DIFF_NO_DELTA to any value to prevent it.
By default, moulti diff acts like a blackbox: it reads diff data, connects to the adequate Moulti instance, adds dividers and steps, then exits.
That makes it hard (albeit not impossible) to determine the number and ids of dividers and steps added by moulti diff.
If the environment variable MOULTI_DIFF_VERBOSE is set to any non-empty value, moulti diff outputs the type and id of each generated widget to stdout.
Example:
$ MOULTI_DIFF_VERBOSE=y moulti diff run -- git show
step diff_352404_1
divider diff_352404_2
step diff_352404_3
That makes it possible to perform simple update/delete operations on these widgets.
Like moulti diff, moulti manpage offers two subcommands (parse and run) that make it possible to load and read
man pages in Moulti:
moulti run -- moulti manpage run -- man bashFor the sake of convenience, Moulti provides moulti-man, a wrapper around man:
moulti-man bashPer se, Moulti does not:
- number lines (use e.g.
nl -baorcat -n) - timestamp lines (use e.g.
ts '%FT%T%z'from themoreutilspackage) - perform syntax highlighting (use e.g.
bat/batcatorrich) - wrap lines (use e.g.
fold) - distinguish stdout from stderr (it reads a single stream anyway; use e.g.
stderred) - tweak the output buffering policy of other processes:
- look for command-line options and environment variables that explicitly address the issue, e.g.
--line-buffered,PYTHONUNBUFFERED=1orSTDBUF(NetBSD-specific) - use
LD_PRELOAD-based tools such asstdbuf(from thecoreutilspackage) or cvolny/faketty - use tools that allocate a pty, e.g.
script,unbuffer(from theexpectpackage) or dtolnay/faketty:
script --quiet --return --command 'your command here' /dev/null | moulti pass your_step
- look for command-line options and environment variables that explicitly address the issue, e.g.
- trick other processes into outputting colors or emojis:
- look for command-line options and environment variables that explicitly address the issue, e.g.
--color=alwaysorFORCE_COLOR=1 - use
LD_PRELOAD-based tools such as cvolny/faketty - use tools that allocate a pty, e.g.
scriptor dtolnay/faketty
- look for command-line options and environment variables that explicitly address the issue, e.g.
- strip colors from input:
- look for command-line options and environment variables that explicitly address the issue, e.g.
--color=neverorNO_COLOR=1 - use tools to strip ANSI escape codes, e.g.
ansi2txtfrom colorized-logs
- look for command-line options and environment variables that explicitly address the issue, e.g.
- keep track of when your processes started, how long they ran and/or what return code they exited with... but see
moulti_execin moulti-functions.bash for an example of it.
All of this can be achieved from the controlling script.
These features may appear in future versions:
typefeature, for animation purposes.
As these lines are being written, Moulti's performance has room for improvement. Consequently, commands that quickly output numerous lines (e.g. find / -ls) will seem like they keep piping output to Moulti whereas they have exited already.
If you know in advance a command is going to output numerous lines, you can tweak the way Moulti will read them:
# The default behaviour is fine when one needs to display each line as soon as possible:
ping example.org | moulti pass my_step

# This outputs 45,000+ lines, so increase read size significantly:
find /sys -ls | moulti pass my_step --read-size=131072
Passing --read-size=0 or not mentioning --read-size at all is equivalent to --read-size=8192.
The typical use of moulti pass is some_command | moulti pass my_step.
However, it is also possible to invoke moulti pass my_step directly. In this case, each line you type in your terminal will end up in Moulti after you hit Enter, and this is the expected behavior.
But beware: hitting Ctrl+c or Ctrl+z will act as expected on the moulti client process... BUT the Moulti instance still holds a file descriptor to your terminal's standard input and still reads from it. This essentially breaks your current terminal (with the Moulti instance eating up about half the characters you type) until you:
- quit the Moulti instance (just hit
q) - send
Ctrl+din the affected terminal.
The correct way to use moulti pass interactively is to signal the end of file through Ctrl+d.
$ moulti pass my_step
1st line<enter>
2nd line<enter>
n-th line<enter>
last line<enter>
<Ctrl+d>You can scroll through steps:
- by grabbing the main scrollbar handle using the mouse pointer;
- using the mouse wheel (or its laptop equivalent) -- tip: ensure the cursor is not over a scrollable step log part;
- by hitting the
Up,PgUp,HomeorEndkey -- tip: ensure the focus is not held by a step log part.
If moulti is already scrolling through steps automatically (see next section Programmatically scrolling through steps),
but you want to read a part of the output while the job is still running, hit l or click "L Lock scroll" in the footer
to prevent programmatic scrolling from interfering with your actions.
The main scrollbar handle turns green to indicate that the lock is enabled and automatic scrolling is disengaged.
Use moulti scroll step_name to make Moulti scroll to a given step.
If this step cannot be displayed entirely, moulti scroll will display its upper part.
It is possible to define which line of the step should absolutely be displayed by specifying an offset as second argument. Important: here, a line does not mean a line of the text output shown by the chosen step but rather one of the lines that make up the entire chosen step on screen.
# Ensure the first line of the step is displayed:
moulti scroll step_name 0
# Ensure the second line of the step is displayed:
moulti scroll step_name 1
# Ensure the third line of the step is displayed:
moulti scroll step_name 2

# Ensure the last line of the step is displayed:
moulti scroll step_name -1
# Ensure the second to last line of the step is displayed:
moulti scroll step_name -2
It often makes sense to call moulti scroll after adding an interactive step (buttonquestion, inputquestion).
Sometimes, it is desirable to make a step visible when a new line of output shows up.
This can be achieved using --scroll-on-activity:
# By default, steps do not scroll on activity:
moulti step add foo --bottom-text=' ' --title='Your shiny title here'
moulti pass foo <<< 'do not scroll'

# Enable scroll on activity:
moulti step update foo --scroll-on-activity=true
# Try it:
moulti pass foo --append <<< 'scroll!'

# A typical use case is to ensure the last line of output is displayed:
moulti step update foo --max-height=0 --scroll-on-activity=-1
# Try it:
yes 'scroll to the last line!' | nl -ba | head -500 | moulti pass foo --append

# Disable scroll on activity:
moulti step update foo --scroll-on-activity=false
moulti pass foo --append <<< 'do not scroll!'By default, Moulti enables auto-scrolling, i.e. it strives to display the latest lines it received and thus keeps scrolling down as long as lines keep coming. Auto-scrolling stops as soon as you scroll up:
- using the mouse wheel (or its laptop equivalent);
- by grabbing the scrollbar handle using the mouse pointer;
- by hitting the
Up,PgUporHomekey.
If enabled (cf next section), auto-scrolling resumes when you hit the End key.
Moulti currently offers no support for programmatic scrolling inside steps. It is, however, possible to enable or disable auto-scrolling:
# Disable auto-scroll:
moulti step add foo --no-auto-scroll
yes 'Do not scroll.' | nl -ba | head -500 | moulti pass foo
# Enable auto-scroll again:
moulti step update foo --auto-scroll
moulti pass --append foo <<< 'Now, scroll!'
Moulti offers text search, i.e. the ability to find and iterate over all occurrences of a given pattern found in the contents displayed by Moulti:
- instance title
- step titles
- step top and bottom texts
- questions and logs
Limitation: this feature ignores input fields and buttons. Additionally, searching occurs over plain text: it is possible to find all occurrences of the word "fox", but it is not possible to find blue occurrences of it.
To start searching, press either / (to search forward) or ? (to search backward).
The search bar appears at the bottom of the screen (but above the console if it is shown).
You can exit the search bar by pressing Escape, Enter or Backspace.
Type a new pattern to search, or look for a previously entered pattern using the up and down arrows.
The pattern can be case-sensitive or case-insensitive: use Ctrl+t to switch between these modes.
The pattern can be a Python regex or a plain pattern: use Ctrl+r to switch between regex and plain pattern.
If the regex you enter is not syntactically correct, it turns to red and submission is blocked until you fix it or switch to plain mode.
Hit Enter. If the pattern is nowhere to be found, a red notification says so. Otherwise, the next occurrence is found, highlighted and scrolled to (expanding its parent step if necessary).
Hit n to go to the next occurrence or N to go to the previous one.
MOULTI_INSTANCE: name of your Moulti instance; defaults todefault; taken into account by the instance to compute the default value ofMOULTI_SOCKET_PATH.MOULTI_SOCKET_PATH: path to the network socket that Moulti should listen/connect to; taken into account by both the instance and the CLI; if not specified, Moulti defaults to a platform-specific value that reflects your username andMOULTI_INSTANCE; examples:@moulti-bob-test-instance.socket,/run/user/1000/moulti-bob-test-instance.socket.MOULTI_ALLOWED_UID: abstract sockets (i.e. Linux) only! By default, Moulti only accepts commands from the user (uid) that launched the Moulti instance; setting this environment variable beforehand makes it accept arbitrary uids; example:export MOULTI_ALLOWED_UID="1001,1002,5000,$(id -u alice),$(id -u bob)" moulti init
MOULTI_ALLOWED_GID: abstract sockets (i.e. Linux) only! By default, Moulti only accepts commands from the user (uid) that launched the Moulti instance; setting this environment variable beforehand makes it accept arbitrary gids; example:export MOULTI_ALLOWED_GID=141 moulti initMOULTI_PASS_CONCURRENCY: define how many concurrent "moulti pass" commands is acceptable; defaults to 20.
MOULTI_MODE:lightto start Moulti in light mode,darkto start Moulti in dark mode; defaults todark.MOULTI_TAB_SIZE: when passing text to steps, tab characters are expanded into a fixed number of spaces, which defaults to 8. Use e.g.MOULTI_TAB_SIZE=4orMOULTI_TAB_SIZE=2to control that behaviour.MOULTI_ANSI: define whether and how Moulti alters the 16 standard ANSI colors. There are three available policies:-
verbatim: (default value since v1.5.0) ANSI colors appear the same way inside Moulti as outside Moulti. However, Moulti does not try to guess the background and foreground colors of your terminal. That may affect readability. If needed, you can specify them using this syntax:MOULTI_ANSI=verbatim:darkbg=000000,darkfg=e6e6e6,lightbg=ffaaff,lightfg=000000 # darkbg: background color in dark mode; default value: #0c0c0c # darkfg: foreground color in dark mode; default value: #d9d9d9 # lightbg: background color in light mode; default value: #f7f7f7 # lightfg: foreground color in light mode; default value: #000000The order of these attributes does not matter and you do not have to specify all of them unless actually needed. Therefore,
MOULTI_ANSI=verbatimandMOULTI_ANSI=verbatim:work fine. -
theme:dark=theme_name1,light=theme_name2: define what ANSI themes to use in dark and light modes; specifying one theme for each mode is usually enough; if needed, specify multiple themes separated by:so that Moulti picks the first one it knows about.Built-in themes include:
DEFAULT_TERMINAL_THEME,MONOKAI,DIMMED_MONOKAI,NIGHT_OWLISH,SVG_EXPORT_THEME. -
textual_default: let the Textual framework handle ANSI colors (default behavior before v1.5.0). In practice, Textual uses built-in themes:Therefore,
MOULTI_ANSI=textual_defaultmeans the same asMOULTI_ANSI=theme:dark=MONOKAI,light=ALABASTER.
-
MOULTI_ANSI_THEME_*: define your own ANSI themes; examples:Manually defining# 16-color theme: MOULTI_ANSI_THEME_Kibble=bg=0E100A,fg=F7F7F7,ansi=4D4D4D:C70031:29CF13:D8E30E:3449D1:8400FF:0798AB:E2D1E3:5A5A5A:F01578:6CE05C:F3F79E:97A4F7:C495F0:68F2E0:FFFFFF # 8-color theme: specified colors are used as both regular and bright colors: MOULTI_ANSI_THEME_halfvga=bg=000000,fg=AAAAAA,ansi=000000:AA0000:00AA00:AA5500:0000AA:AA00AA:00AAAA:AAAAAA
MOULTI_ANSI_THEME_*can be painful. So have a look at this helper script that turns Gogh themes into such variables:Important:tools/gogh2moulti.bash
- Setting
MOULTI_ANSI_THEME_*defines a Moulti theme but does not use it; to use it, setMOULTI_ANSI. - Theme names are case-sensitive: if you define
MOULTI_ANSI_THEME_AlphaBeta, be sure to mention e.g.MOULTI_ANSI=dark=AlphaBeta, notMOULTI_ANSI=dark=ALPHABETA.
- Setting
MOULTI_CUSTOM_CSS: absolute filepath to a custom TCSS file; see "How to define my own step classes ?"MOULTI_ENFORCE_COLLAPSIBLE: enforce the way new collapsible widgets are displayed and prevent client tools from collapsing or expanding existing widgets:collapse: always collapse new collapsible widgetsexpand: always expand new collapsible widgets
MOULTI_ANSIBLE_COLLAPSE: Ansible-specific: comma-separated list of Ansible parts that should appear collapsed, e.g.MOULTI_ANSIBLE_COLLAPSE=prompt,recap,task
About colors in MOULTI_ANSI*:
- colors may be prefixed with
#; - hexadecimal digits may be specified as lower or uppercase but there must be exactly 6 digits.
MOULTI_QUIT_POLICY defines how Moulti should behave upon quitting.
Moulti considers two modes:
running: when the command launched bymoulti runis still running;default: any other situation.
Each mode is assigned a "quit policy" among these:
ask: a modal dialog appears and asks end users whether they actually want to quit and whether it should kill the running script, if any;quit: simply quit -- default mode only;leave: leave the running script untouched and quit -- running mode only;terminate: terminate the script (SIGTERM) and quit -- running mode only.
Examples:
# Default policy:
export MOULTI_QUIT_POLICY='running=ask;default=quit'
# Always ask before quitting:
export MOULTI_QUIT_POLICY='running=ask;default=ask'
# Never ask, leave running processes untouched:
export MOULTI_QUIT_POLICY='running=leave;default=quit'
# Never ask, always kill:
export MOULTI_QUIT_POLICY='running=terminate;default=quit'MOULTI_ANSIBLE_NO_TITLEto prevent the Ansible plugin from changing the title of the Moulti instanceMOULTI_DIFF_NO_TITLEto preventmoulti difffrom changing the title of the Moulti instanceMOULTI_MANPAGE_NO_TITLEto preventmoulti manpagefrom changing the title of the Moulti instance
MOULTI_SAVE_PATH: base path under which export directories are created when saving a Moulti instance; defaults to.i.e. the instance's current working directory.MOULTI_RUN_OUTPUT: see moulti run: dealing with stdin, stdout, stderrMOULTI_DIFF_NO_DELTAsee moulti diff: delta integrationMOULTI_DIFF_ENCODING: see moulti diff: encodingMOULTI_DIFF_VERBOSE: see moulti diff: generated widgetsMOULTI_MANPAGE_ENCODING: same asMOULTI_DIFF_ENCODINGformoulti manpageMOULTI_MANPAGE_VERBOSE: same asMOULTI_DIFF_VERBOSEformoulti manpageMOULTI_CLIPBOARD_COPY: see Saving a single Moulti stepMOULTI_ASKPASS_DEFAULT_PROMPT: prompt shown bymoulti-askpassif none was passed on the command line; defaults toaskpass
These variables are set by the Moulti instance when it runs a script, e.g. moulti run -- my_script.bash:
MOULTI_RUN: its value is irrelevant but its mere presence means your script should NOT try to spawn a new Moulti instance.MOULTI_INSTANCE_PID: process id of the Moulti instance, in case your script needs to act upon the Moulti process itself.MOULTI_SOCKET_PATH: described in the previous section; the Moulti instance explicitly sets this variable to ensure your script can connect to it.
Additionally, Moulti may set variables so other tools integrate into Moulti:
Such variables may or may not be set depending on criteria like existing environment variables or the command-line.
If you feel confused and want to investigate the matter, run moulti run --print-env -- your command here.
Example:
$ moulti run --print-env -- true
MOULTI_RUN=moulti
MOULTI_SOCKET_PATH=@moulti-username-default.socket
MOULTI_INSTANCE_PID=271828
SSH_ASKPASS=moulti-askpass
SSH_ASKPASS_REQUIRE=force
SUDO_ASKPASS=/usr/local/bin/moulti-askpassTERM: per se, Moulti does nothing with this environment variable. However,$TERMhas a strong influence on the behavior and visual aspect of curses applications and Moulti is no exception. Your mileage may vary but, overall, it seemsTERM=xterm-256colorfrequently fix things.NO_COLOR: if present, convert the application to monochrome; this variable comes from the Textual framework.
Out of the box, Moulti provides five step classes:
standard(blue)success(green)warning(orange)error(red)inactive(gray)
Here, "class" is a synonym for "style" or "color" and actually refers to the notion of CSS class. Moulti is based on the Textual framework, which borrows various principles from the world of web design, starting with their own variant of CSS: Textual CSS (TCSS).
Moulti embeds its TCSS inside its Python code but allows end users to redefine whatever they see fit through a TCSS file of theirs, the path of which should be passed through the MOULTI_CUSTOM_CSS environment variable.
The snippets below demonstrate how to leverage this mechanism to define one's step classes and change the colors of the Moulti header.
/path/to/moulti-custom.tcss:
/* Define a step class named "customstate" rendered with red text on a yellow background: */
Step.customstate {
    & CollapsibleTitle {
        color: red;
    }
    color: red;
    background: yellow;
    & MoultiLog { scrollbar-corner-color: yellow; }
}

/* Customise steps shown by moulti-askpass: */
.askpass {
    color: gray;
    background: black;
    padding: 2;
    border: panel blue;
}

/* Change the colors of the Moulti header: */
#header {
    background: red;
    color: yellow;
}
MOULTI_CUSTOM_CSS=/path/to/moulti-custom.tcss moulti initCaution: if the MOULTI_CUSTOM_CSS environment variable is set, the path it indicates must exist and point to a syntactically valid TCSS file or the Moulti instance will crash.
Moulti requires a Unix-friendly operating system. Specifically, it requires an operating system that implements AF_UNIX+SOCK_STREAM local network sockets.
Microsoft Windows does implement such sockets but the Python interpreter does not expose this feature to applications yet.
Progress on this matter ought to happen through Python issue #77589.
Once this issue is resolved, porting Moulti to Microsoft Windows should become possible.
Moulti requires Python ≥ 3.10 because:
- Moulti leverages Textual, which requires Python 3.8 or later.
- Moulti uses send_fds and recv_fds, which require Python ≥ 3.9.
- Tests using Python 3.9.18 almost immediately hit blocking issues, specifically:
- steps not reacting to keyboard/mouse events ;
Task got Future <Future pending> attached to a different loopPython exception.
- Python 3.9 isn't receiving regular bug fixes anymore.
- Moulti type hints use PEP 604 (Allow writing union types as X | Y) syntax, which requires Python ≥ 3.10.
The exact version of Textual required to run Moulti is 0.86.3. Details:
- version 0.86.0 replaces the dark vs light modes with themes; Moulti went through this breaking change on its way to Textual 1.0.0
- version 0.84.0 introduces a rendering issue that affects focus indicators
- version 0.83.0 removes the need to override
Screen.ALLOW_IN_MAXIMIZED_VIEW - version 0.79.0 supports maximizing widgets
- version 0.76.0 supports dynamic keybindings
- version 0.53.0 exposes ANSI themes
- version 0.47.0 was the minimum requirement before the implementation of ANSI themes
- version 0.46.0 fails with message "Error in stylesheet"
- version 0.24.0 fails with message "ImportError: Package 'textual.widgets' has no class 'Collapsible'"
- version 0.1.13 fails with message "ImportError: cannot import name 'work' from 'textual'"
This section exposes various reflections that contributed to the architectural design of Moulti.
Moulti is a CLI-driven TUI. This implies that a (relatively) long-running process takes care of maintaining and updating the TUI while (relatively) short-running processes send instructions about what to update. To this end, CLI processes need a protocol to communicate with the TUI instance.
In the end, Moulti is architected around 5 components:
- the CLI part, used to drive the instance but also used to initialize it.
- the client part
- the protocol
- the server part
- the TUI part
Implementation-wise, these 5 components are spread across only 3 Python modules:
- moulti.cli (CLI + client)
- moulti.protocol
- moulti.app (server + TUI)
The protocol does not neeed to work across network hosts, it simply needs to work across processes on a single host. At this stage, all IPC techniques remain available.
Enter another requirement: it should be possible to fill Moulti steps by piping the output of a command to the CLI, e.g.:
some_command --with arguments 2>&1 | moulti pass step_nameIn a naive scenario, the CLI acts like a proxy:
- the command writes to the pipe
- the CLI reads from the pipe
- the CLI writes to the instance
- the instance reads from the CLI
- the instance updates the step
A more straightforward approach is to pass the file descriptor the CLI would read from to the instance. This way:
- the command writes to the pipe
- the instance reads from the file descriptor
- the instance updates the step
This can be achieved with Unix Domain Sockets (AF_UNIX) and SCM_RIGHTS ancillary data. Unix Domain Sockets are available on all Unix and Unix-like operating systems, and even on Windows. However, they bring security constraints:
- on most platforms, Unix sockets are materialized by special files that appear on regular filesystems and file permissions determine what processes may or may not interact with the server.
- in addition to this file-based mechanism, Linux also supports abstract sockets, the entry points of which no longer rely upon file permissions.
In almost all cases, the CLI and TUI components run as the exact same user and should never interact with any other user. However, it remains relevant to accept instructions from a whitelist of other users for specific use-cases.
With regular file-based Unix sockets, it is necessary to cautiously pick:
- the permissions of the socket file; by default, they are derived from the user's umask, which cannot be predicted.
- the directory that will host the socket file:
- /tmp is very exposed and thus risky
- /run/user/ is known to be protected and thus a perfect choice
- directories under $HOME are typically (but not systematically) protected from other users and are therefore a suitable failover whenever /run/user is not available.
With abstract sockets, it is necessary to check the "credentials" of each incoming connection; here, "credentials" simply means "uid and gid". It is also possible to check those credentials with file-based Unix sockets but the mechanisms to do so suffer from portability issues.
Moulti:
- defaults to abstract sockets with credentials check on Linux;
- stores file-based Unix sockets in:
$XDG_RUNTIME_DIR(if this environment variable is set)$XDG_CACHE_HOME/moulti(if this environment variable is set)~/Library/Caches/moulti(if~/Library/Cachesexists)~/.cache/moulti
Therefore, even with a particularly permissive umask value (e.g. umask 0), Moulti sockets should remain out of reach
of other users.
Explicitly sharing a Moulti instance with other users remains possible:
- Linux users simply need to stick with abstract sockets and set
MOULTI_ALLOWED_UIDand/orMOULTI_ALLOWED_GID. - Other users need to pick a suitable
umaskand a suitable path throughMOULTI_SOCKET_PATH.
Additionally, operations feasible through the socket are essentially write-only. Consequently, a malicious user able to establish a connection with a Moulti instance that does not belong to them could:
- send "ping" commands
- change the title displayed by the instance
- add new steps with arbitrary contents (possibly consuming large amounts of memory)
- alter or erase existing steps, but only if they can guess their names
- read answers to questions (this is the only command that may actually leak sensitive information)
... but they cannot:
- list existing steps (bruteforce attacks remain possible though)
- read properties of existing steps
- read contents of existing steps
- dump all current steps to disk (possibly filling the underlying storage)
- copy any step to the clipboard
- change appearance settings (TCSS, ANSI theme, dark/light mode)
- execute any command
This last point is crucial: precisely because it listens on a network socket (even a strictly local one), Moulti does
not provide any mechanism that could run a command passed through that socket. It does offer the ability to run a single
command on startup but this command comes from command-line arguments passed to moulti run and thus from the rightful
TUI owner.
