-
Notifications
You must be signed in to change notification settings - Fork 0
Connecting via USB on Mac OS X
If you have not already, make sure you have followed the instructions in Getting Started Step 4.
-
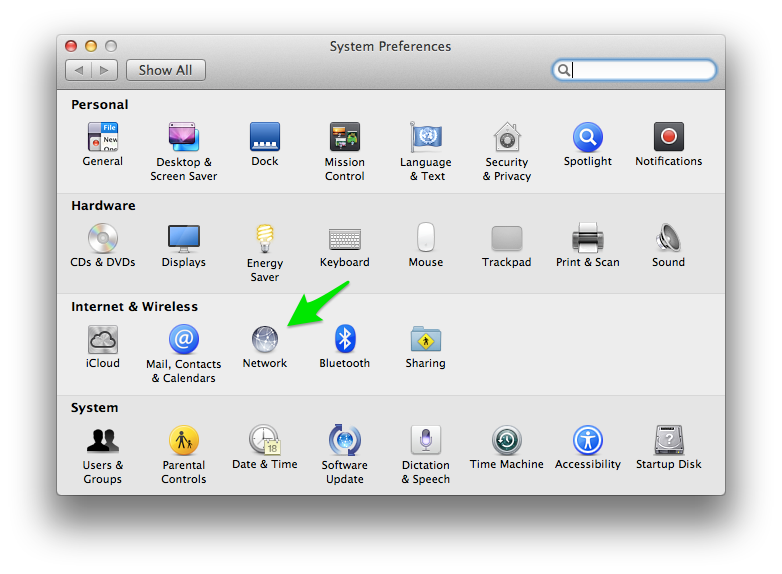
On your Mac, open up System Preferences and select Network.
-
Once you get the Network dialog, click on the
+icon in the lower left area to add a new network device. You'll need to select the CDC Composite Gadget in the drop down box. The name will be similar to what is shown below. I have renamed the service "ev3dev" so it's easier to keep track of later. Click Create when you are done.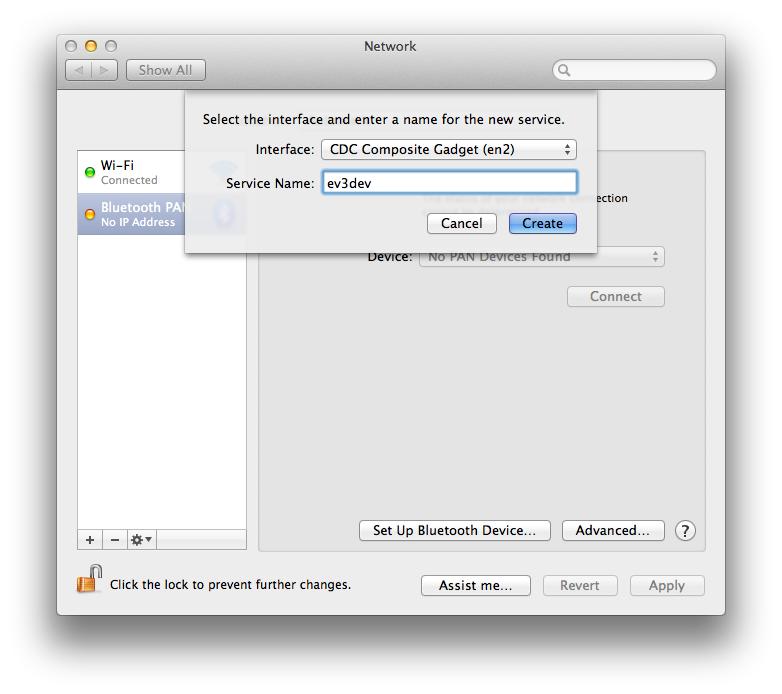
-
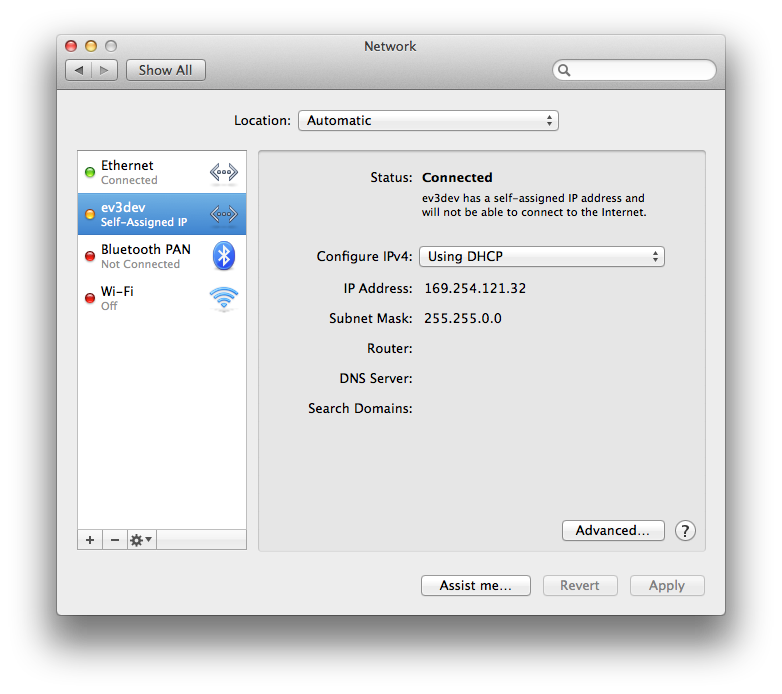
Click Apply to save your changes. After a short time, \tThe ev3dev entry (or whatever you named it) should show connected and have a Self-Assigned IP address
-
Now, we need to share our internet connection with the EV3. Go back to System Preferences and select Sharing.
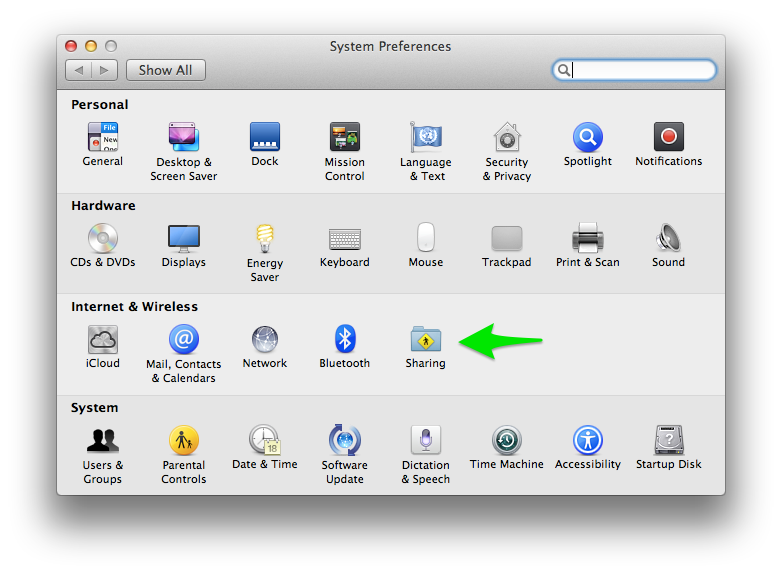
Click Internet Connection on the left, but don't check the box yet. On the right, Share your connection from: will be Wi-Fi (or Ethernet if you have a wired connection). Also check the box next to CDC Composite Gadget
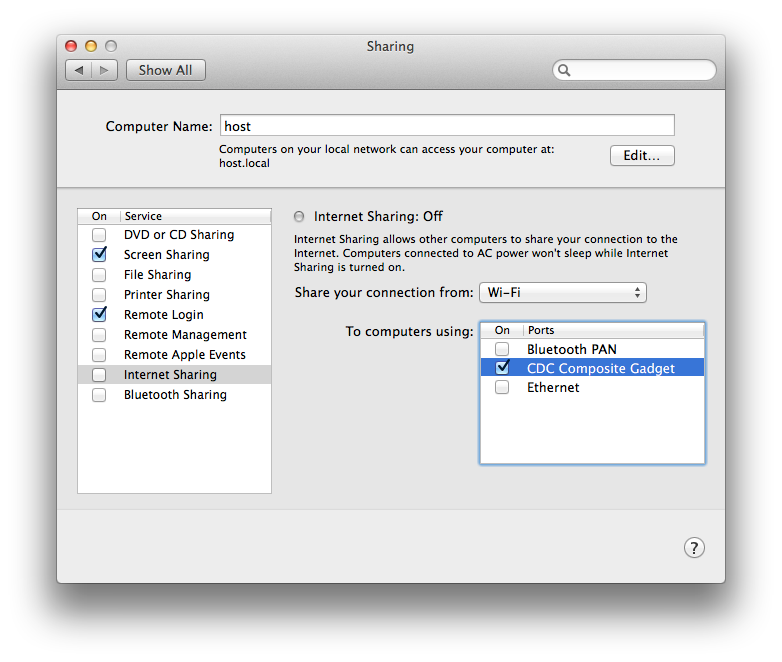
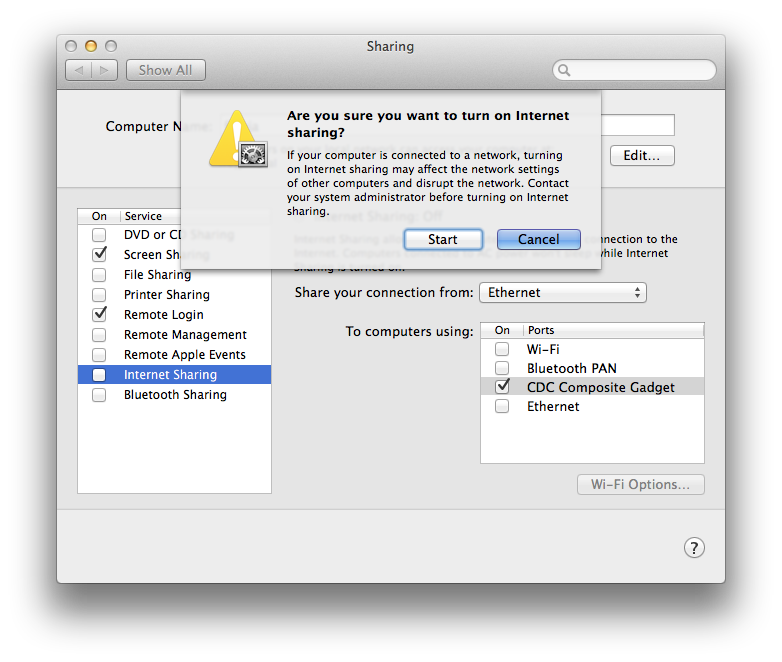
Now check the box next to Internet Connection on the left to enable it. Read the warning and then click Start.
-
Next, we need to find the IP address that was assigned to the EV3. You can do this in Console and filter for bootpd, but since we are going to be using the terminal in a moment anyway, we will just show you how to do it there.
 host:~ user$ cat /var/log/system.log | grep bootpd
 Mar 27 16:50:12 host.domain bootpd[27463]: server name host.domain
 Mar 27 16:50:12 host.domain bootpd[27463]: interface en0: ip 192.168.0.100 mask 255.255.255.0
 Mar 27 16:50:12 host.domain bootpd[27463]: interface bridge100: ip 192.168.2.1 mask 255.255.255.0
 Mar 27 16:50:12 host.domain bootpd[27463]: DHCP REQUEST [bridge100]: 1,66:11:22:33:44:55 <ev3dev>
 Mar 27 16:50:12 host.domain bootpd[27463]: ACK sent ev3dev 192.168.2.2 pktsize 300
The line with
ACKhas the IP address that was assigned to the EV3. 1921.68.2.2 in this case. -
For
sshaccess to the EV3 under OS X, you can use the good oldsshprogram from the terminal window. I'm sure there are other solutions, and if you send me your suggestions I'll add them to a list.In a terminal, run the following command. Replace 192.168.2.2 with the IP address you found in the system log.
host:~ user$ ssh root@192.168.2.2If you have never connected before, you will prompted to confirm the authenticity of the host, so type
yeswhen prompted.The authenticity of host '192.168.3.1 (192.168.3.1)' can't be established. RSA key fingerprint is xx:xx:xx:xx:xx:xx:xx:xx:xx:xx:xx:xx:xx:xx:xx:xx. Are you sure you want to continue connecting (yes/no)? yes Warning: Permanently added '192.168.3.1' (RSA) to the list of known hosts.The default root password is
r00tme.root@192.168.3.1's password: Linux ev3dev 3.3.0-0-ev3dev #2 PREEMPT Wed Mar 19 20:10:05 CDT 2014 armv5tejl _____ _ _____ _|___ / __| | _____ __ / _ \ \ / / |_ \ / _` |/ _ \ \ / / | __/\ V / ___) | (_| | __/\ V / \___| \_/ |____/ \__,_|\___| \_/ Debian GNU/Linux 7 on LEGO MINDSTORMS EV3! The programs included with the Debian GNU/Linux system are free software; the exact distribution terms for each program are described in the individual files in /usr/share/doc/*/copyright. Debian GNU/Linux comes with ABSOLUTELY NO WARRANTY, to the extent permitted by applicable law. root@ev3dev:~# -
Now check out the list of first things you should do with ev3dev.