-
-
Notifications
You must be signed in to change notification settings - Fork 18
Malta
This guide uses data from the airborne LIDAR survey conducted as part of the ERDF156 project on the 17th February 2012, therefore use it at your discretion. The data uses the Aattribution-NonCommercial-NoDerivatives 4.0 International license and has no limitations to public access.
This guide is intended for those who wish to create a custom terrain dataset to use in Malta. The guide only shows you how to download and generate the DEM(digital elevation model), to be used in the main guide. For this guide to work, you will need to install CloudCompare and QGIS. After you complete all the steps, follow Part two: Generating/using your dataset, starting at step B.
- Download and install the latest stable release of CloudComapre from here
- Download and install the latest version of QGIS (3.16) in OSGeo4W

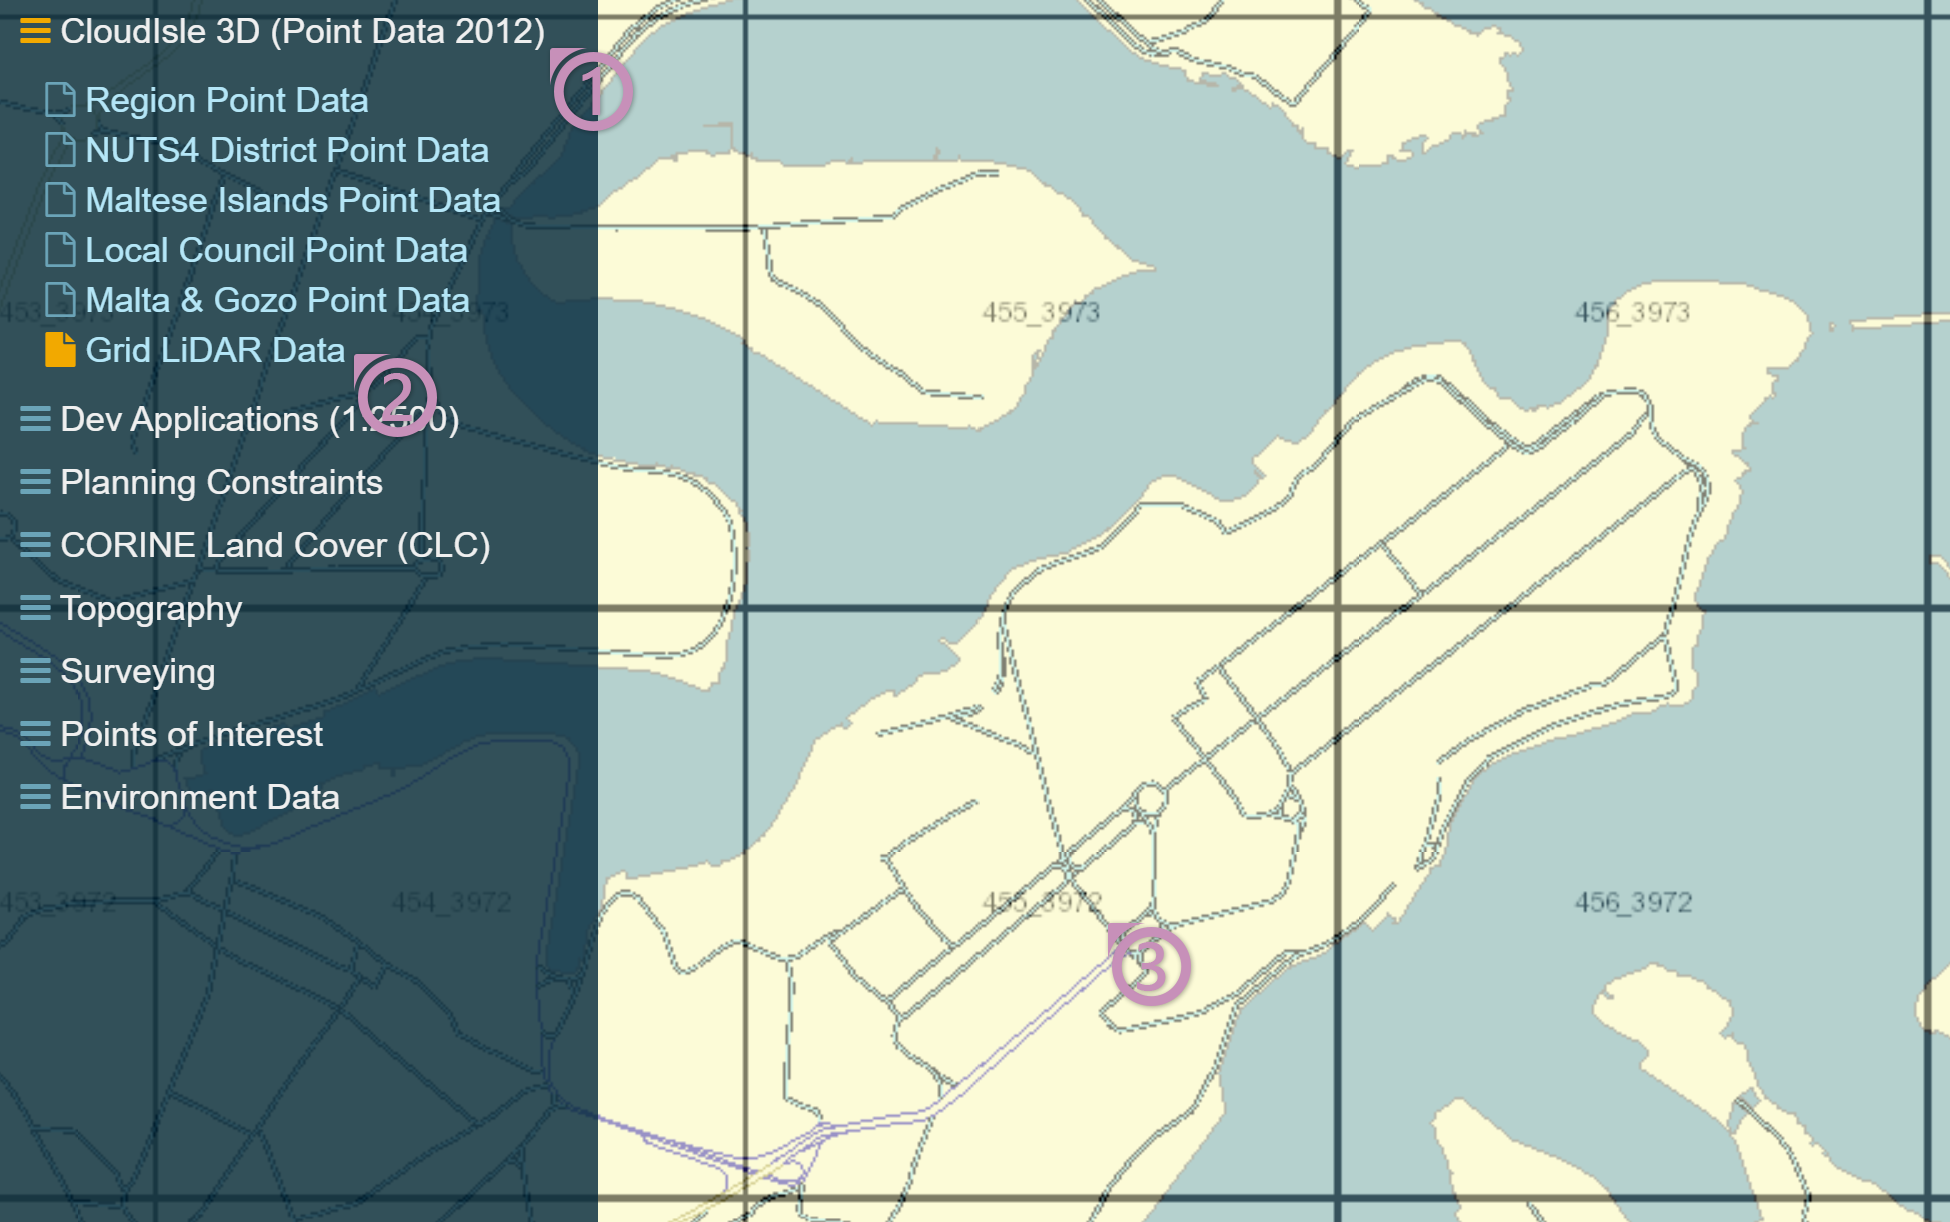
- First, open the Malta Public Geoserver website
- Zoom to the desired area
- On the left side (Table of Contents) click on
CloudIsle 3D (Point Data 2012) - Then choose
Grid LiDAR Data - From the map, take a note of which tiles you wish to use
(ex 456_3972,456_3973,455_3972,455_3973) - Download the downloader.py script
- Open QGIS and navigate to
Plugins/Python Consolein the toolbar - In the opened bottom panel click on the
Show Editorbutton (Script icon) - Open the downloader.py file using the
Open Script...button (Folder icon) - Once open, navigate to the
download_dirline (line: 12) - Here replace the path with the path where you wish to store the downloaded lidar data and make sure to use double backslash
- Navigate one line down (line: 13)
- Here, type in one or more noted tiles and make sure to use quotation marks and no comma at the end, like in the example
- Save the changes using the
Savebutton (Floppy disk icon) - Navigate to
View/Panels/Log Messagesin the toolbar - Now, depending on how many tiles you wish to download, this can take quite a while. Click on the
Run Scriptbutton (green play button) - After the script is finished you will get a notification from QGIS
- Download the export_dem_malta.py script
- Open the
export_dem_malta.pyfile using theOpen Script...button (Folder icon) - Once open navigate to the
source_directoryline (line: 14) - Here replace the path with your path to the folder where you saved the lidar data (
downlaod_dirin the previous step) and make sure to use double backslash - Then navigate to the
dem_directoryline (line: 15) and replace the path where you wish to save the dem files, making sure to use double backslash - Save the changes using the
Savebutton (Floppy disk icon) - Now, depending on the size of the area, this can take quite a while. Click on the
Run Scriptbutton (green play button) - After the script is finished you will get a notification from QGIS
- From here on forward, follow Part two: Generating/using your dataset, starting at step B, but be sure to use
EPSG:23033as the crs for the imported layer and when asked which transformation to use in theSelect Transformationwindow, select the one that has an area of use:World - N hemisphere - 12°E to 18°E, Malta - onshore(9th one)
You can contact me on Discord, under davixdevelop#3914, or you can join us on our BTE Development Hub on Discord, and ask away under the #terraplusplus-support channel.