-
Notifications
You must be signed in to change notification settings - Fork 10
Home
Welcome to the MetaClockClock wiki!
A MetaClockClock is a set of individual analog 'clocks' which use their hands to display information or interesting animation patterns.
The clock units can be freely arranged and combined for smaller or larger installation.

To get familiar with the project, have a look at the articles and videos below:
- “60 Billion Lights”: 2400 RGB LEDs and 120 Stepper Motors hiding behind Canvas Art
- Behind the Canvas: Making of “60 Billion Lights”
- New (round) Version
- New MetaClockClock V3 finished with 60 Clocks
- MetaClockClock V4 for the Year 2021
- MetaClockClock Build Instructions
Please see the Hardware page page for:
- Ordering PCBs
- Wiring connection between MCU and Motor board
- Using LPC845-BRK as a master
- Adding push buttons to change time/etc
- Using hardware RTC (Realtime Clock)
- Connecting to RS-485 with the Sparkfun breakout board
The projects are using the NXP MCUXpresso IDE (Eclipse based, V11.2.0 or later) using the MCUXpresso SDK. The projects have the necessary SDK data included, so there should be no need to install the SDKs.
- Clone the sources from git or download as zip file and extract them into a folder.
- Import the projects (e.g. Drag&Drop) into the IDE. Make sure you link to the projects.
Library: The projects are using common files as a library
- ClockCommon: shared modules for clocks and master projects.
- McuLib: MCU library from McuOnEclipse Library.
There are two types of projects:
- Clock: controls one or up to four clocks. Can be used standalone or connected together with RS-485, controlled by a master board.
- Master: dedicated board which communicates with multiple clocks in a matrix organisation.
Clock Projects:
- K02_64_Clock2: round clock version using the Kinetis K02 64KByte Flash version, able to drive two clocks.
- K02_128_Clock2: same as the 64KByte version, but with 128 KByte Flash.
Master Master Projects:
- LPC845_Master: this is the project for the master (LPC845-BRK) board.
- tinyK22_Master: Master board using the tinyK22 with RTC and WS2812B interface.
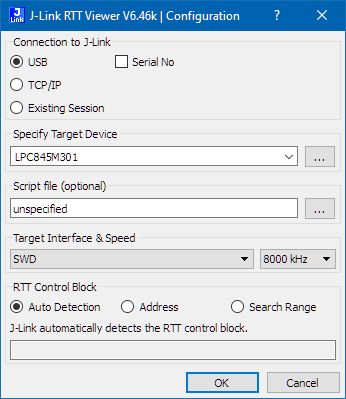
SEGGER RTT (see Using Segger Real-Time-Terminal) is a communication protocol over the SEGGER J-Link debugger connection. SEGGER offers tools to communicate using the Segger RTT Viewer. Configure the SEGGER RTT connection as below:
- Connect to the correct device on your board
- LPC845M301 for LPC845 based boards (both master and clock boards).
- MK02FN128XXX12 or MK02FN64XXX12 for Kinetis K02 based boards.
- MK22FN512XXX12 for tinyK22 based master board.

- Sending: Send on Enter

Using the SEGGER RTT it is possible to communicate with each board locally using an attached SEGGER J-Link.
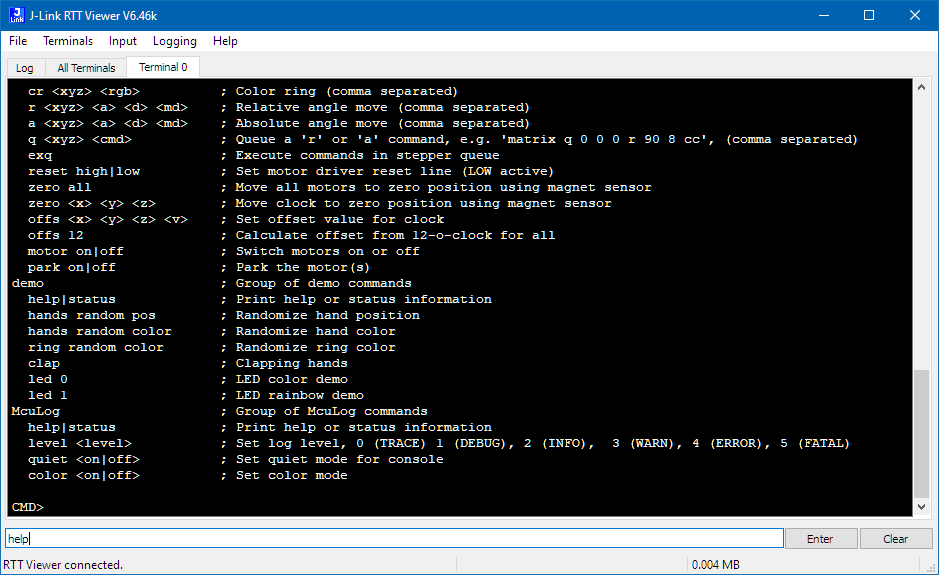
Connect to the board using the SEGGER RTT Viewer and client and type help to get a list of available commands.

Type status to list the status for each module.
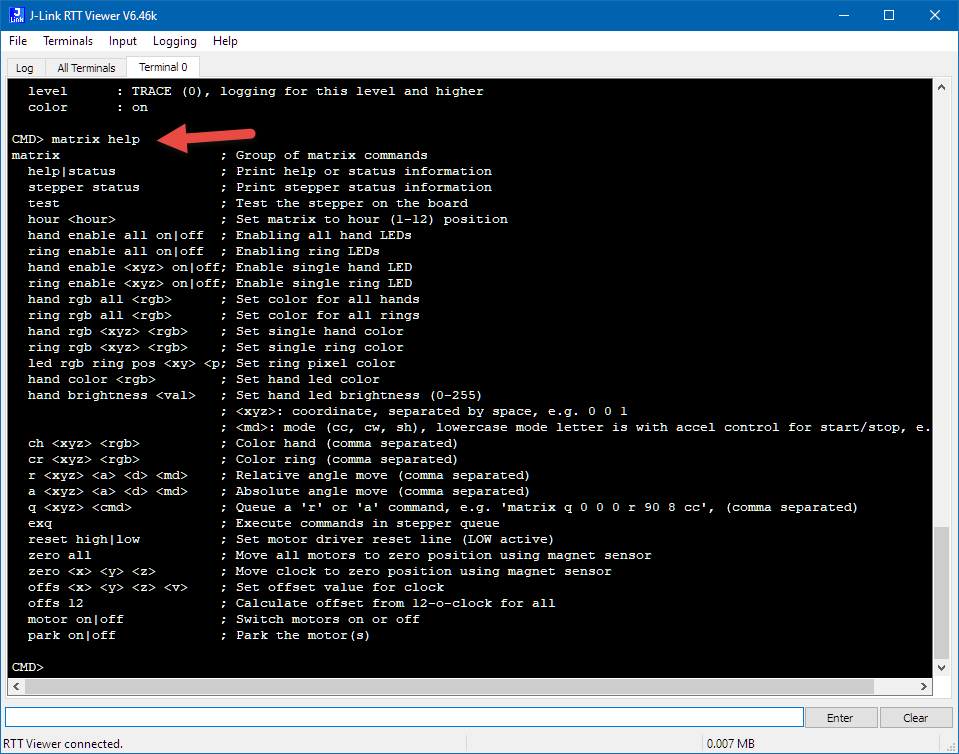
Each module commands can have the module name pre-fix. For example matrix help lists the commands for the matrix module.

Each project has a 'platform.h' which is used to configure the project.
- Board:
PL_CONFIG_BOARD_IDdefines the board used. - Matrix Configuration:
PL_MATRIX_CONFIG_IS_?x?, currently1x1,8x3and12x5are supported. - The master board and each clock board has a unique RS-485 address.
The addresses based on the matrix configuration are in
ClockCommon/matrixconfig.h.
Each board needs a unique address. The currently assigned address is displayed with rs status.

The rs module offers the rs addr command to set the address, e.g. with rs addr 0x62.

The address gets permanently stored in the non-volatile memory (FLASH). Use nvmc status to show the currently stored values.
The address 0x0 is reserved as broadcast address and shall not be used on any board. The master board usually has the address 0x1.
Using rs sendcmd it is possible to send commands from one board to another. In the example below the rs help and rs status status commands to the board with the address 0x62.

For new boards it make sense to test if the motors are working properly. Do this for each motor.
- Make sure that the motors are powered if having a motor on/off switch (present on the K02 clock boards) with
matrix motor on. - Move a motor for example with the
matrix rrelative move command. The command uses a coordinate system (x, y, z) for each motor. For examplematrix r 0 0 0 90 2 shmoves the motor at coordinate (0,0,0) (first motor, top hand) by 90 degrees with a delay of 0 andshacceleration mode. - Test each motor (by default motors are organized in x direction), so the LPC845 4-clock board has following coordinates:
- Motor 0:
0 0 0,0 0 1 - Motor 1:
1 0 0,1 0 1 - Motor 2:
2 0 0,2 0 1 - Motor 3:
3 0 0,3 0 1
- Motor 0:
The software has a way to find and calibrate the 12-o-clock position. For this the hall sensors and magnets on each hand are used.
- Move the hands by hand to the 12-o-clock position.
- Execute the following command in the RTT/Shell:
matrix offs 12 - This moves both hands counter-clockwise to the magnet position, stores the offset in flash and then moves the hands back to the 12-o-clock position
The offsets gets permanently stored in the non-volatile memory (FLASH). Use nvmc status to show the currently stored values.
Each project/board has a NVMC (non-volatile memory configuration) in FLASH. This area is located at the end of the FLASH area and is not overwritten if you flash a new firmware. The flash area has a version number. The ability to migrate the configuration area from an old version to a new version is currently not implemented. So you have to migrate the data from an earlier version the following way:
- display the current values with
nvmc status - initialize the area:
nvmc init - then set again the old values using the
nvmcor ohter commands, e.g.rs addr 0x12
The LPC845-BRK offers a serial connection to the board. Use a terminal program (e.g. Termite or PutTTY) and connect to the board using 115200 baud with the correct COM port on your system.

Use the McuTimeDate commands to set the RTC (Real-Time Clock).