This small App is developed for IvS to drive the motor for the dip coater. The motor is connected to a Raspberry Pi through the GPIO bus.
This App is developed with Textual and the motor driver is controlled using the TMC_2209_Raspberry_Pi library.
Always install in a dedicated virtual environment!
$ cd </path/to/dip-coater>
$ python3 -m venv venv --prompt=dip-coater
$ source venv/bin/activate
$ python3 -m pip install --upgrade pip setuptools wheel
$ python3 -m pip install -e .
On a Raspberry Pi, install the project together with the RPi package:
$ pip install dip-coater[rpi] When you want to develop and test on a macOS or Linux system, install without the RPi package. The App will mock the imports and functions.
$ pip install dip-coaterStart the App from the command line in a terminal. You can start it also from a remote ssh session in a terminal, e.g. if you have the installation on the Raspberry Pi and you have a remote connection to your RPi.
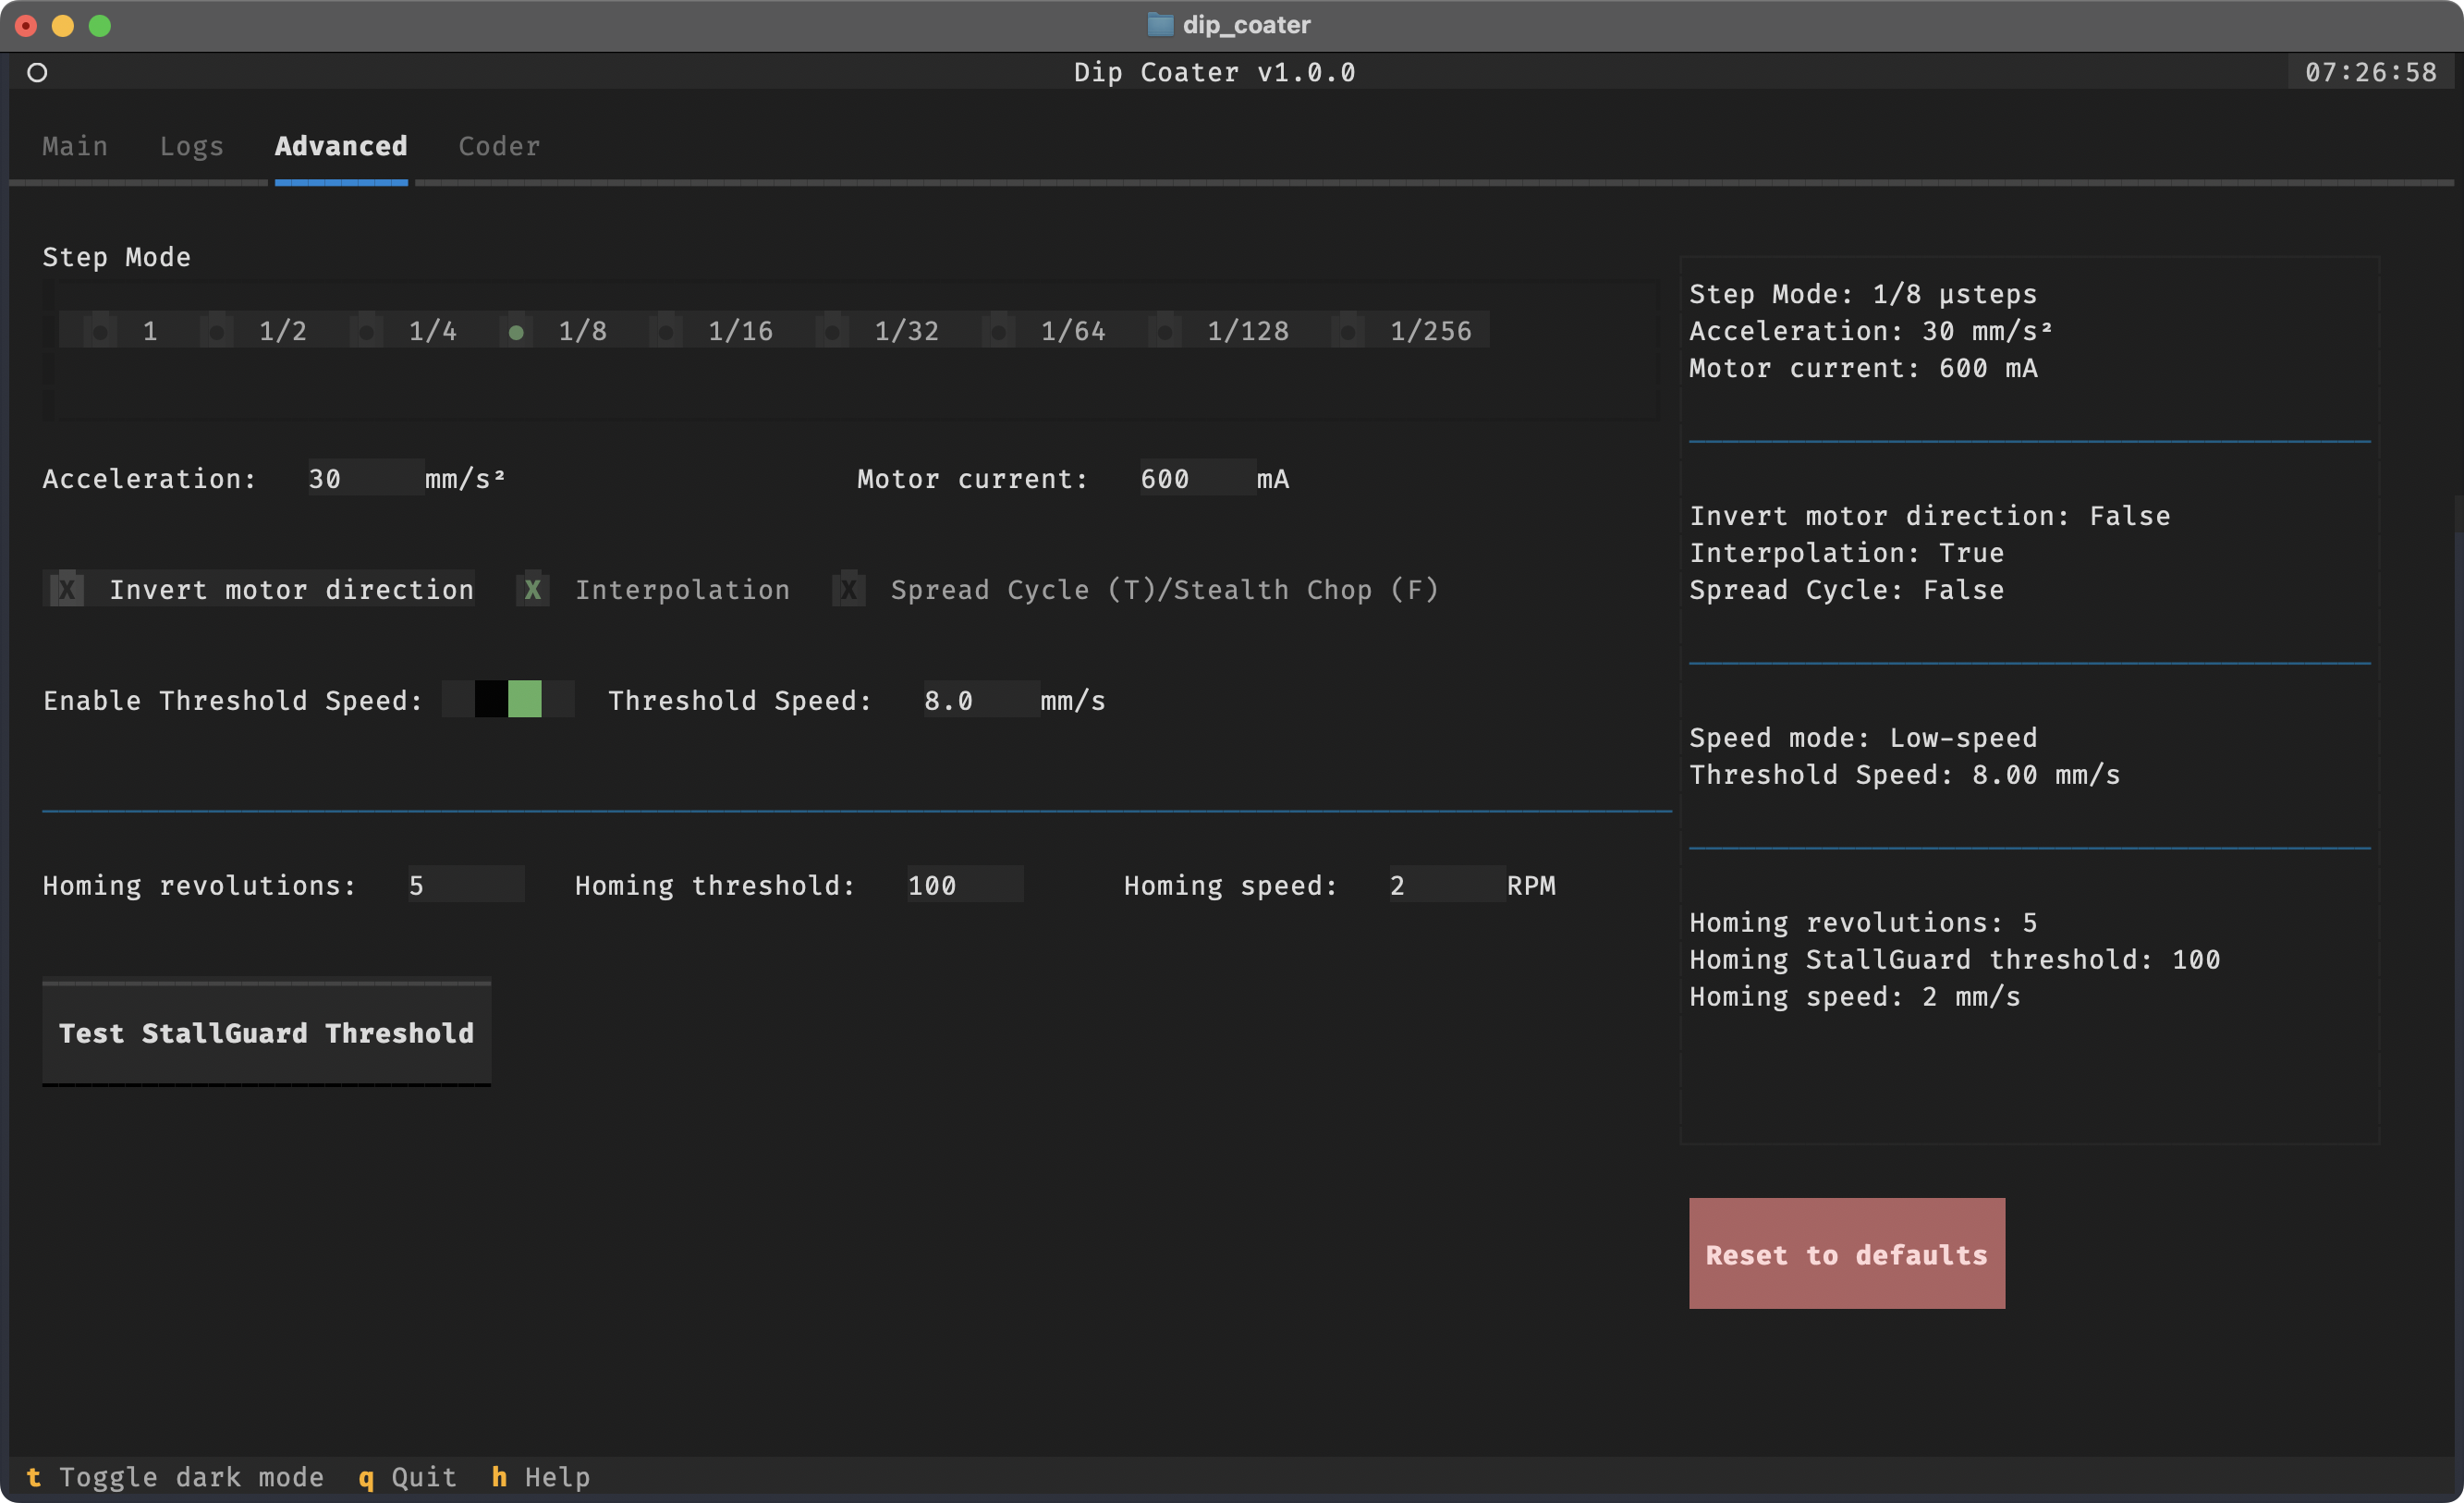
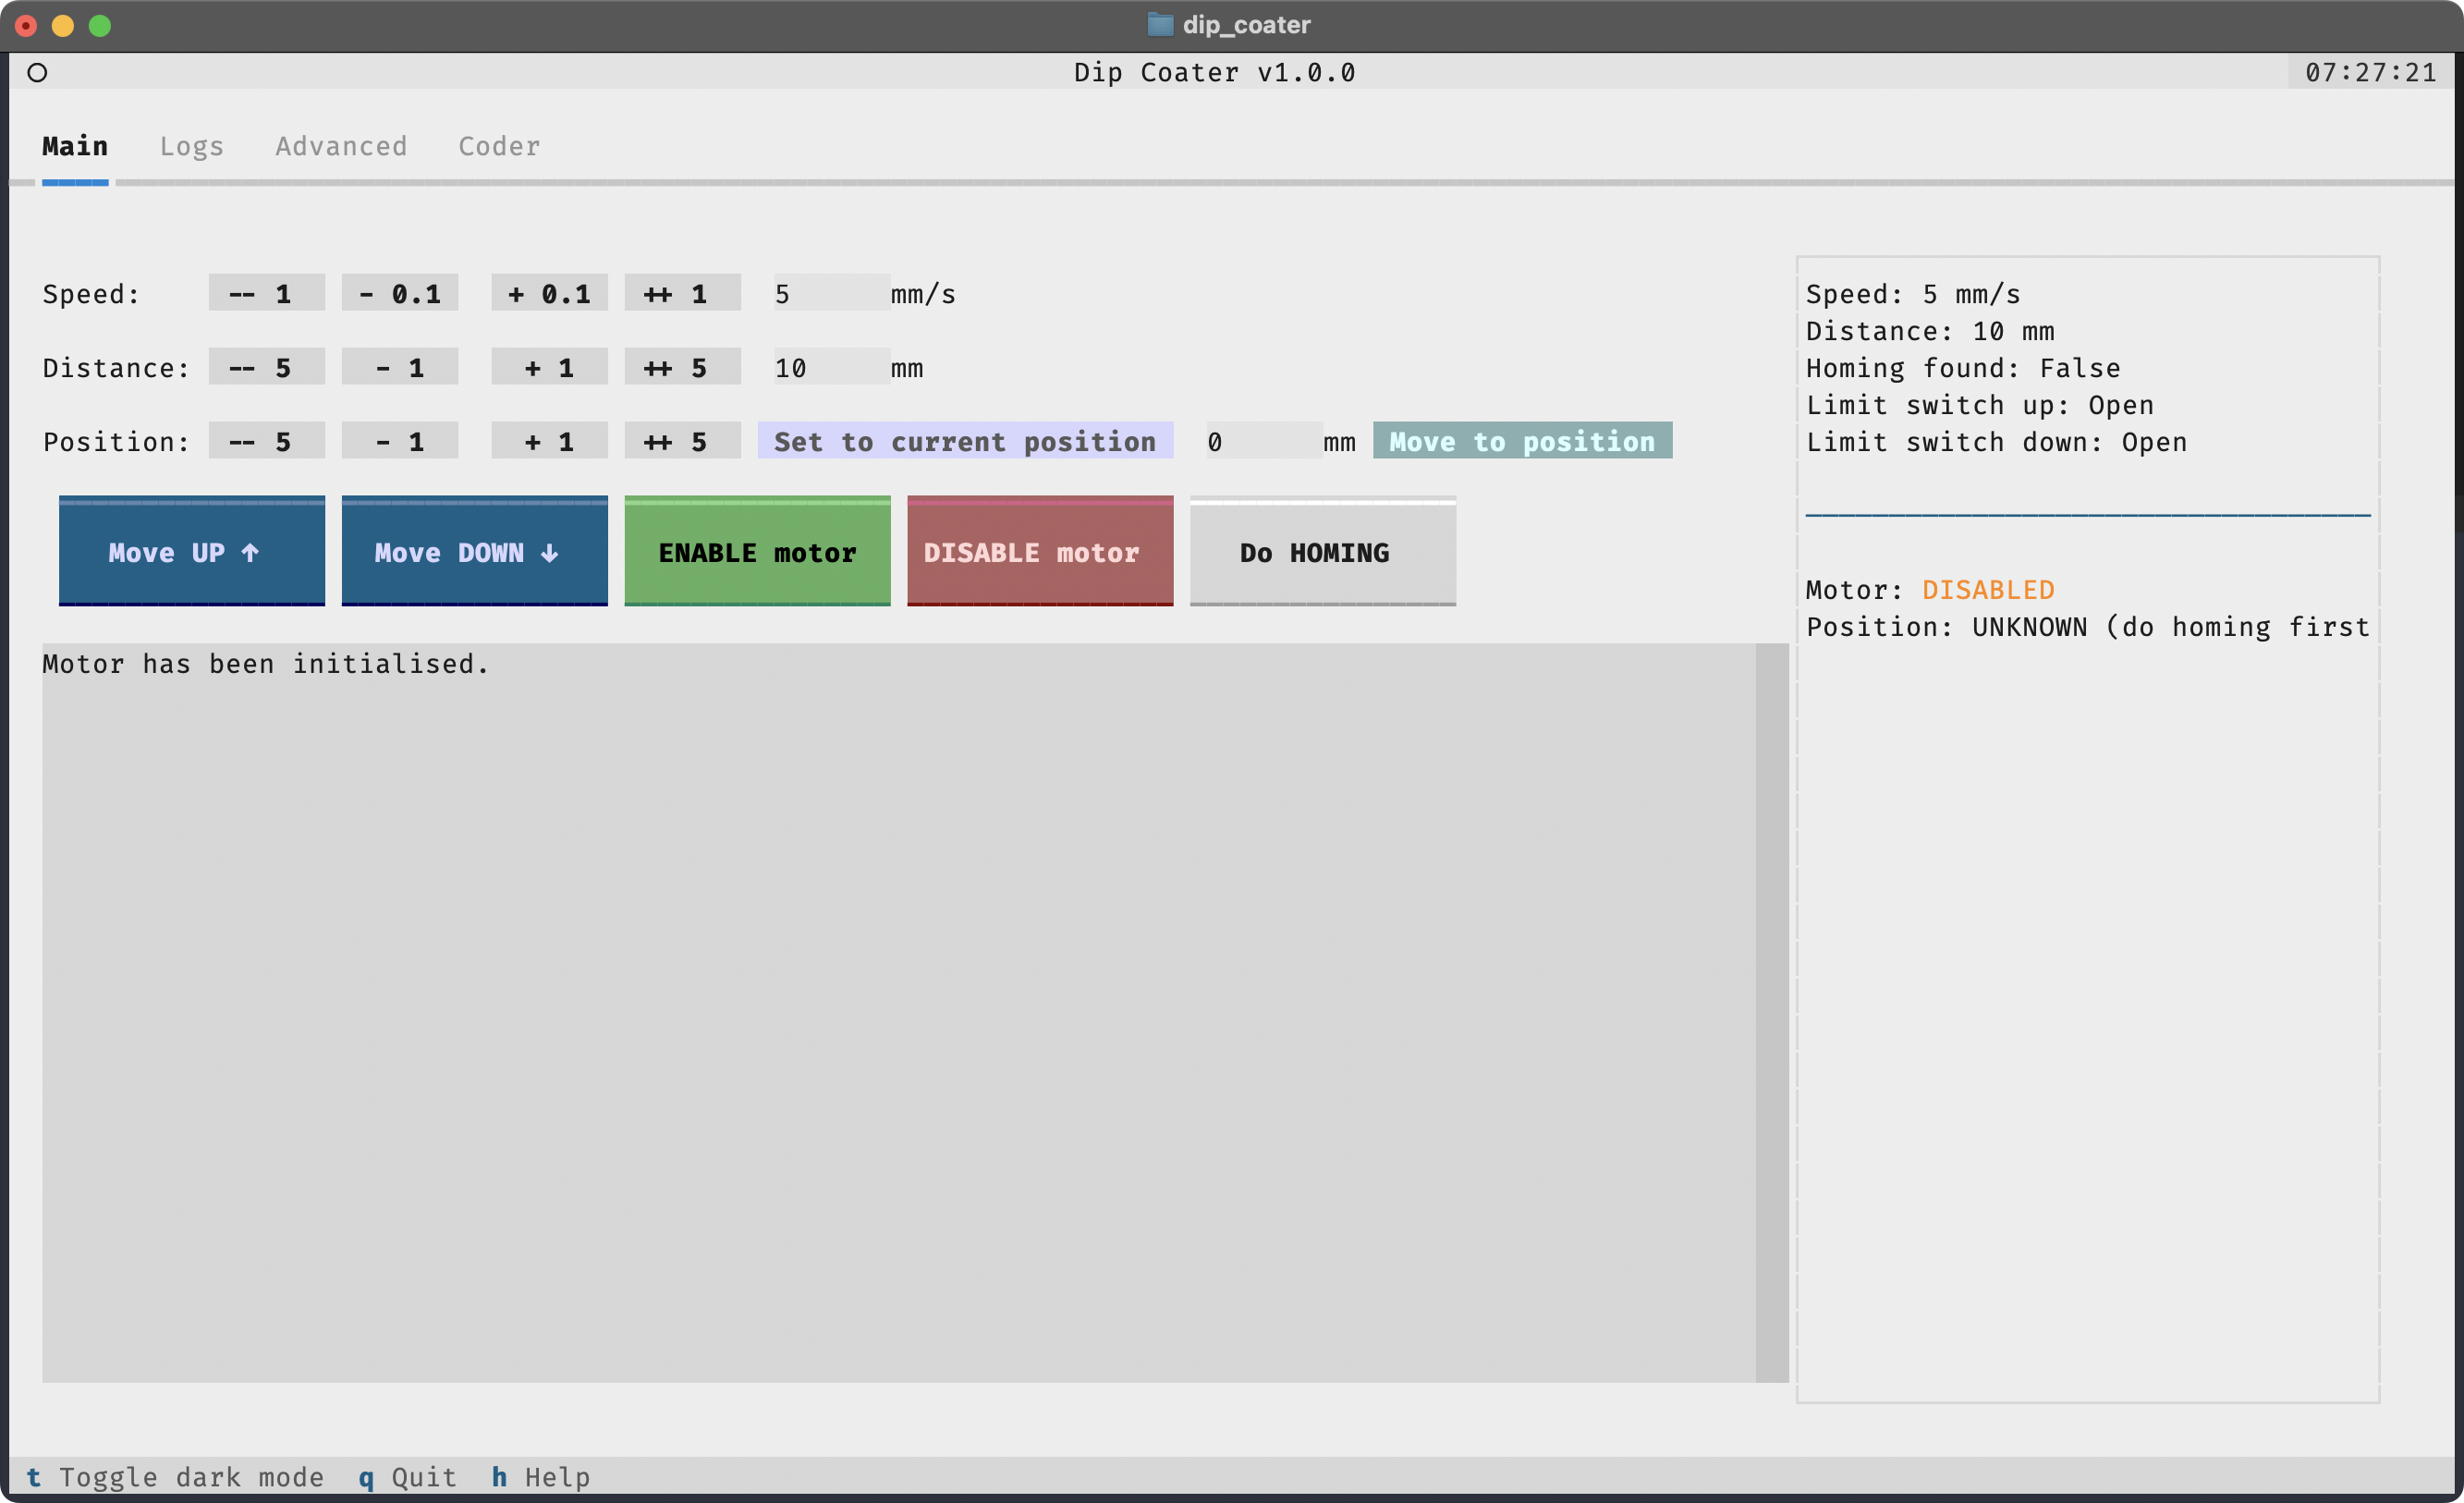
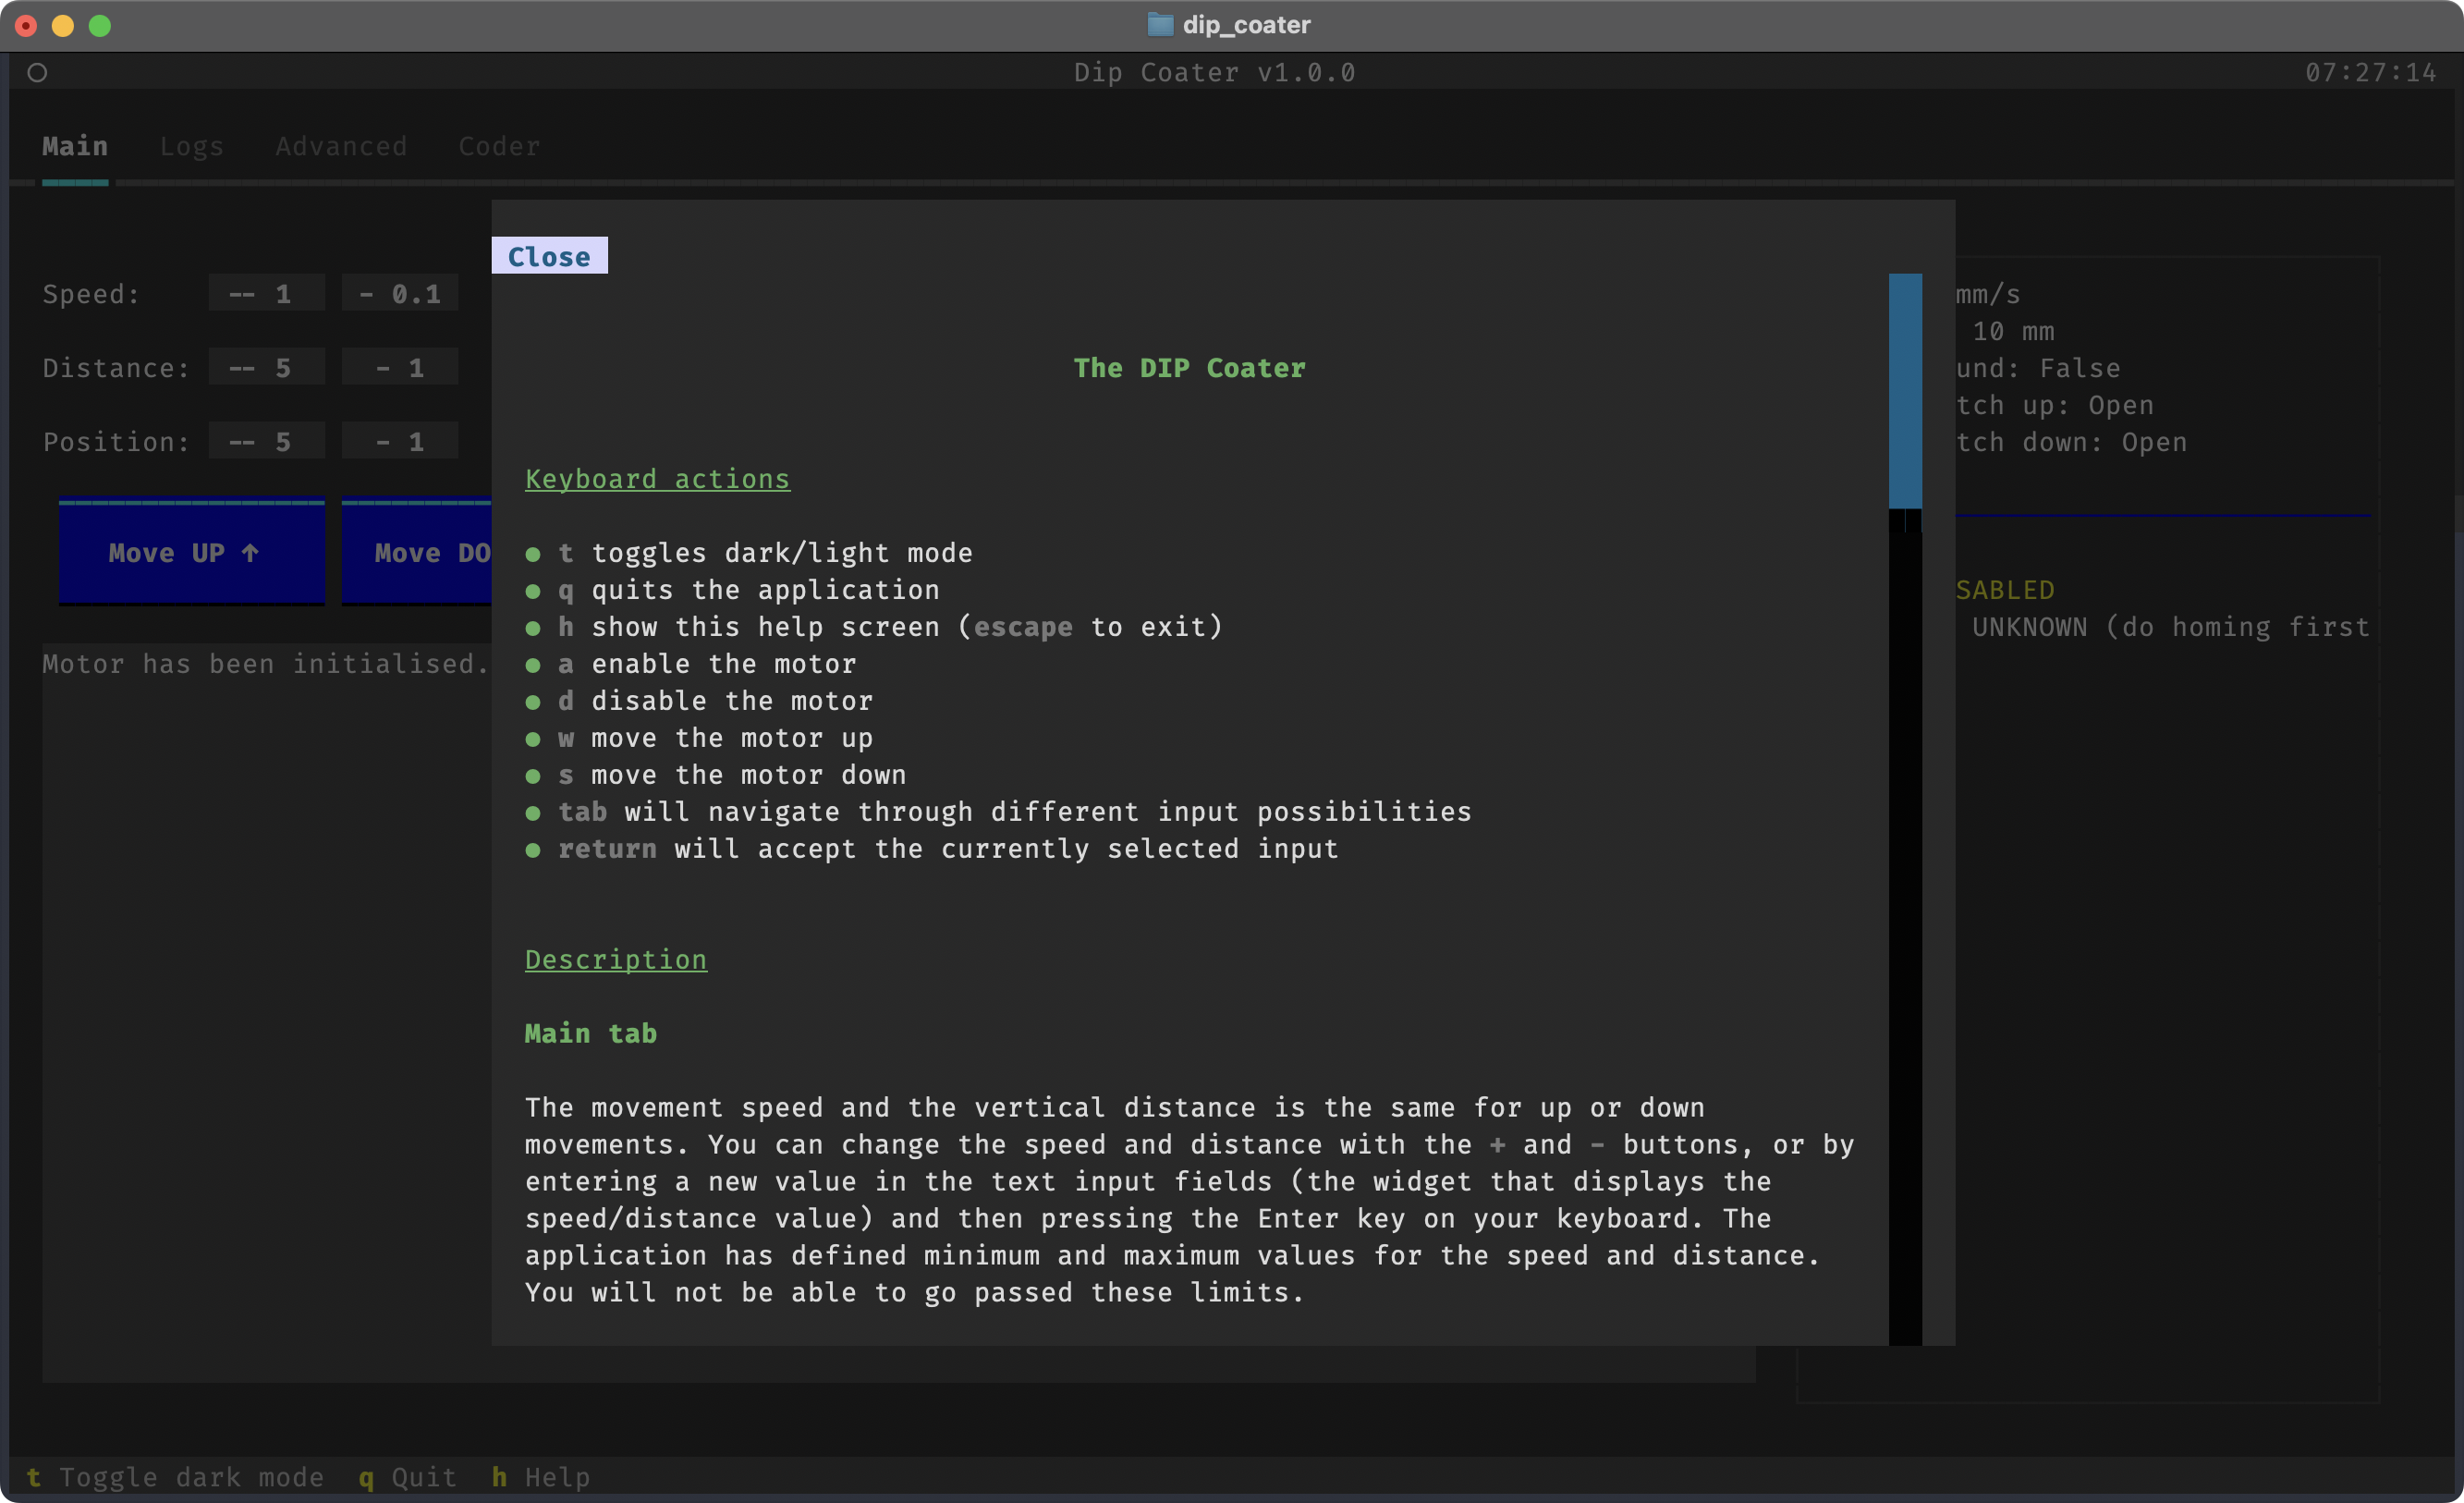
$ dip-coaterThis will show the following App in your terminal:
By default, the Main tab is selected. You can switch to the Advanced tab on top of the screen to access more advanced settings.
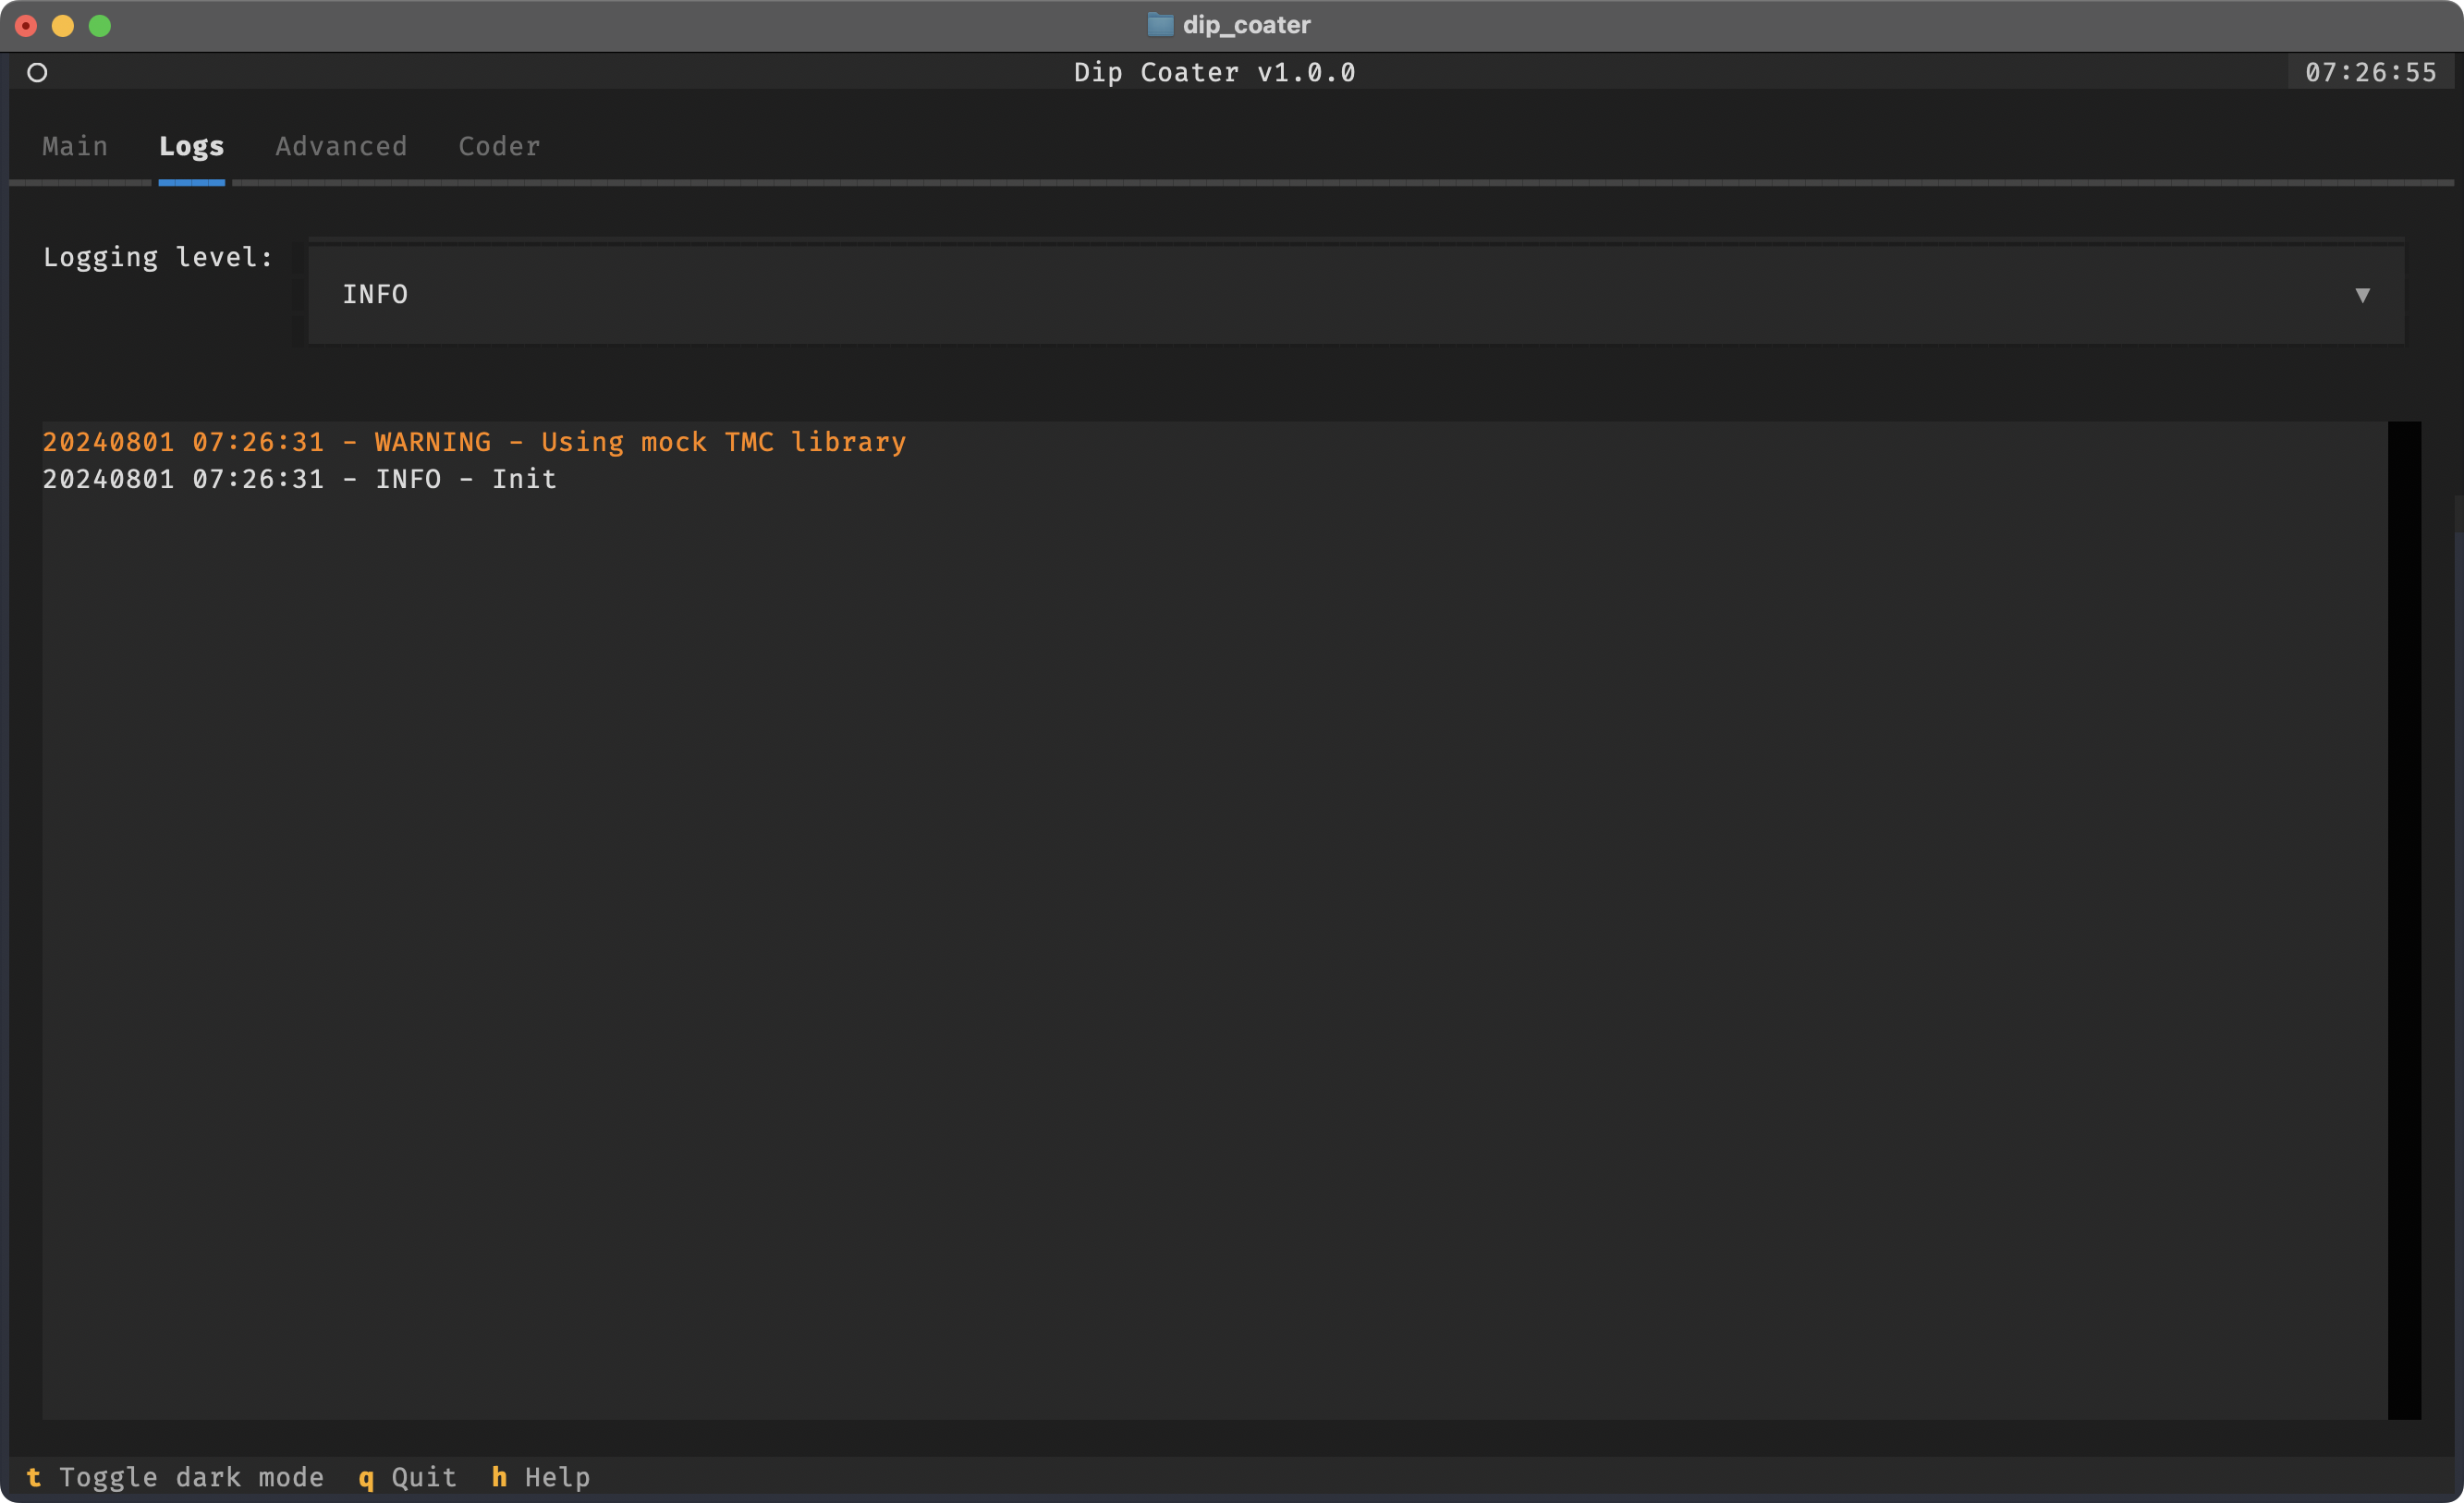
To view log messages of the program for debugging, you can switch to the Logs tab.
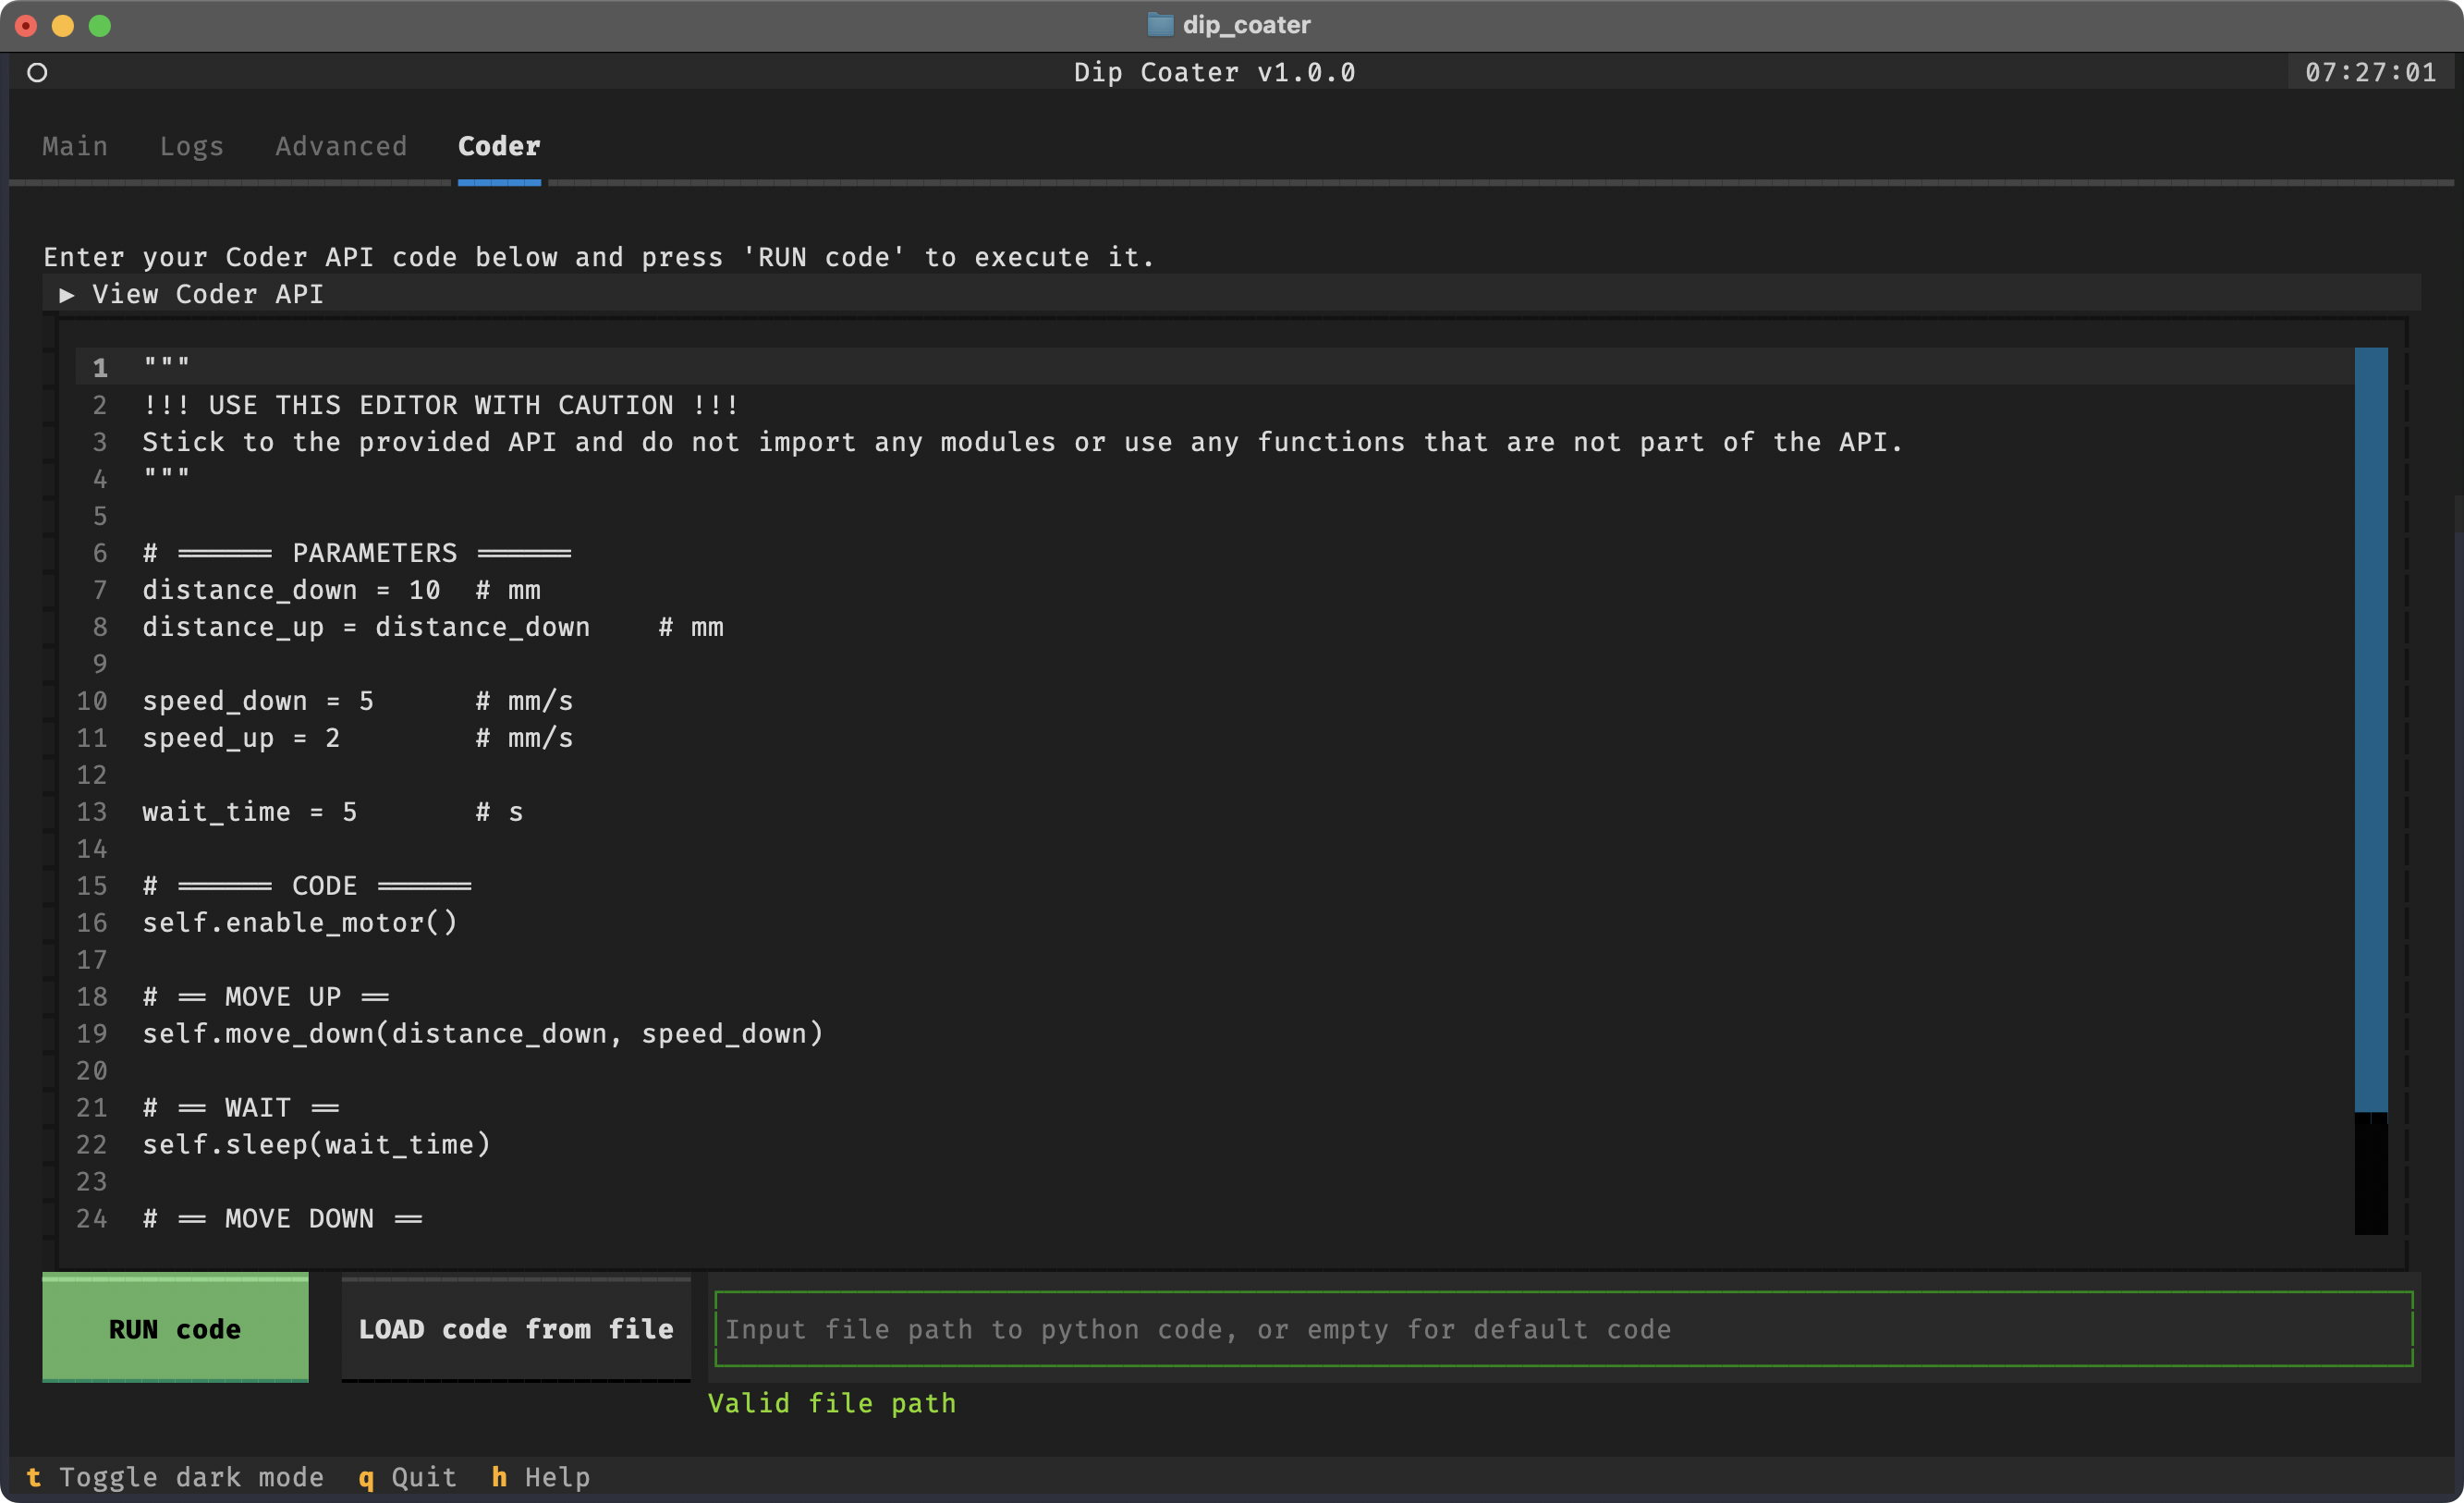
To run custom, automated routines, you can use the Coder tab. Here you can write your own Python code to control the motor
using the Coder API. The code is executed when you press the RUN code button. You can view the available Coder API calls in the
collapsible section at the top of the screen, or in the help menu. If you do not want to use the default code, you can
enter the file path to a Python file on the bottom of the coder panel. The new file will be loaded when you press the
LOAD code from file button
If you prefer light mode, press the t key.
Further help is available in the App by pressing the 'h' key:
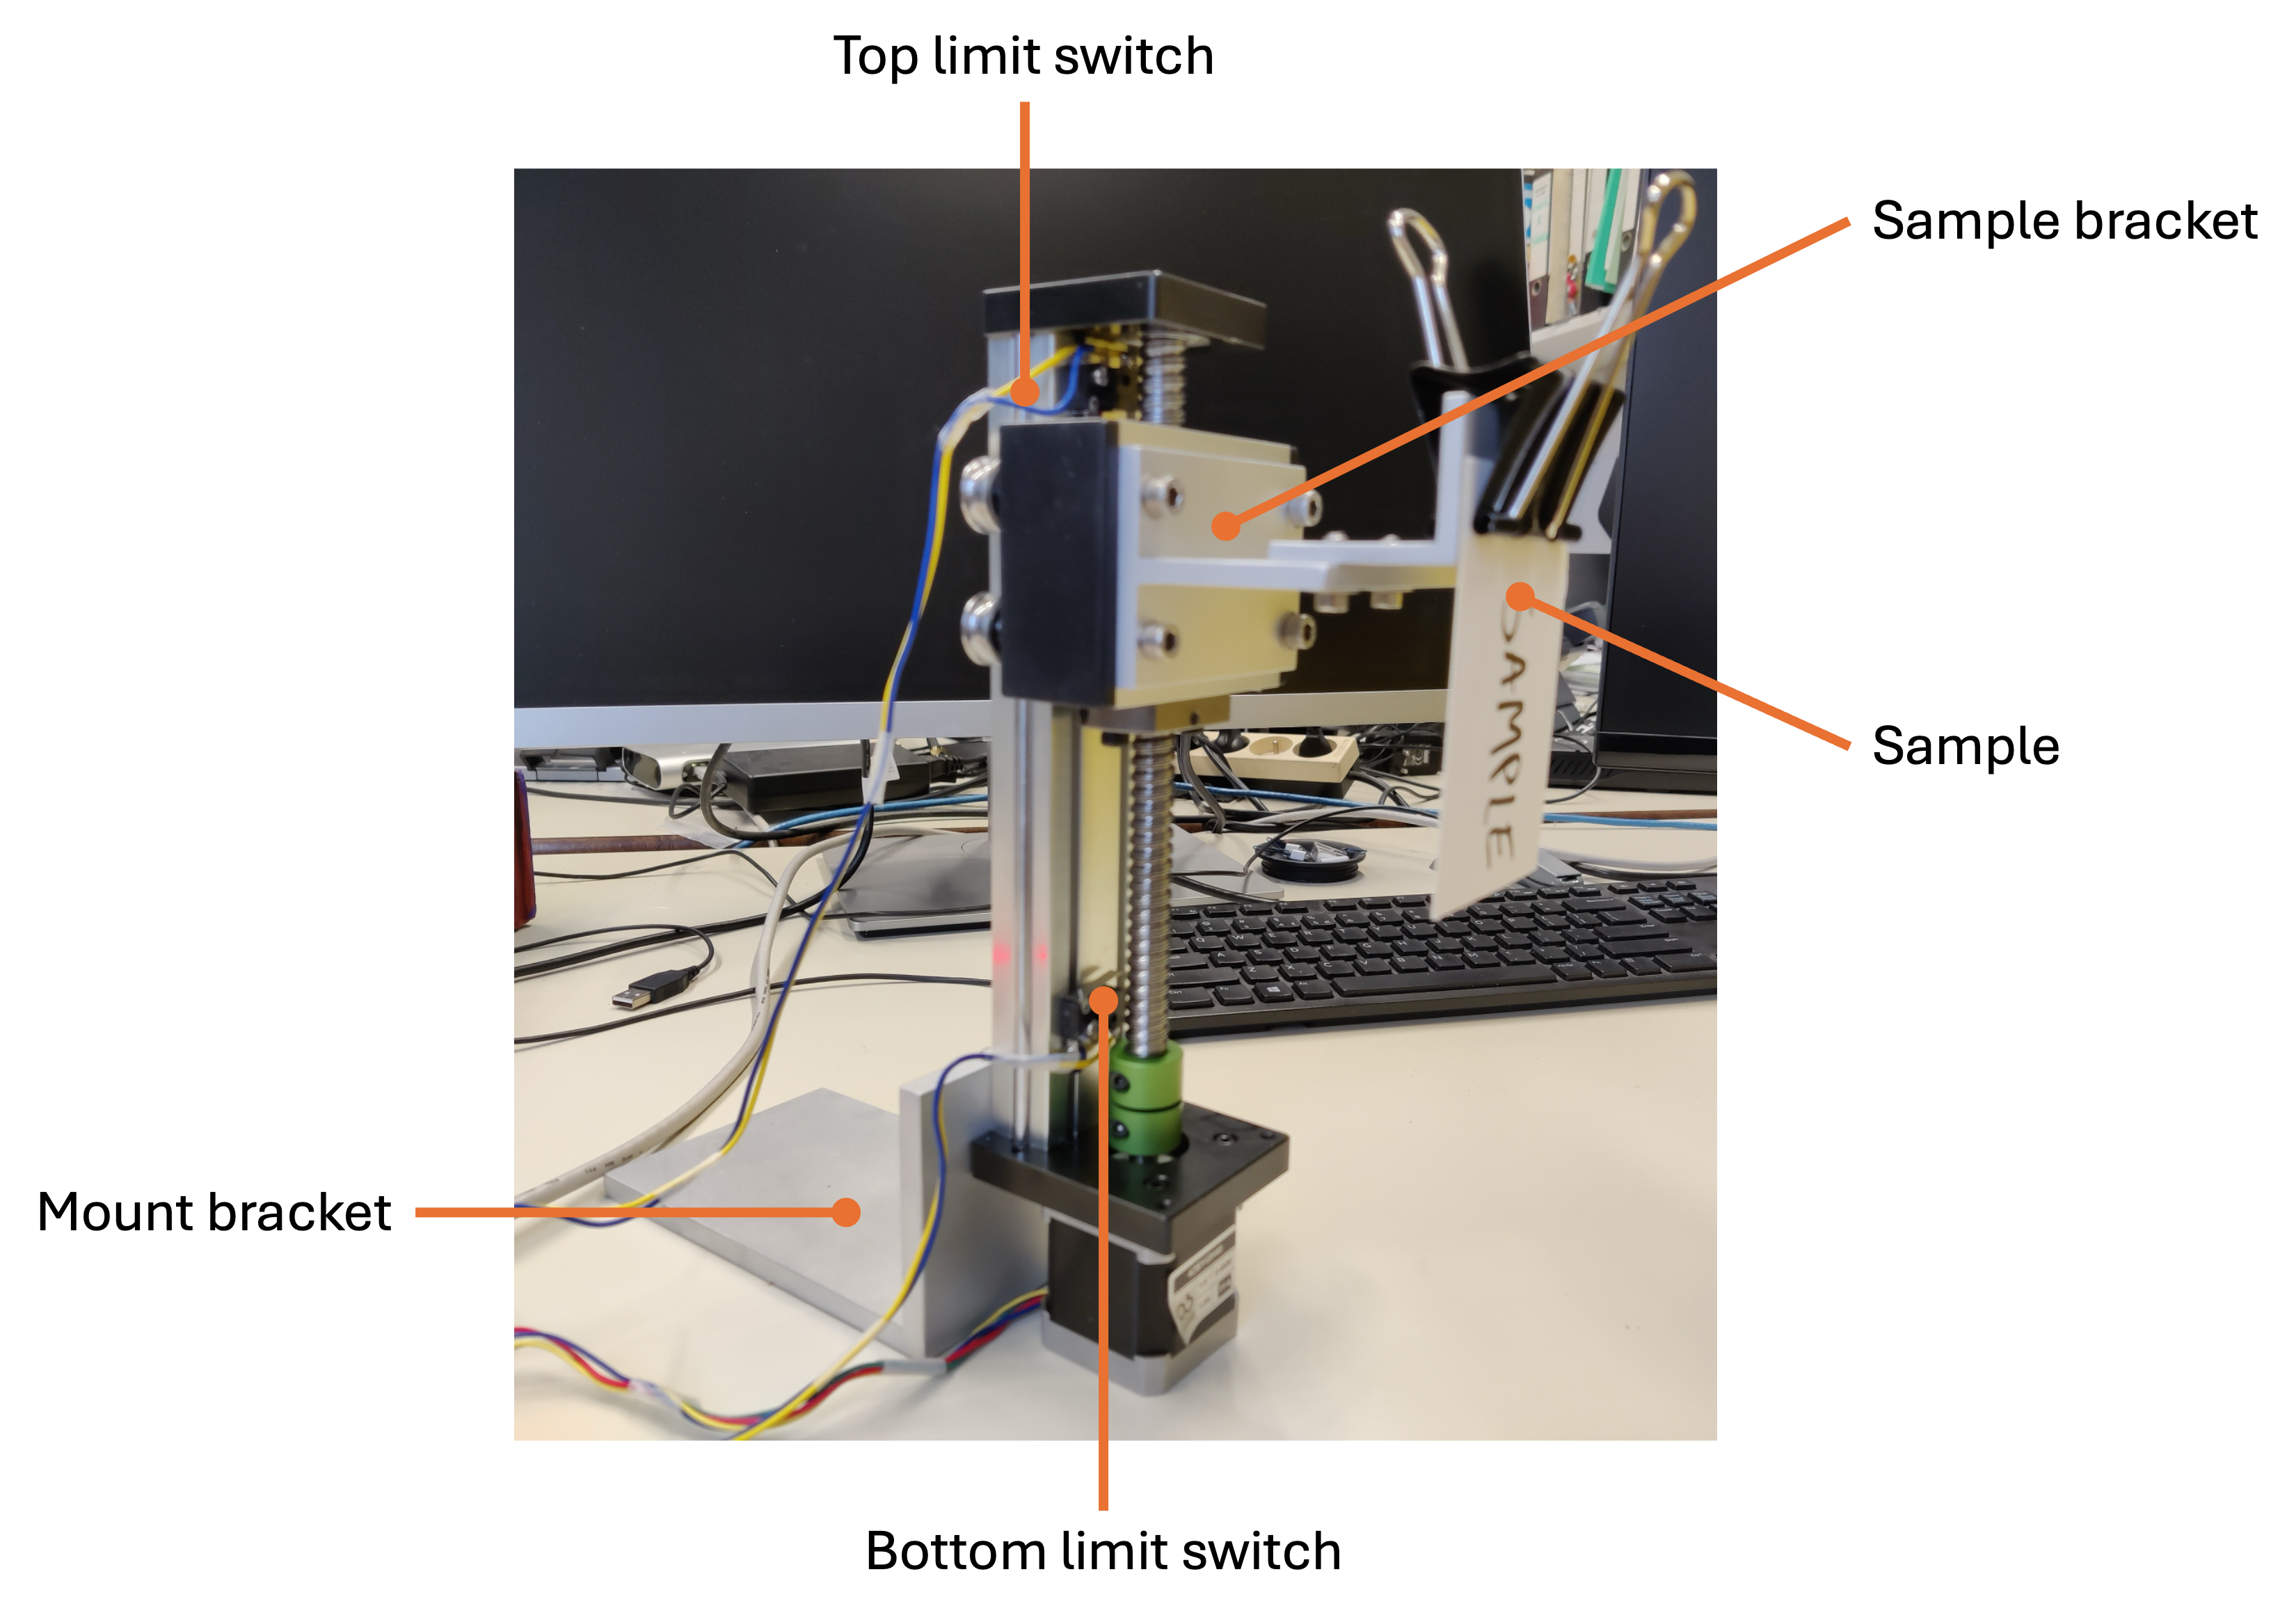
The frame of the dip coater is a 1204 Ball Screw Linear Guide 100mm Long Stage Actuator Slide (link). This linear guide is driven by a NEMA 17 stepper motor (42BYGH48). A mount bracket is added to the back of the linear guide to fixate the linear guide. A sample bracket is added to the guide block to hold the dip sample using a clamp.
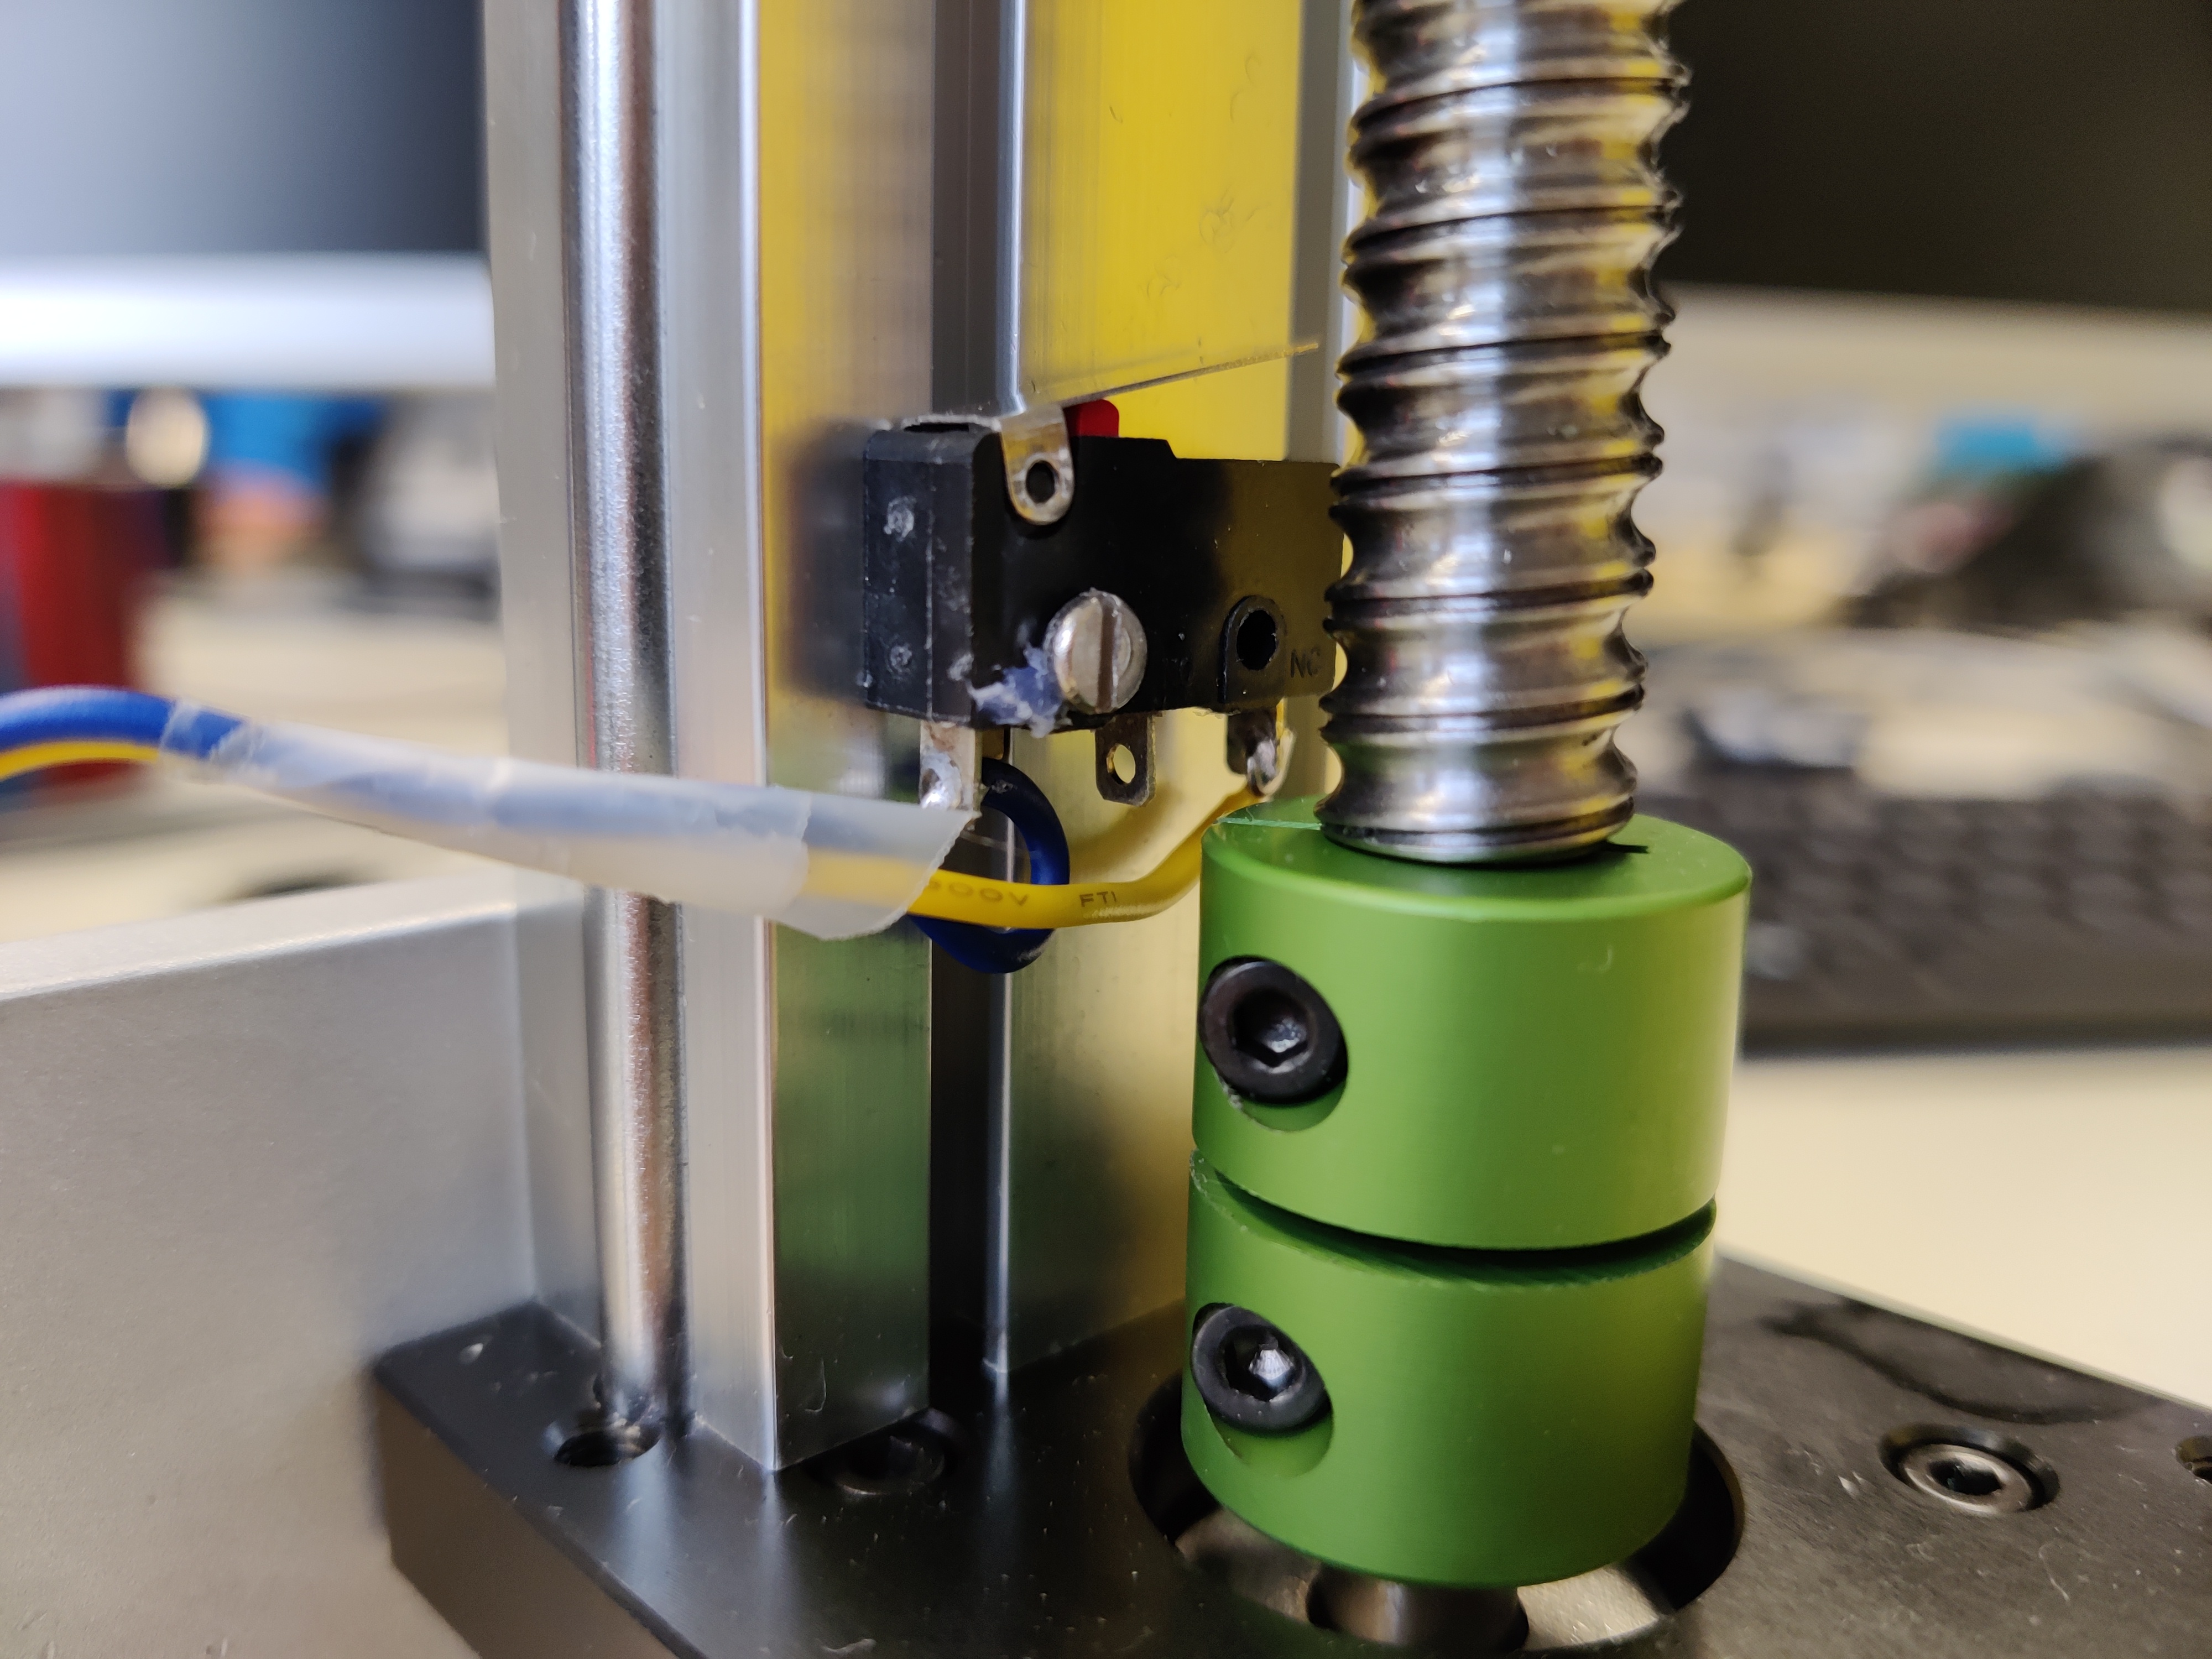
For safety reasons and to have an absolute point of reference, two limit switches are installed, one at the top and one at the bottom of the linear guide. When either of the limit switches is triggered, the motor stops. Additionally, you can also perform a homing routine to set the zero position of the motor. Here is an image of the bottom limit switch:
The blue wire is connected to the COM pin of the limit switch, the yellow wire to the NC pin.
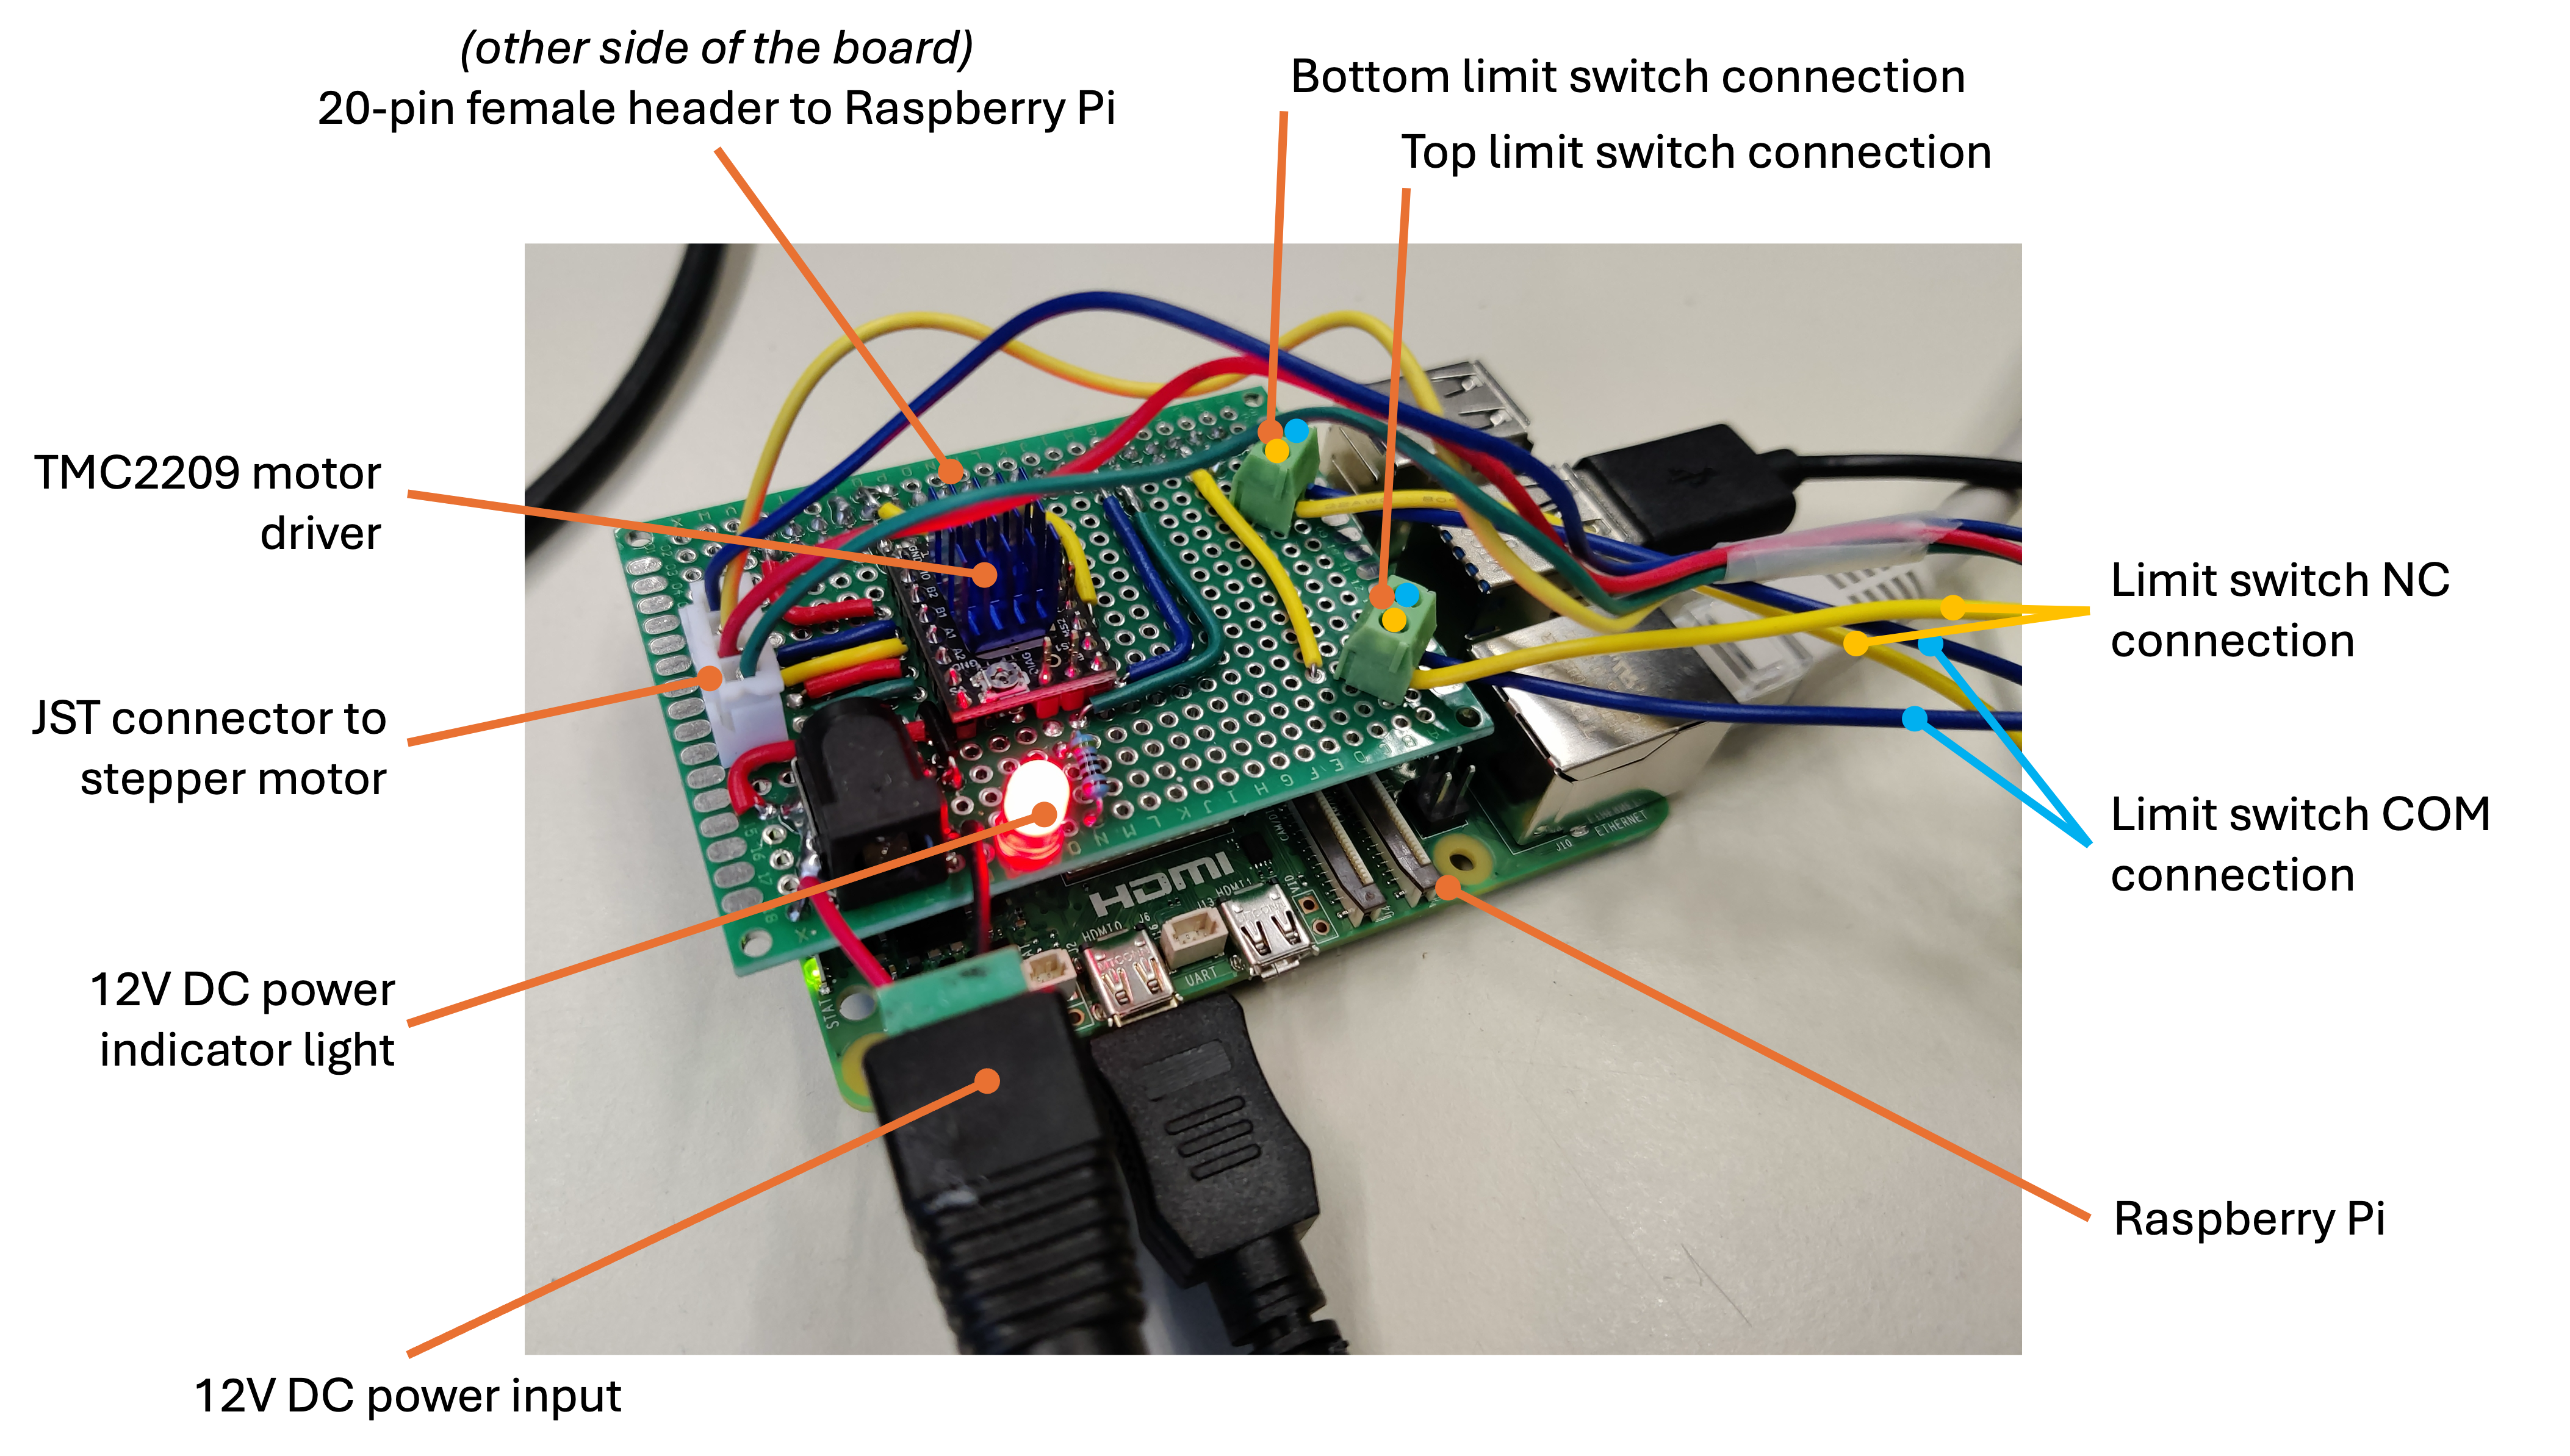
The motor is driven by a BIGTREETECH TMC2209 1.3 stepper motor driver. This driver offers smooth motion control with low noise, low vibrations and advanced capabilities such as StallGuard for sensorless homing. To easily interface the TMC2209 with the Raspberry Pi, the motor, limit switches, and the power, a custom perf board is used. This board contains the following components:
- TMC2209 stepper motor driver
- 4-pin female JST connector for the stepper motor
- barrel connector for the 12-24 V DC power input for the motor
- 2 2-pin screw terminals for the limit switches
- 2x20 female pin header to connect to the Raspberry Pi's GPIO pins
- red LED to indicate power
A Raspberry Pi 5 controls the motor driver and provides the user interface. The Raspberry Pi is connected to the TMC2209 using the GPIO pins with the following connections:
| Pin TMC2209 | connect to | Function |
|---|---|---|
| TX with 1kOhm | UART TX (GPIOXX) of Raspberry Pi | send data to TMC via UART |
| RX | UART RX (GPIOXX) of Raspberry Pi | receive data from TMC via UART |
| VDD | 3,3V of Raspberry Pi | optional, for more stable logic voltage |
| GND | GND of Raspberry Pi | GND for VDD and Signals |
| VM | 12V (or 24V) of power supply | power for the motor |
| GND | GND of power supply | power for the motor |
| EN | GPIO11 of Raspberry Pi | enable the motor output |
| STEP | GPIO9 of Raspberry Pi | moves the motor one step per pulse |
| DIR | GPIO10 of Raspberry Pi | set the direction of the motor |
| DIAG | GPIO5 of Raspberry Pi | for StallGuard |
When installing this package on a Raspberry Pi, it may not be set up correctly for the TMC2209 driver library. (see this page for more information: TMC_2209_Raspberry_Pi). To fix this, you can run the following commands in the terminal:
sudo raspi-configThere go to '3 Interface Options' -> 'P3 Serial Port' Would you like a login shell to be accessible over serial? No Would you like the serial port hardware to be enabled? Yes Finish and then reboot
You may need to add your user (pi) to the dialout group with sudo usermod -a -G dialout pi and then relog.
If that does not work, make sure that your user has read/write permissions on the dev file /dev/serial0 by calling sudo chmod 660 /dev/serial0.
I don't know the IP address of my RPi and the screen doesn't work.
If the RPi is on the same network as you, you can scan the IPs on your network.
- Install nmap (
sudo apt install nmapon Linux,brew install nmapon macOS) - Find your network range; Linux:
ip addr show | grep inet, macOS:ifconfig | grep "inet " | grep -v 127.0.0.1Look for your network interface and not the IP/subnet. - Scan your network: e.g.
sudo nmap -sn 192.168.1.0/24 - Look for an entry with "Raspberry Pi".

