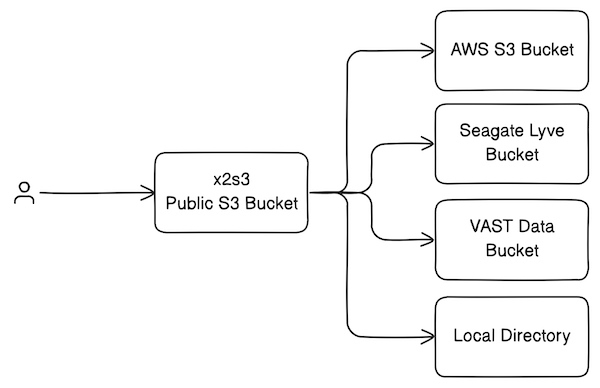
RESTful web service which makes any storage system X available as an S3-compatible REST API, hence the name "X to S3". It was initially built to support cloud-compatible microscopy image viewers such as N5 Viewer (BigDataViewer) and Neuroglancer.
At Janelia, we use x2s3 to make private buckets on Seagate Lyve appear public, and to proxy internal resources (e.g. VAST S3). It can also be used as a pop-up file service for quickly viewing local images in BigDataViewer or Neuroglancer.
- Extensible support for backend storage systems
- Optional web-based bucket explorer
- Hidden buckets
- Partial buckets (chroot-like prefixes)
- Non-blocking object streaming
Inspired by S3 proxies such as oxyno-zeta/s3-proxy and pottava/aws-s3-proxy, this service goes a step further to implement enough of the AWS S3 API to be useable by AWS clients, such as BigDataViewer. The S3 proxy implements which do this well (e.g. gaul/s3proxy) only proxy a single bucket at a time.
S3 endpoints implemented:
S3 features omitted:
- Permissions
- Encryption
- Versioning
- RequestPayer
- etc.
Create a config.yaml file that contains all of the buckets you want to serve. You can get started quickly by using the provided example template:
cp config.template.yaml config.yamlSee the documentation for more information about the configuration file.
The simplest way to run the service is to use Docker:
docker run -it -p 8000:8000 -v ./config.yaml:/app/x2s3/config.yaml ghcr.io/janeliascicomp/x2s3:latestYou can also run the service with Python/Uvicorn directly. See the development documentation for more information on setting that up.
For production deployments, we recommend using an orchestrator (like Docker Compose) to run the prebuilt Docker container along with an Nginx reverse proxy which provides caching and TLS termination.
Create a ./docker/.env file that looks like this:
CONFIG_FILE=/path/to/config.yaml
VAR_DIR=/path/to/var/dir
CERT_DIR=/path/to/certs
NGINX_CACHE_DIR=/path/to/cache
These properties configure the service as follows:
CONFIG_FILE: path to theconfig.yamlsettings fileVAR_DIR: optional path to the var directory containing access keys referenced byconfig.yamlCERT_FILE: optional path to the SSL cert fileKEY_FILE: optional path to the SSL key fileNGINX_CACHE_DIR: path for Nginx response caching (you can disable caching by editingnginx.conf)
Now you can bring up the container:
cd docker/
docker compose up -d- Configuation - how to use
config.yamlto configure the service - Development - notes on developing the service codebase
- Proxy icons created by Uniconlabs - Flaticon
- AWS S3 API Reference
