![]()
Awesome fastapi_ctf created by OzymandiasThe2
This is a project I created to learn some FastAPI stuff and to do automate simple commands expected for Capture the Flag competitons as well as some Forensic Security stuff that I thought were neat to automate.
STILL A BIG WIP in progress.
- Base64 Decryption
- File Analysis: Returns MD5 hash, file type, and file size
- Stegsnow: Runs "stegsnow", but currently broken
- Strings: Runs "strings" on uploaded image
- Exiftool: Runs "Exiftool" on uploaded image
- Zsteg: Runs "Zsteg" on uploaded image. Note that it only supports PNG and BMP images, so error responses need to be added for incompatible file types.
- Nmap: Runs a basic Nmap query on a targeted IP. Currently working on automating multiple arguments.
- Unshadow: Creates an unshadow file for you if you have a passwd file and shadow file. Then outputed file can be cracked with tools like John the Ripper.
NOTE: The following should work but will hang since uploading large files seems to cause issues
- Fsstat: Runs "fsstat" on an image
- Sha256: Gives the sha256 for an image.
- Packet Capturing
- fls
- icat
- pngcheck
- xor
- unhex
- Frequency Analysis
from source
git clone https://github.com/OzymandiasThe2/fastapi-ctf fastapi_ctf
cd fastapi_ctf
make install
may or may not need to run this command depending on the setup
source .venv/bin/activatefrom pypi
pip install fastapi_ctf$ fastapi_ctf run --port 8080or
python -m fastapi_ctf run --port 8080or
$ uvicorn fastapi_ctf:app❯ fastapi_ctf --help
Usage: fastapi_ctf [OPTIONS] COMMAND [ARGS]...
Options:
--install-completion [bash|zsh|fish|powershell|pwsh]
Install completion for the specified shell.
--show-completion [bash|zsh|fish|powershell|pwsh]
Show completion for the specified shell, to
copy it or customize the installation.
--help Show this message and exit.
Commands:
create-user Create user
run Run the API server.
shell Opens an interactive shell with objects auto imported❯ fastapi_ctf create-user --help
Usage: fastapi_ctf create-user [OPTIONS] USERNAME PASSWORD
Create user
Arguments:
USERNAME [required]
PASSWORD [required]
Options:
--superuser / --no-superuser [default: no-superuser]
--help IMPORTANT To create an admin user on the first run:
fastapi_ctf create-user admin admin --superuserYou can enter an interactive shell with all the objects imported.
❯ fastapi_ctf shell
Auto imports: ['app', 'settings', 'User', 'engine', 'cli', 'create_user', 'select', 'session', 'Content']

In [1]: session.query(Content).all()
Out[1]: [Content(text='string', title='string', created_time='2021-09-14T19:25:00.050441', user_id=1, slug='string', id=1, published=False, tags='string')]

In [2]: user = session.get(User, 1)

In [3]: user.contents
Out[3]: [Content(text='string', title='string', created_time='2021-09-14T19:25:00.050441', user_id=1, slug='string', id=1, published=False, tags='string')]Run with fastapi_ctf run and access http://127.0.0.1:8000/docs
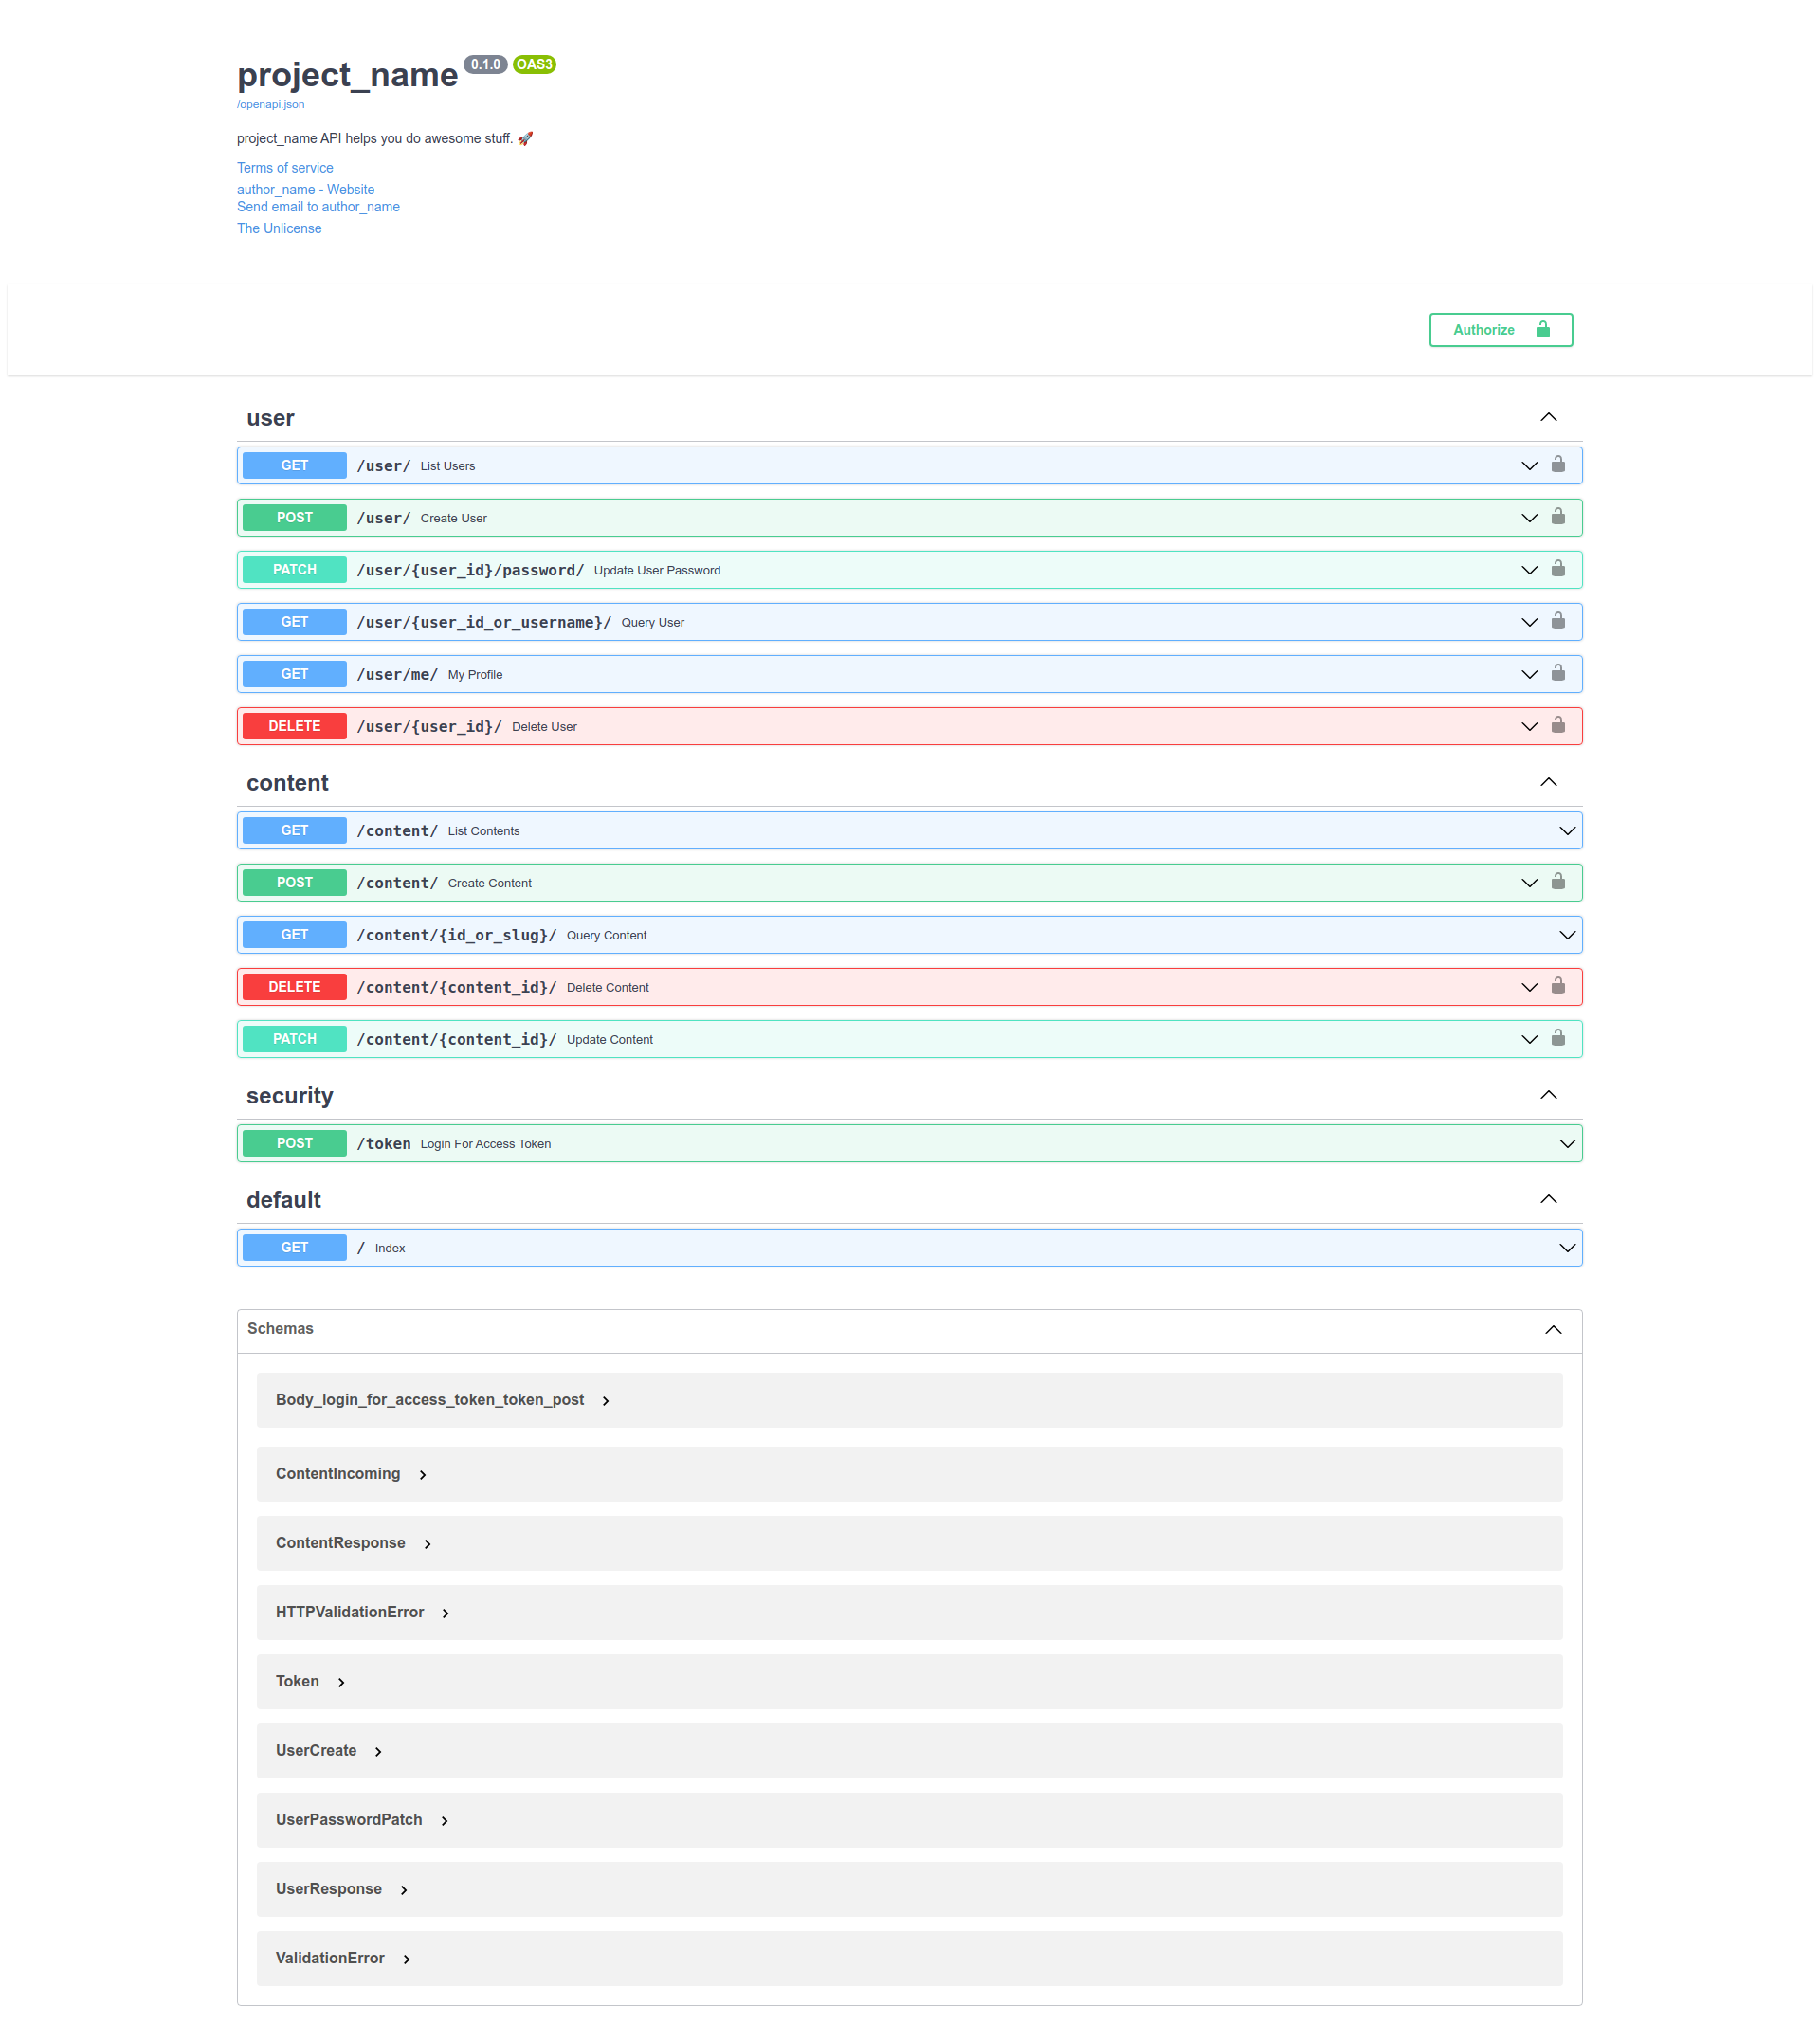
For some api calls you must authenticate using the user created with fastapi_ctf create-user.
❯ make test
Black All done! ✨ 🍰 ✨
13 files would be left unchanged.
Isort All done! ✨ 🍰 ✨
6 files would be left unchanged.
Success: no issues found in 13 source files
================================ test session starts ===========================
platform linux -- Python 3.9.6, pytest-6.2.5, py-1.10.0, pluggy-1.0.0 --
/fastapi-project-template/.venv/bin/python3
cachedir: .pytest_cache
rootdir: /fastapi-project-template
plugins: cov-2.12.1
collected 10 items

tests/test_app.py::test_using_testing_db PASSED                           [ 10%]
tests/test_app.py::test_index PASSED                                      [ 20%]
tests/test_cli.py::test_help PASSED                                       [ 30%]
tests/test_cli.py::test_cmds_help[run-args0---port] PASSED                [ 40%]
tests/test_cli.py::test_cmds_help[create-user-args1-create-user] PASSED   [ 50%]
tests/test_cli.py::test_cmds[create-user-args0-created admin2 user] PASSED[ 60%]
tests/test_content_api.py::test_content_create PASSED                     [ 70%]
tests/test_content_api.py::test_content_list PASSED                       [ 80%]
tests/test_user_api.py::test_user_list PASSED                             [ 90%]
tests/test_user_api.py::test_user_create PASSED                           [100%]

----------- coverage: platform linux, python 3.9.6-final-0 -----------
Name                              Stmts   Miss  Cover
-----------------------------------------------------
fastapi_ctf/__init__.py              4      0   100%
fastapi_ctf/app.py                  16      1    94%
fastapi_ctf/cli.py                  21      0   100%
fastapi_ctf/config.py                5      0   100%
fastapi_ctf/db.py                   10      0   100%
fastapi_ctf/models/__init__.py       0      0   100%
fastapi_ctf/models/content.py       47      1    98%
fastapi_ctf/routes/__init__.py      11      0   100%
fastapi_ctf/routes/content.py       52     25    52%
fastapi_ctf/routes/security.py      15      1    93%
fastapi_ctf/routes/user.py          52     26    50%
fastapi_ctf/security.py            103     12    88%
-----------------------------------------------------
TOTAL                               336     66    80%


========================== 10 passed in 2.34s ==================================
make lint  # checks for linting errors
make fmt # formats the codeThis project uses Dynaconf to manage configuration.
from fastapi_ctf.config import settingssettings.get("SECRET_KEY", default="sdnfjbnfsdf")
settings["SECRET_KEY"]
settings.SECRET_KEY
settings.db.uri
settings["db"]["uri"]
settings["db.uri"]
settings.DB__urisettings.toml
[development]
dynaconf_merge = true

[development.db]
echo = true
dynaconf_mergeis a boolean that tells if the settings should be merged with the default settings defined in fastapi_ctf/default.toml.
export fastapi_ctf_KEY=value
export fastapi_ctf_KEY="@int 42"
export fastapi_ctf_KEY="@jinja {{ this.db.uri }}"
export fastapi_ctf_DB__uri="@jinja {{ this.db.uri | replace('db', 'data') }}"There is a file .secrets.toml where your sensitive variables are stored,
that file must be ignored by git. (add that to .gitignore)
Or store your secrets in environment variables or a vault service, Dynaconf can read those variables.
fastapi_ctf_ENV=production fastapi_ctf runRead more on https://dynaconf.com
Read the CONTRIBUTING.md file.