Admin Panel Manual
⚠️ Warning : This panel does not handle any security by itself. If you use it, it's up to you to prevent the public from accessing it !
The Admin panel is a class that need to be instantiated and then run. It's not a callable file so you'll need to call it via a regular php file :
<?php

use VFou\Search\AdminPanel;

// include the composer autoload file, modify the path if needed
require "vendor/autoload.php";

// securize your file access or directly here
// if($_SERVER['REMOTE_ADDR'] != "127.0.0.1") exit('unauthorized');

// instantiate the panel and then run it
$admin = new AdminPanel();
echo $admin->run();
The AdminPanel's constructor accept as first parameter the same config array as you may use to instanciate the Engine, and you'll want to pass it if you have customized schemas. (or else the panel will not work properly).
Admin Panel's run function takes two parameters, $uri and $baseUrl. The first one override the auto handling of url and let your app decide what url you want the panel to display. The second parameter changes the base of every generated url on the panel. These parameters are meant to be used if you want to integrate it into a framework for example.
The panel contains 5 pages, accessibles from everywhere via the header's buttons:
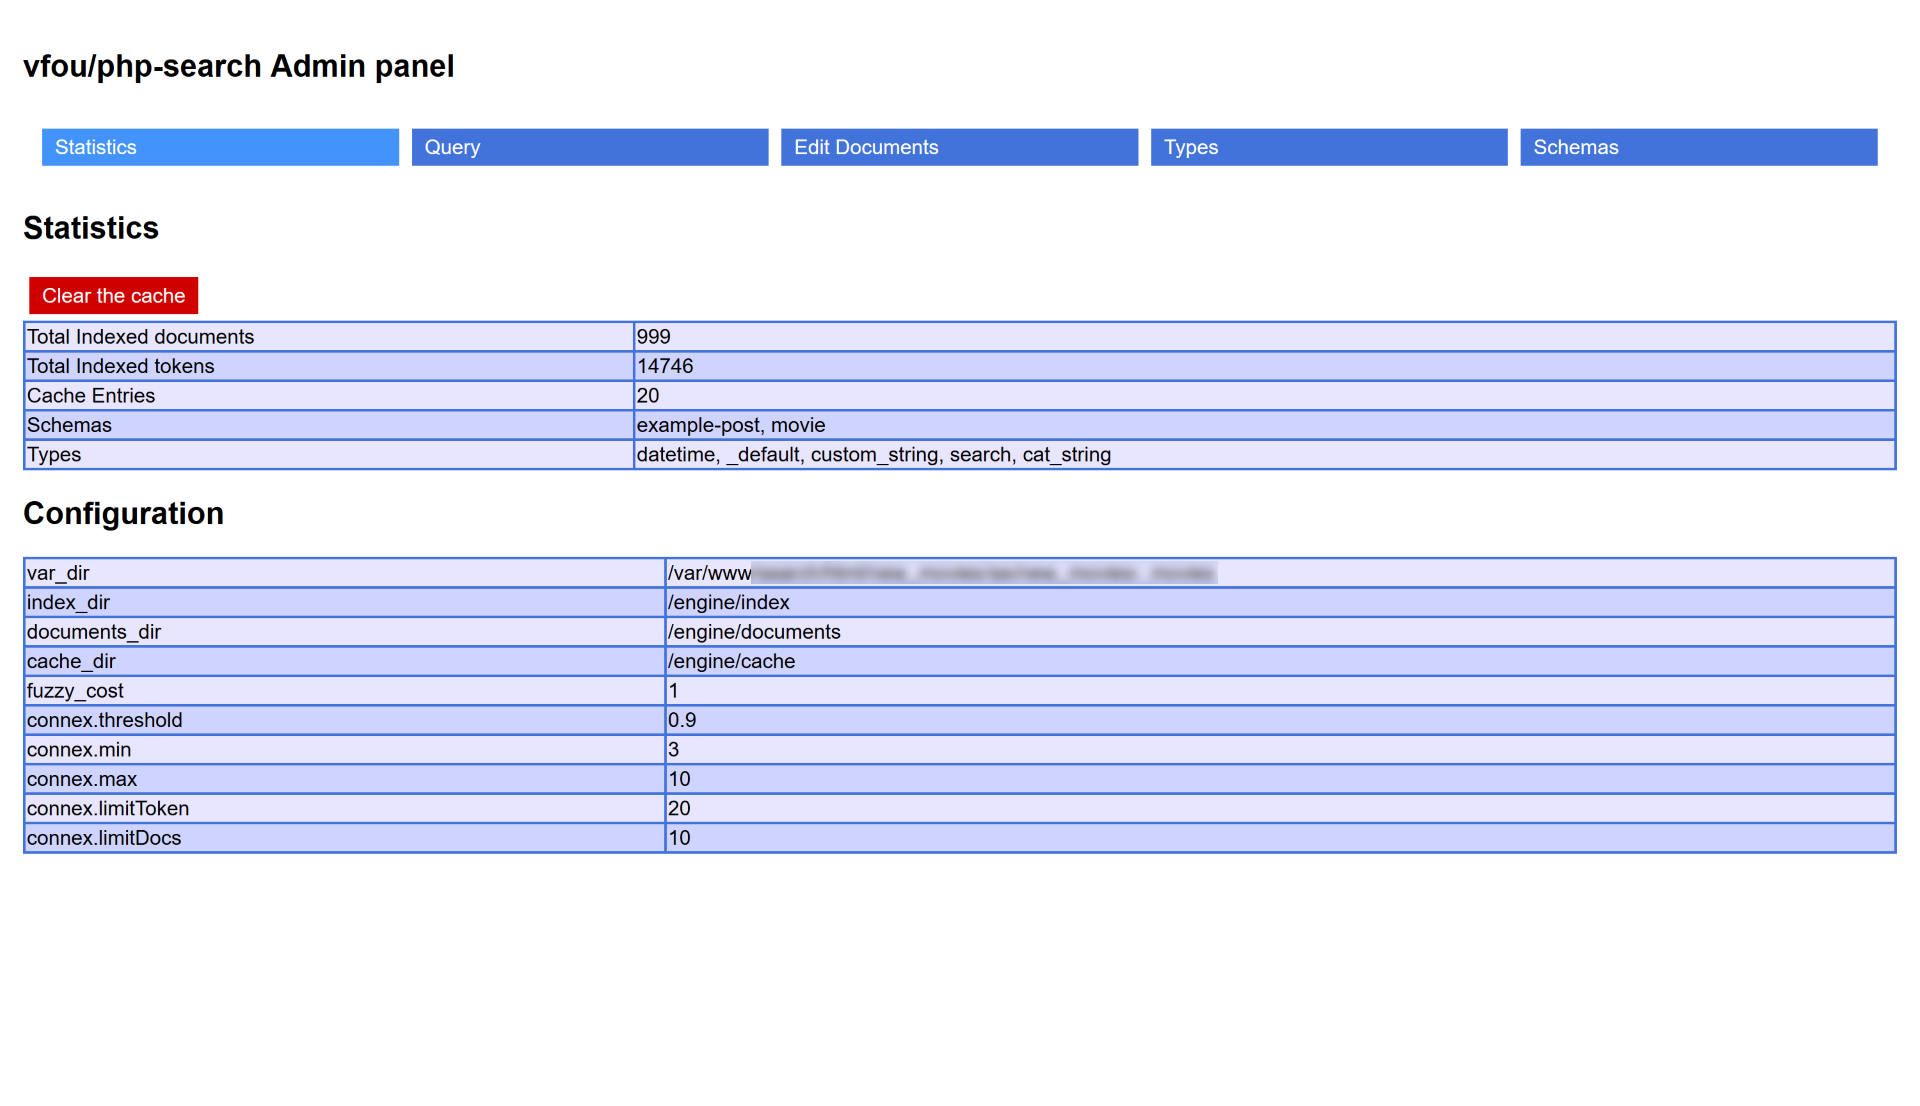
This page summarizes data that your index contains and allows you to clear the cache if needed.
There is also a configuration section that'll show the engine's configuration and give you information about each line if you hover one with your cursor.
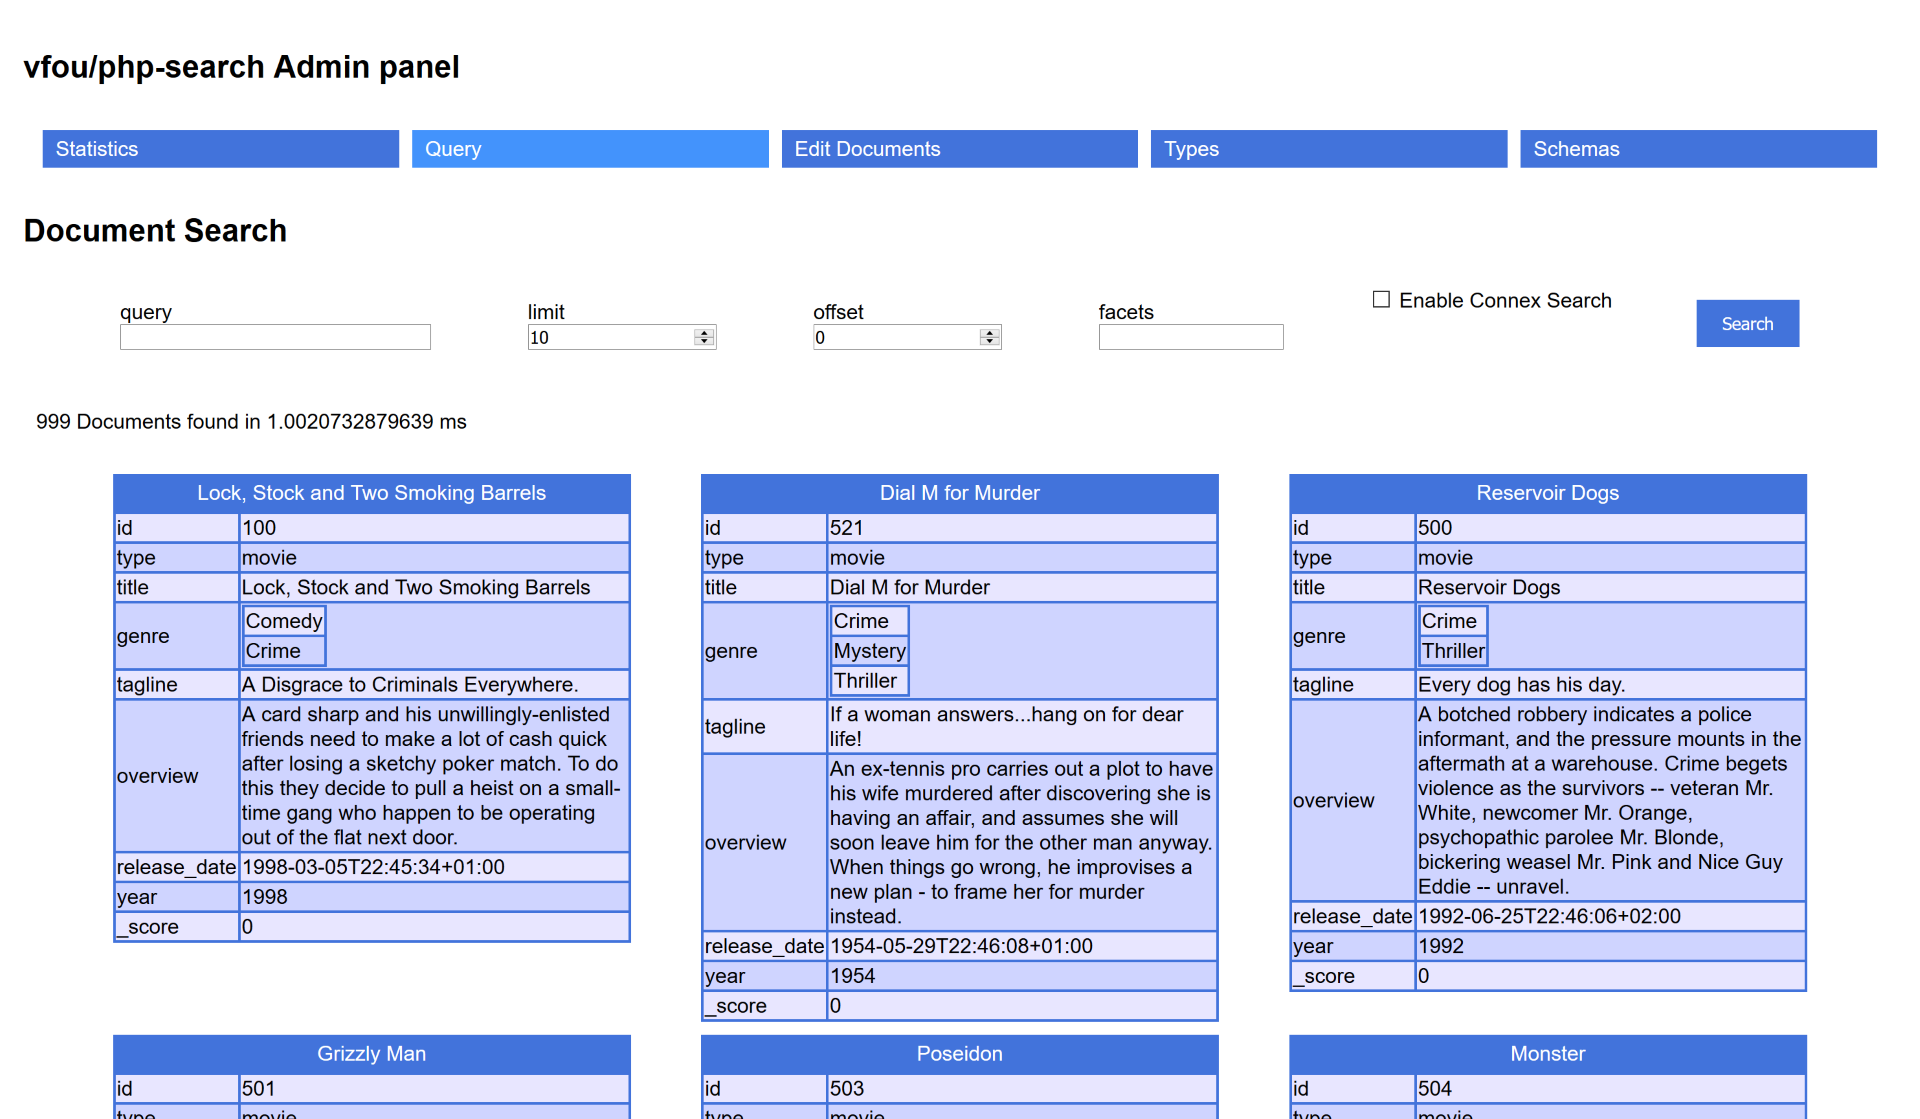
This page contains a bunch of fields that allows you to search in the current index.
- The facet field is a comma-separated list of the facets you want to load.
- The Connex Search adds a section at the end of the documents where he'll display his findings
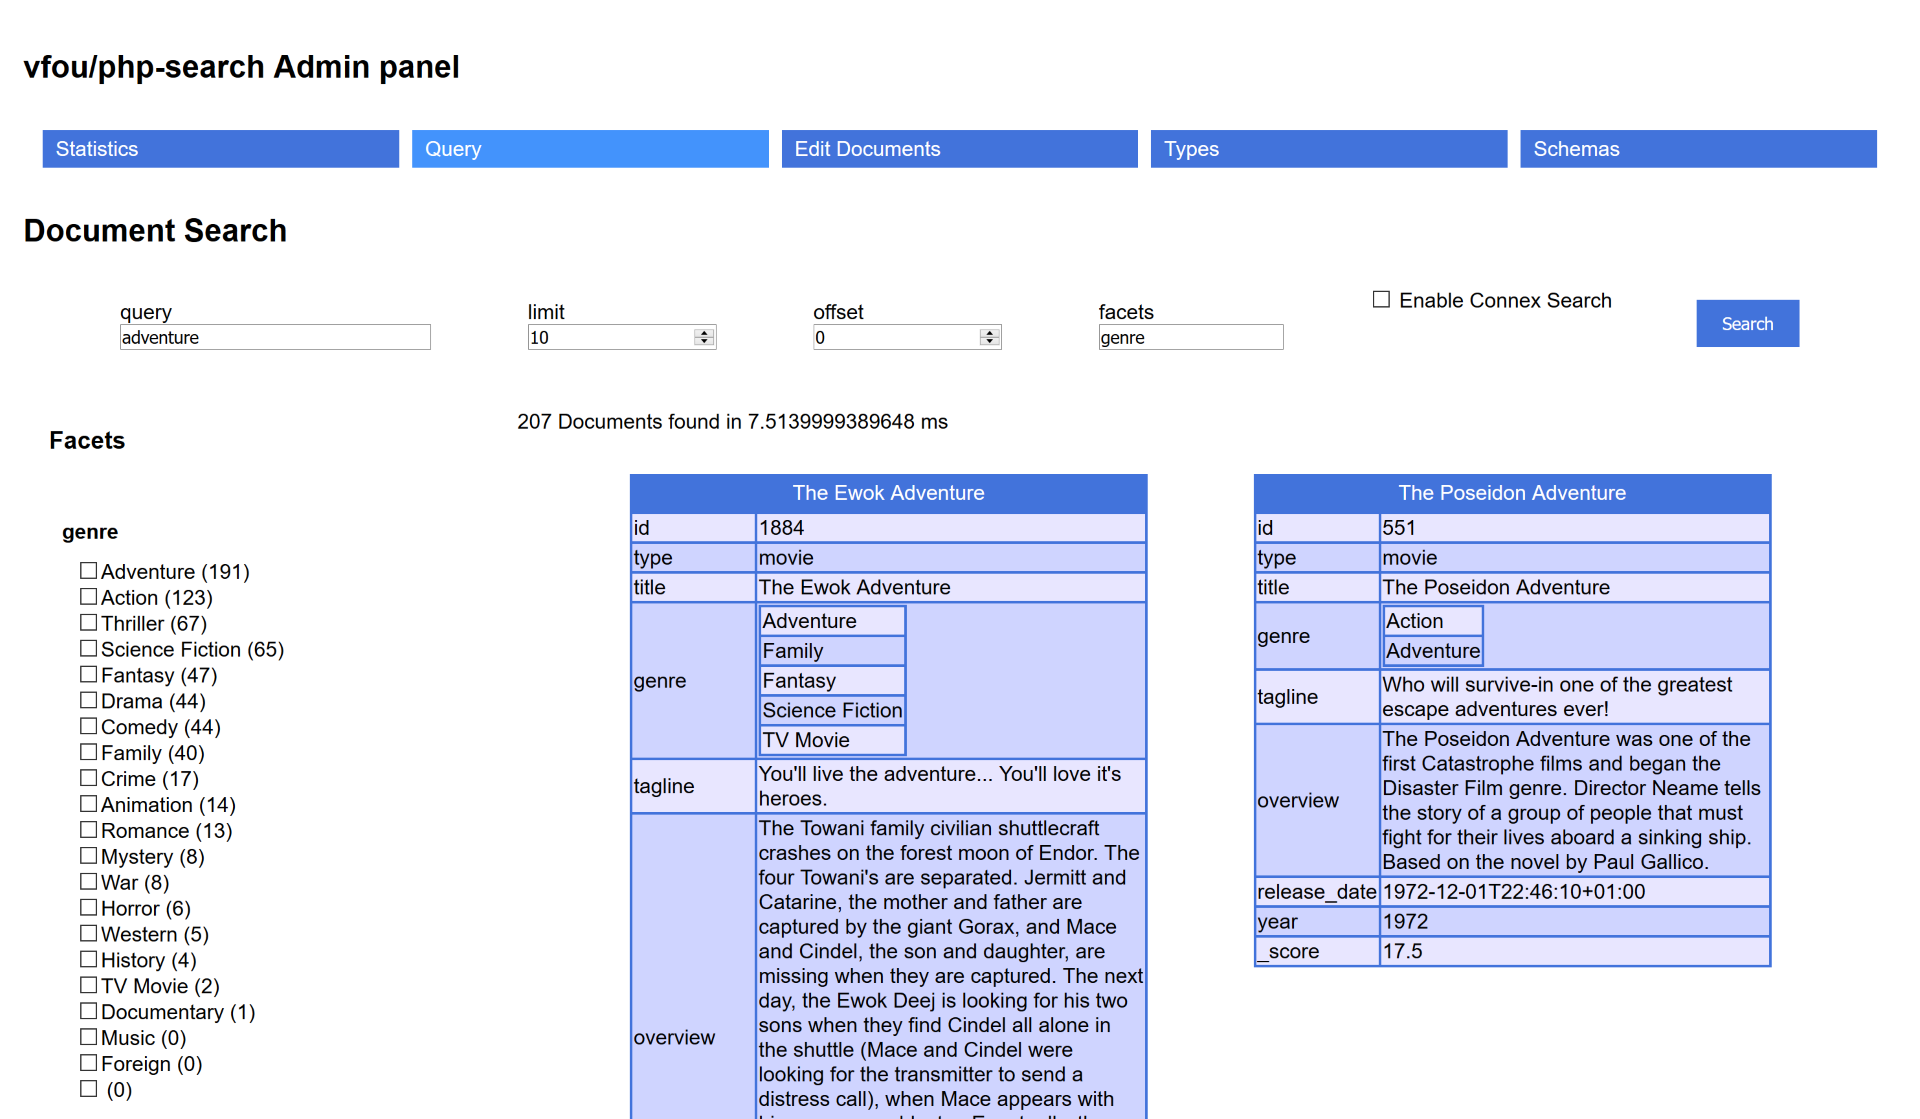
Searching with facets will display a list on the side where all facets requested will be displayed. Checking a value will automatically reload the search.
Note that you can edit every documents by clicking on their header.
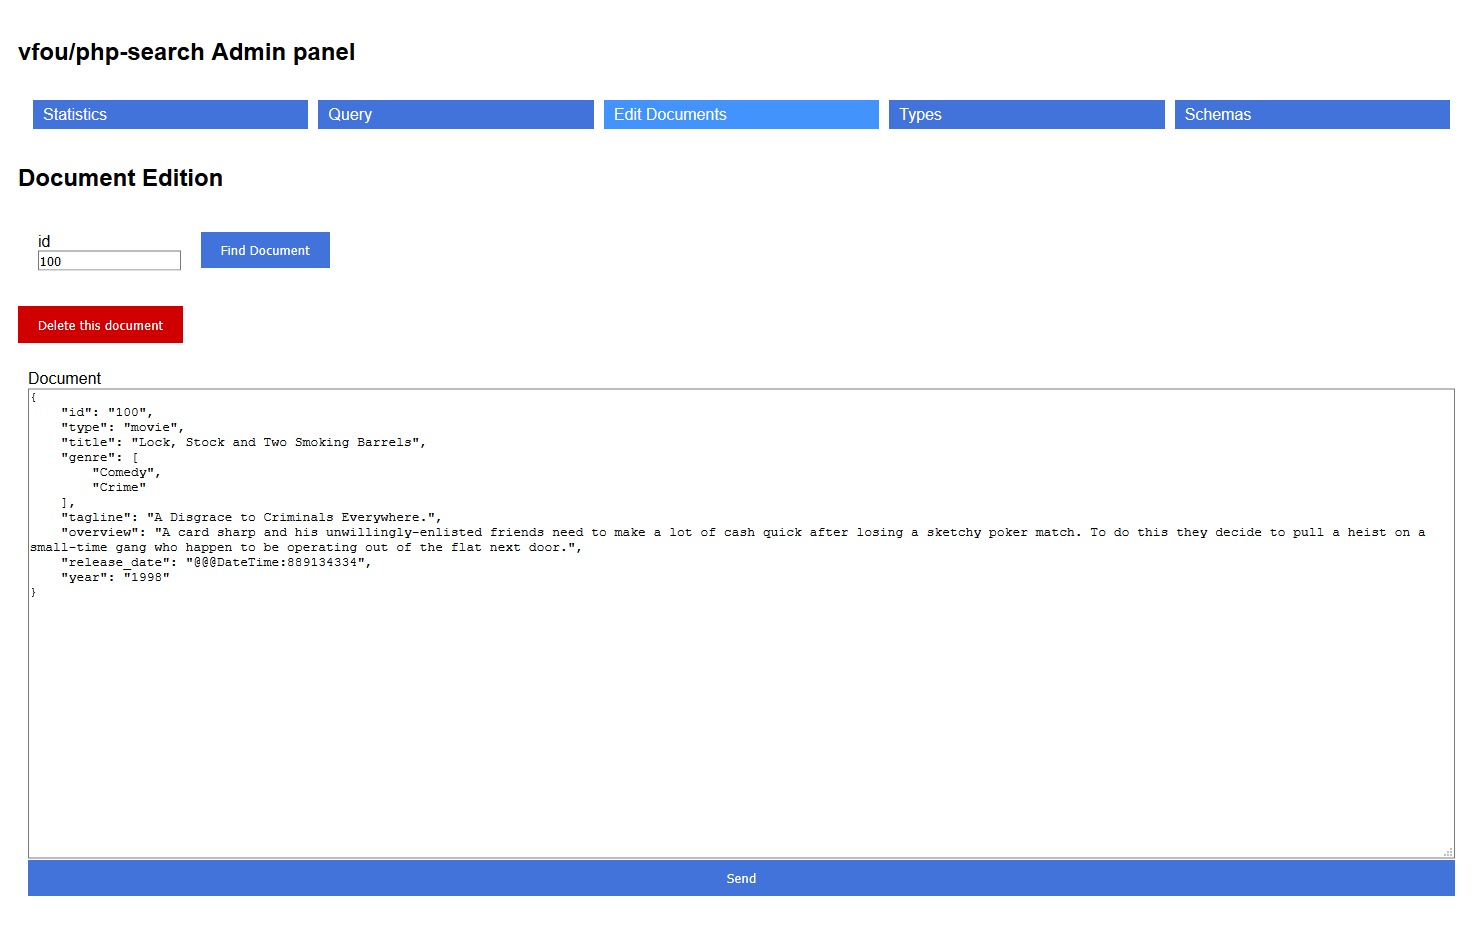
This page allows you to edit documents that you have clicked on the previous page, or by giving an id.
You can also use this page for creating new documents. You'll just need to write the values as you like in JSON format. Note that DateTime objects are serialized into a string containing a timestamp.
You also have the possibility to delete a document if needed.
Tip : if you want to create a document, but don't have the fields in mind, you can go to the Schema page and click on the header of the schema you want to create.
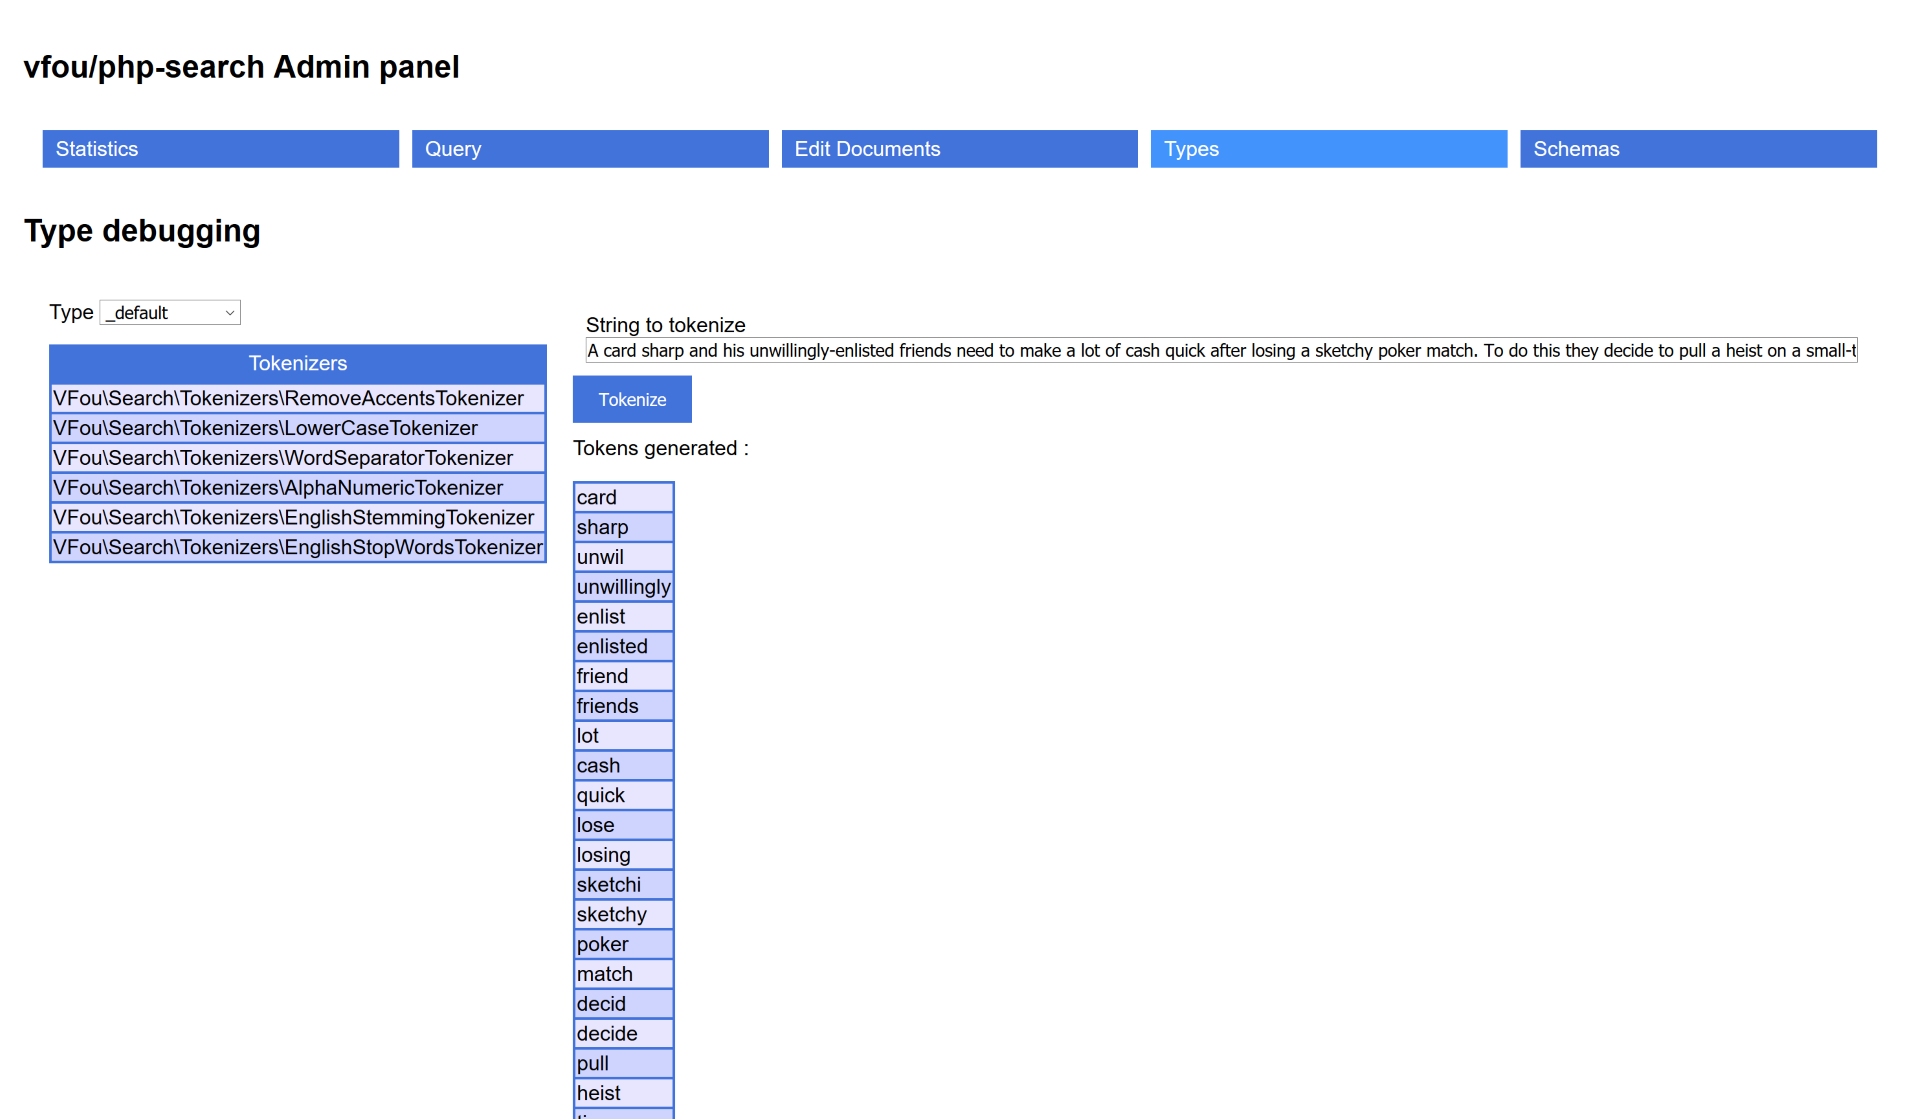
This page allows you to test if your current type definition is correctly tokenized as you wish.
On the left you have a select box that contains every configured types you have. Selecting one will display the configured tokenizers below.
On the right you have a field that you can fill with every values you want and then clicking on the Tokenize button (or pressing enter after filling the field) will display the resulted tokens.
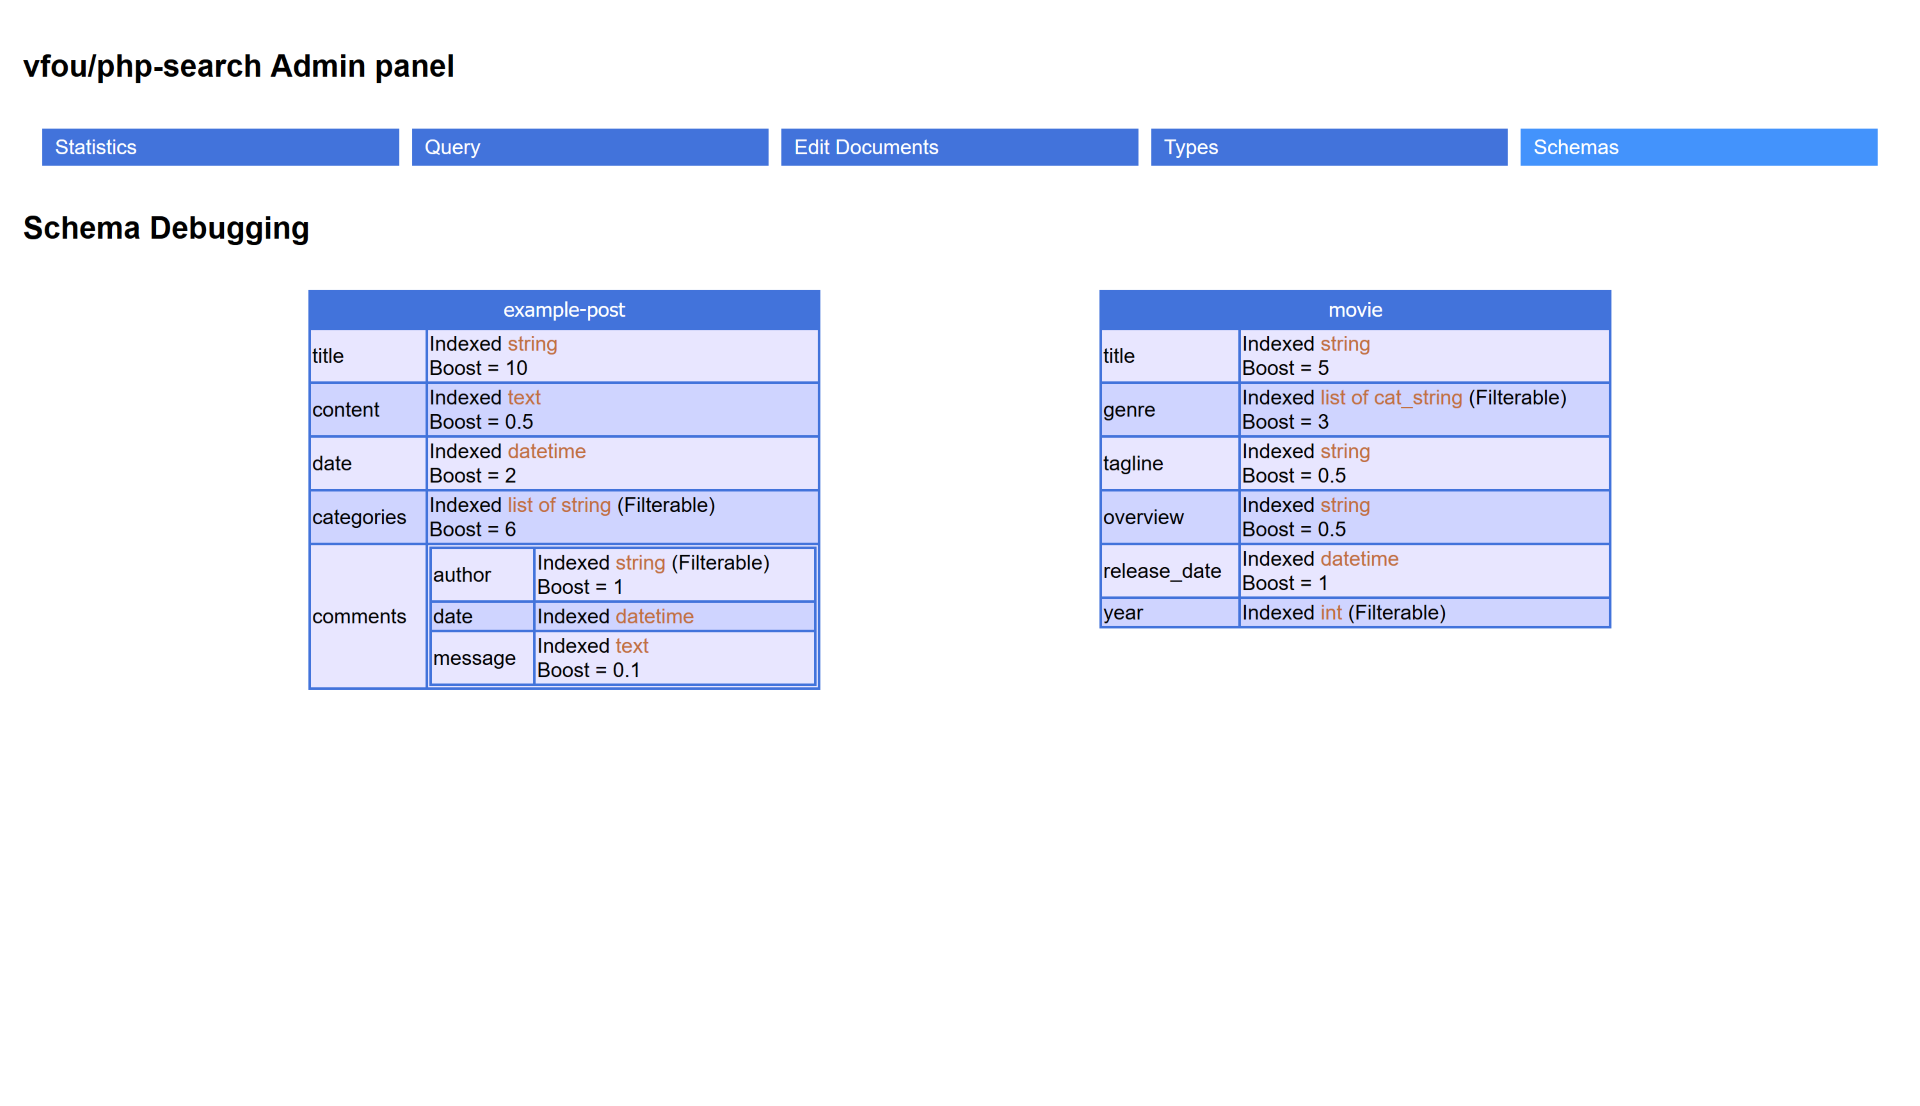
This page will display every schemas that you have in your configuration.
All Schema are interpreted so if there are incoherences found they'll be displayed here. This can be useful to review the schemas when you have a bunch of them.
As said in the "Edit Document" section, Clicking on a schema name will redirects you to the Document Edition tool with the json prefilled with dummy values that you can change as you like