-
Notifications
You must be signed in to change notification settings - Fork 3
PropertyTopomesh in TissueLab
Make sure you have everything installed (see main installation page)
Update the Tissue Mesh source repository (draco_stem) with the command
git pull
To launch OpenAlea open a terminal and type:
oalab
Then when the window pops up, select Tissue to open the software with the TissueLab extension. More simply you can also just type:
oalab -e tissue
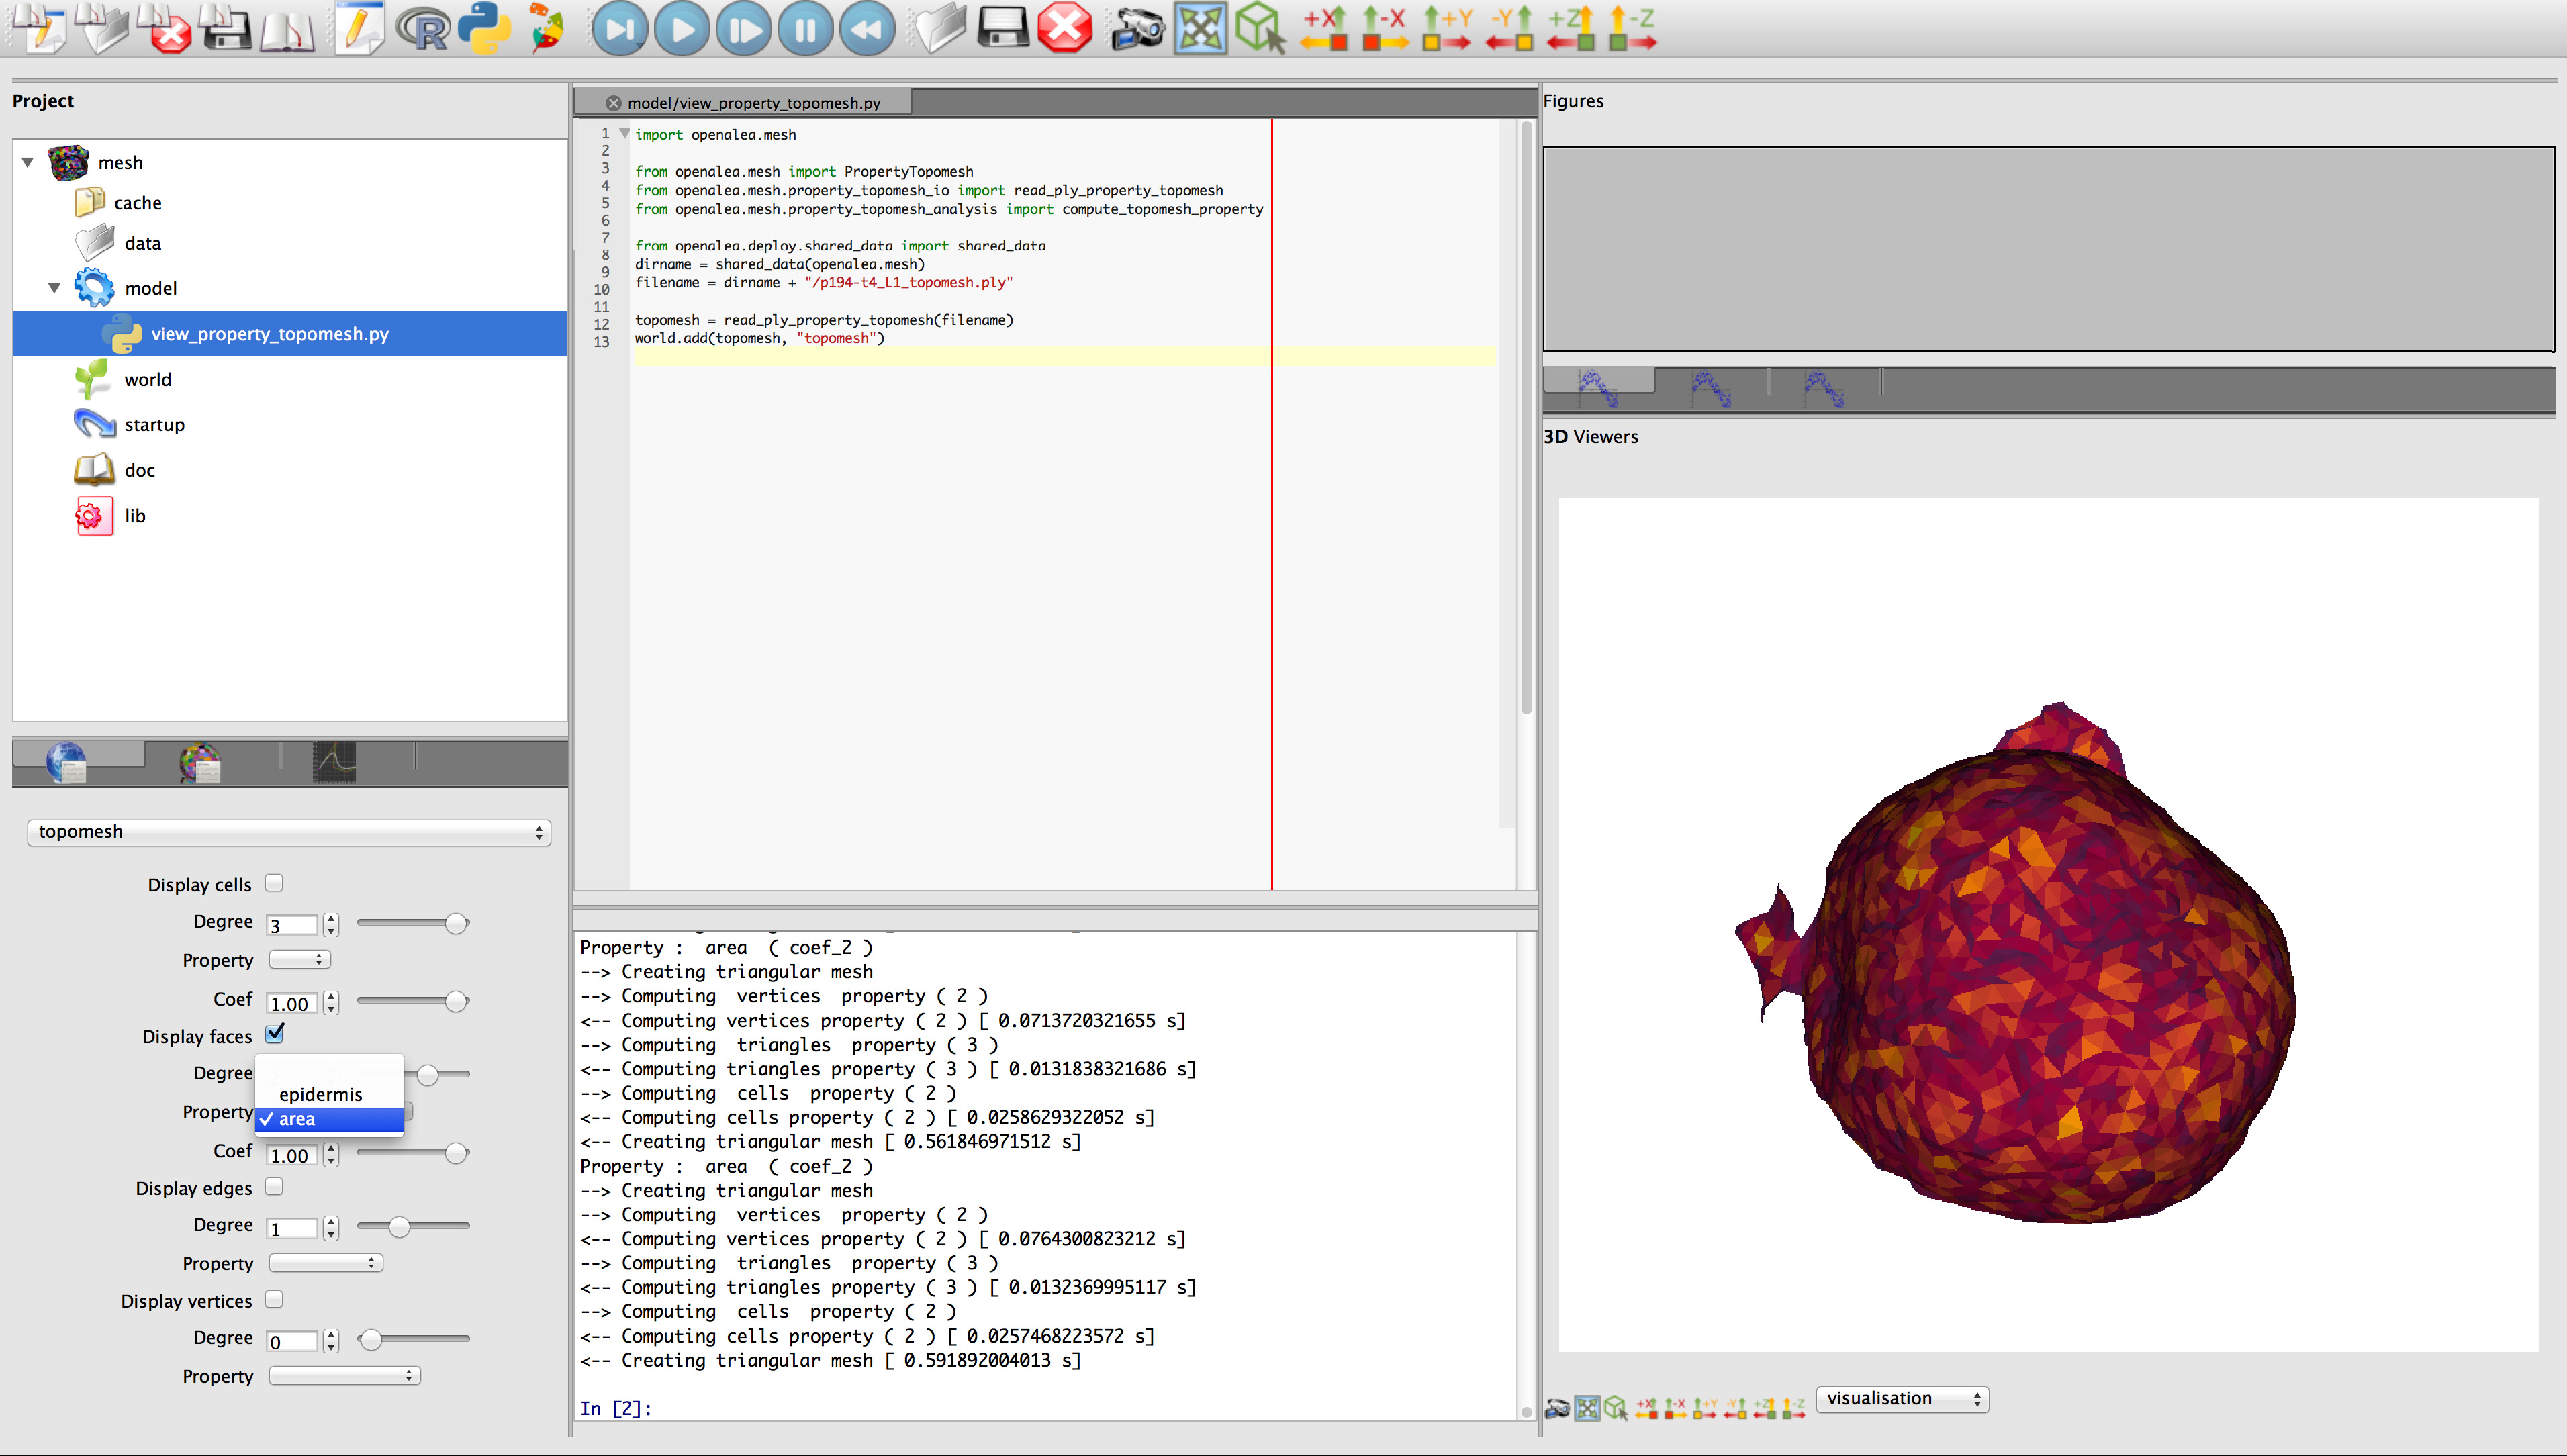
You will open the application with a default environment containing:
- An editor for Python programs or VisuAlea workflows (Center-Top)
- A IPython shell (Center-Bottom)
- A project manager (Left-Top)
- A panel controlling the displayed objects (Left-Bottom)
- A set of figures available for plotting (Right-Top)
- A 3D viewer (Right-Bottom)

OpenAleaLab (OALab) provides a highly customizable modelling/developing environment where functionalities can be added in a modular fashion, notably under the form of application-specific applets.
To add the applet handling tissue mesh objects, right-click in a panel where you will add the applet and select "Edit Layout".

Then click on "Add Tab" to make a new available space for the new applet.

In the applet list at the bottom select the "Topomesh Controls" applet to add it in the new tab.

Your environment now contains this applet that will make the visualization of tissue meshes natively possible. If you quit the application and open it again the environment will be saved so that you only have to perform this manipulation once.

To make re-usable development in OAlab, the best way is to use a project that will contain scripts, models and possibly some data. An example project is provided in the mesh package, but some steps are necessary to load it.
First, click on open project to see the list of available projects. It is likely that the mesh project does not appear here, so indicate the path the "oalab" directory in the mesh package through the option "Add more items".

The mesh project should now appear in the list, simply select it and open it.

If you quit the application, on the next opening the current project will be reopened, just as you left it!
In the mesh project, there is an example that loads and displays a mesh as a PropertyTopomesh. Just open view_property_topomesh.py by double clicking on it.

The script simply imports the main functions used to manipulate PropertyTopomesh objects.
import openalea.mesh

from openalea.mesh import PropertyTopomesh
from openalea.mesh.property_topomesh_io import read_ply_property_topomesh
from openalea.mesh.property_topomesh_analysis import compute_topomesh_property
Then it loads the mesh provided in the share/data directory of the mesh package, accessing it without need of absolute path.
from openalea.deploy.shared_data import shared_data
dirname = shared_data(openalea.mesh)
filename = dirname + "/p194-t4_L1_topomesh.ply"

topomesh = read_ply_property_topomesh(filename)
To view the mesh, the only thing to do is the add the object to the world, that represents the set of objects known by the application, that will potentially be visualized by the appropriate applet.
world.add(topomesh,"topomesh")The best way to run this script is to long press on the run icon and select "Run in shell". This way all the variables used in the script will still be available in the IPython shell.

Once the code is run, a new object is added to the world, which appears on the World Control panel on the left. Having the "Display cells" option selected (default) will add a visual representation of the mesh cells in the viewer.
You might have to click on the Auto-focus button of the viewer (or simply press 'R' while hovering over the viewer) to see the mesh.

You may now want to interact with the visualization by for example:
- Displaying faces instead of cells (untick "Display cells", tick "Display faces")
- Changing the scale of the faces displayed (changing the "Coef" value next to the faces)
- Selecting another property to display (for instance the area of the triangles)
- Changing the colormap of the displayed faces by in the options the "topomesh_faces" object

