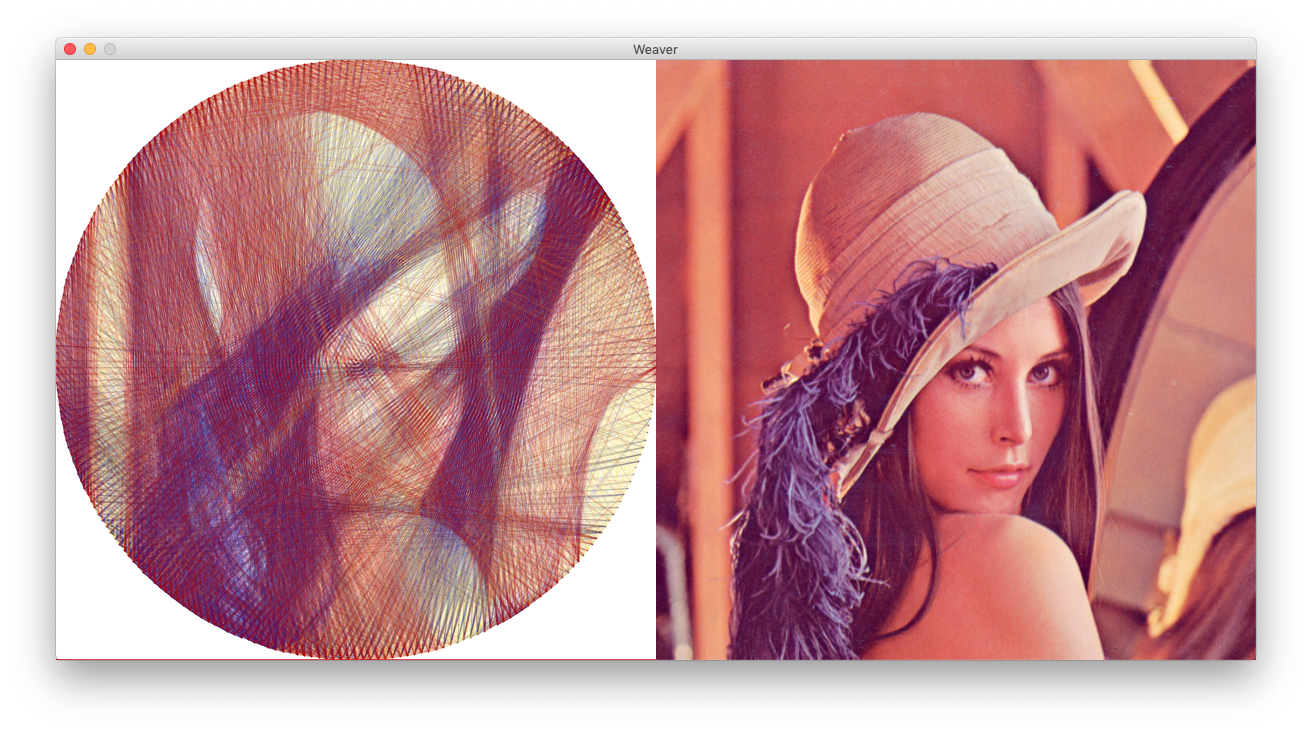
The idea is to take an image and come up with data to weave it using a single thread on a circular rim.
Basically this: A picture is worth a thousand words.

| Output | Input |
|---|---|
 |
 |
No. of pins: 254
No. of lines: 4000 (Approx. 1.75 km thread)
Credit: @larryisgood
This piece of software requires 3 inputs from the user:
- A picture to be drawn
- Total points/nails on a circular rim,
P - Total lines to be drawn,
L
All three inputs are crucial on how the final result is going to look. The program does the following:
- Converts the color picture to grayscale.
- The picture is then cropped to a square.
- Places a virtual circular rim with
Pequidistant points on it. - Takes the first point (
p = 0) as the starting point. - Finds the next point
p'to draw a line from pointpby finding the highest intensity line.- The intensity of a line is calculated by adding up the all the pixel values of a line from
ptop'.
- The intensity of a line is calculated by adding up the all the pixel values of a line from
- A new line is drawn from
ptop'on the circular rim. - The original image is modified such that the pixels under the line from
ptop'are lightened* so that the same line is not drawn next time. p'is set as the new starting pointpand then the steps from5is repeated untilLlines are drawn.
* The amount by which a line should be lightened can also be configured.
- You'll need to download Processing. It's available for Windows / Mac / Linux.
- Open up
Weaver.pdeusing Processing. - Hit
Runor pressCTRL+Rto execute the application. - Click anywhere on the application to start processing.
- Click again to pause.
- After the process is complete, a text file will be generated. This file contains the positions of each point where the thread should be knitted next.
Note: Those of you who are downloading the repository as .zip file, you must rename the folder Weaver-master to Weaver before opening on Processing.
The setup() function in Weaver.pde chooses one of the example configurations. Check the example.pde to modify the configuration of each example.
Kudos to i-make-robots for originally writting this algorithm.
I changed it a little bit to clean up the code, improve GUI and add some extra features.


