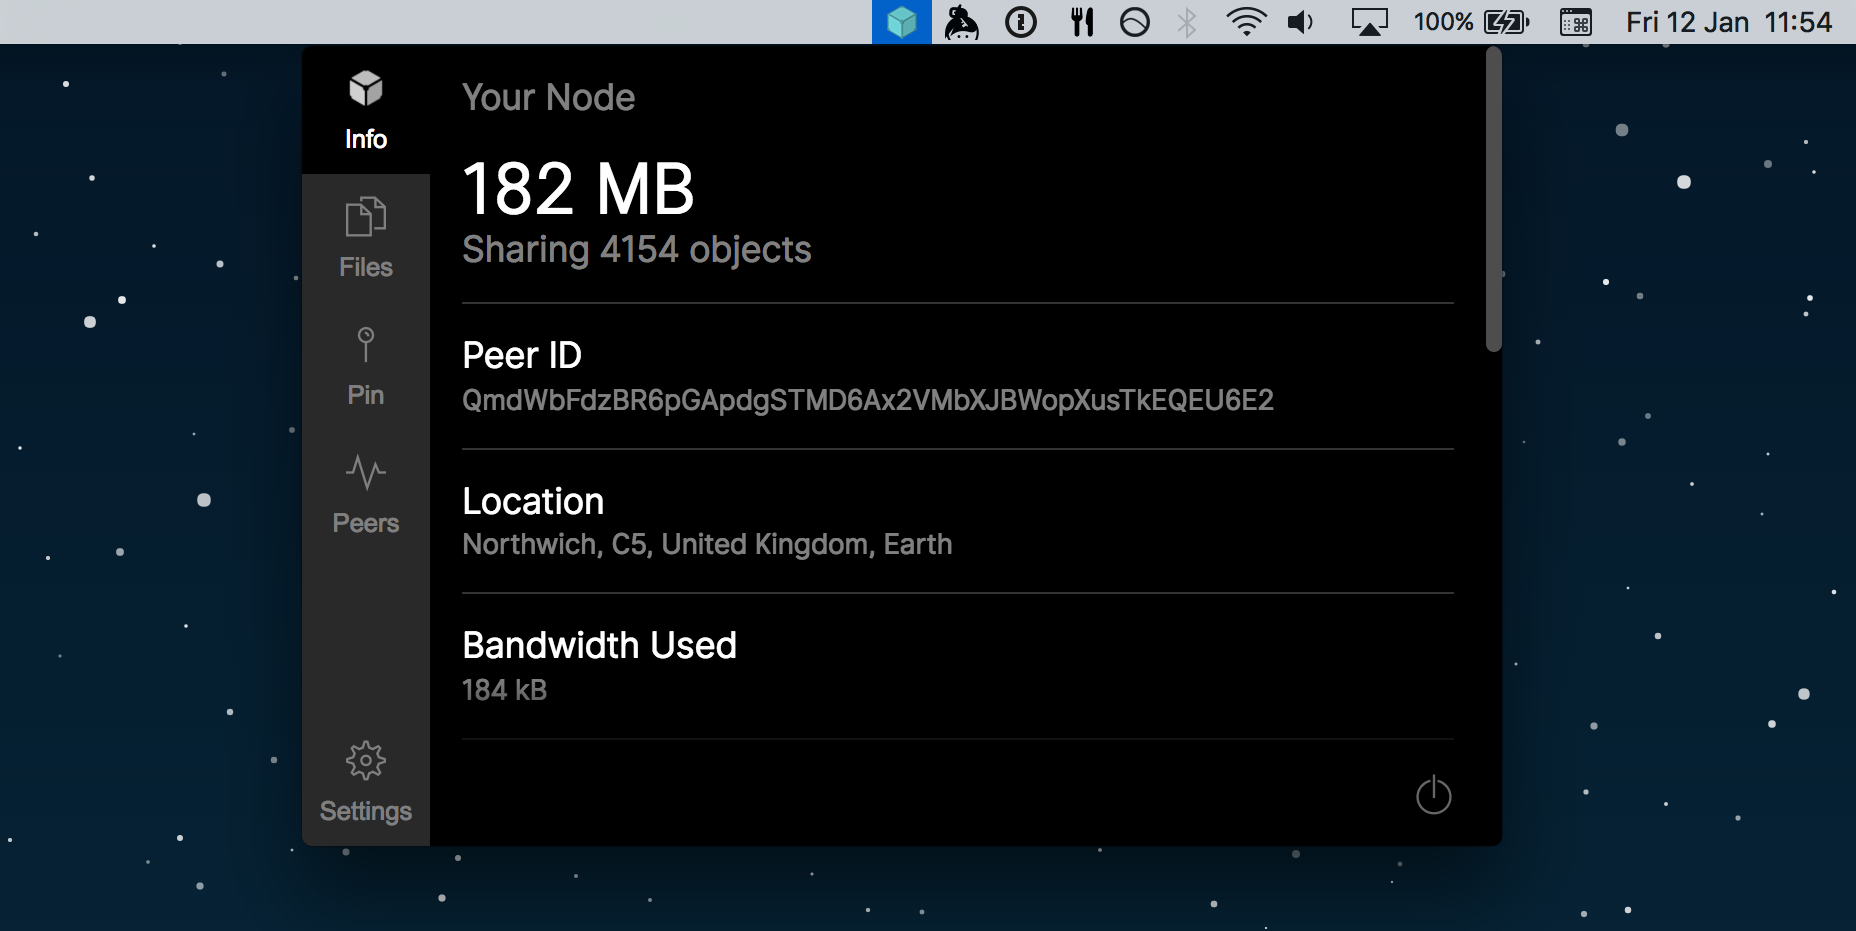
A menubar IPFS application to get you on the Distributed Web!
IPFS Desktop allows you to run your IPFS node on your machine without having to bother with command line tools. You can manage your node, add your files, easily change the settings... everything from just one interface.
Go to the latest release page and download IPFS Desktop for your OS.
- Note for Debian and Ubuntu users: starting with apt 1.1 (Ubuntu 16.04, Debian Stretch)
apt installallows local files:sudo apt install ./ipfs-desktop*.deb
If you're interested in developing IPFS Desktop, you can also install it from source...
You will need Node.js >=6.0.0 and
need npm >=3.0 installed.
On macOS you may also need Xcode command line tools, if you haven't already, do so by:
xcode-select --install
sudo xcode-select --switch /Library/Developer/CommandLineTools
Then the follow the steps below to clone the source code, install the dependancies and run it the app:
git clone https://github.com/ipfs-shipyard/ipfs-desktop.git
cd ipfs-desktop
npm install
npm start
The IPFS Desktop app will launch and should appear in your OS menu bar.
Click on the IPFS icon in the menubar to open the app.
| See IPFS Node Info | Share Files |
|---|---|
| Pin Hashes | See connected Peers |
|---|---|
| Stats and Information | Files | Other |
|---|---|---|
| Peer ID | Add by drag'n'drop | Easy access to the WebUI |
| Location | Add entire directories | Easy access to Node Settings |
| Addresses | Delete files | Pin hashes with labels |
| Public Key | Copy and share links | Optional launch on startup |
| Repository Size | Auto add screenshots | |
| Bandwidth Usage | Download copied hash | |
| Down/Up Speeds | ||
| Peers |
All of the important files of this application are into src folder, which can be seen as the following tree:
├───controls
├───fonts             Static font files.
├───img               Static image assets.
├───js
│   ├───components
│   │   ├───logic     Reusable and stateful components. They have 'state' to track.
│   │   └───view      Reusable and stateless components. They are written as stateless functional components.
│   |───panes         A pane is a larger component to be used within screens.
|   └───screens       A screen is the everything visible at a given point in time inside a single window.
├───styles            Stylesheets in LESS format.
├───utils             Utilitarian classes and functions.
|───views             HTML view files.
└───index.js          Main entry point of the application.
Start by creating a new file inside ./src/js/panes with the following bootstrap content. For more information about each piece, take a look at the Header and Footer components.
import React from 'react'

import Pane from '../components/view/pane'
import Header from '../components/view/header'
import Footer from '../components/view/footer'

export default function MyPane {
    return (
      <Pane>
        <Header title='The title of your pane' />

        <div className='main'>
          <p>The body of your pane</p>
        </div>

        <Footer>
          <p>The footer of your pane</p>
        </Footer>
      </Pane>
    )
  }
}
Then, you'll have to import the file and create an entry on panes array on ./src/js/screens/menu.js with a content similar to this one:
{
  id: 'my-pane-id',       // A simple slug to identify your pane.
  title: 'Title',         // To be shown in the menu.
  icon: 'ipfs'            // A themify icon ID (themify.me/themify-icons)
}
Now, you already have your pane created and its menu entry. Although, it you click on it, you'll probably get an error message since you aren't really routing that path to it. On the same file, go to _getRouteScreen function, and add a case for your pane on the switch. The value must be the same as the id you put on the menu entry.
The components are classes exported with CamelCase names. The corresponding files have the associated class name with hyphen-separated-words. So, e.g., simple-stat.js exports a class named SimpleStat.
- Button is a simple button with text.
- CheckboxBlock is like an
InfoBlock, but with a checkbox attached to it. - FileBlock is used within a file list to describe a file with a button to copy its link.
- Footer is the footer of a pane.
- Header is the header of a pane.
- Heartbeat displays an heartbeat-like animation with the IPFS logo.
- IconButton is a button with an icon inside.
- IconDropdownList is a dropdown list with an icon.
- Icon shows an icon.
- InfoBlock shows a block of information (used on node info pane).
- KeyCombo is a key combination.
- Key is a key.
- MenuOption is a menu option to show within a menu bar.
- PinnedHash is a pinned hash.
- NewPinnedHash is a new pinned hash form.
Feel free to join in. All welcome. Open an issue!
This repository falls under the IPFS Code of Conduct.


