Release process
The release process for Ganga is largely automated with some steps that require manual intervention for historical compatibility or for decisions to be made. The majority of the process is performed through the Jenkins UI.
For the purpose of this document, the version number 7.0.1 will be used but of course, that should be changed to whatever the correct version is.
Check the GitHub issue list at <https://github.com/ganga-devs/ganga/milestones/7.0.0>_ and make sure that there are no open issues or pull requests. Everything on that list should be either merged, closed or deferred to another release.
Creating the release is a fully automated process that is as simple as using the GitHub release UI. Follow the below steps.
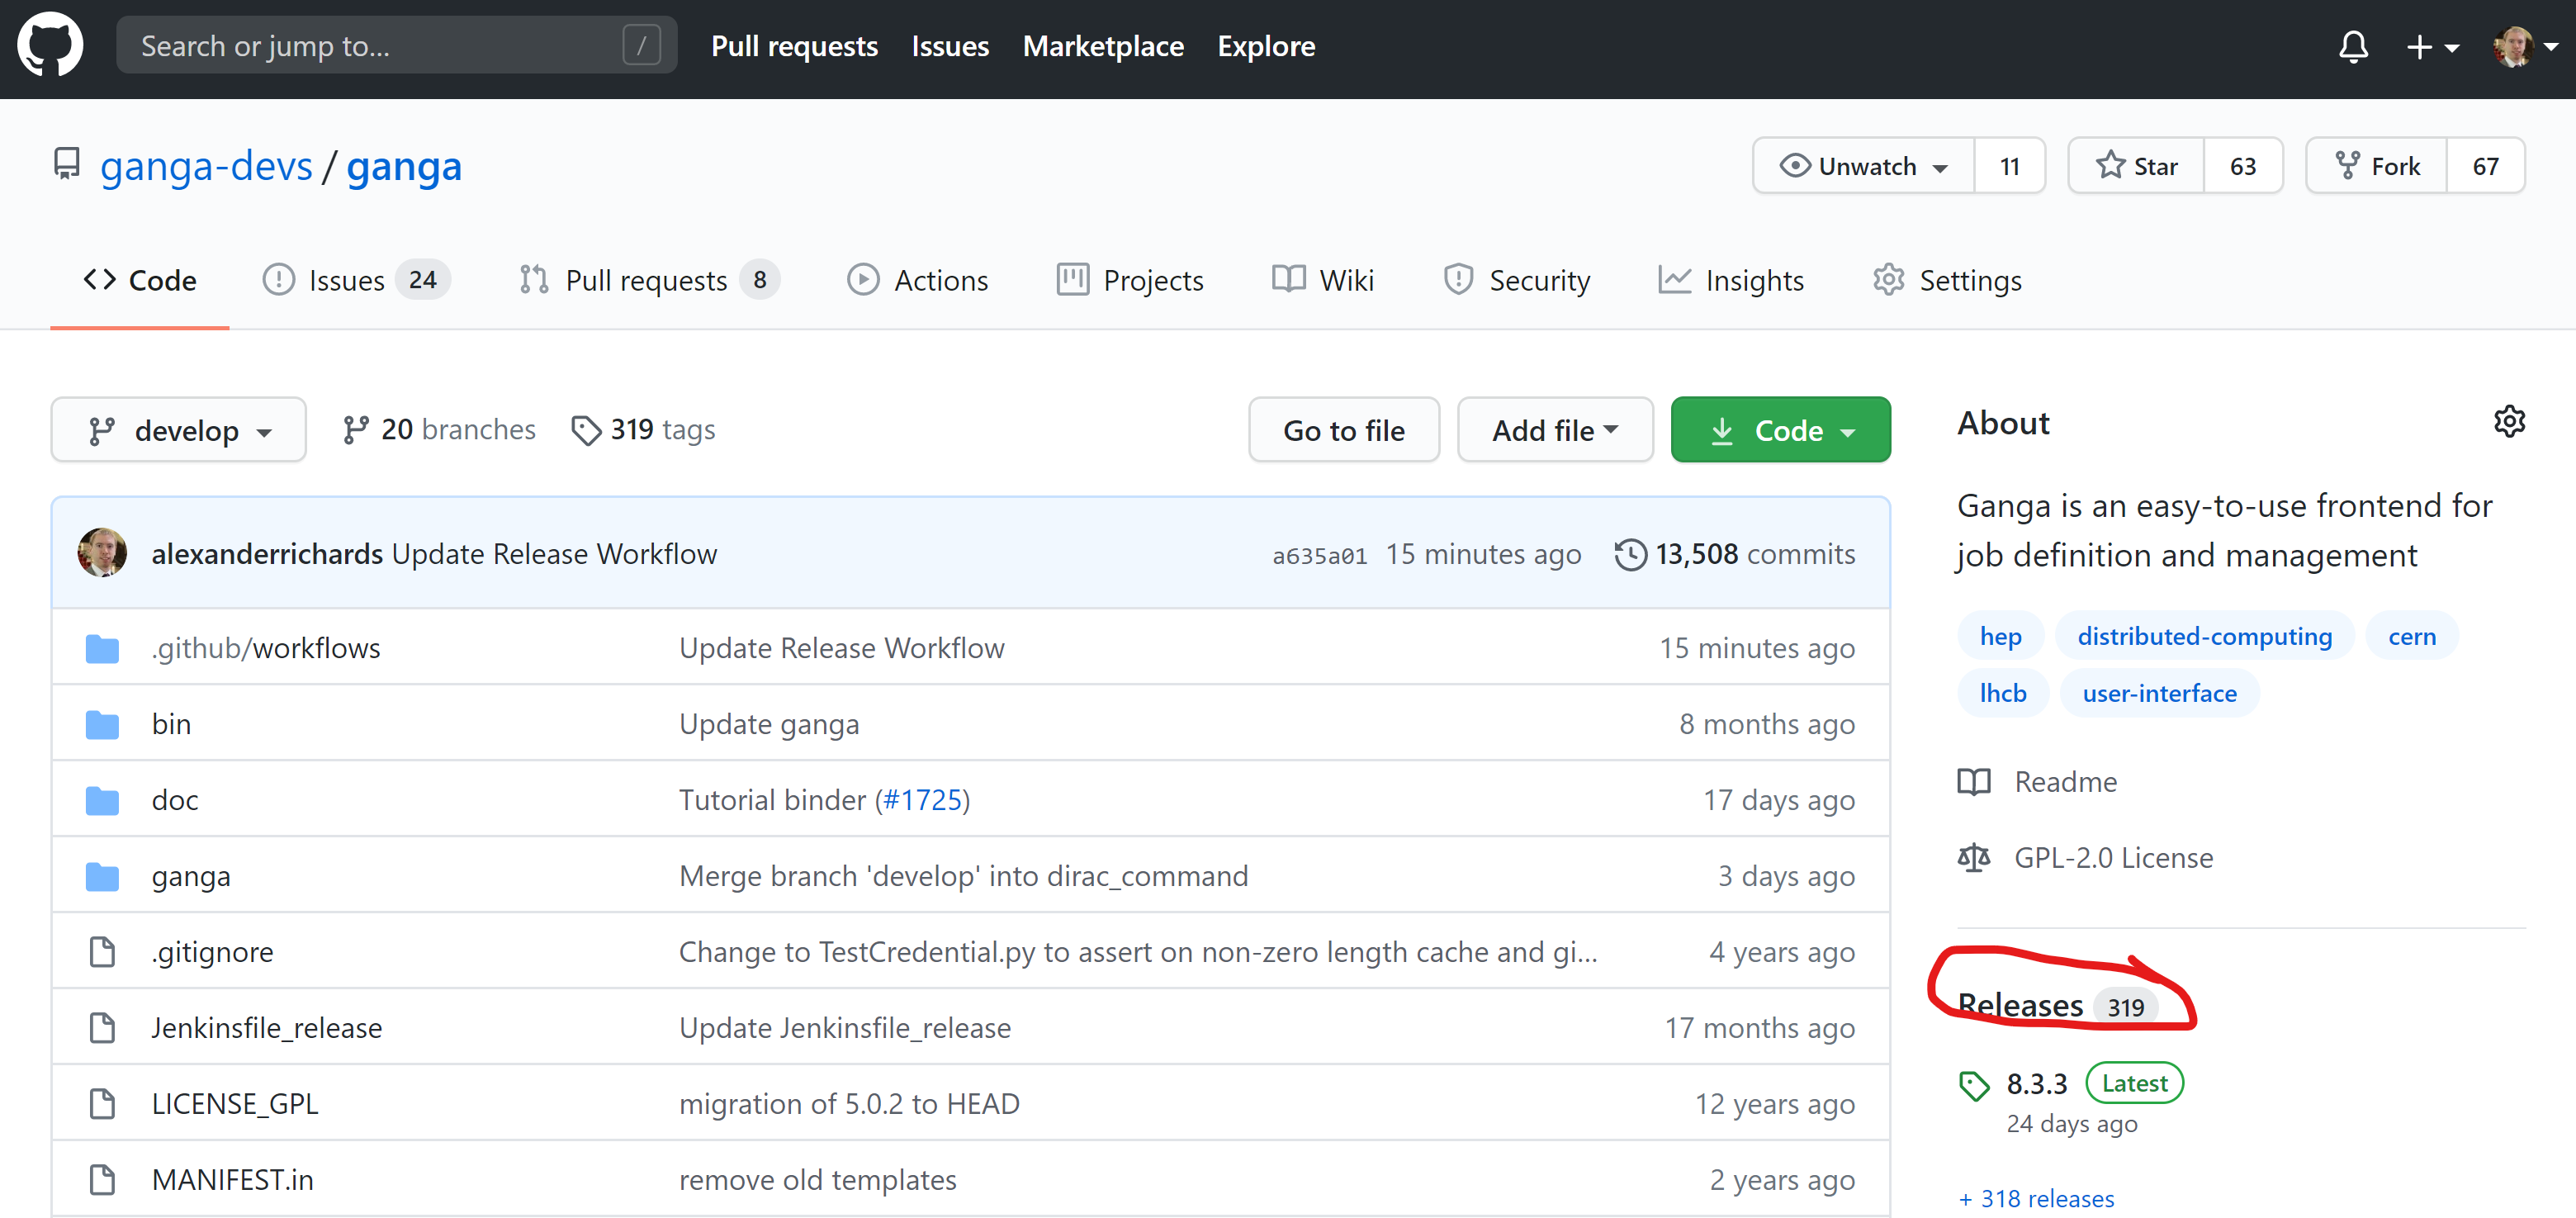
- To start with, from the main Ganga project page, click the
Releasesbutton to navigate to the releases page.
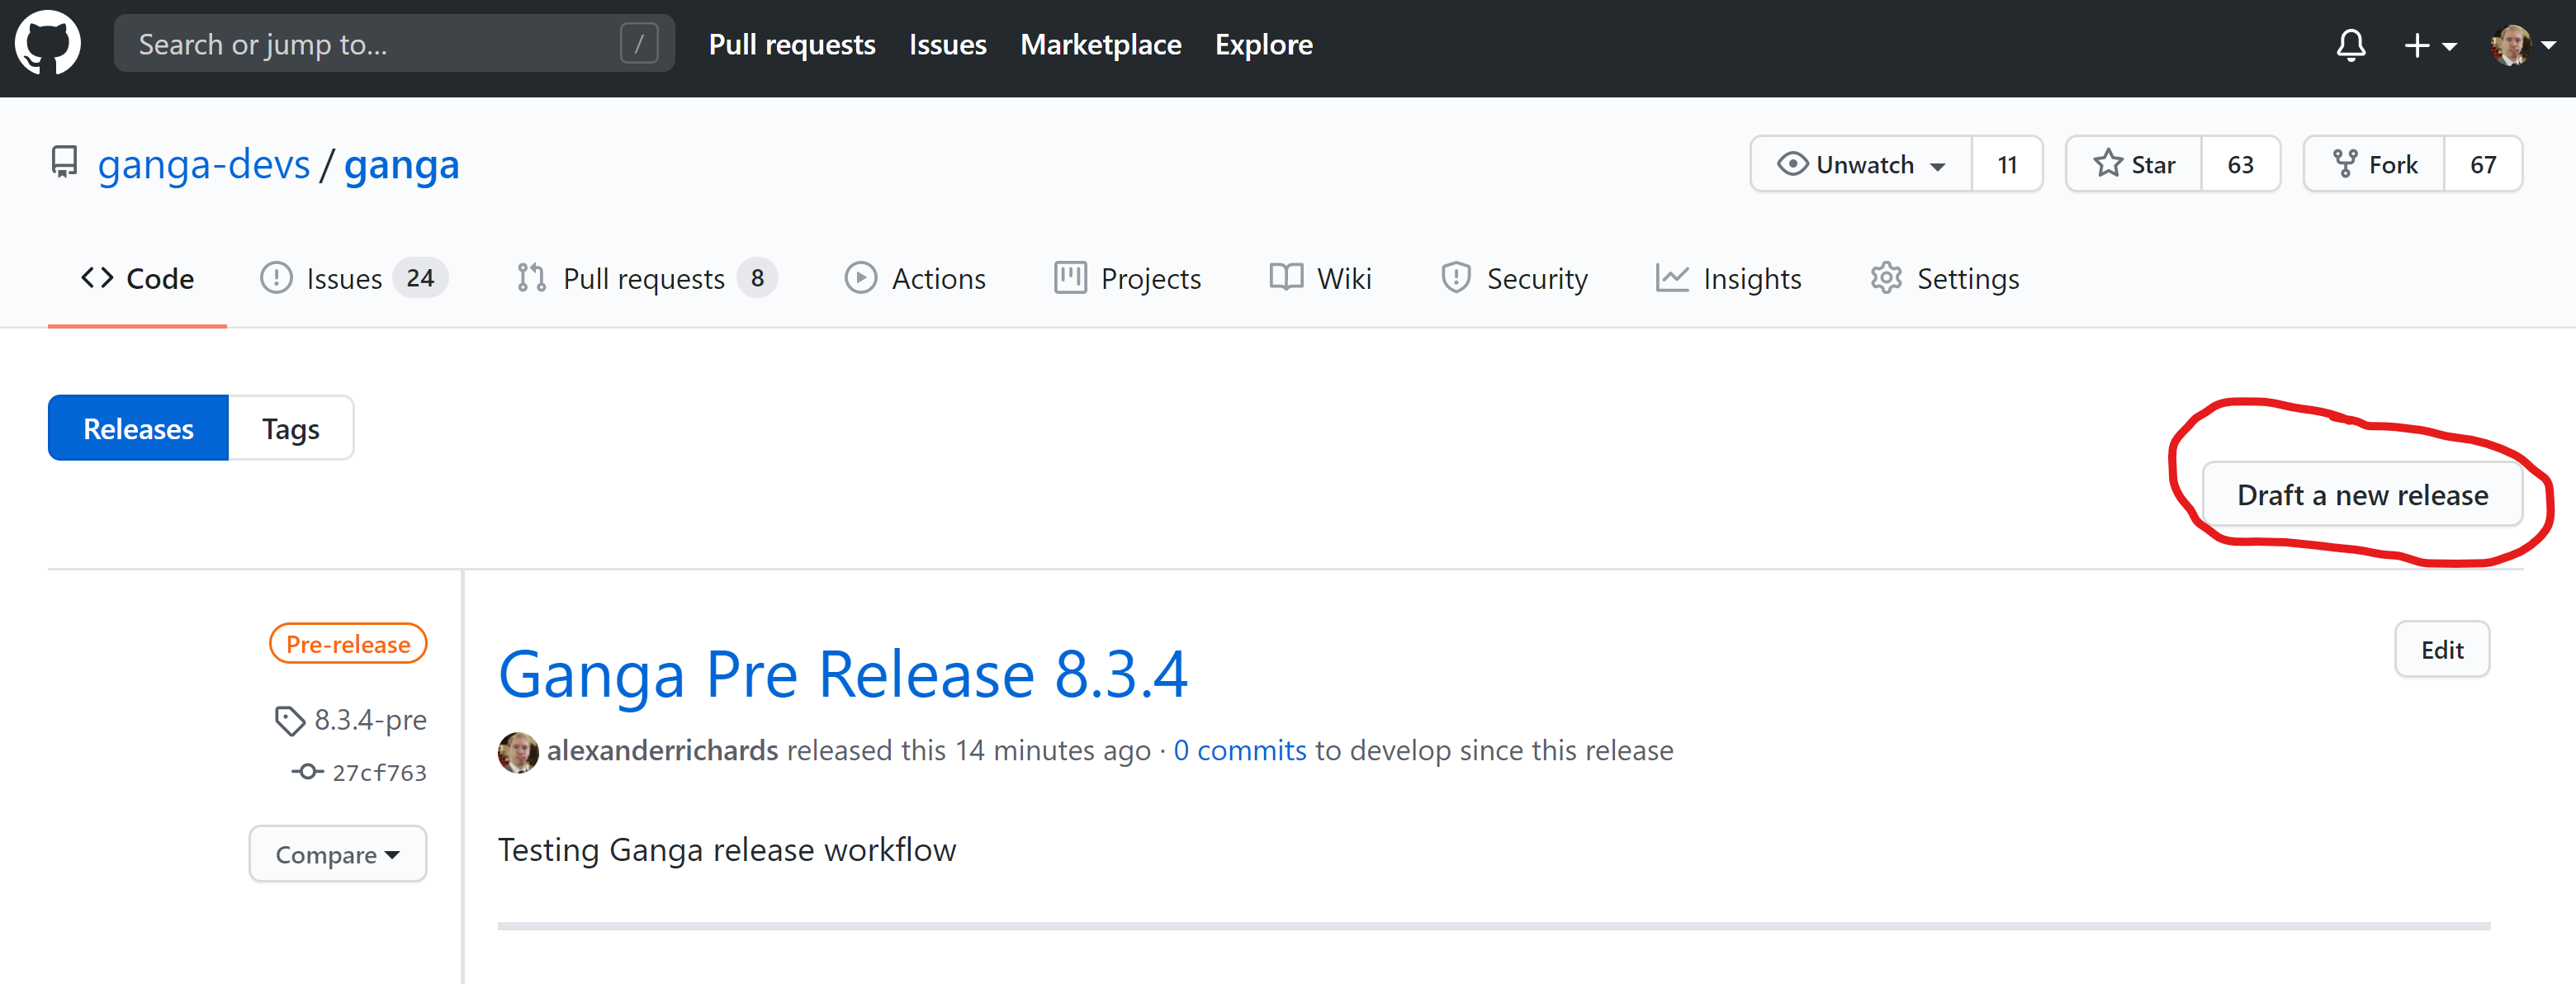
- From the releases page, click
Draft a new release
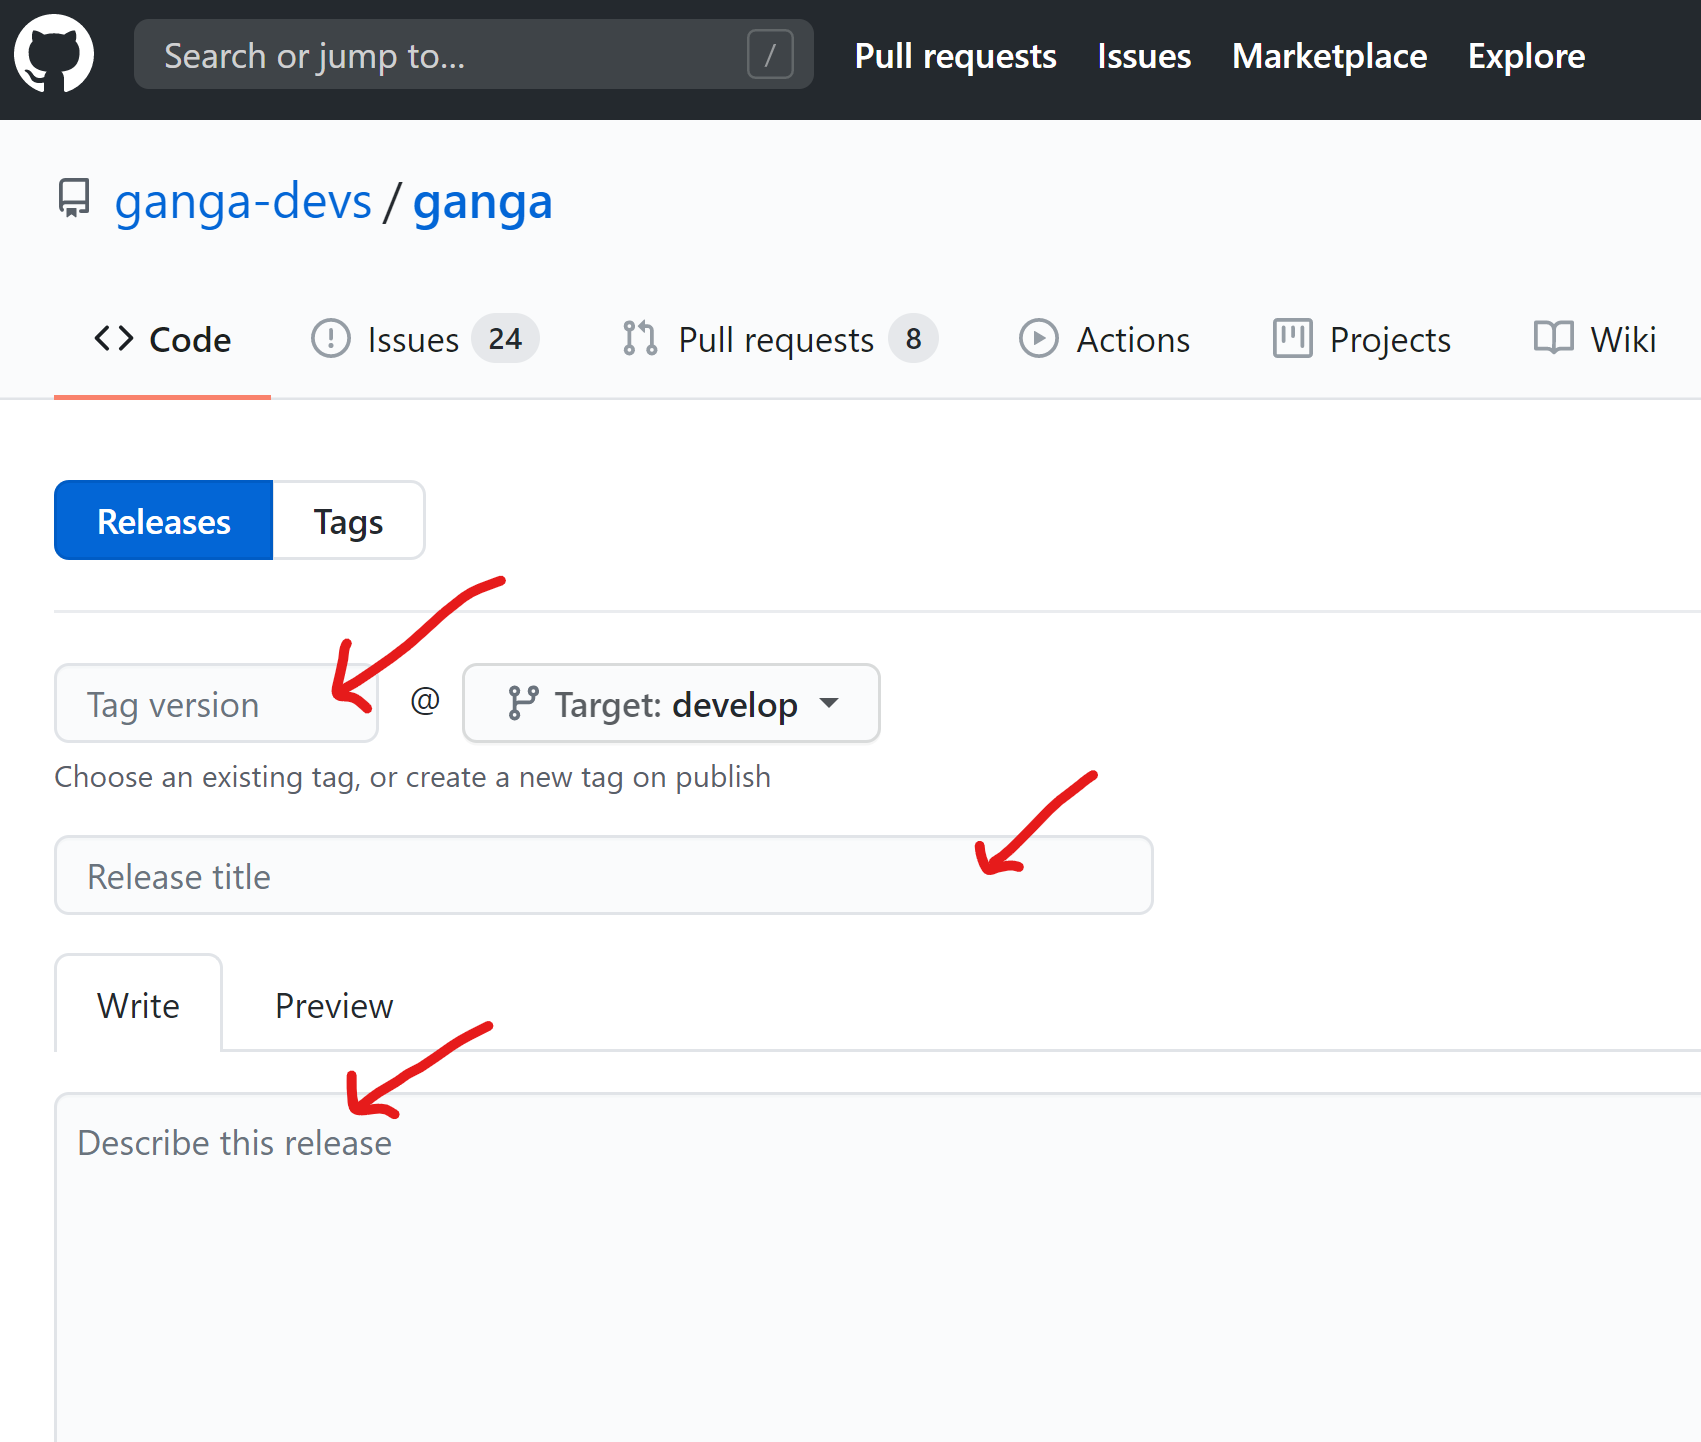
- On the new release page you will need to fill out three input boxes for:
-
The tag/release (version) number
This should not match any existing tags (GitHub should stop this) and should be of the following form:
-
<major>.<minor>.<patch>for full releases -
<major>.<minor>.<patch>-pre<pre-release>or<major>.<minor>.<patch>rc<pre-release>for pre-releases (release candidates). Note: When deploying to PyPI the former will be converted to the latter and so the latter is recommended for consistency between GitHub tags and PyPI releases
-
-
The title for the release, Generally this will be
Ganga <version>orGanga Pre-Release <version> -
The release notes (optional, but recommended)
see the images below depicting the location of the input boxes and example content:

- Publish the release by clicking the
Publish releasebutton after checking theThis is a pre-releasecheckbox if relevant. See image below:

The CVMFS repository /cvmfs/ganga.cern.ch/ is found at cvmfs-ganga.cern.ch. Only CERN users that are members of the Lxcvmfs-Ganga can log in to this machine. You need to have a valid kerberos ticket to login to this machine - the easiest way to get this is to login via lxplus using the same account id as the one to be used on cvmfs-ganga.cern.ch. After this, you can do the following for direct manual intervention:
sudo -i -u cvganga
cvmfs_server transaction ganga.cern.ch
<do stuff at /cvmfs/ganga.cern.ch/>
cvmfs_server publish ganga.cern.ch
However, there is a cronjob (access it after sudo'ing to cvganga by using the command crontab -e) that runs the script:
check-new-ganga.py
This is run hourly and scrapes the release page of github in order to find out what the latest release is. If there is a new release it runs the ganga-cvmfs-install.sh script. This creates a virtual env (name given by the version number) in the correct CVMFS location using a version of python 2.7.13 supplied by LCG. It starts the virtualenv and installs ganga (including externals). It then makes a modification to bin/ganga to use the version of python in the user's environment. Subsequently the new CVMFS version is published and the install scripts from the new release are copied back to the home area in case of updates. The results are emailed to the project-ganga-developers mailing list.
There is also a script ganga-cvmfs-install-dev.sh that is run once per day that installs the latest version from the develop branch into the DEV folder.
We use our own python installation, via micromamba. This should match the version number of that used by lb-dirac. If this needs updating, don't forget to install the requisite gfal plugins as well: gfal2, gfal2-util, python-gfal2. Also it is nice to install a few useful python packages whilst you are at it: yaml, json, pandas, numpy etc.
We use the python API for HTCondor. This is a compiled dependency so one installation will not work across multiple platforms. You need to install the wheels explicitly and then add them to the path in the Ganga startup script:
pip install --only-binary=:all: --python-version 311 --platform manylinux2014_x86_64 --target condor_2_17 htcondor
pip install --target condor_2_34 htcondor
then
if 'glibc2.17' in platform.platform():
    sys.path.append('/cvmfs/ganga.cern.ch/Ganga/install/condor_install/condor_2_17')
else:
    sys.path.append('/cvmfs/ganga.cern.ch/Ganga/install/condor_install/condor_2_34')
In addition to Ganga, we also provide an installation of the Dirac client, primarily for users of the GridPP Dirac service. This doesn't need to be updated very often at all, but when it does, the following process should be followed:
Follow the instructions for installation at https://www.gridpp.ac.uk/wiki/Quick_Guide_to_Dirac . For the proxy, you will need to copy it in from elsewhere. Install in a directory that includes the version number and move the dirac_ui softlink in /cvmfs/ganga/cern.ch to point to the new installation. Edit the bashrc file inside to have
export X509_CERT_DIR=/cvmfs/lhcb.cern.ch/etc/grid-security/certificates export SSL_CERT_DIR=/cvmfs/lhcb.cern.ch/etc/grid-security/certificates
to point to a location that is updated all the time. Do not touch X509_VOMS_DIR.