


To run the example project, clone the repo, and run pod install from the Example directory first.
IQKeyboardToolbar is available through CocoaPods. To install it, simply add the following line to your Podfile:
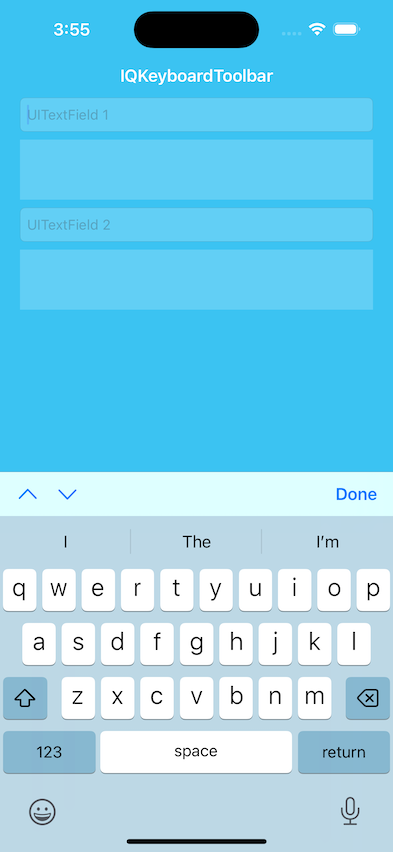
pod 'IQKeyboardToolbar'This library can be used to add toolbar to the keyboard
Previous Next and Done button
textField.iq.addPreviousNextDone(target: self,
previousAction: #selector(textField1PreviousAction),
nextAction: #selector(textField1NextAction),
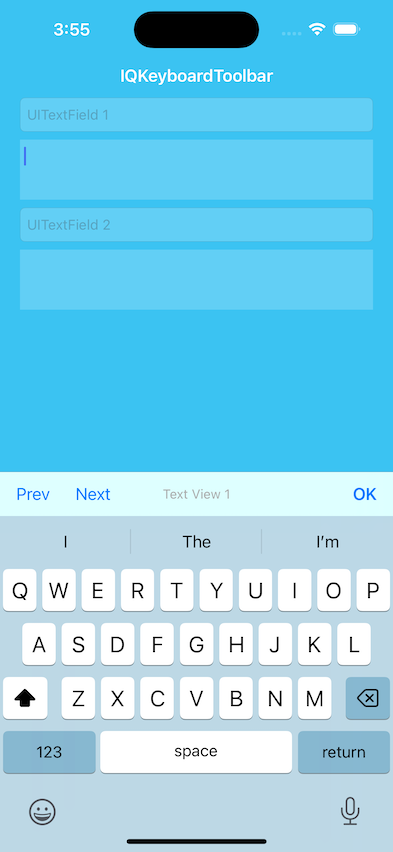
doneAction: #selector(doneAction), showPlaceholder: true)Previous Next and Right button with customized titles or images
textField.iq.addPreviousNextRight(target: self,
previousConfiguration: .init(title: "Prev", action: #selector(textView1PreviousAction)),
nextConfiguration: .init(title: "Next", action: #selector(textView1NextAction)),
rightConfiguration: .init(image: UIImage(systemName: "chevron.down")!, action: #selector(doneAction)),
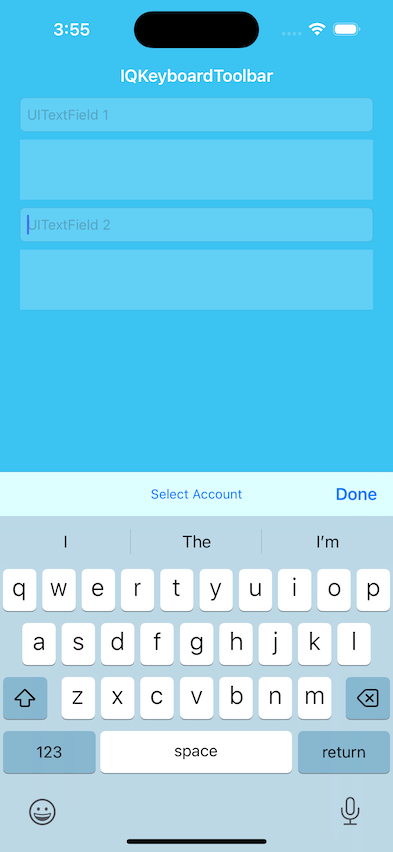
title: "Text View 1")Action button
textField.iq.addDone(target: self,
action: #selector(doneAction),
title: "Select Account")
textField.iq.toolbar.titleBarButton.setTarget(self,
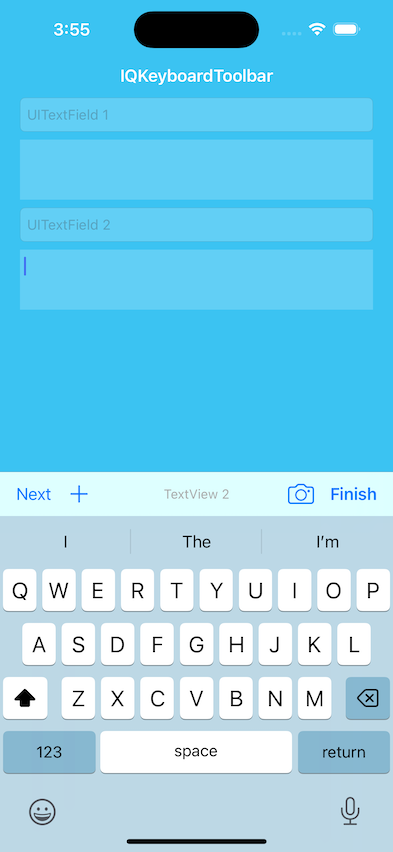
action: #selector(selectAccount))Additional leading and trailing buttons
        textField.iq.toolbar.additionalLeadingItems = [.init(barButtonSystemItem: .add, target: self, action: #selector(addAction))]
        textField.iq.toolbar.additionalTrailingItems = [.init(barButtonSystemItem: .camera, target: self, action: #selector(cameraAction))]
        textField.iq.addToolbar(target: self,
                                previousConfiguration: nil,
                                nextConfiguration: .init(title: "Next", action: #selector(doneAction)),
                                rightConfiguration: .init(title: "Finish", action: #selector(doneAction)),
                                title: "TextView 2")
Hide Placeholder
textField1.iq.hidePlaceholder = trueCustomized Placeholder
textField1.iq.placeholder = "My Own Placeholder"Iftekhar Qurashi hack.iftekhar@gmail.com
IQKeyboardToolbar is available under the MIT license. See the LICENSE file for more info.