DataTables
See an example below to create a new datatable.
php artisan module:make-datatable ArticleDatatables --module=BlogLadmin Pakcage use Laravel DataTables package from Yajra for further information click here →
If it was created successfully then a new component's file will be saved as Modules/Blog/Datatables/ArticleDatatables.php.
Create query builder at __construct in \Modules\Blog\Datatables\ArticleDatatables class, for example we use \Modules\Blog\Models\Article model.
. . .
namespace Modules\Blog\Datatables;
use Hexters\Ladmin\Supports\Datatables;
use Illuminate\Support\Facades\Blade;
use Modules\Blog\Models\Article;
class ArticleDatatables extends Datatables
{
/**
* Page title
*
* @var String
*/
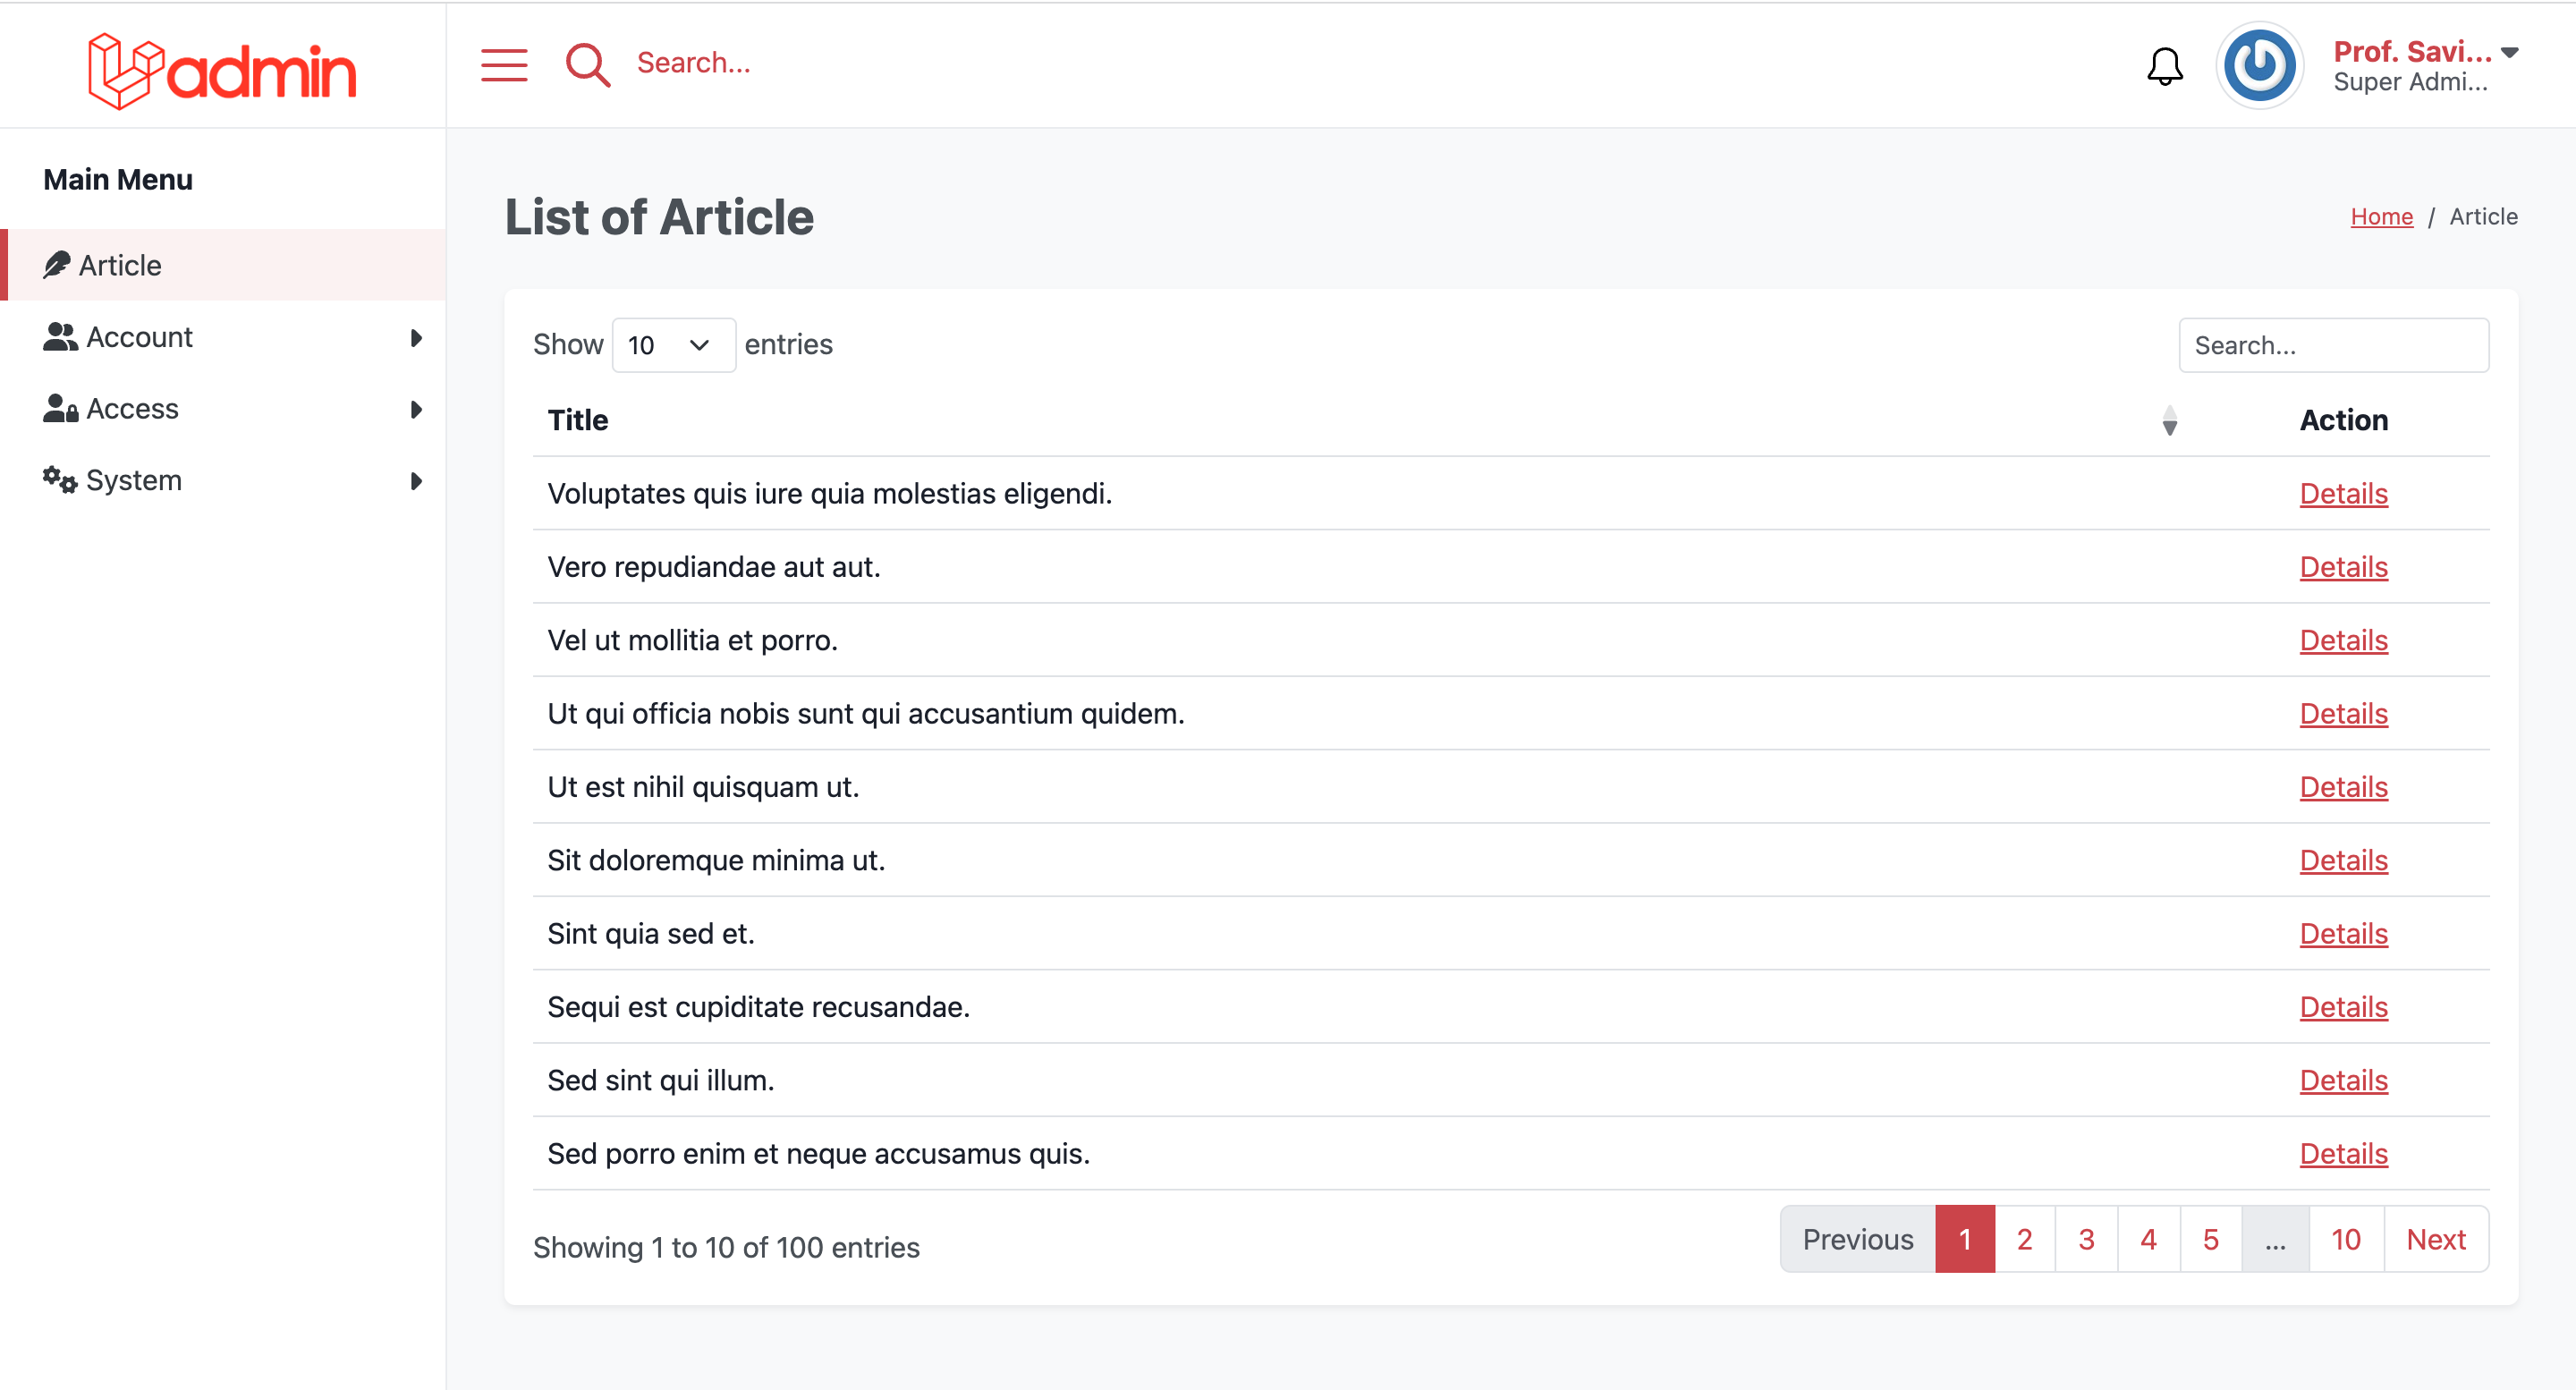
protected $title = 'List of Article';
/**
* Setup query builder
*/
public function __construct()
{
/**
* Add model \Modules\Blog\Models\Article here
*/
$this->query = Article::query();
}It is very easy to run datatable by open the controller class you want to use, see the example below.
. . .

/**
 * Display a listing of the resource.
 *
 * @return \Illuminate\Http\Response
 */
public function index()
{
    return ArticleDatatables::view();
}

. . .
Woala... And the result will be shown here
You can also use a custom view
return ArticleDatatables::view( blade: 'blog::article.index' );And in your blade file, call datatable's component bellow.
<x-ladmin-data-tables :options="$options" :headers="$headers" />Important please do not remove this attribute
:options="$options"and:headers="$headers"
You can send data from controller to datatable class, see example below.
return ArticleDatatables::view( data: [
    'status' => 'draft'
]);

// ------- OR --------

return ArticleDatatables::view( blade: 'blog::article.index', data: [
    'status' => 'draft'
]);
In method handle() DataTables class, we can call by use attribute $this->data
. . .

/**
 * DataTables using Eloquent Builder.
 *
 * @return DataTableAbstract|EloquentDataTable
 */
public function handle()
{
    $query = $this->query->where('status', $this->data['status']);

    return $this->eloquent($query)
        ->addColumn('action', function ($row) {
            return Blade::render('<a href="">Button</a>');
        });
}

. . .
And the data can be called on a custom blade file.
If you want to specify the data to display in the datatables, for example.
/**
     * Table headers
     *
     * @return array
     */
    public function headers(): array
    {
        return [
            'date',
            'Title',
            'Action' => ['class' => 'text-center'],
        ];
    }

    /**
     * Datatables Data column
     * Visit Doc: https://datatables.net/reference/option/columns.data#Default
     *
     * @return array
     */
    public function columns(): array
    {
        return [
            ['data' => 'created_at'],
            ['data' => 'title'],
            ['data' => 'action', 'class' => 'text-center', 'orderable' => false]
        ];
    }
And the result will be shown here

You can add a button or anything to the right of the page's title, see example below
. . .

/**
 * Button create for page view
 *
 * @return \Illuminate\Support\Facades\Blade | Html
 */
public function button()
{
    return Blade::render(
        '<a href="' . route('ladmin.blog.article.create') . '" class="btn btn-primary">+ Add New</a>'
    );
}

. . .
Or use a blade file
. . .

/**
 * Button create for page view
 *
 * @return \Illuminate\Support\Facades\Blade | Html
 */
public function button()
{
    return view('blog::article.button');
}

. . .
And the result will be shown here.

Sometimes we need to display more than one datatable in one page, this version can handle this. Follow the steps below.
Create route to send json from datatables, Add ajax() method to your DataTables class, and point to the route you have set up.
. . .

/**
 * Datatables ajax url
 *
 * @return string
 */
public function ajax()
{
    return route('your.custom.route.for.datatables.json');
}

. . .See example route below for sending json data.
. . .

use Modules\Blog\Datatables\ArticleDatatables;

. . .

Route::get('article-datatables-json', function() {

    return ArticleDatatables::renderData();

})->name('your.custom.route.for.datatables.json');

. . .Prepare a blade view to accommodate the datatables that we will save, for example we use the view view('blog::article.index') see the example below.
<x-ladmin-card>
    <x-slot name="body">
        {{ \Modules\Blog\Datatables\ArticleDatatables::table() }}
    </x-slot>
</x-ladmin-card>


<x-ladmin-card>
    <x-slot name="body">
        {{ \Modules\Blog\Datatables\CommentDatatables::table() }}
    </x-slot>
</x-ladmin-card>
And so also with CommentDatatables class follow the steps above. You can also see an example in the Modules\Ladmin\Http\Controllers\AdminController@index class.