-
-
Notifications
You must be signed in to change notification settings - Fork 41
automatic builds for maven, jenkins and gitbucket
This setup demo a full automation setup using nginx, gitbucket, Jenkins, Pipeline multibranch, Github branch source, webhooks and build statuses.
In this setup the goal is to:
- fire a build for each commit, on every branch or on any PR
- have different project versions per branch and PR
- to have build statuses set on git commits
All the setup below is provided as an example, adapt with recent versions and with your platform.
I built this setup on windows 10.
The services will be availabe at:
- jenkins: http://jenkins.my.pc
- gitbucket: http://gitbucket.my.pc
We will fake DNS names for gitbucket & jenkins services.
Edit your hosts file, mine is under C:\Windows\System32\drivers\etc, add entries for the 2 services
127.0.0.1 jenkins.my.pc
127.0.0.1 gitbucket.my.pc
We will serve both services on port 80 using the server names defined above. For that we will a nginx reverse proxy.
Having a nginx-1.12.1 running instance, mine is installed under D:\dev\tools\web\nginx\nginx-1.12.1
Create NGINX_HOME\conf\ci.conf file.
server {
    listen 80;
    server_name jenkins.my.pc;

    location / {

      proxy_set_header        Host $host:$server_port;
      proxy_set_header        X-Real-IP $remote_addr;
      proxy_set_header        X-Forwarded-For $proxy_add_x_forwarded_for;
      proxy_set_header        X-Forwarded-Proto $scheme;

      # Fix the "It appears that your reverse proxy set up is broken" error.
      proxy_pass          http://127.0.0.1:8090;
      proxy_connect_timeout   150;
      proxy_send_timeout      100;
      proxy_read_timeout      100;

      # Required for new HTTP-based CLI
      proxy_http_version 1.1;
      proxy_request_buffering off;
    }
}

server {
    listen 80;
    server_name gitbucket.my.pc;

    location / {
        proxy_pass              http://127.0.0.1:8080;
        proxy_set_header        Host $host;
        proxy_set_header        X-Real-IP $remote_addr;
        proxy_set_header        X-Forwarded-For $proxy_add_x_forwarded_for;
        proxy_connect_timeout   150;
        proxy_send_timeout      100;
        proxy_read_timeout      100;
        proxy_buffers           4 32k;
        client_max_body_size    500m; # Big number is we can post big commits.
        client_body_buffer_size 128k;
    }
}
edit NGINX_HOME\conf\nginx.conf, add an include to above file.
...
http {
   ...
   # Include CI specific setup for gitbucket & jenkins
   # put the include INSIDE the http tag
   include "D:/dev/tools/web/nginx/nginx-1.12.1/conf/ci.conf";
}
...
Restart/reload nginx: nginx -s reload
Here we will use a default installation of gitbucket using version 4.21.2.
Download gitbucket.war from 4.21.2 release.
- start gitbucket:
java -jar gitbucket.war - navigate to http://gitbucket.my.pc/
- connect using
root/root, then create users:- ci/ci: an administrator, will be used from jenkins
- john/j: a simple user
- bill/b: another simple user
Download Jenkins and run it using java -jar jenkins.war --httpPort=8090
I personally skipped default installation and then manually added:
- GitHub Branch Source Plugin 2.3.1
- Pipeline: Basic Steps 2.6
- Pipeline: Model API 1.2.5
- Pipeline: Multibranch with defaults 1.1
- Pipeline: Nodes and Processes 2.17
- Pipeline: Shared Groovy Libraries 2.9
- Pipeline: Stage Step 2.3
Configure jenkins:
Manage Jenkins > Configuration
- Jenkins url: http://jenkins.my.pc/
- Add a Github Enterprise Server:
-
API endpoint:
http://gitbucket.my.pc/api/v3 -
Name:
Gitbucket local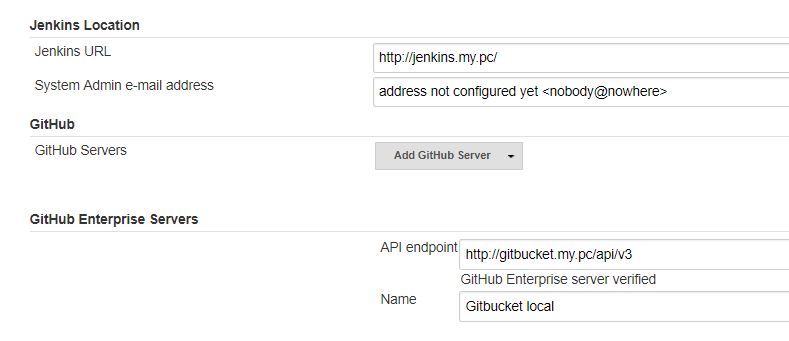
-
API endpoint:
Manage Jenkins > Global Tool Configuration
- Add a git installation, point it to git.exe on your disk. A recent version of git.exe is required, because git.exe will have to follow http redirections ; my version is
2.14.2.windows.2 - Add a JDK 1.8 installation, name it
JDK 1.8 - Add a Maven 3.3.x installation, name it
Maven 3.3.x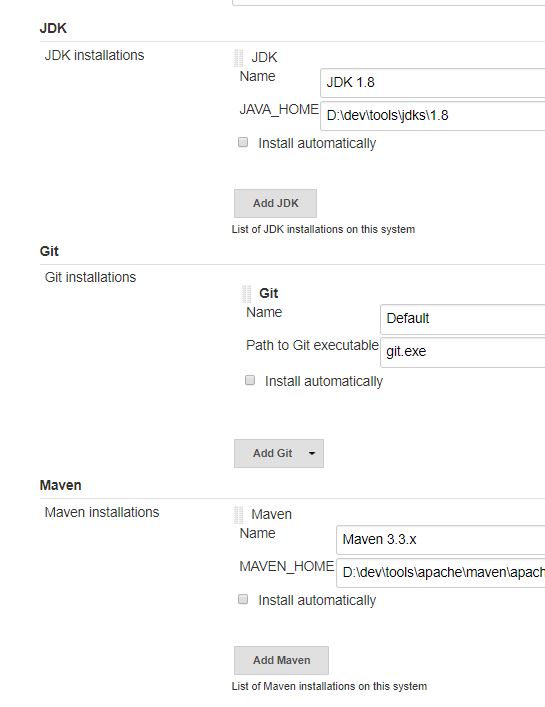
We will use the project demo-ci-jgitver-maven-plugin.
Create placeholder project in John gitbucket space.
- Connect as
john/j - Create placeholder repository, call it
demo-ci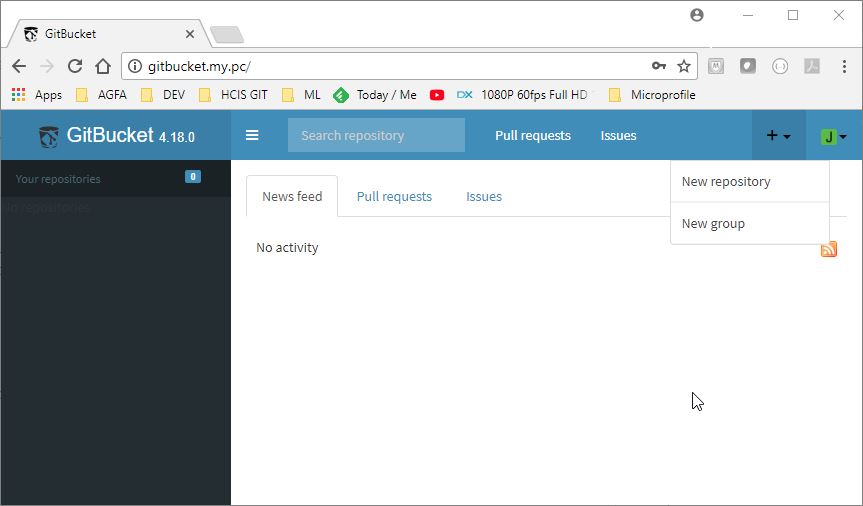
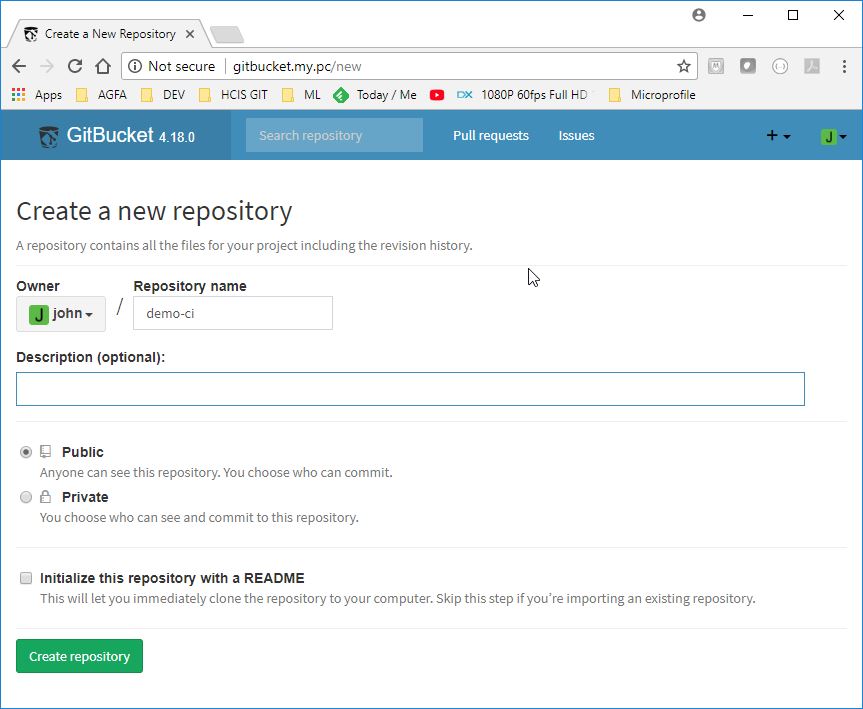
- checkout github project and push it to john space
git clone https://github.com/jgitver/demo-ci-jgitver-maven-plugin.git demo-ci
cd demo-ci
git push http://john:j@gitbucket.my.pc/git/john/demo-ci.git
- Go to gitbucket project settings page, choose "Service Hooks" tab
- Add a webhook to
http://jenkins.my.pc/github-webhook/, select "Pull Request" & "Push" events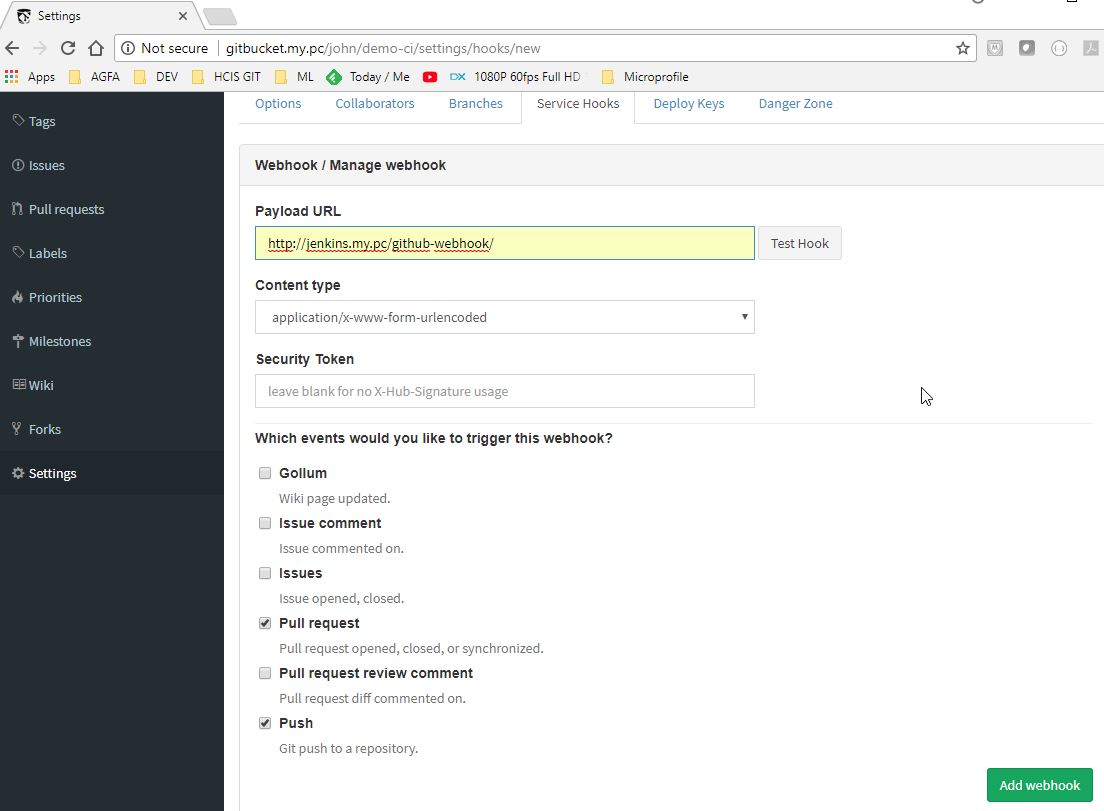
- Navigate to jenkins: http://jenkins.my.pc
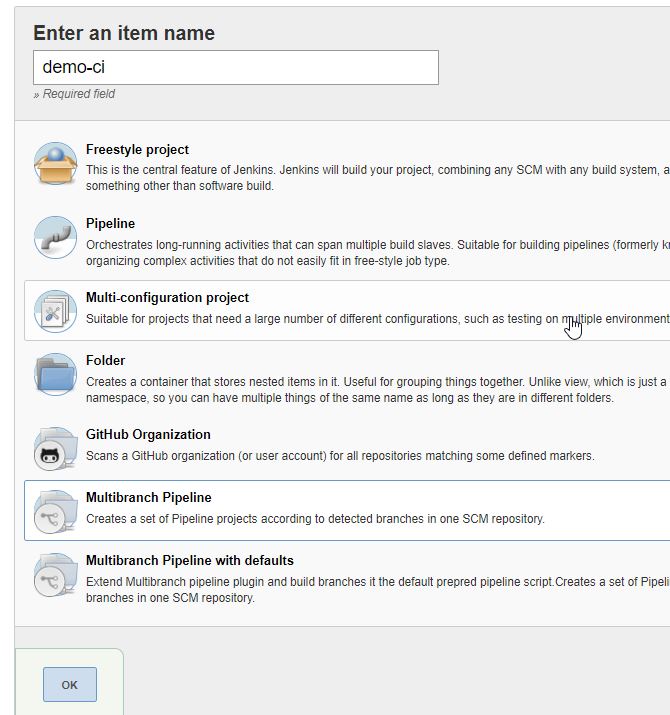
- Create a new Job "demo-ci" as a "Multibranch Pipeline"
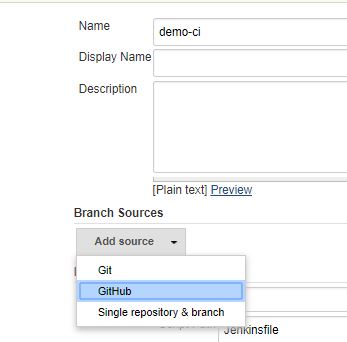
- Add a github branch source
- Choose "Gitbucket local" server
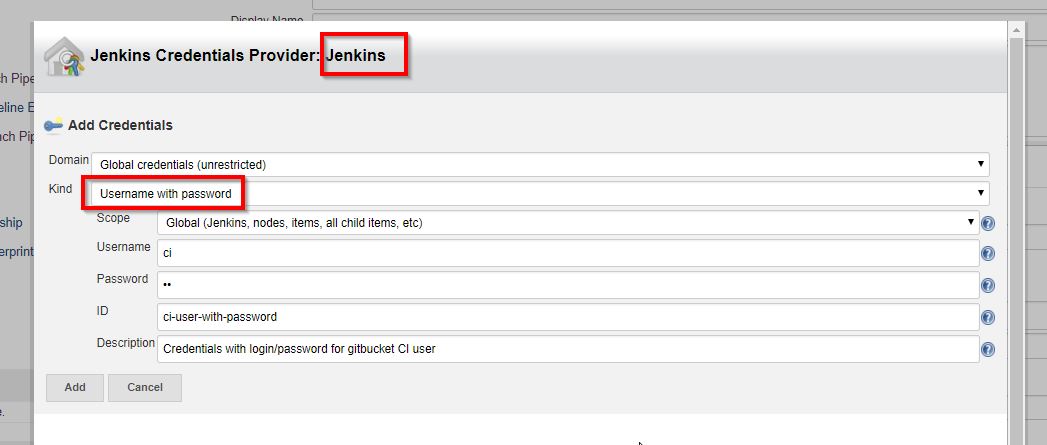
- Add Username with password credentials for "ci" user
- Enter "john" as owner
- choose "demo-ci" as repository

In order to have jgitver correctly naming versions for branches and pr, few additional behaviors are required for the git source
- Add a "filter by name" behavior
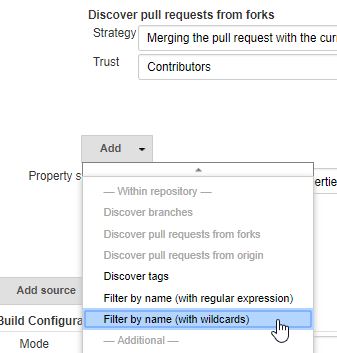
- enter
**as include filter - Add a "Check out to matching local branch" behavior
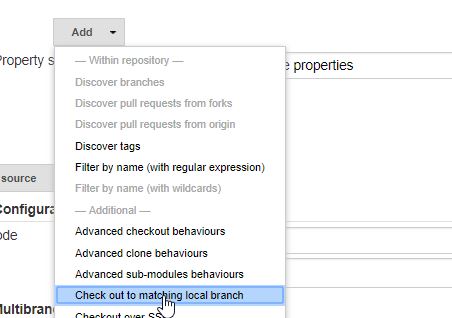
Configuration should be
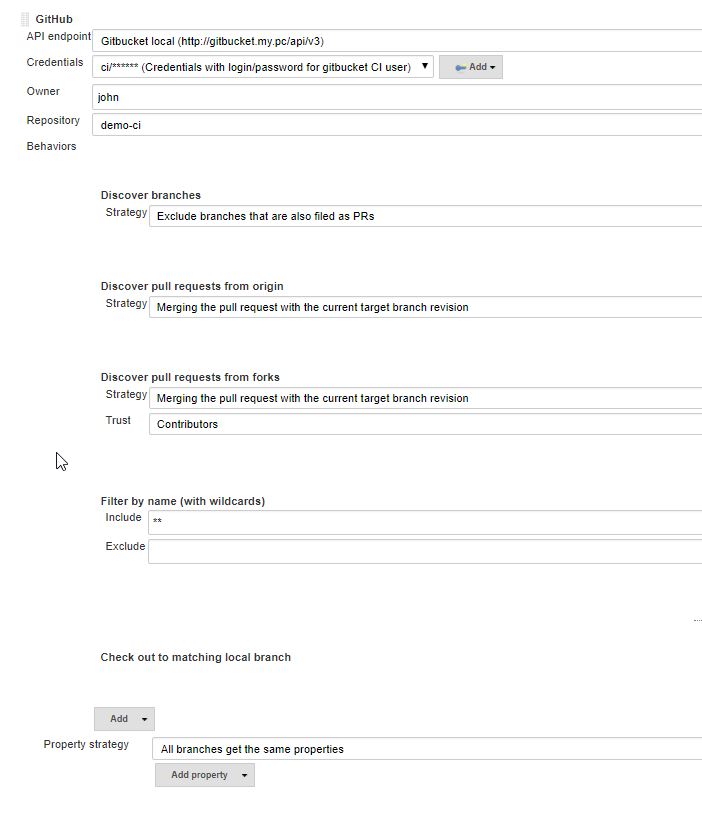
- Click save, et voilà ! Jenkins discovered the master branch and fired a build for it.
Now as John, create a branch 'br', make a small change (in README.md for example) and commit.
Automatically, Jenkins (via the webhook) will be notified of the commit and will build the 'br' branch.
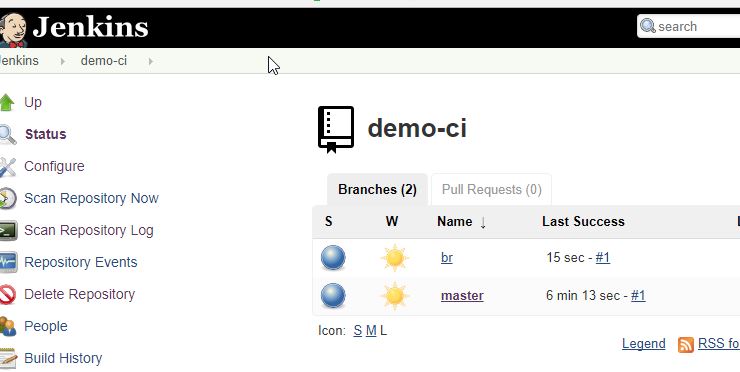
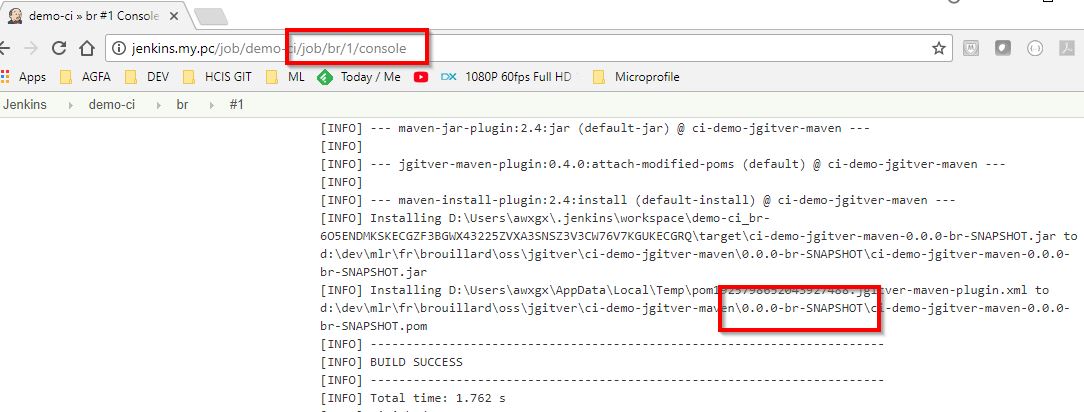
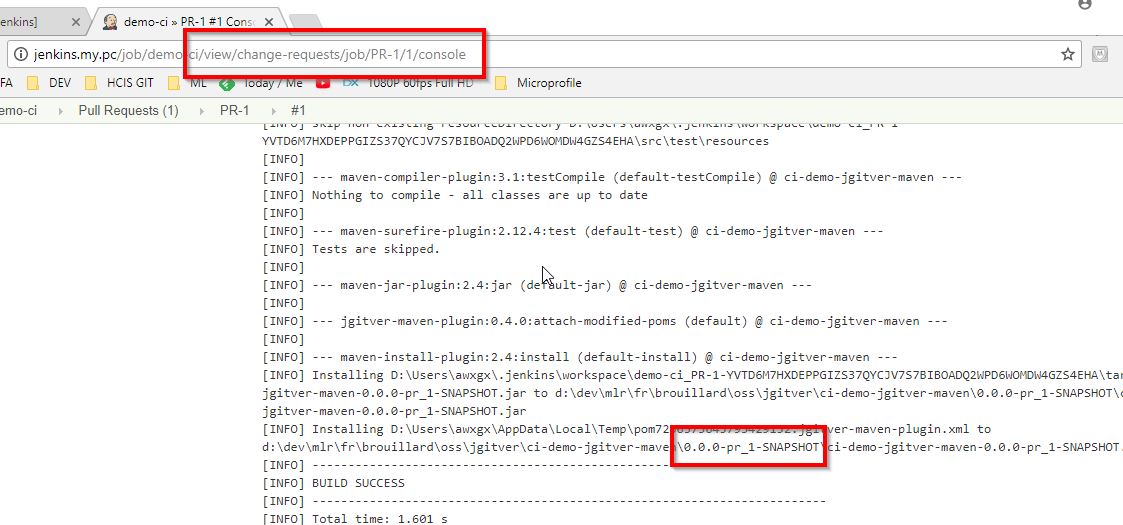
By looking at the build result for the br branch, you will see that jgitver correctly calculated the project version.
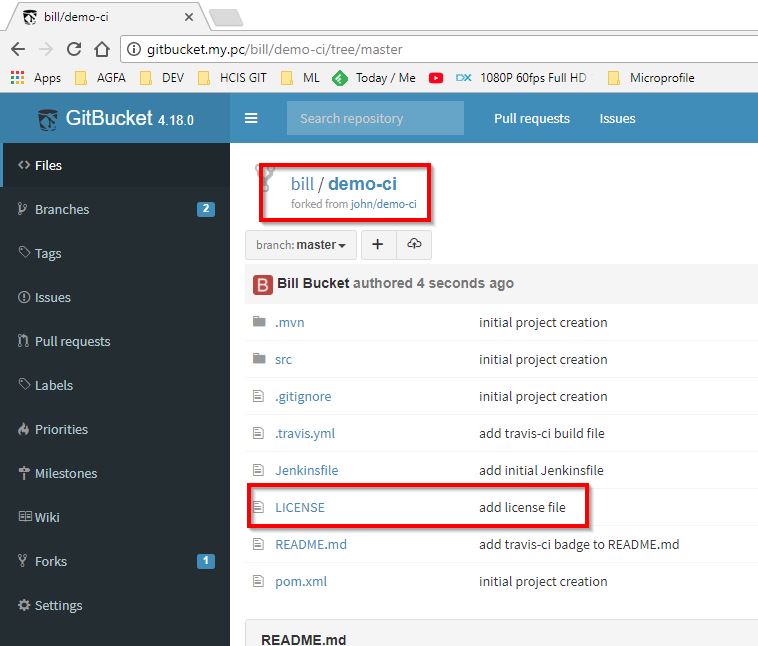
As Bill, in gitbucket, fork John repository.
Do a small change and commit (here we added a LICENSE file).
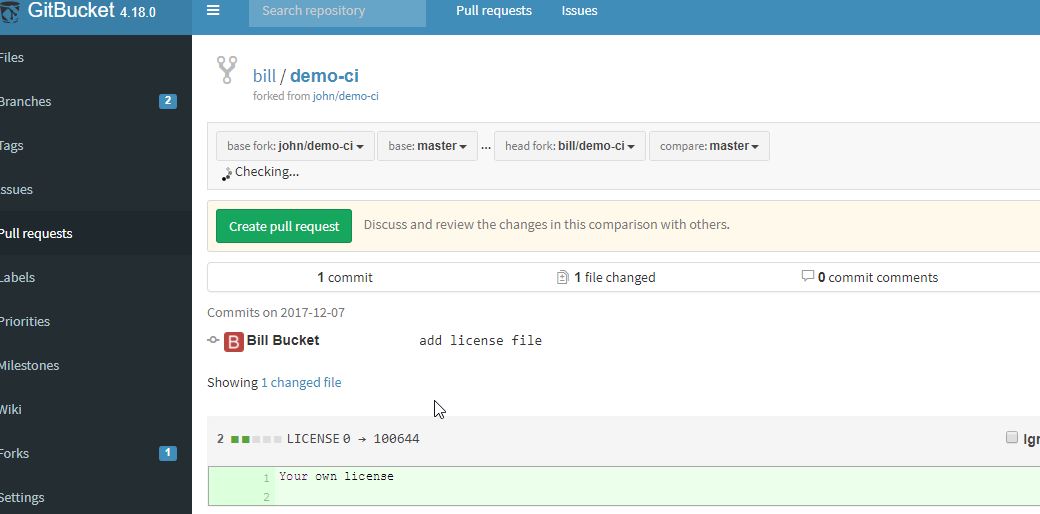
Go to "Pull Request" menu, and create a "Pull Request"
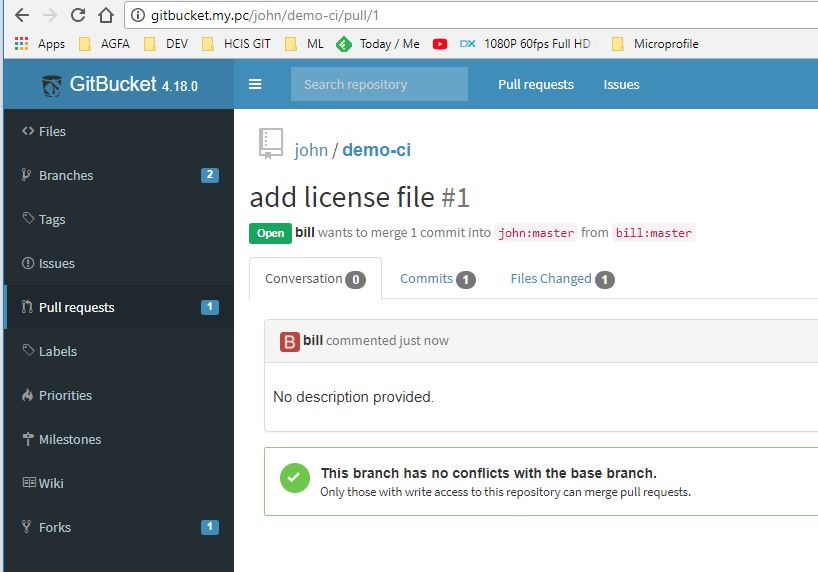
In John view the PR appeared
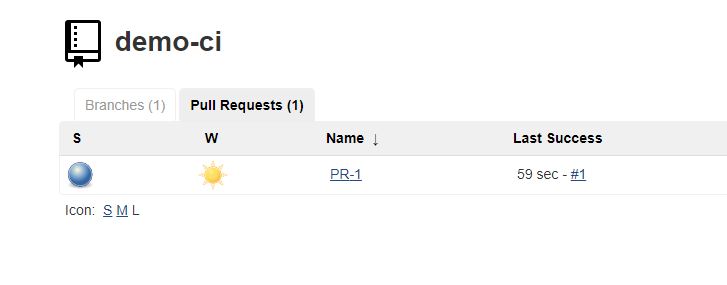
Jenkins should have been informed of the PR, and should have built a version for it.
jgitver should have named it accordingly
Usage guide
- Starting from scratch
- Introduce jgitver-maven-plugin in existing project
- Use a lightweight tag to change project version
IDE usage
Continuous integration
- native GIT aware travis-ci circle-ci
- jenkins integration multibranch pipeline
- continuous deployment - semi automated
- automatic builds for maven, jenkins and gitbucket
Developer & contributions guide