This guide was made by Yuri-chan. A more advanced guide can be found on the official RuneLite page. This guide is for people who have never developed before and will probably have no idea what they're doing. It's filled with a bunch of pictures to help you out visually.
The screenshots were taken using IntelliJ 2018. Your version of the software might look slightly different. However, the compilation procedure below will more or less still remain the same.
Download: https://www.oracle.com/technetwork/java/javase/downloads/jdk8-downloads-2133151.html
If it asks you to make an Oracle account, use this link instead. The link above might be outdated.
File Size: Approximately 200.0~ MB
Note: Java JRE will not work. Java JRE is commonly used by consumers products. Java JDK contains libraries required by developer programs. Building with IntelliJ, the compilation software below, requires the Java JDK 8 software. You can have multiple Java versions on your PC without confliction.
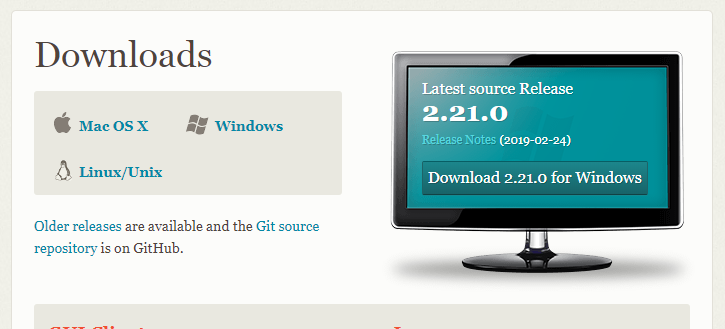
Download: https://git-scm.com/downloads
File Size: Approximately 40.0~ MB
Download https://www.jetbrains.com/idea/download/#section=windows
File Size: Approximately 480.0~ MB
Please install the programs listed in the requirements above in the order that they are listed. In every installation process, you are able to just spam on the [NEXT] and [FINISH] buttons. There is no ad-ware lurking in these development tools; and hopefully never will.
At this point, you should have all 3 of the required software installed. This section begins the tutorial on how to build RuneLite from scratch using the compiler.
Simple right? I hope you don't get stuck here...
Click on Check out from Version Control and then select Git.
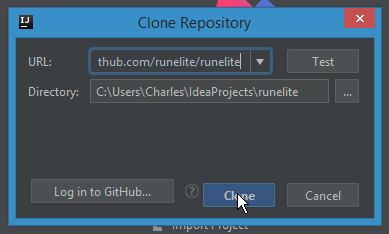
When asked for the repository location, enter https://github.com/runelite/runelite as the URL. Then click Clone.
When you are prompted to import the project, hit Yes.
Your screen should now look something like this.
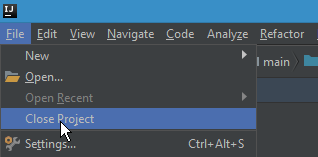
Go to File > Close Project.
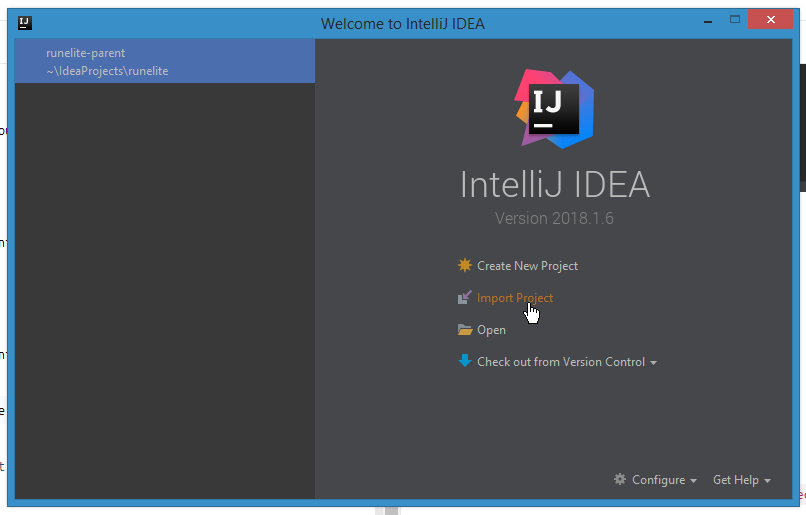
Re-import the project again. This time, use the Import Project feature.
Under File Location enter in the location of your RuneLite. Unless you have changed it, by default, you can type in ~/IdeaProjects/runelite as shown below to find the correct file.
Import the project as Import project from external model > Maven > Next ...
You should be back to the screen you were at before you closed your project above. Navigate to File > Settings.
Navigate to Plugins > Search and search for Lombok. Install this software as it is used to compile RuneLite.
At this point, you will be prompted to restart your IDE. You should do so.
In the top right corner of your screen find a dropdown box click it and navigate to Edit Configurations....
Add a new Maven configuration by clicking [+] > Maven.
Click the folder next to Working Directory and select runelite-parent.
The under Command line, enter install -DskipTests -U. You can now hit Apply and Okay to close the window.
Back to where the Edit Configurations... was, you should now see a M option. Click the Play button next to it.
Note: If your button isn't green, you might need to wait a couple minutes for your IntelliJ to finish indexing the files.
A console will now appear at the bottom of the screen. Wait until the console shows an exit code before continuing. This process will take a while if you are running it for your first time.
You should now be able to run RuneLite. Open the File Explorer by clicking project on the left-most sidebar. Navigate to runelite > runelite-client > src > main > java > net > runelite > client. This is done by expanding your project workspace to the left.
Scroll down until you see the RuneLite class. Right click it and click Run 'RuneLite.main()'
RuneLite should now launch. When you launch RuneLite for the first time using this method, the client may fail to load and get stuck on Fetching Game Updates 99%, black screen, or whatever. If this happens, re-run your Maven module back in Step 4. You may need to re-select the drop-down menu, as shown in the image below. Also, when you launch RuneLite for the first time, there may be a short wait time. This is normal.
If you are able to get RuneLite launched and working, you have succeeded.
Now, instead of navigating hundreds of folders every single launch time, use the quick launch configurations in the top as shown in the picture above. Playing RuneLite will launch the client. Playing install will launch maven. Quick and easy.
If you're able to launch RuneLite successfully from Step 6 from above, plugin installation becomes really easy.
Remember the RuneLite class that you had to run in a previous step? In the same folder, there is a plugins folder. Navigate to runelite > runelite-client > src > main > java > net > runelite > client to find it.
When you want to install a plugin, drag your plugin inside the plugins folder.
When prompted with a confirmation message, simply click Okay.
Like above, navigate to runelite > runelite-client > src > main > java > net > runelite > client.
However, this time, expand the plugins folder. You should see a bunch of plugins.
Highlight the plugin you wish to uninstall. Then press the Delete button your keyboard.
Uninstall the plugin you wish to upgrade, then install the new patch. Simple.
Every Thursday, after the weekly game update, RuneLite also performs a client update. This changes the code that interacts with their servers. As a result, you may notice your global settings disappear, your bank value malfunctioning, etc. You will need to update your code on IntelliJ as a result. This is a simple process.
Right click the top level project folder.
Navigate to Git > Repository > Pull.
Pull the new RuneLite update. This could take a minute or two.
Go back to Git > Repository > Fetch. This should take a couple seconds.
Finally, Git > Repository > Rebase. This should also take a couple seconds.
If you are presented with a message, click OK. Everything is continuous for these steps.
Import new changes to the Maven file by navigating to Maven > Reimport.
Re-run your Maven (the install -DskipTests -U thing in the installation process above). Then click the green triangle Play as you did before.
Switch back to RuneLite and you're done! Your RuneLite has been updated!


