03 Create a storage account
Every storage account must belong to an Azure resource group. A resourcegroup is a logical container for grouping your Azure services. When you create a storage account, you have the option to either create a new resource group, or use an existing resource group. This article shows howto create a new resource group.
A general-purpose v2 storage account provides access to all of theAzure Storage services: blobs, files, queues, tables, and disks. The steps outlined here create a general-purpose v2 storage account, but the steps to create any type of storage account are similar. For more information about types of storage accounts and other storage account settings, see Azure storage account overview. To create a general-purpose v2 storage account in the Azure portal, follow these steps:
- On the Azure portal menu, select All services. In the list of resources, type Storage Accounts. As you begin typing, the list filters based on your input. Select Storage Accounts.
- On the Storage Accounts window that appears, choose Add.
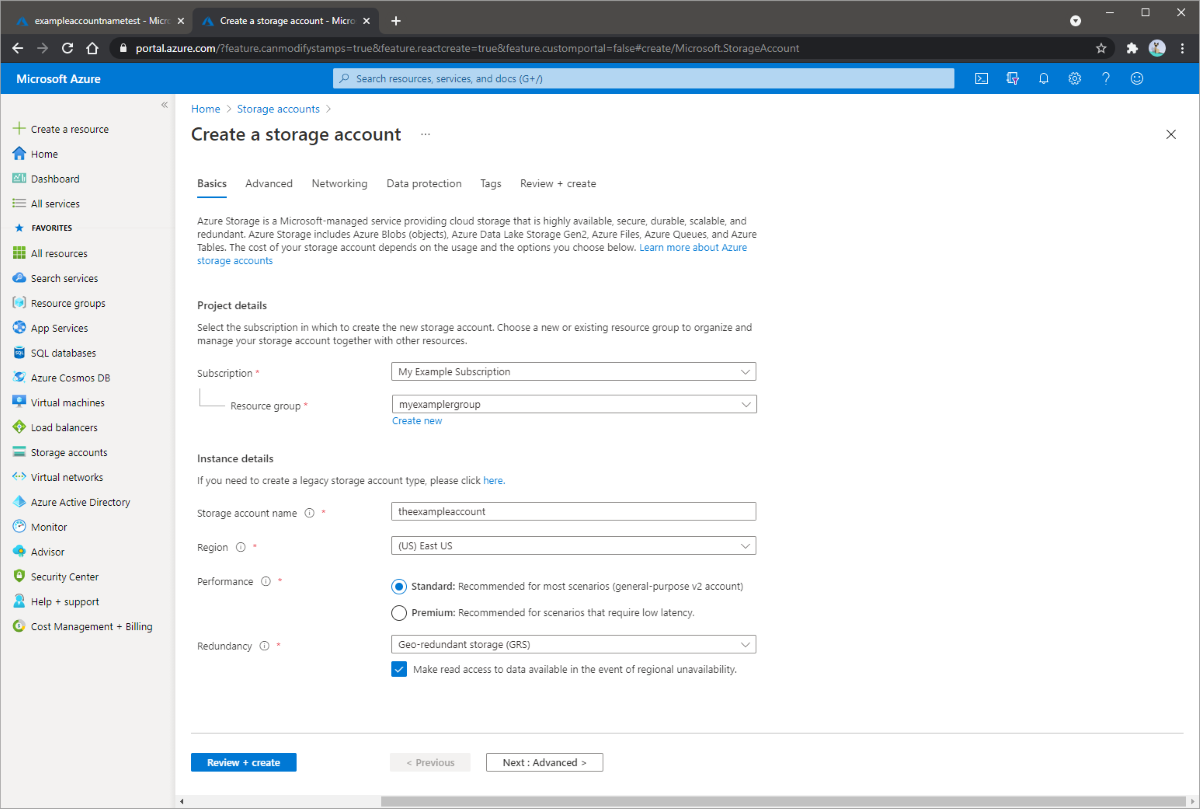
- On the Basics tab, select the subscription in which to create the storage account.
- Under the Resource group field, select your desired resource group, or create a new resource group. For more information on Azure resource groups, see Azure Resource Manager overview.
- Next, enter a name for your storage account. The name you choose must be unique across Azure. The name also must be between 3 and 24 characters in length, and may include only numbers and lowercase letters.
- Select a location for your storage account, or use the default location.
- Select a performance tier. The default tier is Standard.
- Set the Account kind field to Storage V2 (general-purpose v2).
- Specify how the storage account will be replicated. The default replication option is Read-access geo-redundant storage (RA-GRS). For more information about available replication options, see Azure Storage redundancy.
- Specify the access tier for blobs in the storage account. The default tier is hot. For more information about blob access tiers, see Hot, cool, and archive access tiers for blobs.
- To use Azure Data Lake Storage, choose the Advanced tab, and then set Hierarchical namespace to Enabled. For more information, see Azure Data Lake Storage Gen2 Introduction
- Select Review + Create to review your storage account settings and create the account.
- Select Create.
The following image shows the settings on the Basics tab for a new storage account: