A MacOS app to change your Outlook notification sounds.
Changing your Outlook sounds its a two part process. First you need to download the soundset, then you need to install it. This guide will walk you through both steps.
When downloading a Sound Set, it will automaticly be created in your Outlook SoundSet Directory.
- Go to the Shop on the left hand menu.
- Select any pack you want and click "GET".
Once you have a SoundSet downloaded, you will need to change the SoundSet in Outlook.
-
Open the Outlook desktop app on the Mac you want to change the sounds on.
Open Outlook
-
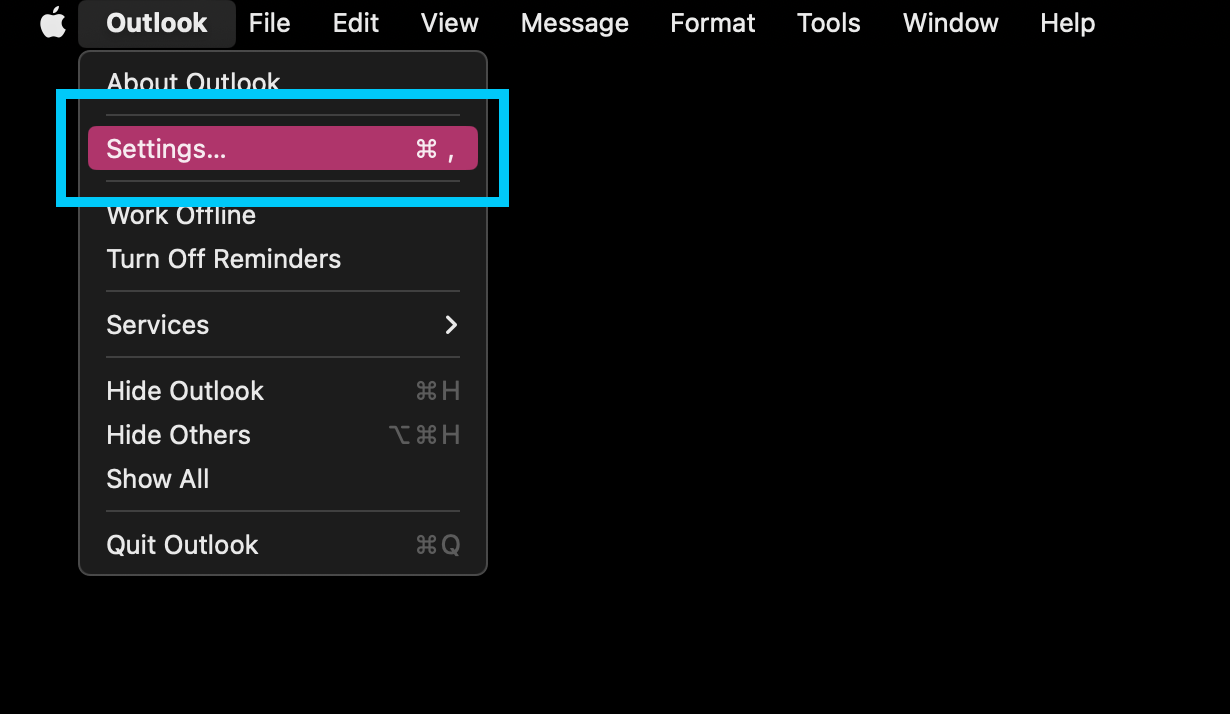
From the top menu bar, Click "Outlook" and select "Settings..."
-
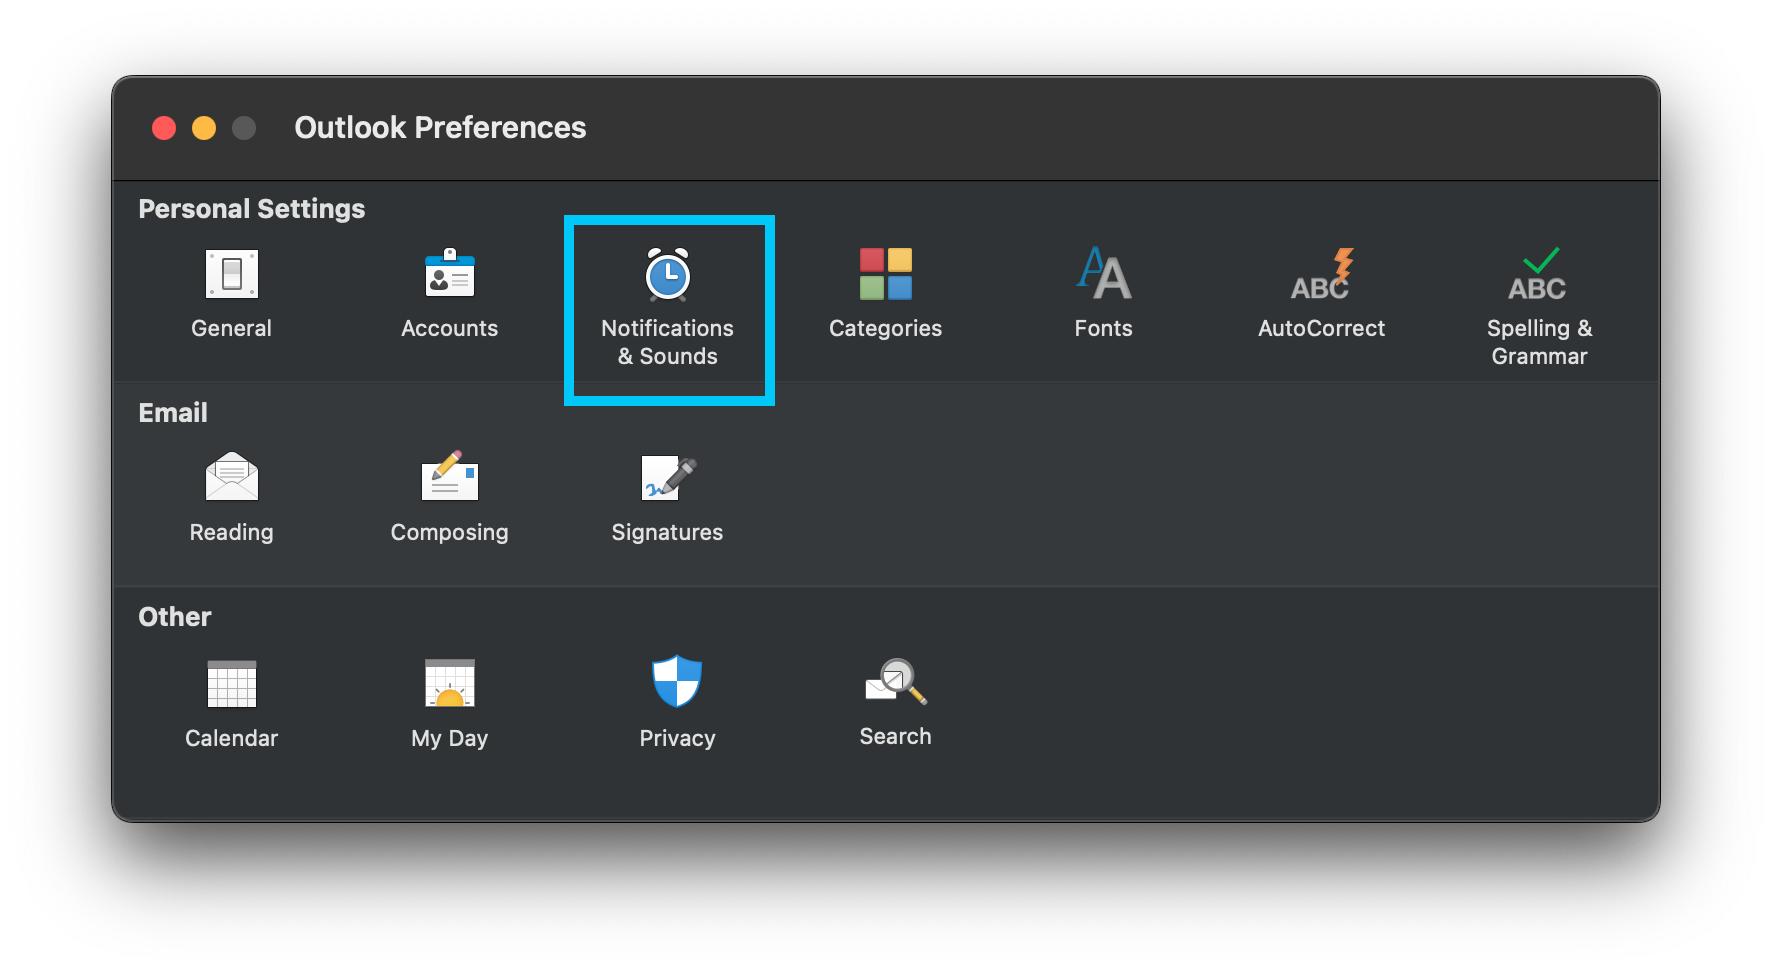
Select Notifications & Sounds in the center of the settings panel.
-
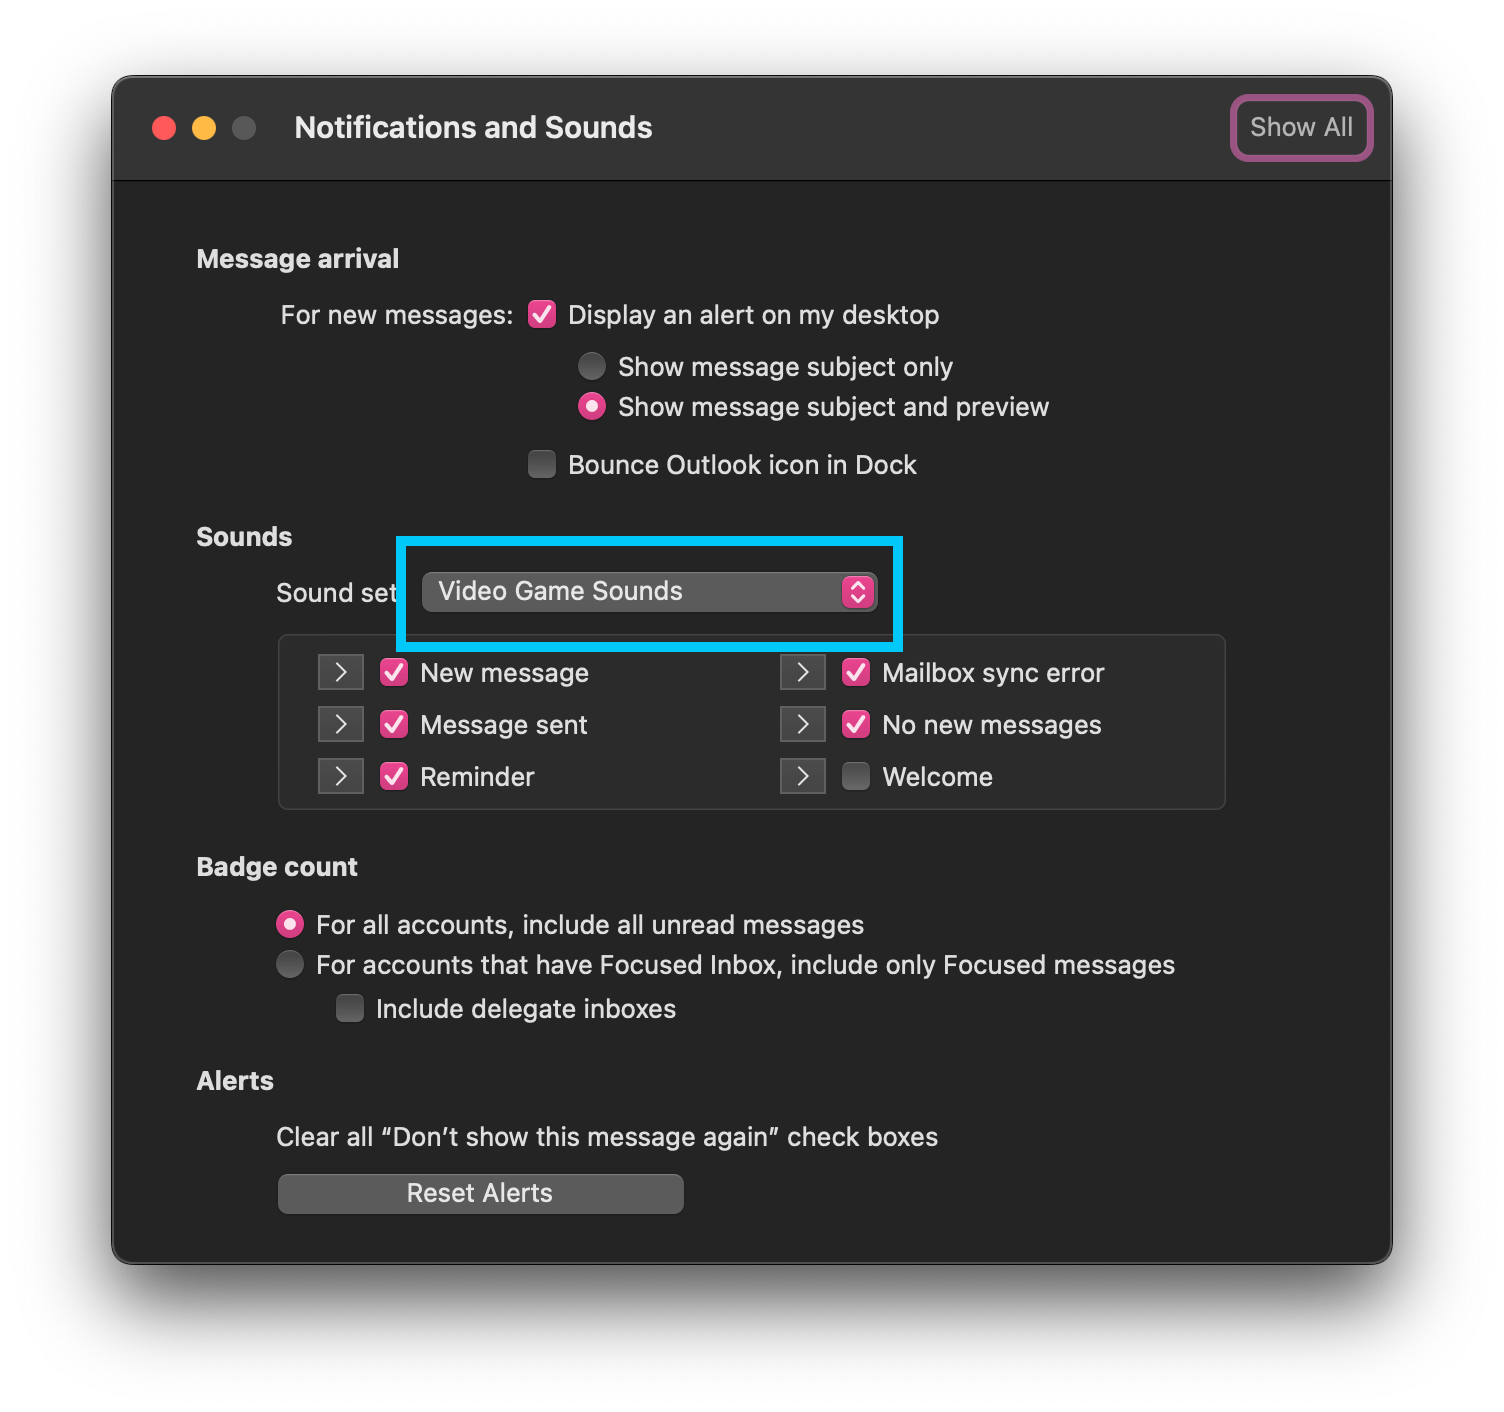
Click the currently enabled SoundSet to open the dropdown and then select the set you want to use.
If your SoundSet is not appearing, try restarting Outlook
- Grab some sounds at https://pixabay.com/ or somewhere similar
- Click the "+" button on the Installed tab
- Click the File icon for and select each sound
- Set that sound in Outlook and enjoy
Creating a new sound set copies the default set that is included with Outlook. Thes audio files are in .wav. Soundsetr will convert whatever new audio you add into the format if the existing Soundset. If you want your files to be in .aif, change the file names in the soundset.plist to .aif, and any new sounds added will auto convert to aif. Otherwise it will convert to .wav.
If your sounds have pops or cliks, try using .wav instead of .aif.


