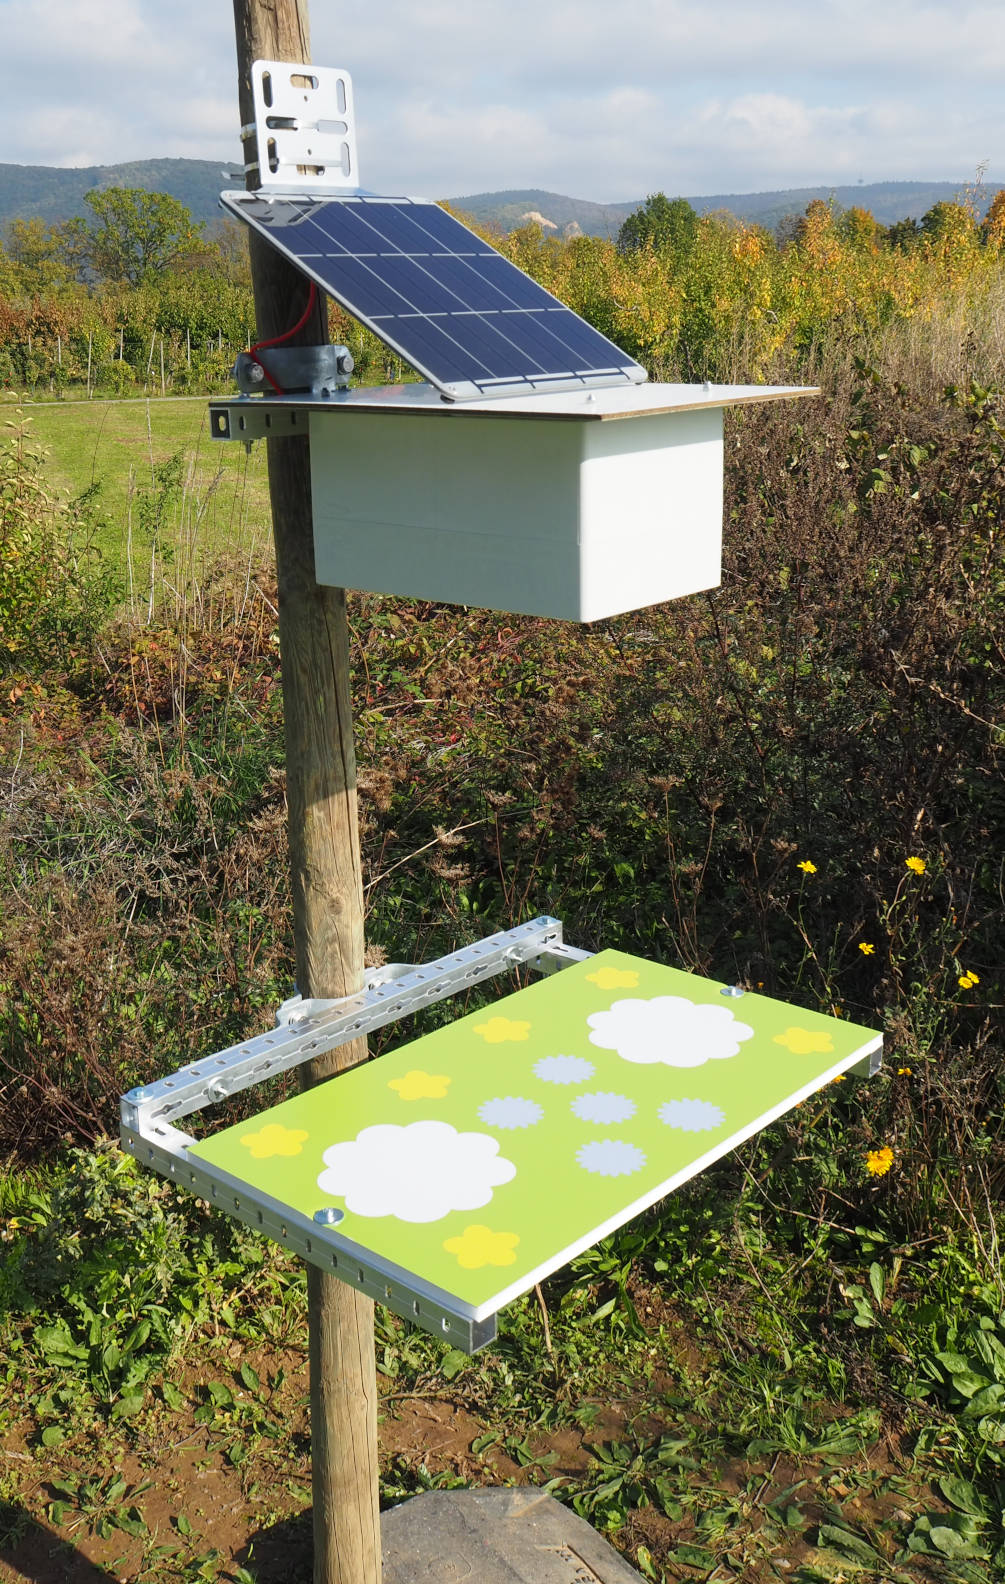
This repository contains Python scripts and YOLOv5, YOLOv6, YOLOv7 and YOLOv8 object detection models (.blob format) for testing and deploying the Insect Detect DIY camera trap for automated insect monitoring.
The camera trap system is composed of low-cost off-the-shelf hardware components (Raspberry Pi Zero 2 W, Luxonis OAK-1, PiJuice Zero pHAT), combined with open source software and can be easily assembled and set up with the provided instructions.
Important
Please make sure that you followed all steps to set up your Raspberry Pi.
Install the required dependencies for Raspberry Pi + OAK by running:
sudo curl -fL https://docs.luxonis.com/install_dependencies.sh | bashInstall the package libopenblas-dev (required for numpy):
sudo apt install libopenblas-devDownload the insect-detect repository:
git clone https://github.com/maxsitt/insect-detectInstall the required packages:
python3 -m pip install -r insect-detect/requirements.txtCheck out the Programming section for more details about the scripts and tips on possible software modifications.
| Model | size (pixels) |
mAPval 50-95 |
mAPval 50 |
Precisionval |
Recallval |
SpeedOAK (fps) |
params (M) |
|---|---|---|---|---|---|---|---|
| YOLOv5n | 320 | 53.8 | 96.9 | 95.5 | 96.1 | 49 | 1.76 |
| YOLOv6n | 320 | 50.3 | 95.1 | 96.9 | 89.8 | 60 | 4.63 |
| YOLOv7-tiny | 320 | 53.2 | 95.7 | 94.7 | 94.2 | 52 | 6.01 |
| YOLOv8n | 320 | 55.4 | 94.4 | 92.2 | 89.9 | 39 | 3.01 |
Table Notes
- All models were trained to 300 epochs with batch size 32 and default hyperparameters. Reproduce the model training with the provided Google Colab notebooks.
- Trained on Insect_Detect_detection dataset version 7, downscaled to 320x320 pixel with only 1 class ("insect").
- Model metrics (mAP, Precision, Recall) are shown for the original PyTorch (.pt) model before conversion to ONNX -> OpenVINO -> .blob format. Reproduce metrics by using the respective model validation method.
- Speed (fps) is shown for the converted models (.blob 4 shaves), running on OAK-1 connected to RPi Zero 2 W (~2 fps slower
with object tracker). Set
cam_rgb.setFps()to the respective fps shown for each model to reproduce the speed measurements. - While connected via SSH (X11 forwarding of the frames), print fps to the console and comment out
cv2.imshow(), as forwarding the frames will slow down the received message output and thereby fps. If you are using a Raspberry Pi 4 B connected to a screen, fps will be correctly shown in the livestream (see gif).
Note
The new version of the processing pipeline (November 2024) differs to the descriptions in the PLOS ONE paper and on the documentation website (will be updated soon). Please refer to the following points for an up-to-date description.
Processing pipeline for the
yolo_tracker_save_hqsync.py
script that can be used for automated insect monitoring:
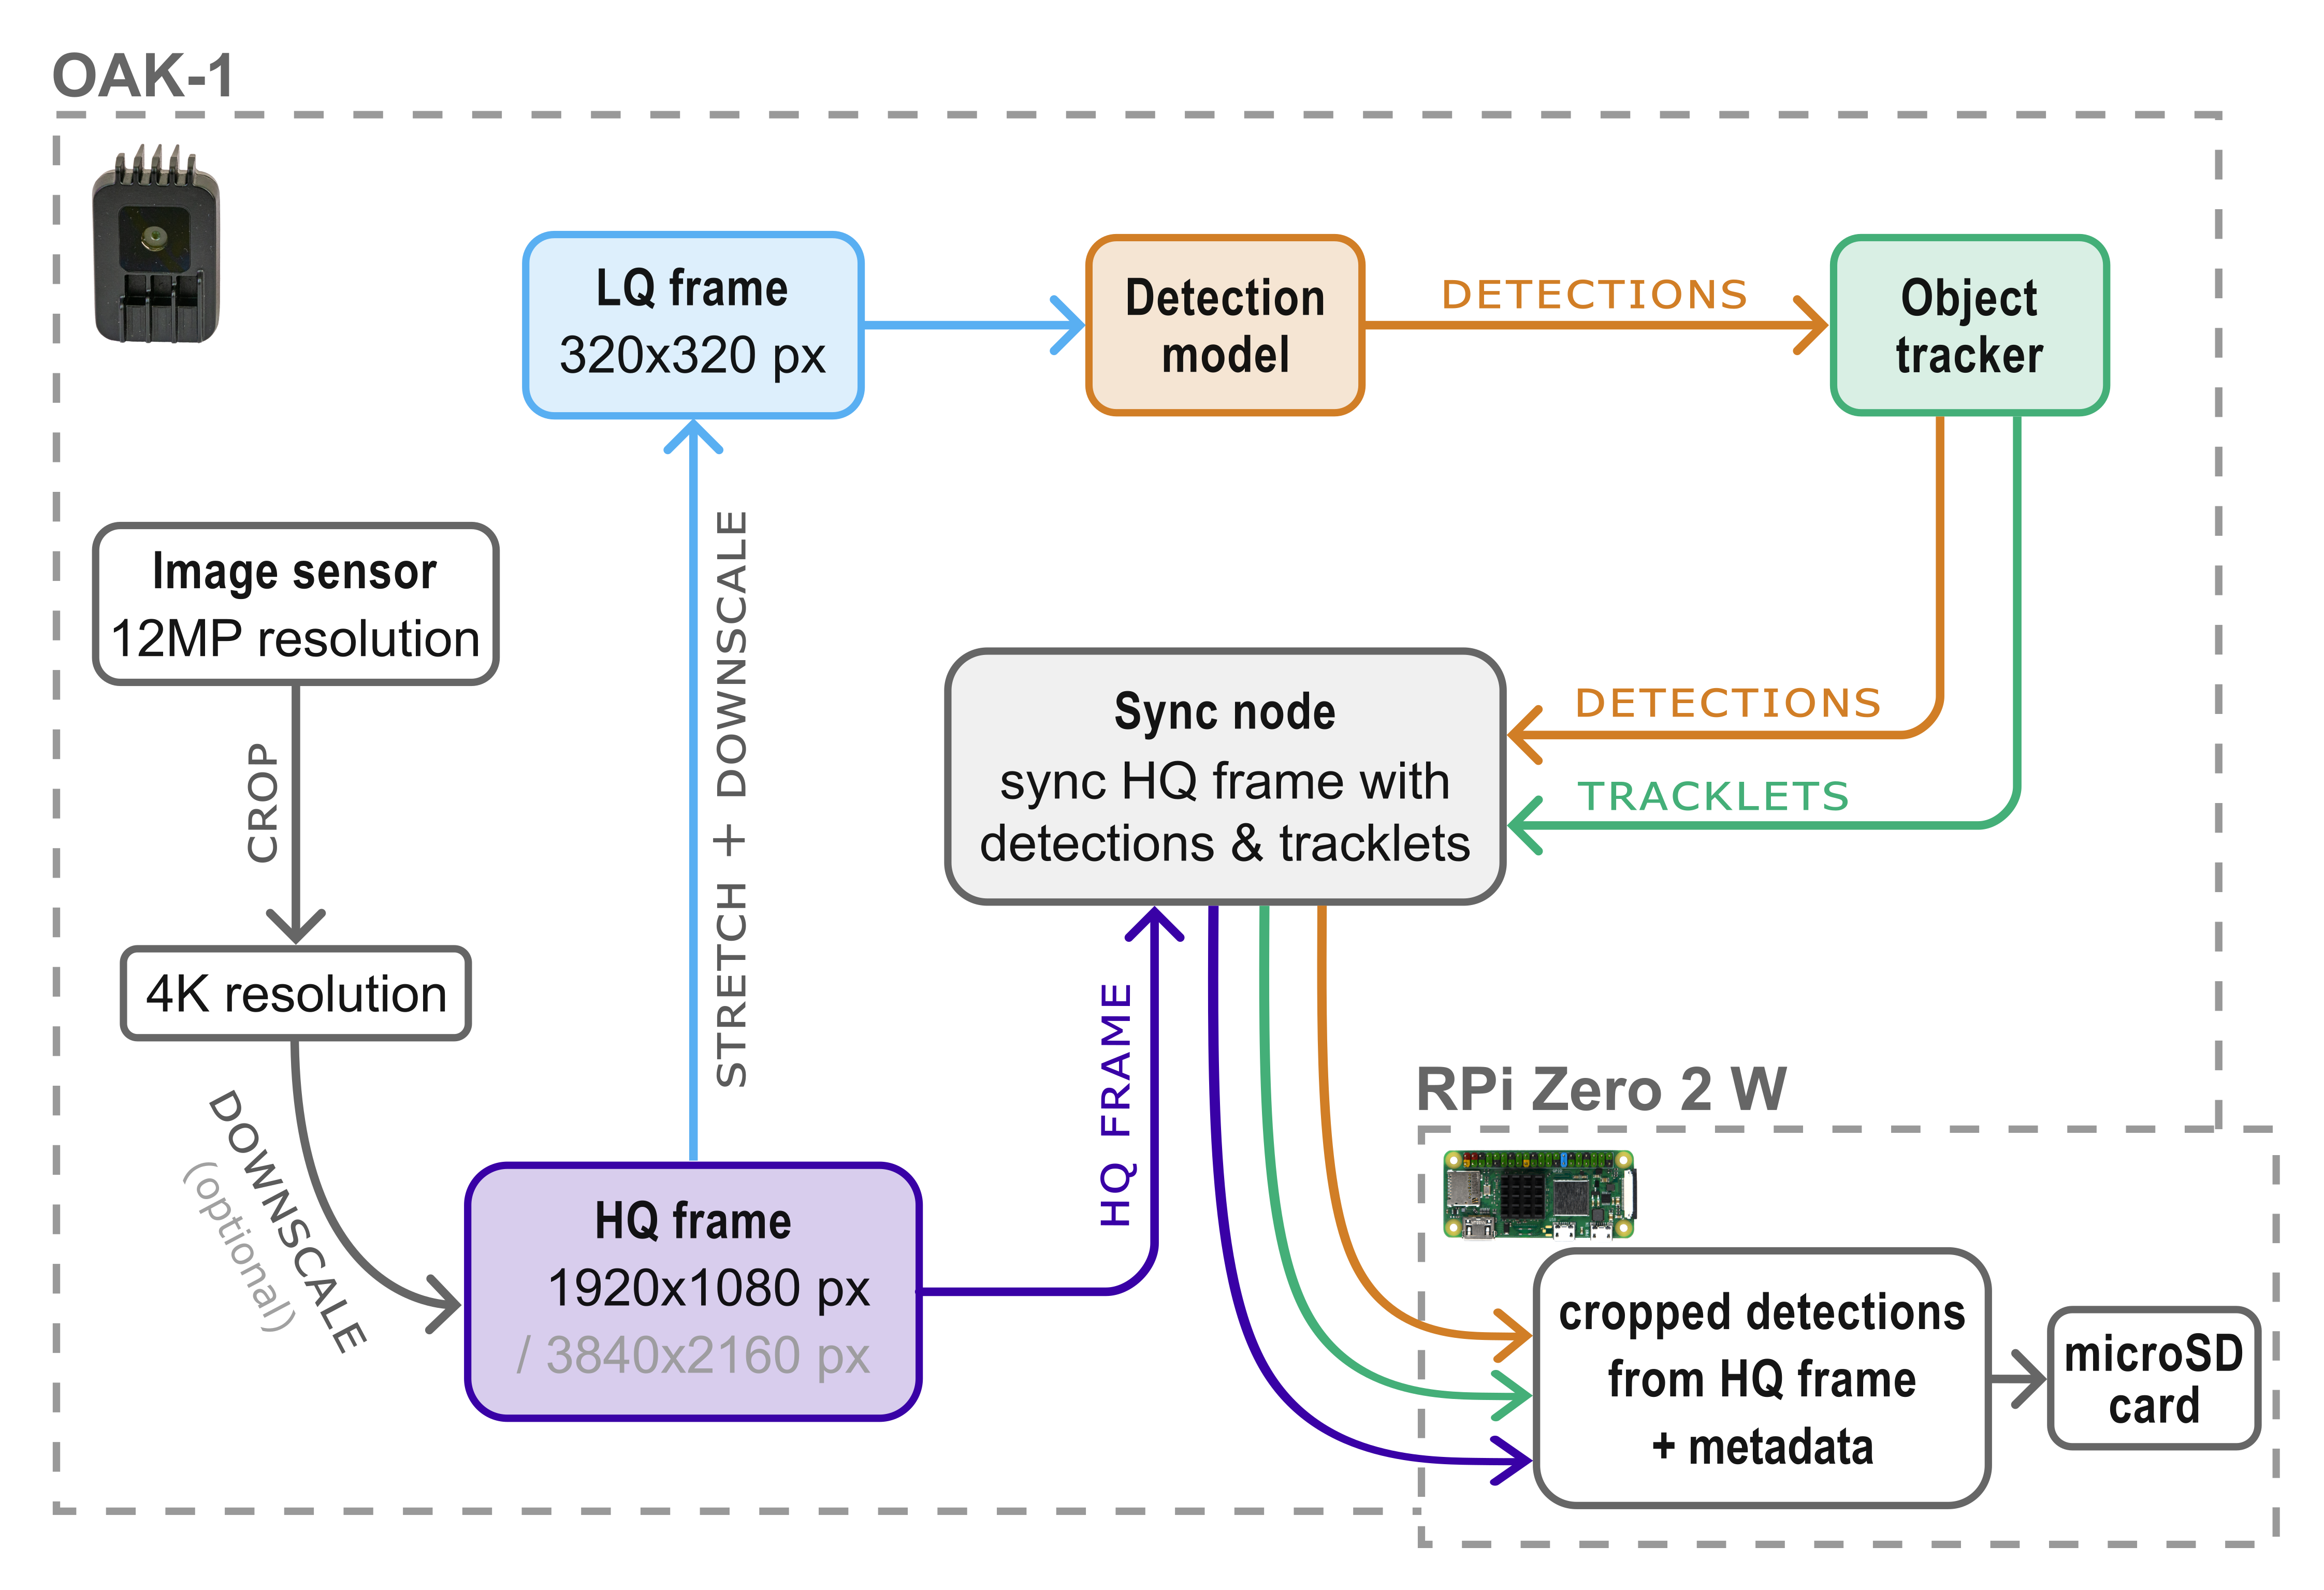
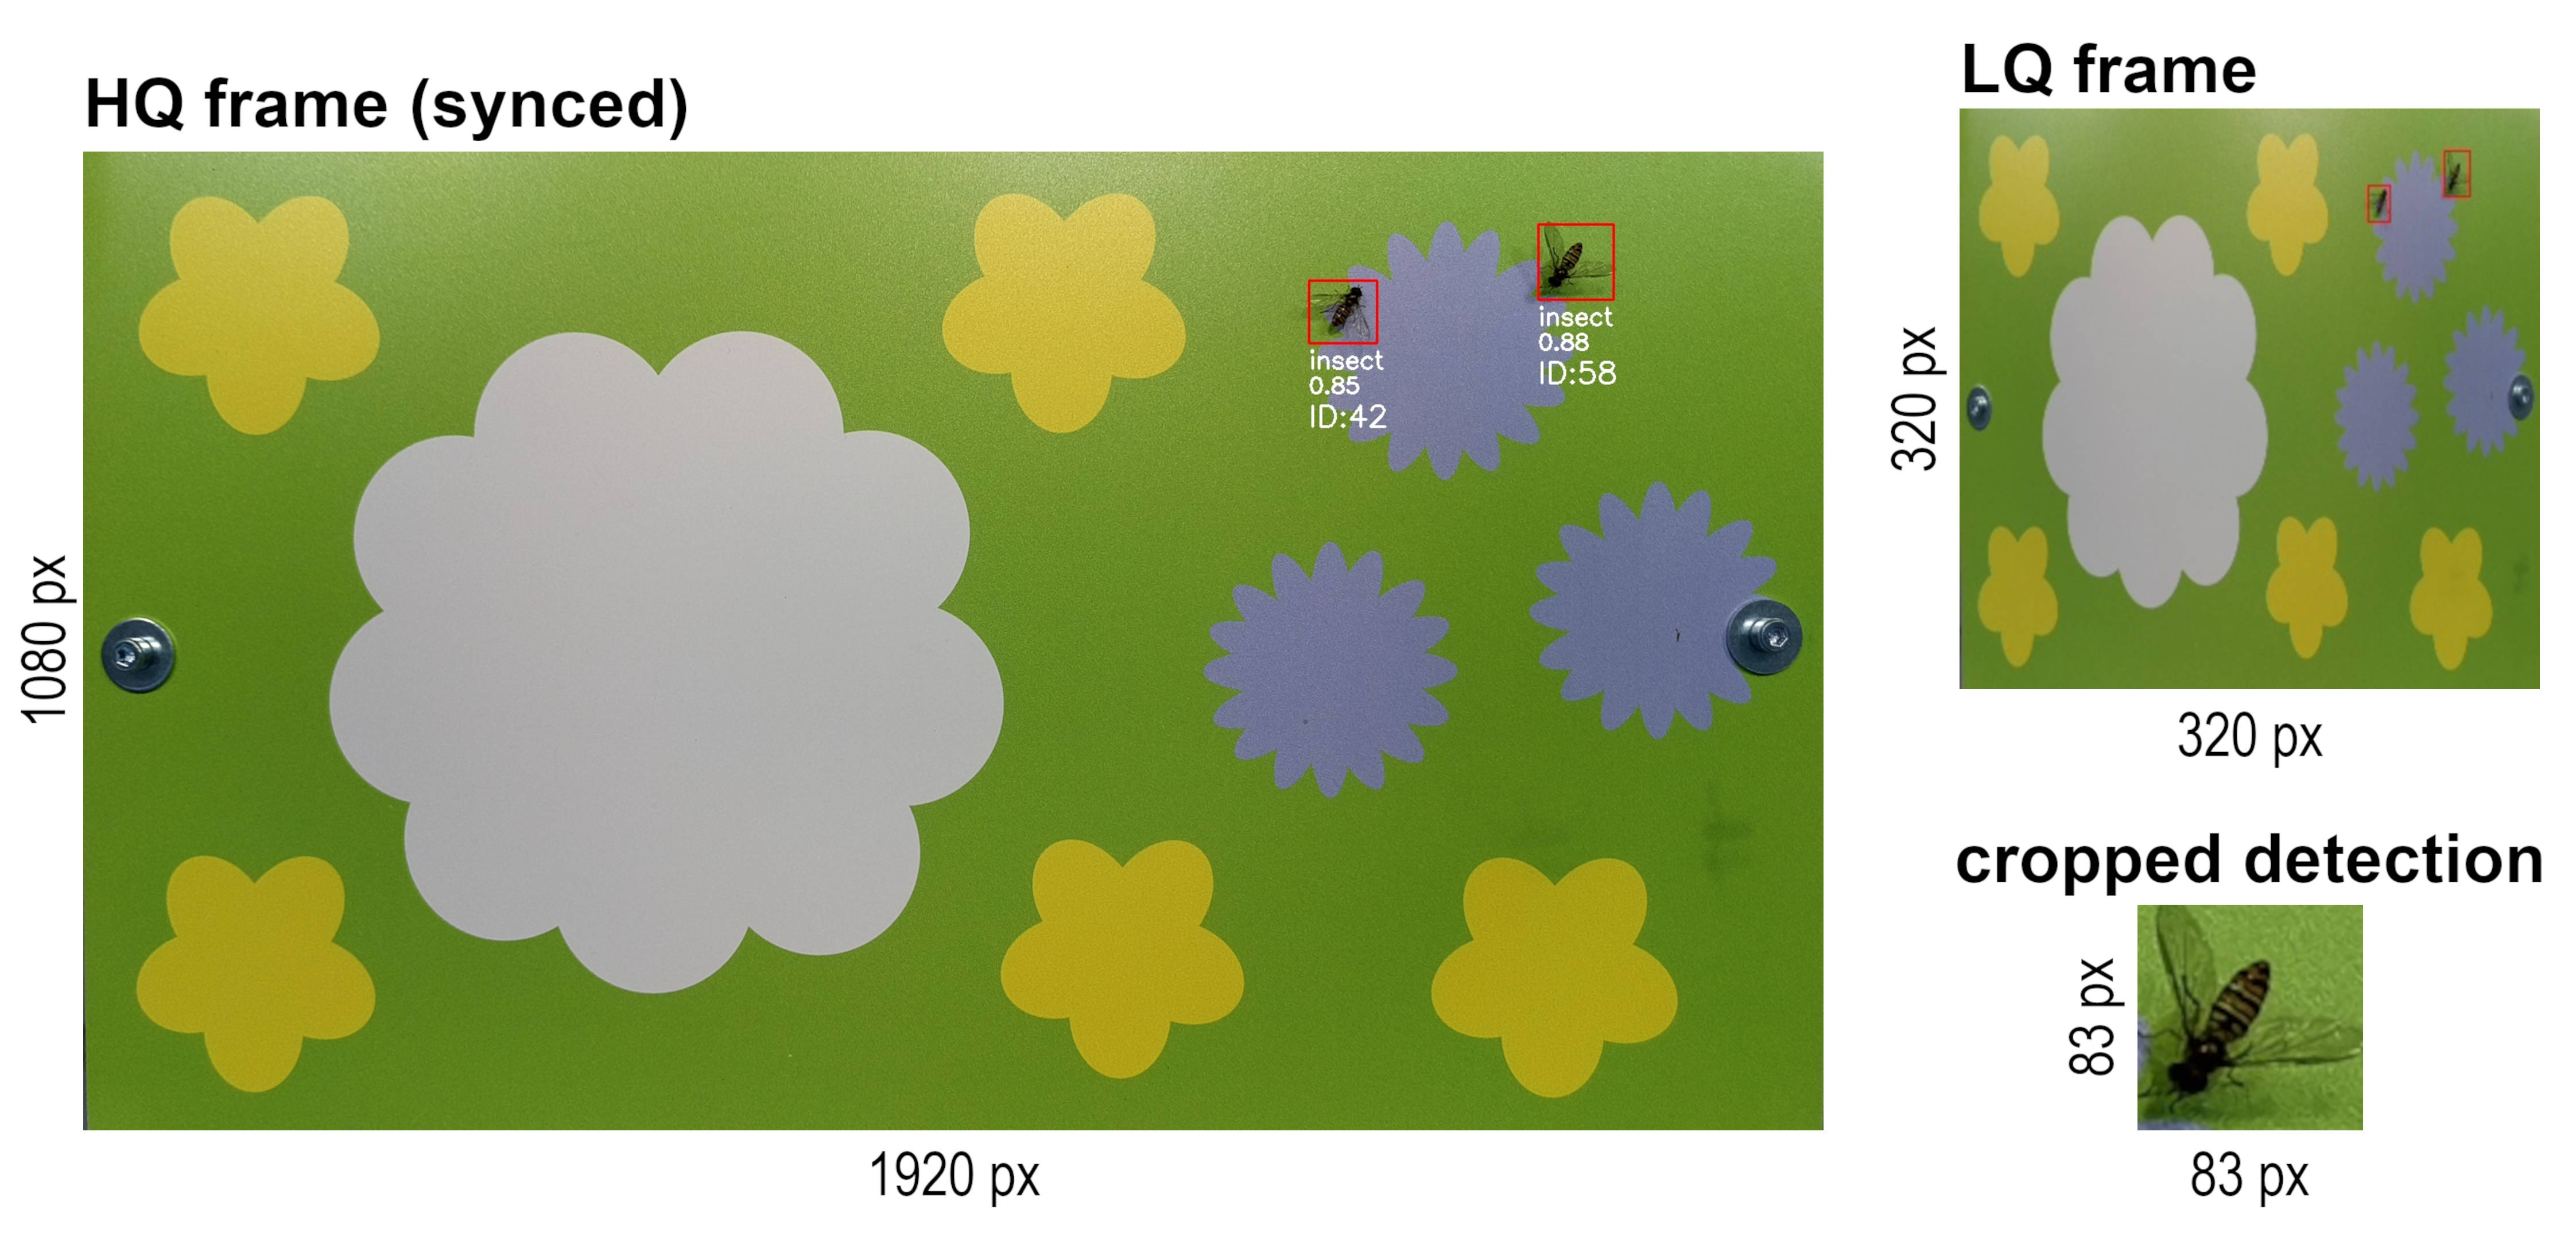
- A custom YOLO insect detection model is run in real time on device (OAK) and uses a continuous stream of downscaled LQ frames (default: 320x320 px) as input
- An object tracker uses the bounding box coordinates of detected insects to assign a unique tracking ID to each individual present in the frame and track its movement through time
- The object tracker (+ model) output from inference on LQ frames is synchronized with MJPEG-encoded HQ frames (default: 3840x2160 px) on device (OAK) using the respective timestamps
- The encoded HQ frames are saved to the Raspberry Pi's SD card at the specified capture interval (default: 1 second) if an insect is detected and tracked and independent of detections at the specified timelapse interval (default: 10 minutes)
- Corresponding metadata from the detection model and tracker output (including timestamp, label, confidence score, tracking ID, tracking status and bounding box coordinates) is saved to a metadata .csv file for each detected and tracked insect at the specified capture interval
- The metadata can be used to crop detected insects from the HQ frames and save them as individual .jpg images and/or save a copy of the frame with overlays. Depending on the post-processing settings, the original HQ frames will be optionally deleted after the processing to save storage space
- During the recording, a maximum pipeline speed of ~19 FPS for 4K resolution (3840x2160) and ~42 FPS for 1080p resolution (1920x1080) can be reached if the capture interval is set to 0 and the camera frame rate is adjusted accordingly
- With default settings, the new pipeline consumes ~3.8 W during recording (previous version: ~4.4 W)
More information about the processing pipeline can be found in the Insect Detect Docs 📑.
Check out the classification
instructions and the insect-detect-ml GitHub repo for
information on how to classify the cropped detections with the provided classification model and script.
Take a look at the post-processing instructions for information on how to post-process the metadata with classification results.
This repository is licensed under the terms of the GNU General Public License v3.0 (GNU GPLv3).
If you use resources from this repository, please cite our paper:
Sittinger M, Uhler J, Pink M, Herz A (2024) Insect detect: An open-source DIY camera trap for automated insect monitoring. PLOS ONE 19(4): e0295474. https://doi.org/10.1371/journal.pone.0295474


