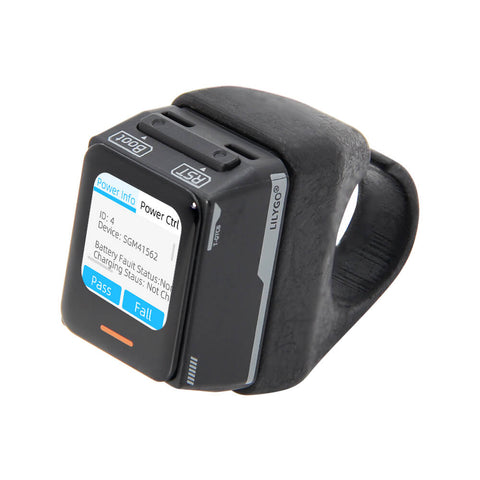
This is an Arduino library (v3.x) to use the LilyGo T-QT C6 with touch gesture display and LiPo battery.
image from lilygo.ccLilyGo T-QT C6 is a mini development board based on the ESP32-C6 chip from espressif and with a 128x128px TFT full-color touch gesture screen
example code from LilyGo: T-QT-C6
- Wireless: Wi-Fi 6 2.4GHz, Bluetooth 5 (LE), Thread, Zigbee
- CPU 32-bit RISC-V 160 MHz
- CPU 32-bit RISC-V 20 MHz
- 320 KB ROM
- 512 KB SRAM
- supports PSRAM
- protocols: SPI, UART, I2C, RMT, TWAI, PWM, SDIO, Motor Control PWM
- 12-bit ADC
- temperature sensor
Clone this repository.
Uncomment a src_dir= line in the platform.ini file.
| example | code | description |
|---|---|---|
| Serial | ./examples/serial | UART as debug output |
| MAC | ./examples/mac | Outputs the MAC address |
| breathing light | ./examples/breathing-light | showcase breathing-light |
| task stack size | ./examples/task-stack-size | gather needed stack size |
| dev mode | ./examples/dev-mode | QtDev class with all features |
| battery voltage | ./examples/battery-voltage | Outputs the battery voltage |
| touch CST816T | ./examples/touch-CST816T | touch gesture to Serial |
| gfx | ./examples/gfx | showcase display drawing |
| touch-CST816T-gfx | ./examples/touch-CST816T-gfx | display with touch gesture |
| WiFi AP | ./examples/wifi-ap | Access Point with Qwik UI |
| catalog | ./examples/ |
-
modify the ./partitions.csv if needed to prepare the filesystem
-
comment out
src_dir = ./examples/wifi-apline in platformio.ini -
build and upload the project
- build and upload Qwik UI (SSG) in
/data
cd ui && pnpm ipnpm build.state- call
Build Filesystem ImagethenUpload Filesystem Image:
-
create a platformio project (e.g. with expressif esp32-c6-devkitc-1)
-
copy the boards path to your project root path
-
adapt the platformio.ini
[env:esp32-c6]
board = esp32-c6-n4
framework = arduino
platform = https://github.com/pioarduino/platform-espressif32/releases/download/stable/platform-espressif32.zip
lib_deps =
https://github.com/mcuw/esp32-t-qt-c6-sdk.git- example main.cpp
#include <Arduino.h>
#include <Qt.h>

Qt qt;

void setup()
{
  qt.begin();
}

void loop()
{
  qt.setBreathingLight(0);
  delay(1000);

  qt.setBreathingLight(255);
  delay(1000);
}Contribution and help ... if you find an issue or wants to contribute then please do not hesitate to create a Pull request or an issue.
We provide our build template as is, and we make no promises or guarantees about this code.


