-
Notifications
You must be signed in to change notification settings - Fork 4.6k
build_FSTDriverless_windows
-
Download the Epic Games Launcher. While the Unreal Engine is open source and free to download, registration is still required.
-
Run the Epic Games Launcher, open the Library tab from left, click on the "Add Versions" which should show the option to download Unreal 4.18 as shown below. If you have multiple versions of Unreal installed then make sure 4.18 is "Current" by clicking down arrow next to the Launch button for the version.
Note: This project works only with UE 4.18. If you have UE 4.16 or older projects, please see the upgrade guide to upgrade your projects.
- You will need Visual Studio 2017 (make sure to install VC++ and Windows SDK 8.x).
- Start
x64 Native Tools Command Prompt for VS 2017. Create a folder for the repo and rungit clone https://github.com/Microsoft/AirSim.git. - Run
build.cmdfrom the command line. This will create ready to use plugin bits in theUnreal\Pluginsfolder that can be dropped into any Unreal project.
Finally, you will need an Unreal project that hosts the environment for your vehicles. Follow the list below to create an environment that simulates the FSD competitions.
- Make sure AirSim is built and Unreal 4.18 is installed as described above.
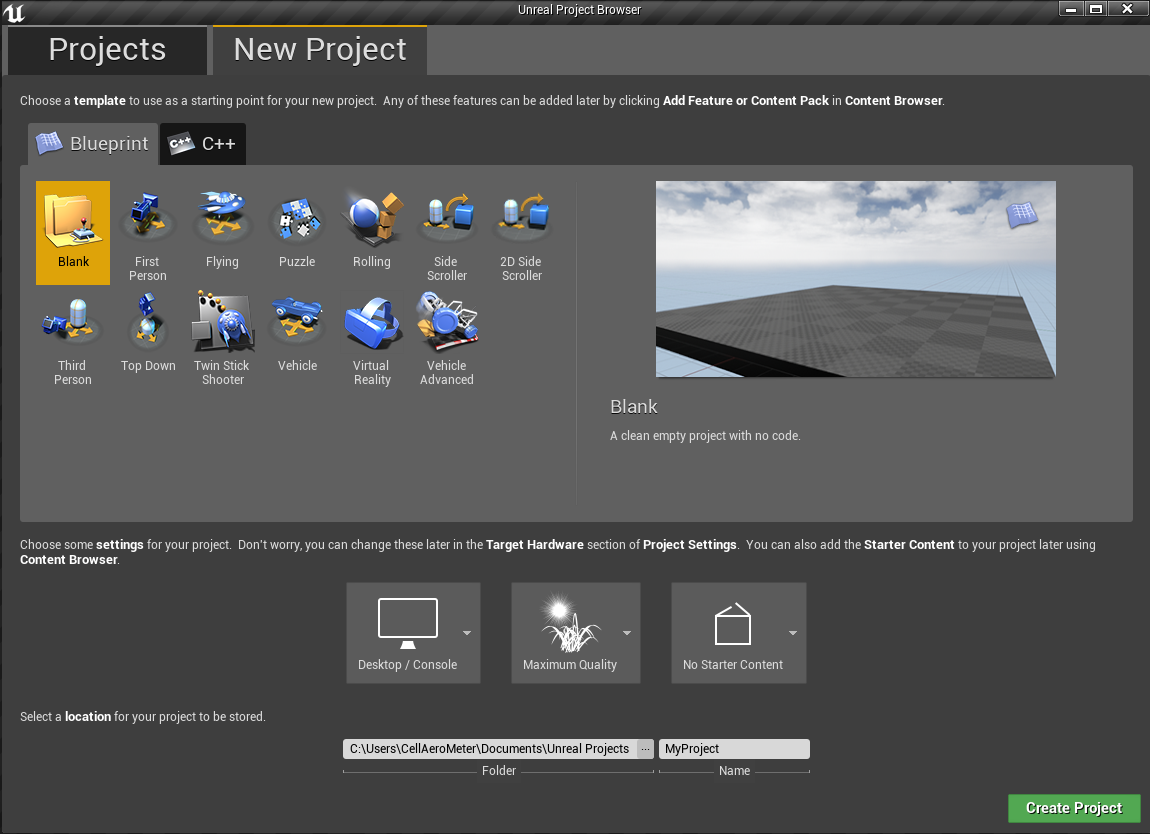
- Open UE editor and choose "New Project". Choose "Blank" with no starter content. Select your project's location, define it's name (
ProjectNamefor example) and press "create project".
-
After the project is loaded to the editor, from the
File menuselectNew C++ class, leave defaultNoneon the type of class, clickNext, leave default nameMyClass, and clickCreate Class. We need to do this because Unreal requires at least one source file in project. It should trigger compile and open up Visual Studio solutionProjectName.sln. -
Close and save
ProjectName.sln. Also, close the UE editor. -
Go to your folder for AirSim repo and copy
Unreal\Pluginsfolder into yourProjectNamefolder. This way now your own Unreal project has AirSim plugin. -
Download the environment assets of FSD racecourse from here. Extract the zip into
ProjectName\Content(see folders tree in the end of this doc). -
Download the formula Technion car assets from here. Extract the zip into
ProjectName\Plugins\AirSim\Content\VehicleAdv\SUVand selectreplacewhen asked forSuvCarPawn.uasset(the original file will be saved into a backup folder). -
Edit the
ProjectName.uprojectso that it looks like this: Notice that we called the projectProjectNamein case you need to change it.
{
	"FileVersion": 3,
	"EngineAssociation": "4.18",
	"Category": "Samples",
	"Description": "",
	"Modules": [
		{
			"Name": "ProjectName",
			"Type": "Runtime",
			"LoadingPhase": "Default",
			"AdditionalDependencies": [
				"AirSim"
			]
		}
	],
	"TargetPlatforms": [
		"MacNoEditor",
		"WindowsNoEditor"
	],
	"Plugins": [
		{
			"Name": "AirSim",
			"Enabled": true
		}
	]
}
- Right click the
ProjectName.uprojectin Windows Explorer and select Generate Visual Studio Project Files. This step detects all plugins and source files in your Unreal project and generates .sln file for Visual Studio.
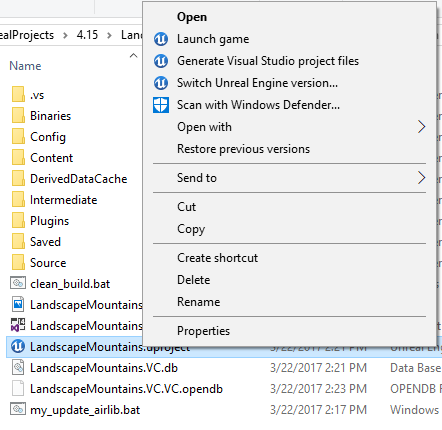
Tip: If the Generate Visual Studio Project Files option is missing you may need to reboot your machine for the Unreal Shell extensions to take effect. If it is still missing then open the ProjectName.uproject in the Unreal Editor and select Refresh Visual Studio Project from the File menu.
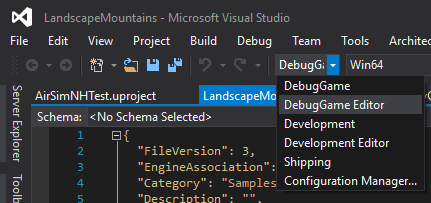
- Reopen
ProjectName.slnin Visual Studio, and make sure "DebugGame Editor" and "Win64" build configuration is the active build configuration.
-
Press
F5todebug. This will start the Unreal Editor. The Unreal Editor allows you to edit the environment, assets and other game related settings. -
First thing, load a map to set your environment. The maps are under
Content\RaceCourse\Maps. To choose one of the maps double-click on it. -
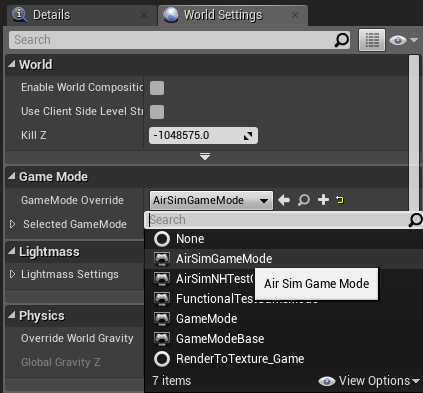
In
Window/World Settingsas shown below, set theGameMode OverridetoAirSimGameMode:
- Next, if you want to change the location of
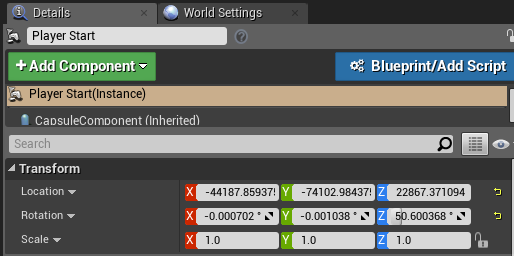
PlayerStartobject in your environment(PlayerStartobject already exist) you can find and fix it in theWorld Outliner. This is where AirSim plugin will create and place the vehicle. If its too high up then vehicle will fall down as soon as you press play giving potentially random behavior.
-
Go to 'Edit->Editor Preferences' in Unreal Editor, in the 'Search' box type 'CPU' and ensure that the 'Use Less CPU when in Background' is unchecked. If you don't do this then UE will be slowed down dramatically when UE window loses focus.
-
Be sure to
Savethese edits. Hit the Play button in the Unreal Editor. See how to use AirSim.
Ready... Set... GO!!! You are now running AirSim in your FSD Unreal environment.
A steering wheel is required if you want to drive manually. See the steering wheel instructions for more details.
Alternatively, you can use APIs for programmatic control or use the so-called Computer Vision mode to move around using the keyboard.