-
Notifications
You must be signed in to change notification settings - Fork 36
Flat File Connector Setup and Configuration
To create the connector described in this section, configure the tabs in the Management Agent Designer as described in the Windows PowerShell Connector technical reference for MIM2016.
The sample connector uses a template file to provide schema information to the Synchronization Service. Create a text file in the Extension folder called MAName_SampleInputFile.txt. Replace the word MAName with the name of your connector. It is recommended to keep the schema file in the extensions folder to make it easy to find it when making changes to the schema in the future.
By default, the Extensions folder can be found at:
%ProgramFiles%\Microsoft Forefront Identity Manager\2010\Synchronization Service\Extensions\
Paste the data located in this file in to MAName_SampleInputFile.txt.
In the schema Script below, replace MAName_SampleInputFile.txt with the actual name of your file.
| Parameter | Value |
|---|---|
| Server | <blank> |
| Domain | <blank> |
| User | <blank> |
| Password | <blank> |
| Impersonate Connector Account | Unchecked |
| Load User Profile When Impersonating | Unchecked |
| Logon Type When Impersonating | None |
| Signed Scripts Only | Unchecked |
| Common Module Script Name (with extension) | xADSyncPSConnectorModule.psm1 |
| Common Module Script | Paste AD Sync PS Connector Module code as value |
| Validation Script | <blank> |
| Schema Script | Paste GetSchema code as value. Replace MAName in the file with the name of your connector. |
| Additional Config Parameter Names | FileName,Delimiter,Encoding |
| Additional Encrypted Config Parameter Names | <blank> |
| Parameter | Value |
|---|---|
| Distinguished Name Style | None |
| Export Type | ObjectReplace |
| Data Normalization | None |
| Object Confirmation | Normal |
| Use DN as Anchor | Unchecked |
| Concurrent Operations of Several Connectors | Checked |
| Partitions | Unchecked |
| Hierarchy | Unchecked |
| Enable Import | Checked |
| Enable Delta Import | Unchecked |
| Enable Export | Checked |
| Enable Full Export | Checked |
| No Reference Values In First Export Pass | Unchecked |
| Enable Object Rename | Unchecked |
| Delete-Add As Replace | Checked |
| Enable Password Operations | Unchecked |
| Enable Export Password in First Pass | Checked |
| Parameter | Value |
|---|---|
| Partition Script | <blank> |
| Hierarchy Script | <blank> |
| Begin Import Script | <blank> |
| Import Script | Paste ImportData code as value |
| End Import Script | <blank> |
| Begin Export Script | Paste Begin export code as value |
| Export Script | Paste ExportData code as value |
| End Export Script | <blank> |
| Begin Password Script | <blank> |
| Password Extension Script | <blank> |
| End Password Script | <blank> |
| FileName_Global | InputFile.txt (use your own name here) |
| Delimiter_Global | ; (or the delimiter used by your file) |
| Encoding_Global | <blank> (defaults to UTF8) |
Keep the defaults.
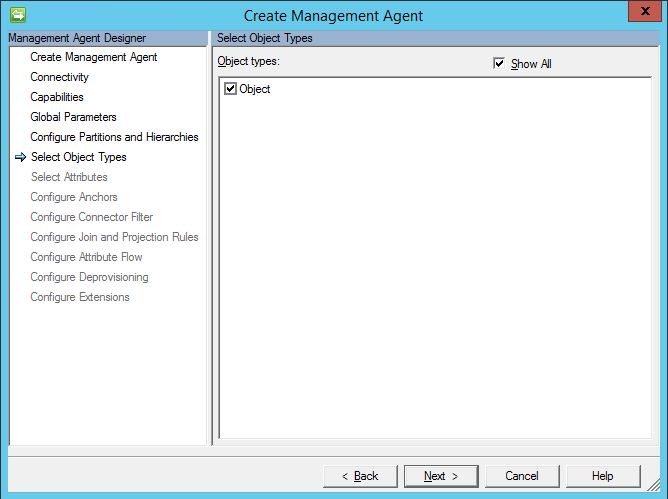
Select the Object Object Type as shown below.

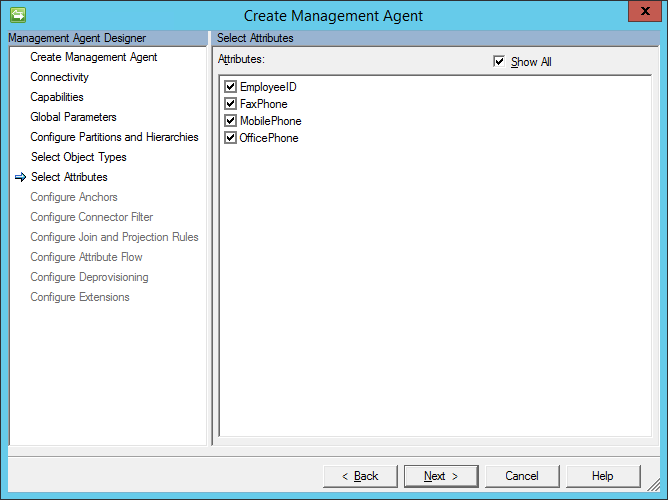
Select each of the four attributes (EmployeeID, FaxPhone, MobilePhone, OfficePhone) as shown below.

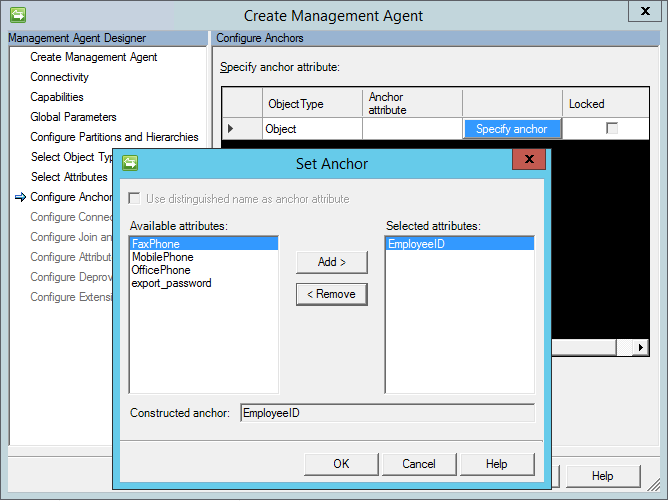
Specify the EmployeeID attribute as the Anchor attribute for the Object Object Type as shown below.

Once the connector has been created, create a run profile with a Full Import run step. Create an additional run profile with a Full Export run step.
- Home
- Related Projects
- Skype/Lync Connector
- Exchange Connector
- Flat File Connector
- SharePoint Site, User and Group Management Connector
- Home Drive Provisioning
- Oracle Identity Management Connector
- FAQ