


Async Firebase Client library for Arduino Documentation.
This is the REST APIs Firebase Client library that supports the following Firebase and Google Cloud products in one place.
Firebase Realtime DatabaseCloud Firestore DatabaseCloud MessagingFirebase StorageGoogle Cloud FunctionsGoogle Cloud StorageSecurity Rules Management
This Firebase library is quite comprehensive which covers many applications.
It is suitable for all serverless applications e.g. data logging, automation and IoTs. You can choose what options and services you want to use (see Library Build Options).
There are many types of authentications supported and you can manage the user account with sign up (user/guest), delete, verify the user and reset the user password.
This library also supports auto- and one-time authentications and you can force the library to re-authenticate any time.
This library also provides the OTA firmware update functionalities by using your Realtime Database data or Firebase/Cloud Storage object (file).
Note that the Firestore data change listening and Realtime Database disconnected event are not support by the Firebase REST API.
The bare minimum code examples provide the basic guidelines for library usage concepts. There is a little more code that needs to be written but it is still simple and understandable.
You can create your own wrapper class as you want that provides the callback-free, cleaner and simpler API. See the Wrapper example for how to.
You can use security rules to fully control the Firebase services access instead of relying only on the authentication credentials and tokens. For access control using custom claims and security rule use case, see AccessControl example.
This library also provides the test tools (web client app) that are simple and ready to try without coding.
To see how Firebase Realtime Database provides the efficient, fast and reliable performance when work with this library, see StreamPerformanceTest example.
To test notification sending with Firebase Cloud Messaging by using our FCM Web Client App, see WebClient example.
The library since v2.1.0 is network independent. All network data and management classes are removed.
Users have to define the macros or build options in their sketch before including the library header file. See Library Build Options section for the available options.
The SSL client can be set via AsyncClientClass::setClient() or in the AsyncClientClass constructors without the network options.
The AsyncClientClass methods that are related to the networks are removed.
ESP8266, ESP32 and all 32-bit MCU except for Atmel AVR.
At Arduino IDE, go to menu Sketch -> Include Library -> Manage Libraries...
In Library Manager Window, search "firebase" in the search form then select "FirebaseClient".
Click "Install" button.
For PlatformIO IDE, use the following command.
pio lib install "FirebaseClient""
Or at PIO Home -> Library -> Registry then search FirebaseClient.
In case ESP32, PlatformIO's platform-espressif32 core is outdated. You should use pioarduino platform instead.
For Arduino IDE, download the zip file from the repository (Github page) by select Code dropdown at the top of repository, select Download ZIP
From Arduino IDE, select menu Sketch -> Include Library -> Add .ZIP Library....
Choose FirebaseClient-main.zip that previously downloaded.
Rename folder from FirebaseClient-main to FirebaseClient.
Go to menu Files -> Examples -> FirebaseClient and choose one from examples.
For Arduino IDE, the Arduino-Pico SDK can be installed from Boards Manager by searching pico and choose Raspberry Pi Pico/RP2040 to install.
For PlatformIO, the Arduino-Pico SDK can be installed via platformio.ini
[env:rpipicow]
platform = https://github.com/maxgerhardt/platform-raspberrypi.git
board = rpipicow
framework = arduino
board_build.core = earlephilhower
monitor_speed = 115200
board_build.filesystem_size = 1m
See this Arduino-Pico SDK documentation for more information.
Note
You cannot install Arduino IDE and Arduino library in Microsoft's OneDrive folder because the OneDrive folder is the sandbox or virtual folder instead of real folder which causes the path error when compilation.
For new Firebase users, please read the Project Preparation and Setup section for preparing the Firebase project.
For new library user that the project was setup and prepared, see the bare minimun examples to start using this library with minimum code that is required by this library.
For more examples, please click here.
This library can be used in two modes i.e. async mode and await or sync mode.
With async mode, the task will be stored in the FIFO queue. The result of the running task can be obtained via the callback function or the proxy object that assign when calling the functions.
The AsyncClientClass is the proxy class that provides the queue for async tasks and also the information of task process when working in await or sync mode.
The async task that is stored in the queue contains the preprocess HTTP request data (headers without auth tokens and payload).
The SSL Client that is assigned with the AsyncClientClass constructor will be the network client used for all async tasks in its queue.
The result of a async task can be obtained from the AsyncResult class object. This object provides the debug, authentication process event, error information and the response payload of the request.
If no async callback function is assigned with the function, the AsyncResult class object should be assigned otherwise it will work in sync mode.
In this case, it should be polling read for new available information from the AsyncResult at the end of the loop function.
In the await or sync mode, task will be processed immediately and waits for the end of process when the response is complete or time out or error occurred.
The information (debug/error) can be obtained by the AsyncClientClass that assign with the function. The response payload or processed value will be obtained if no errors.
The authentications support by this library covers user, service account (admin) and no authentications.
There are authentication classes that store the sign-in and authentication credentials whuch can be used temporary as it will be duplicated to use later.
The authentication tokens are also supported e.g. custom (signed JWT token), ID and access tokens. The refresh token also supports. User can use third party app/services to create these auth token when sign-in and authentication credentials are sensitive and not allowed to store in the sketch.
These authentication tokens (excepts for Reltime Database secret) are the short-lived tokens. It will be expired in 60 minutes.
The FirebaseApp class will be used to handle the authentication task. Some function that executes in the loop function will keep the authentication process running e.g. FirebaseApp::loop.
The authentication process is the task that involved auth token generation using sign-in, auth credentials and tokens that user assigned with the initializeApp function.
The initializeApp function is the static function which also allows the authentication process to work in async and await or sync modes.
In version 2.x.x and later, when assign the timeout (> 0) to the initializeApp function, the authentication task will be processed in await or sync mode.
The callback function assigned with initializeApp function will provide the auth process event, debug and error information while authenticating in async and sync modes.
In version 2.x.x, the FirebaseApp class can also maintain the async tasks that stored in other AsyncClientClasss.
The details for all classes used in this library are available. Click the following links for details.
The OTA firmware update is supported using bin file stored in Firebase Storage and Google Cloud Storage buckets or base64 encoded data stored in Realtime Database.
The Arduino devices that natively supported OTA firmware update are ESP8266, ESP32 and Raspberry Pi Pico.
Since FirebaseClient v1.3.1, the OTA update in Arduino SAMD21 boards that use NINA firmware and WiFi101 firmware was supported using Internal_Storage_OTA library.
The Internal_Storage_OTA is the modified version of WiFi101OTA library which contains only four required files e.g. Internal_Storage_OTA.h, InternalStorage.h, InternalStorage.cppand OTAStorage.h.
To allow OTA update in SAMD21 Arduino boards, you have to include Internal_Storage_OTA.h in your sketch.
Then assign the InternalStorage class object to be used for Realtime Database via RealtumeDatabase::setOTAStorage, for Google Cloud Storage via CloudStorage::setOTAStorage and for Firebase Storage via Storage::setOTAStorage
In SAMD21 Arduino boards, if OTA Storage was not set before calling OTA function, the error OTA Storage was not set will be occurred.
Finally, once the OTA update was finished, in case Internal_Storage_OTA, you have to call InternalStorage.apply() to apply the update and then restart.
Some OTA libraries that provide Storage Class object that derived from the modified version of Arduino WiFi101OTA's OTAStorage class can also be used.
Click here for details.
You have to setup the Firebase project to use Firebase products. Visit Understand Firebase Projects to learn more about Firebase projects.
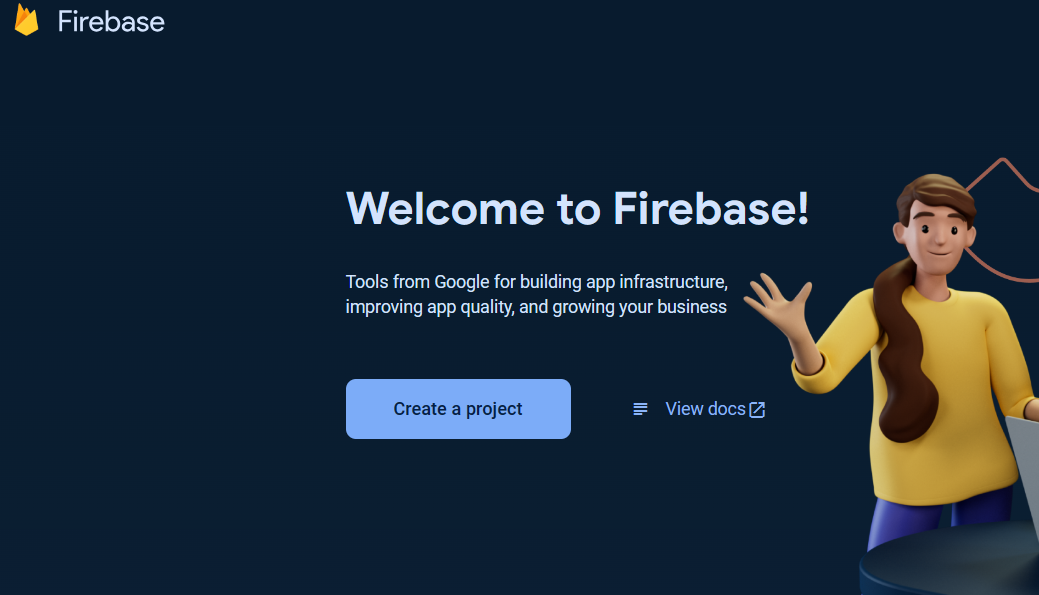
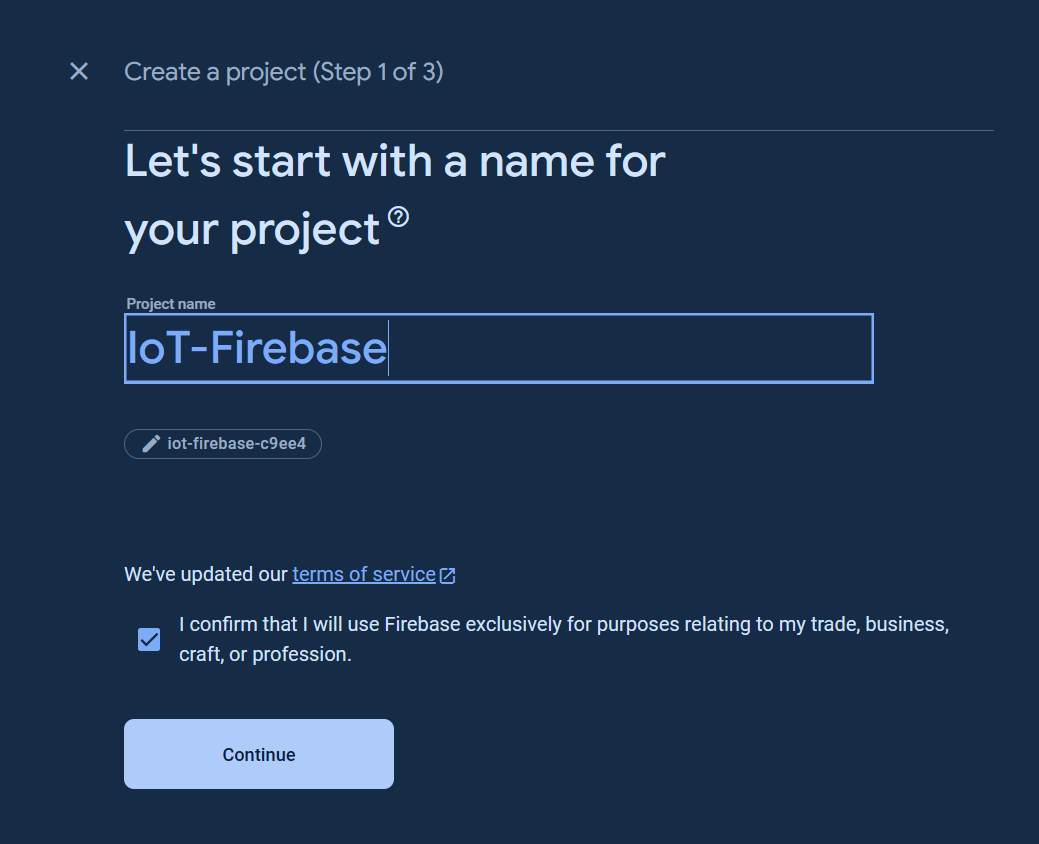
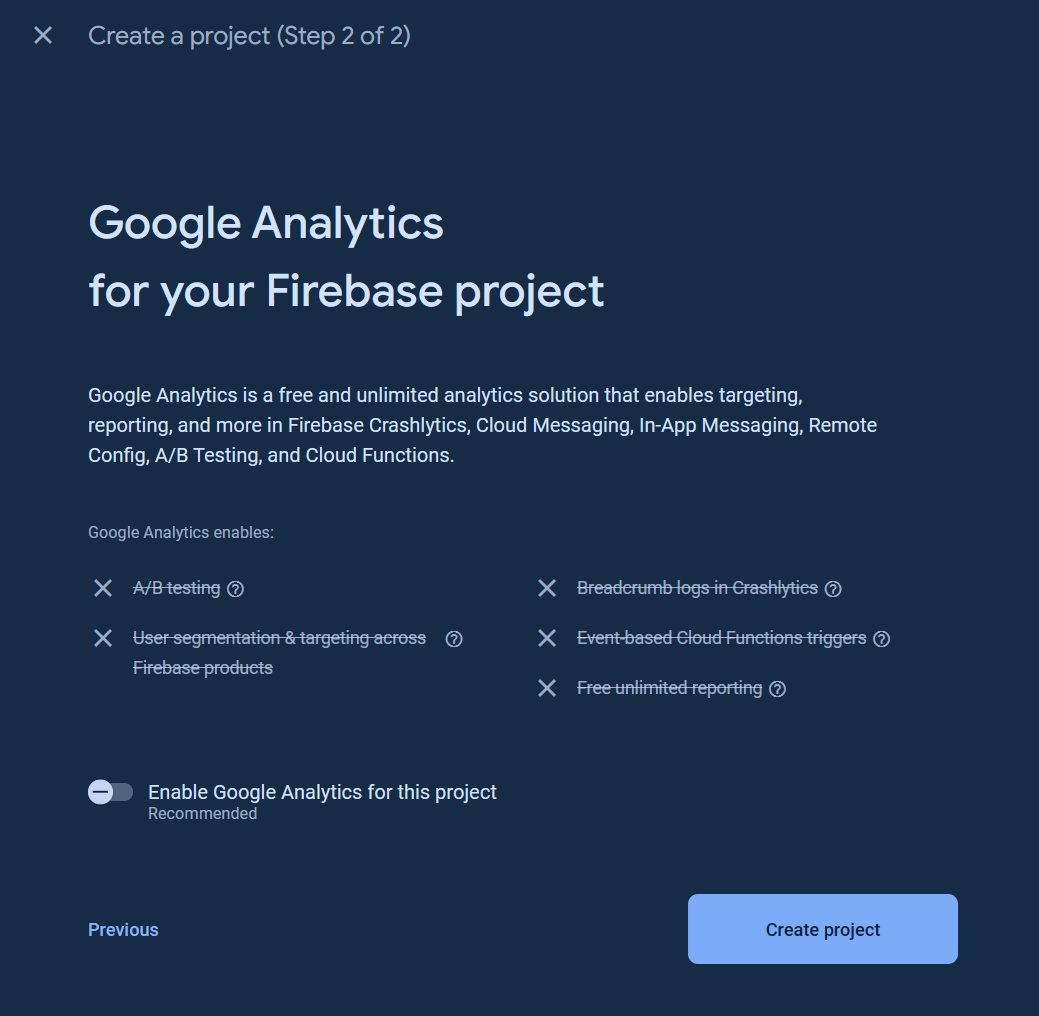
For new Firebase user, go to the Google Firebase Console, sign in to your Google account, and create a new project as the following images.
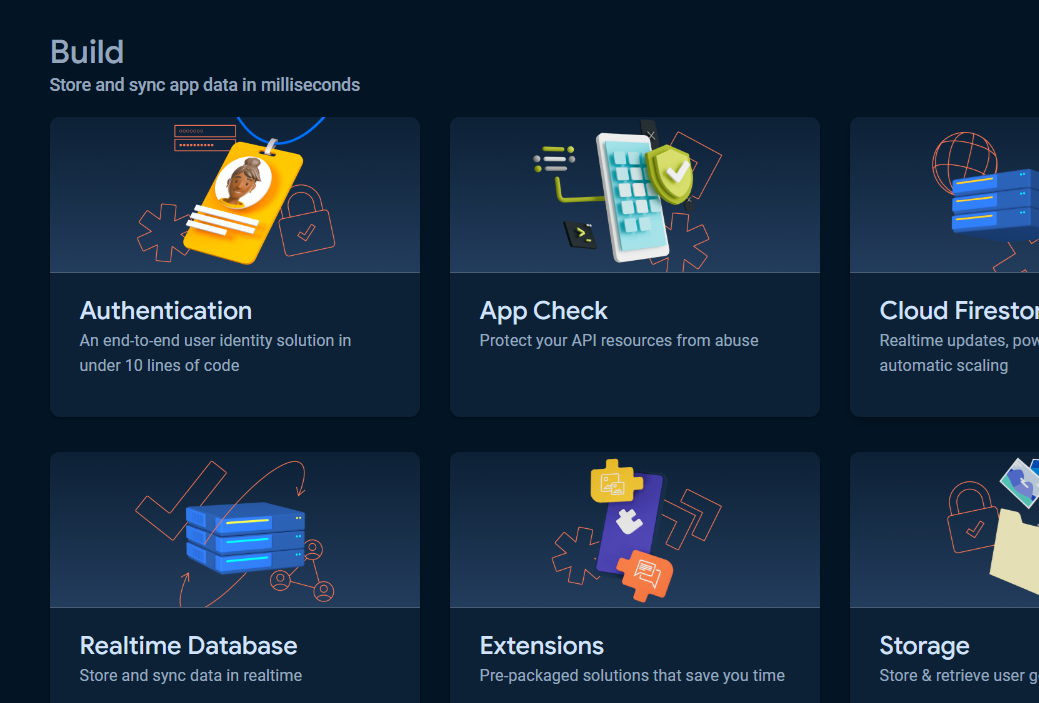
Click All products button.
When custom token, ID token authorization are used via CustomAuth, UserAuth, CustomToken and IDToken, the Authentication service is needed and must be set up otherwise the HTTP status code 400 error will show in the async callback.
[!NOTE]
TheAuthenticationservice is not required forOAuth2.0 access token authentication using service accountauthentication and legacy token (database secret) authorization.
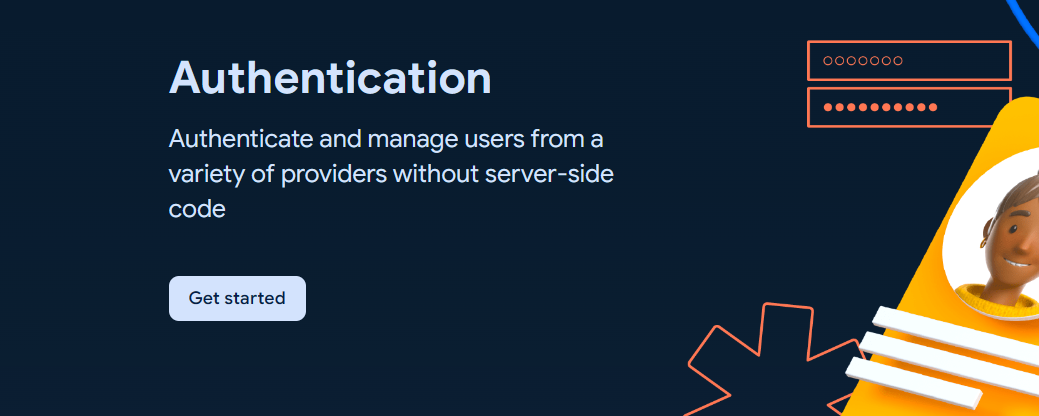
To get started with Authentication, choose Authentication and click Get started button.
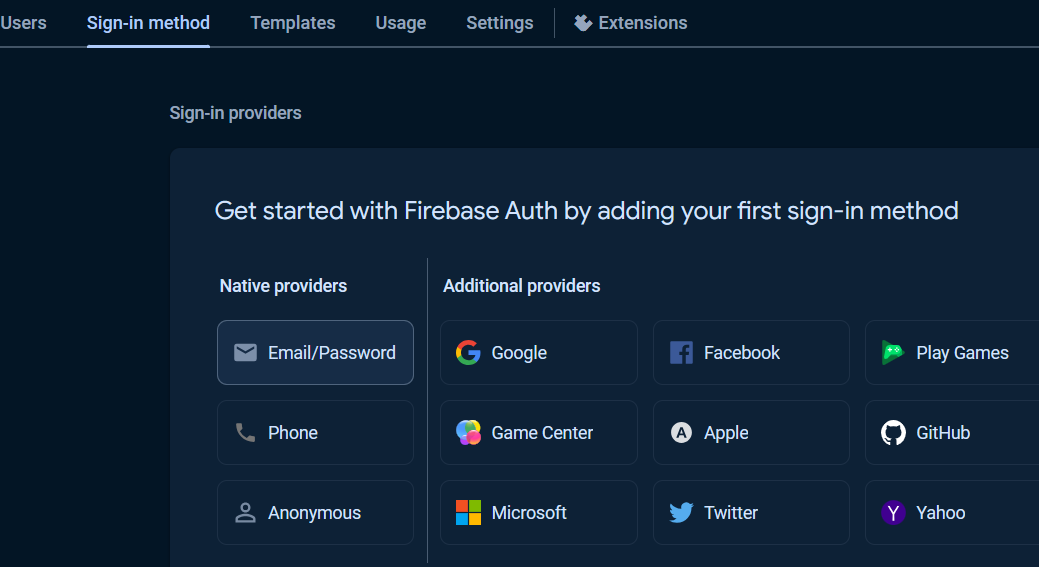
Under Sign-in providers, choose Email/Password.
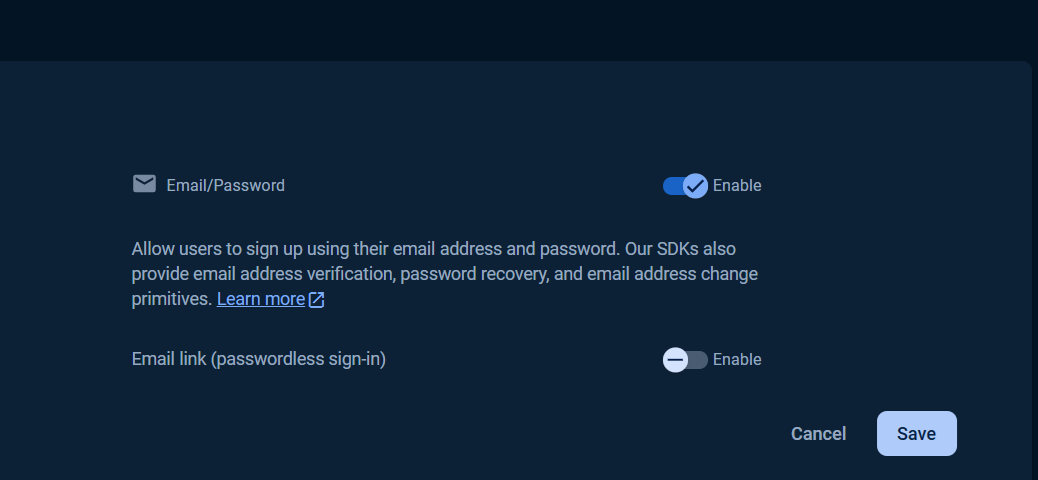
Select Enable check option in Email/Password section, and click Save button.
Then click Users tab, click Add user button.
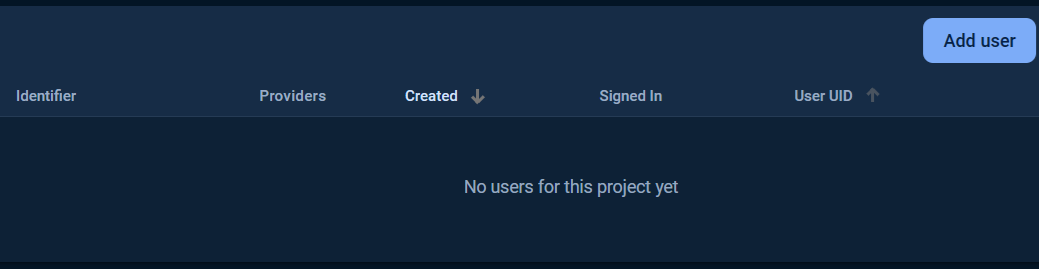
Fill in the Email and Password and click Add user button.
Once the Authentication was setup, the Web API Key will be generated. See the Project Settings page for Web API Key.
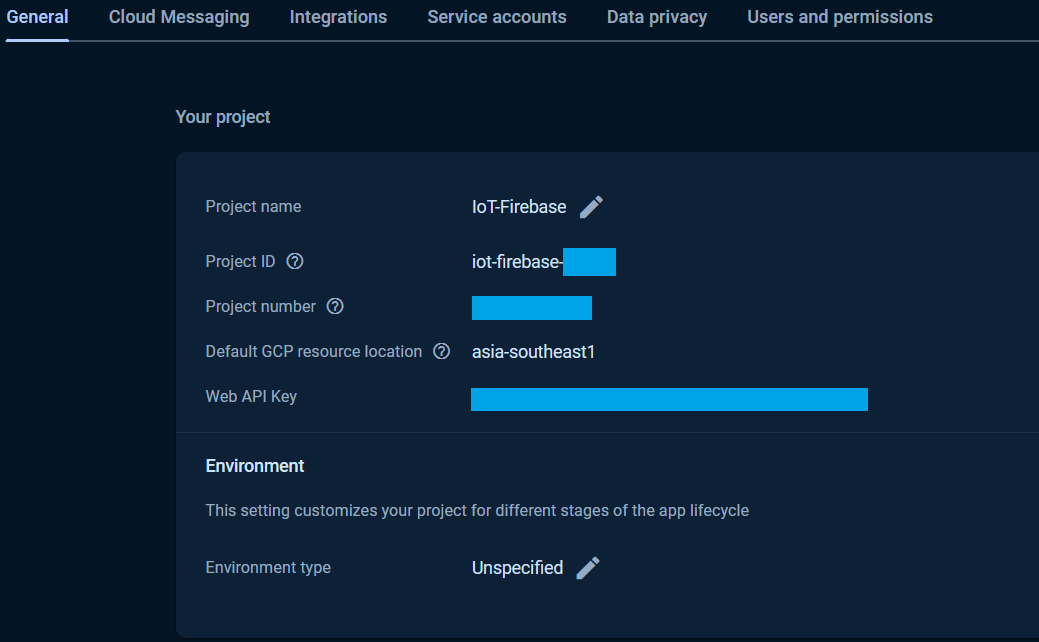
The Web API Key is used in all custom token, ID token authentications that used via the CustomAuth, UserAuth, CustomToken and IDToken provider classes and it was assign to the API_KEY in the exampless.
See API Keys Overview and Authenticate by using API keys for more details.
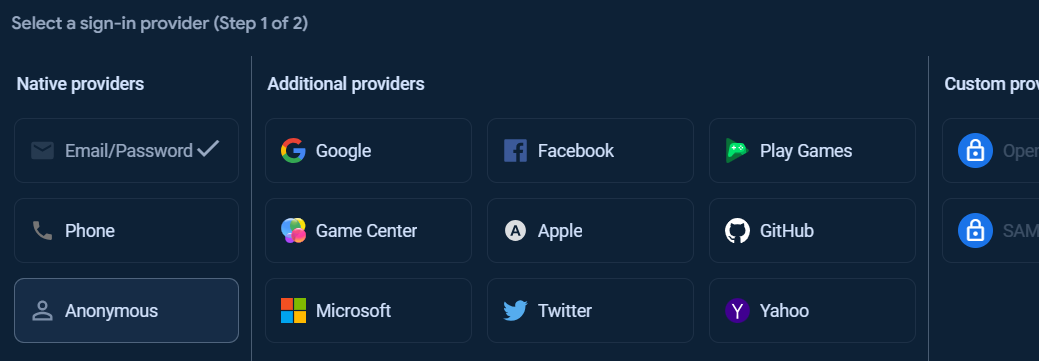
At the Authentication page, under Sign-in method tab, other Sign-in providers can be added.
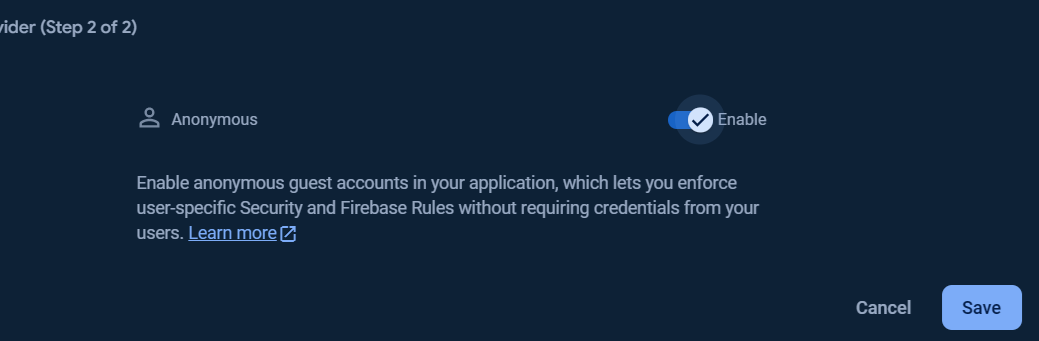
To add Anonymous sign-in provider, click Add new provider button.
Select enable check option in Email/Password section, and click Save button.
To get started with Firebase Realtime Database, choose Realtime Database and click Create Database.
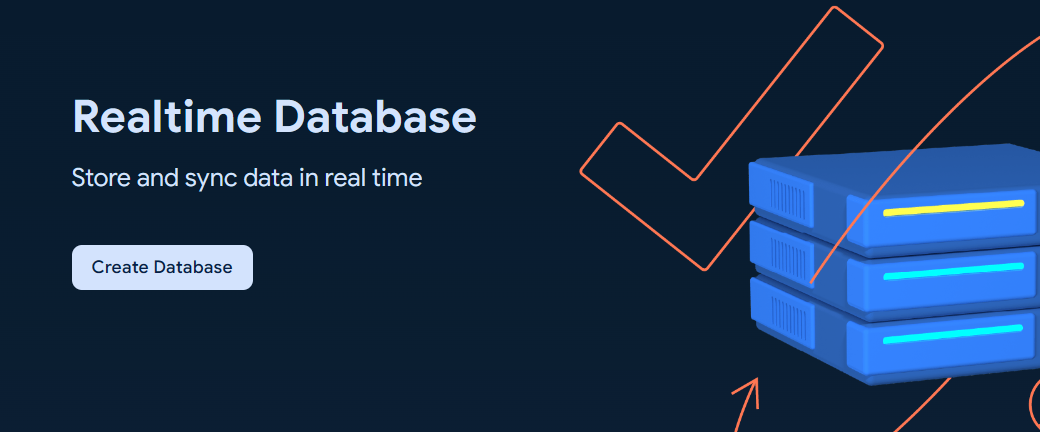
Set up your Database options and Security rules.
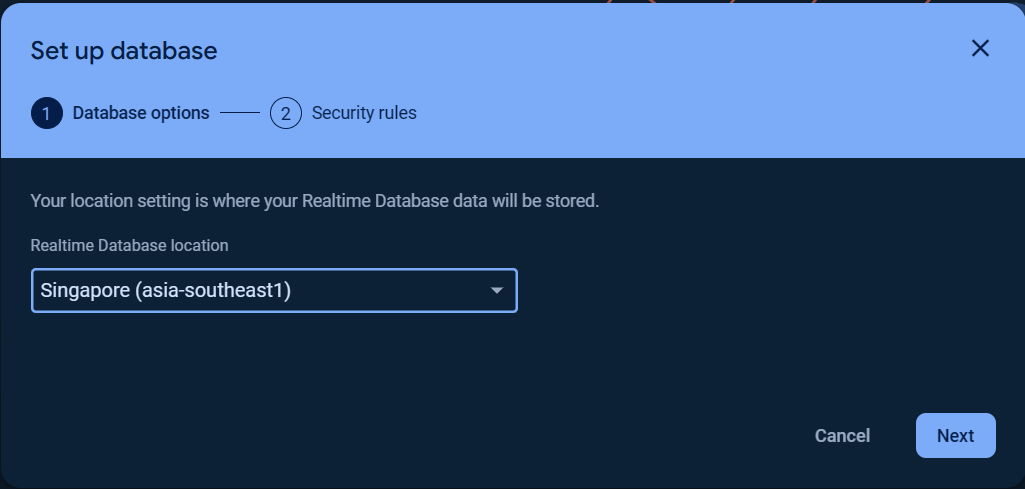
Refer to this Realtime Database locations, the Database URL scheme depends on the Region name (Realtime Database location) you selected.
In some Arduino boards that works with WiFiNINA and WiFi101 firmwares, the database URL that ends with firebasedatabase.app may not work after the SSL certificate was upload into the board firmware which causes Realtime Database server connection failure.
This issue was found on MKR 1000 WiFi board with WiFi101firmware at the moment while MKR WiFi 1010 with WiFiNINA firmware does not have certificate issue.
We don't investigate in to the Arduino firmwares to find the root cause, then us-central1 region for DATABASE_NAME.firebaseio.com URL should be selected for this case.

You can choose Start in locked mode or Start in test mode for Security rules.
Once the database was created, click the Rules tab and change the Security rules as following to allow the basic authentication, click Publish button to apply the changes.
{
  "rules": {
    ".read": "auth != null",
    ".write": "auth != null"
  }
}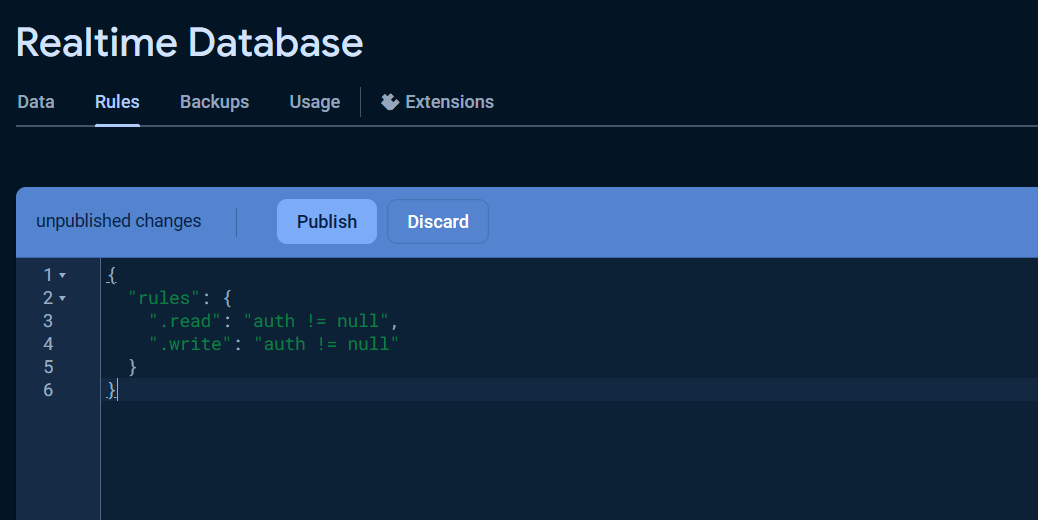
The warning Your security rules are not secure. Any authenticated user can steal, modify, or delete data in your database. will be displayed due to insecure rules which you can change it for more secure later.
Visit Understand Firebase Realtime Database Security Rules to learn more about security rules.
The reference url is the DATABASE_URL that defined and used in the Realtime Database examples can be obtained from the Data tab as the following.

The reference url or database url also can be taken from the Service Account key file, see Service Account section.
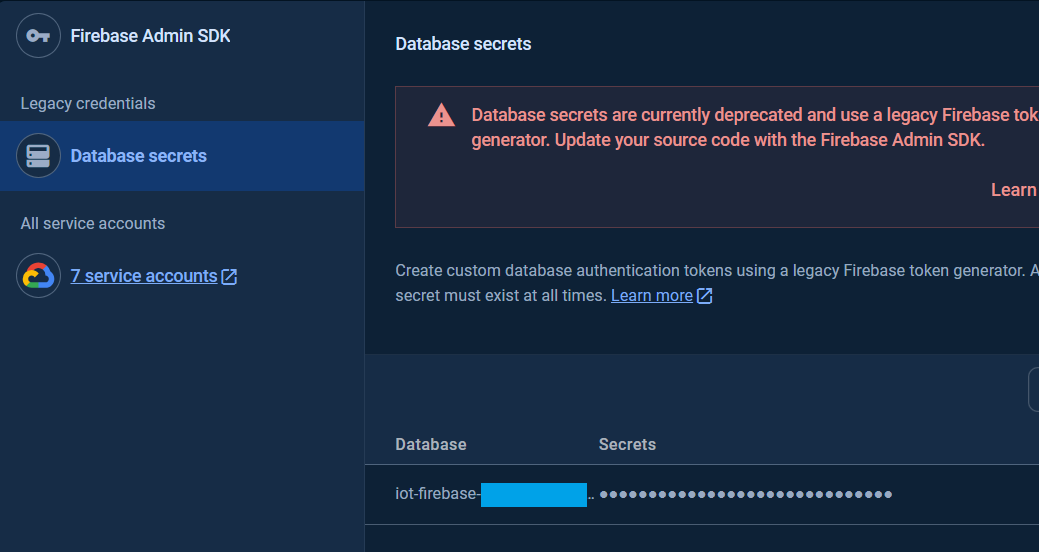
The database secret is the secret key for privileged accessing the Realtime Database service.
The database secret is now currently deprecated. Alternatively, to use the Realtime Database with the same privileged access as database secret but secured, the OAuth2.0 access token authentication using service account via ServiceAuth provider class is recommended.
To get the database secret, in the Project Settings page in the Google Firebase Console, under the Service accounts Tab, click Database secret.
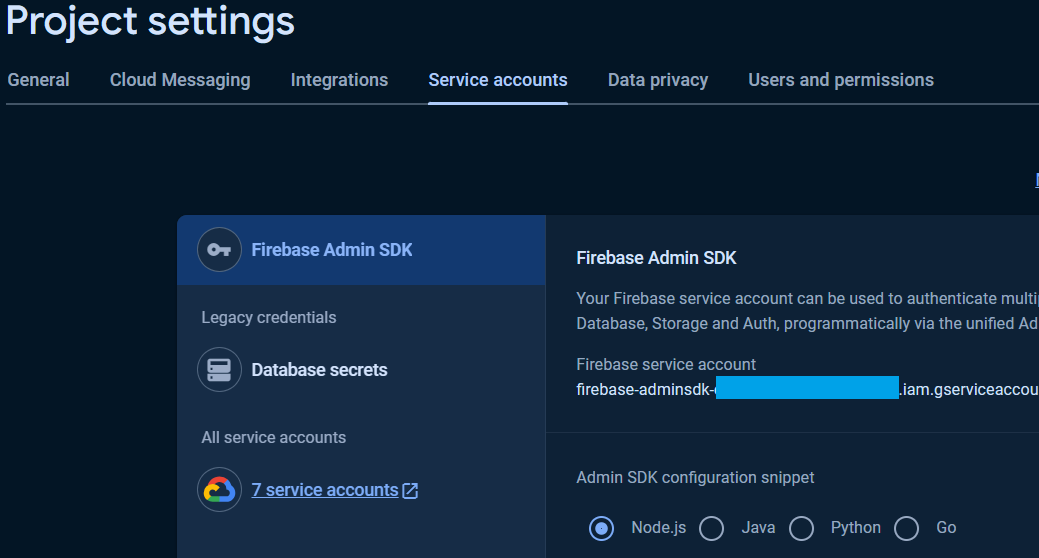
The database secret for the databases are available in the Secrets column.
To get started with Cloud Firestore Database, choose Cloud Firestore and click Create database.
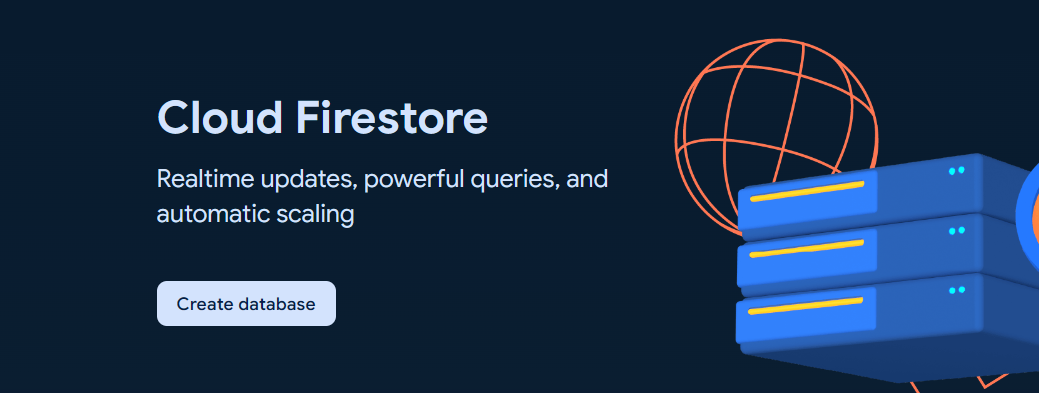
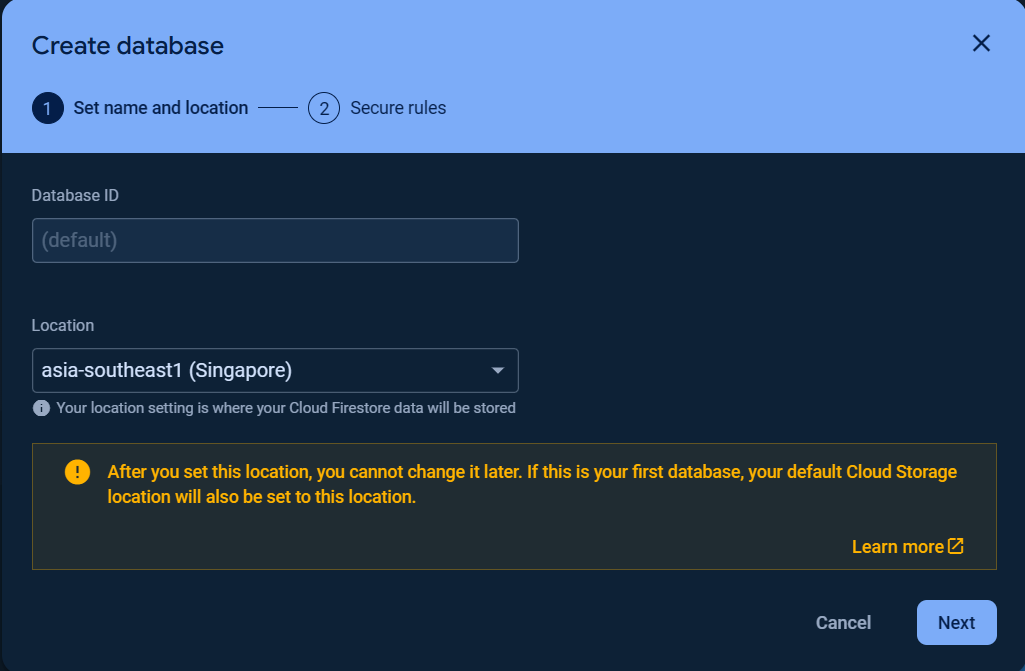
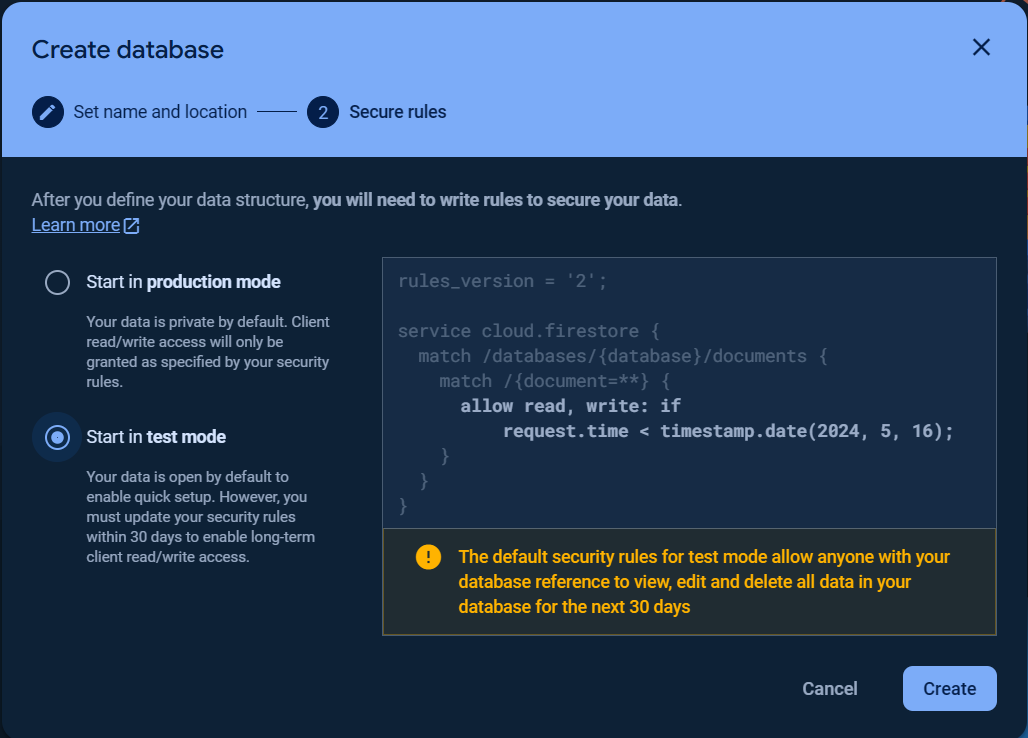
Set up your database Name and Location and Security rules.
[!NOTE]
The first database name (ID) is(default)which cannot be changed.
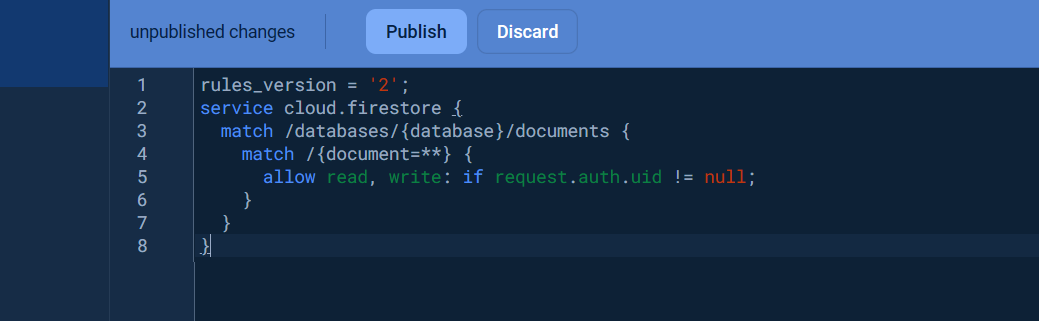
Once the database was created, click the Rules tab and change the Security rules as following to allow the basic authentication, click Publish button to apply the changes.
rules_version = '2';
service cloud.firestore {
  match /databases/{database}/documents {
    match /{document=**} {
      allow read, write: if request.auth.uid != null;
    }
  }
}
Visit Get started with Cloud Firestore Security Rules to learn more about security rules.
To get started with Storage, choose Storage and click Get started.
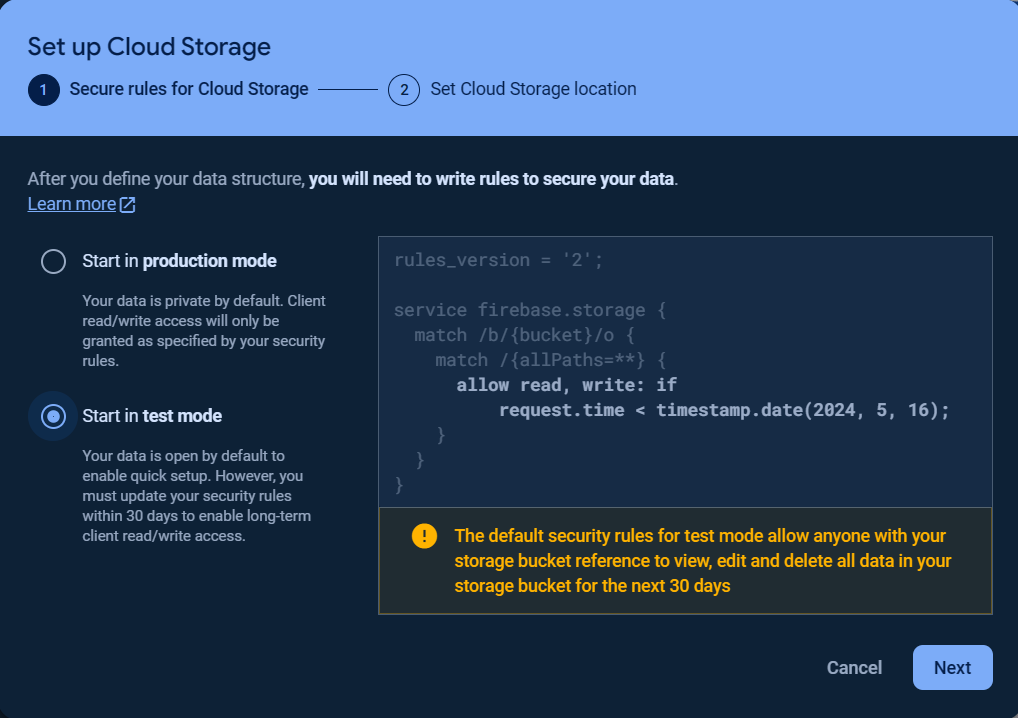
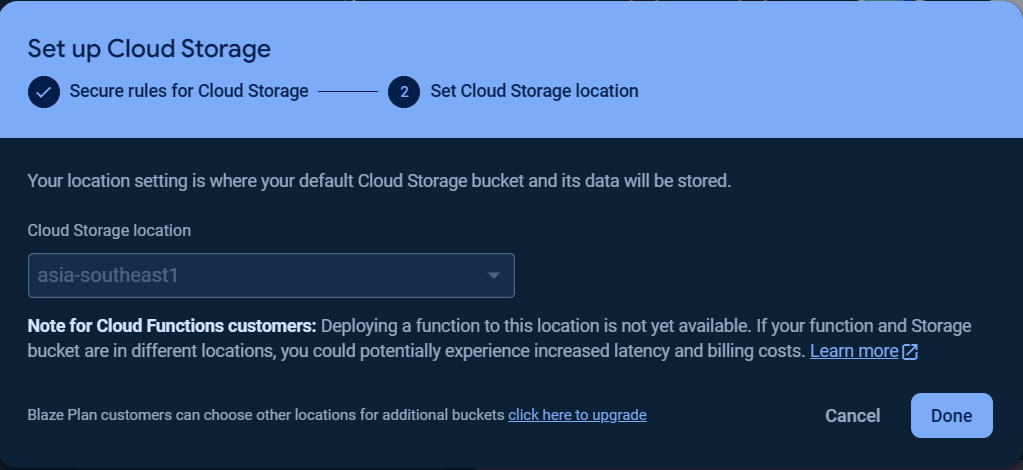
Then set the Secure Rules for Cloud Storage and Cloud Storage location.
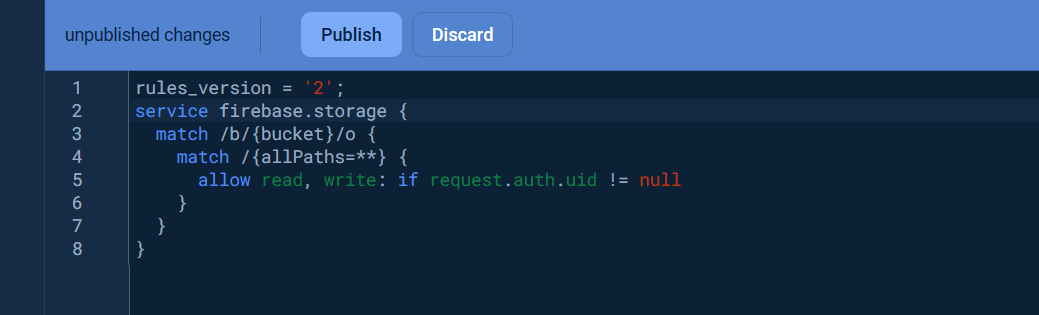
Once the storage bucket was created, click the Rules tab and change the Security rules as following to allow the basic authentication, click Publish button to apply the changes.
rules_version = '2';
service firebase.storage {
  match /b/{bucket}/o {
    match /{allPaths=**} {
      allow read, write: if request.auth.uid != null
    }
  }
}
Visit Get started with Firebase Security Rules to learn more about security rules.
The folder path is the STORAGE_BUCKET_ID that defined and used in the Storage examples can be obtained from the Files tab as the following.

The folder path or the STORAGE_BUCKET_ID also can be taken from the Service Account key file, see Service Account section.
To use the Cloud Functions for running your backend automate code, the billing plan for the project is needed to be upgraded to at least Blaze plan.
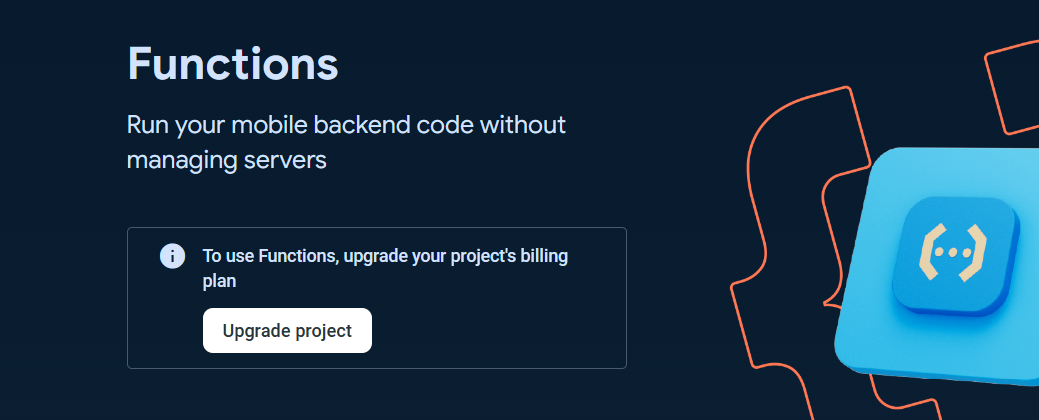
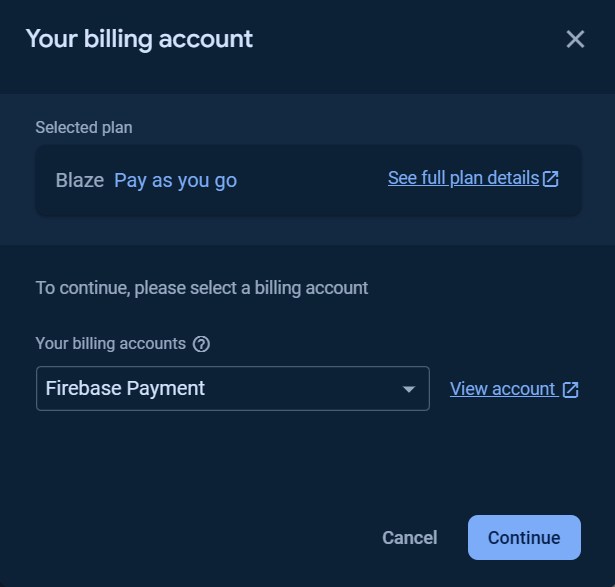
You can Set a billing budget at this step or skip it.
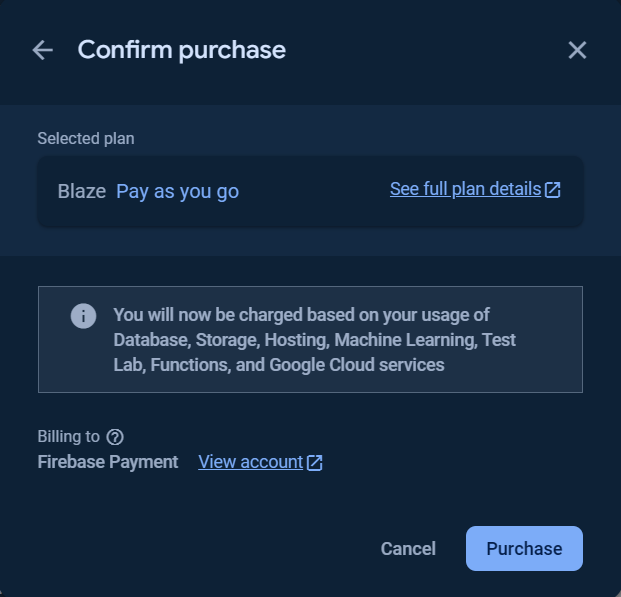
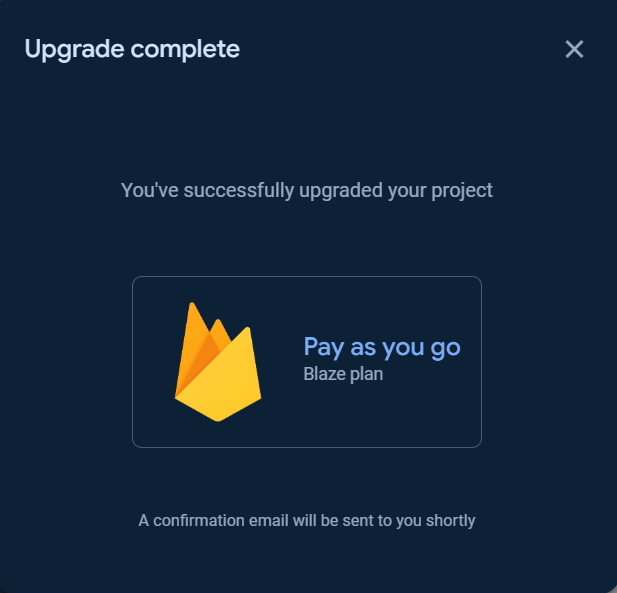
Click the Get started button and follow the steps as show in the following images.
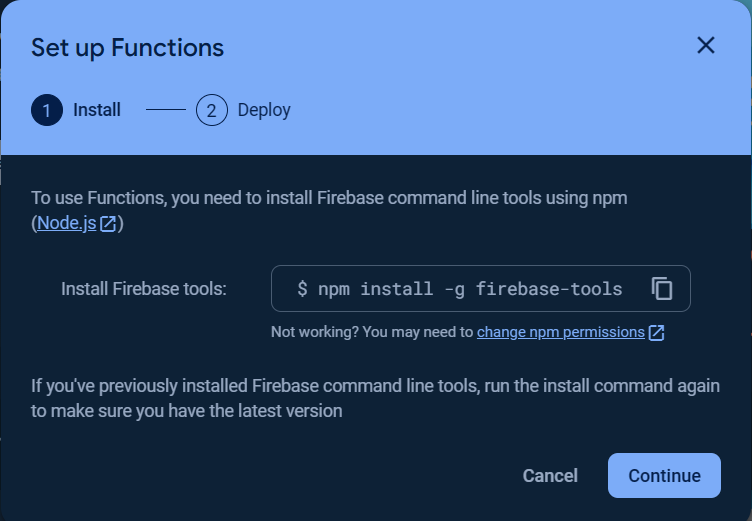
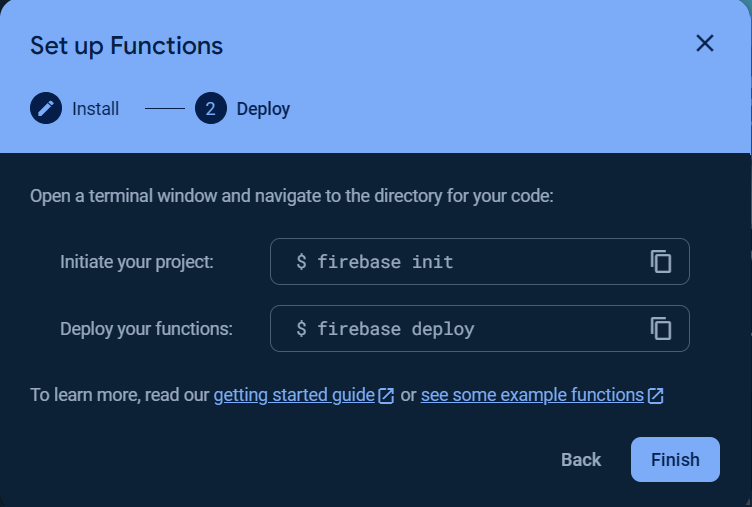
[!IMPORTANT]
TheCloud Build APIandCloud Run Admin APImust be enabled, click here to enableCloud Build APIand here to enableCloud Run Admin API.
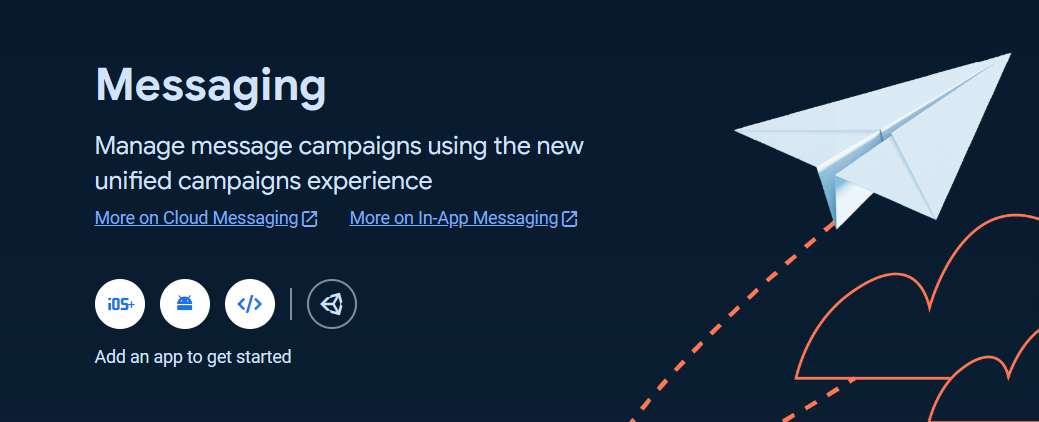
Create an app (iOS, Android, Web, or Unity app) for getting started.
The following steps showed the web app (Javascript) is created.
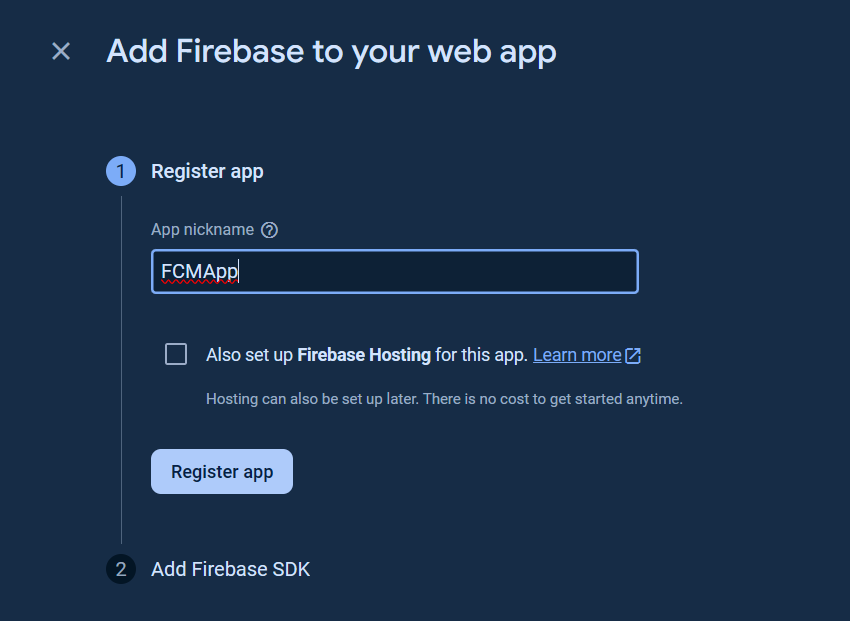
Add the Firebase SDK and click Continue to console button.
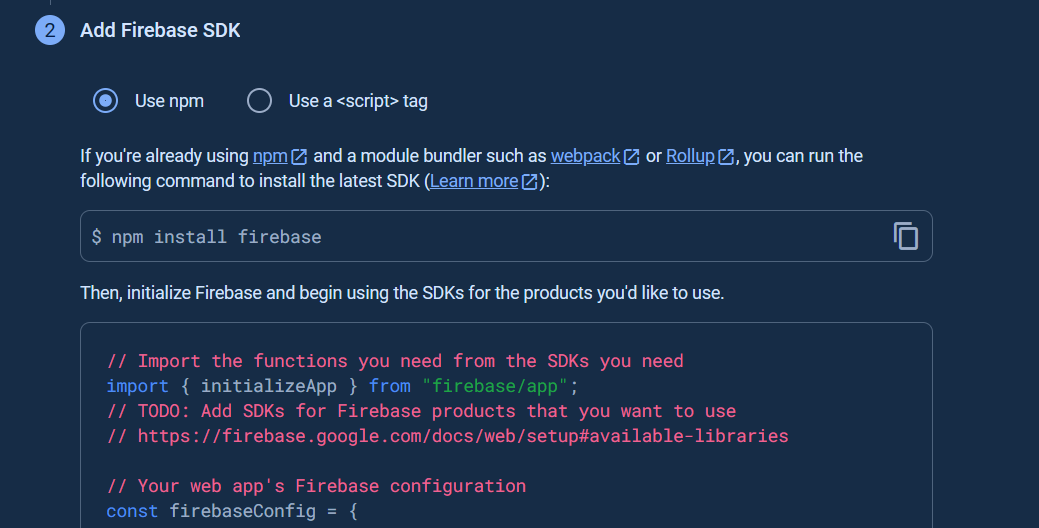
After you register the web app in your Firebase project, the next step is you have to use Firebase SDK to use the Firebase services (FCM for this case).
The FCM web app that consists of html document and related scripts requirs the server (local or remote) to run, you cannot access or browse your web app by opening the file from your local computer via file protocol (file://).
The FCM SDK is supported only in pages served over HTTPS. This is due to its use of service workers, which are available only on HTTPS sites (remote host) or HTTP (local host). If you need a provider, Firebase Hosting is recommended and provides a no-cost tier for HTTPS hosting on your own domain.
There are the choises that you can access the Firebase SDK in your web app.
-
Install the Firebase SDK using the Firebase CLI.
-
Access the Firebase SDK via the global CDN or npm for Node.js apps.
This library provides the ready to test FCM Web Client App in examples/Messaging/WebClient. You can host this FCM web app files (fcm.html and fcm.php) in your local (php) server (localhost via http) or remote (php) server (https only).
You can open examples/Messaging/WebClient/fcm.html via web browser to review and follow the instructions on that page.
In Windows 11 PC, even notification is granted for your site in the brower notification settings, the notification may go directly to the notification center instead of displaying pop-up, if Do not disturb is On in the System > Notifications of Windows settings and you have to turn it Off to allow the notification pop-up to show.
The app (iOS, Android, Web and Unity) registration token or DEVICE_TOKEN is a unique token string that identifies each client app instance. The registration token is required for single device and device group messaging. Note that registration tokens must be kept secret, see this for more info.
A service account is a special kind of account (bot or application account) that belongs to app instead of to an individual end user. Service accounts enable server-to-server interactions between an app and a Google service.
In Google Cloud services, there are several different types of service accounts:
-
User-managed service accounts: Service accounts that you create and manage. These service accounts are often used as identities for workloads.
-
Default service accounts: User-managed service accounts that are created automatically when you enable certain Google Cloud services e.g.
Firebase Admin SDK Service Account. You are responsible for managing these service accounts. -
Google-managed service accounts: Google-created and Google-managed service accounts that allow services to access resources on your behalf.
A Firebase Admin SDK Service Account is created automatically when you create a Firebase project or add Firebase to a Google Cloud project and it is used to communicate with Firebase.
The Service Account credentials are required for the ServiceAuth and CustomAuth classes.
To generate and download Service Account private key file, in the Project Settings page in the Google Firebase Console, click Service accounts tab and Generate new private key.
To use Service Account in your sketch, open the .json file that is already downloaded with the text editor.
{
  "type": "service_account",
  "project_id": "...",
  "private_key_id": "...",
  "private_key": "-----BEGIN PRIVATE KEY-----\n...\n-----END PRIVATE KEY-----\n",
  "client_email": "...",
  "client_id": "...",
  "auth_uri": "https://accounts.google.com/o/oauth2/auth",
  "token_uri": "https://oauth2.googleapis.com/token",
  "auth_provider_x509_cert_url": "https://www.googleapis.com/oauth2/v1/certs",
  "client_x509_cert_url": "...",
  "universe_domain": "googleapis.com"
}
Copy the project_id, client_email and private_key from .json file and paste to these defines in the example.
#define FIREBASE_PROJECT_ID "..." // Taken from "project_id" key in JSON file.
#define FIREBASE_CLIENT_EMAIL "..." // Taken from "client_email" key in JSON file.
const char PRIVATE_KEY[] PROGMEM = "-----BEGIN PRIVATE KEY-----\n...\n-----END PRIVATE KEY-----\n"; // Taken from "private_key" key in JSON file.
Normally Firebase Admin SDK Service Account is used in Firebase APIs authentication/authorization.
To access Google Cloud APIs e.g. Google Cloud Storage, Google Cloud Functions services, you have to update the service account permissions.
When the Firebase Admin SDK Service Account was used for Google Cloud APIs authentication/authorization, you have to update its permissive roles.
The Basic roles are highly permissive roles that used to grant principals broad access to Google Cloud resources.
We can add one of Basic roles i.e. Editor and/or Owner.
To add the Basic's Owner or Editor roles, go to the Identity and Access Management console.
Then choose the project, and select the VIEW BY PRINCIPALS tab.
From the table displayed, look at the firebase-adminsdk in the Name column, then click the pencil icon on the right side in this table row to Edit principal.
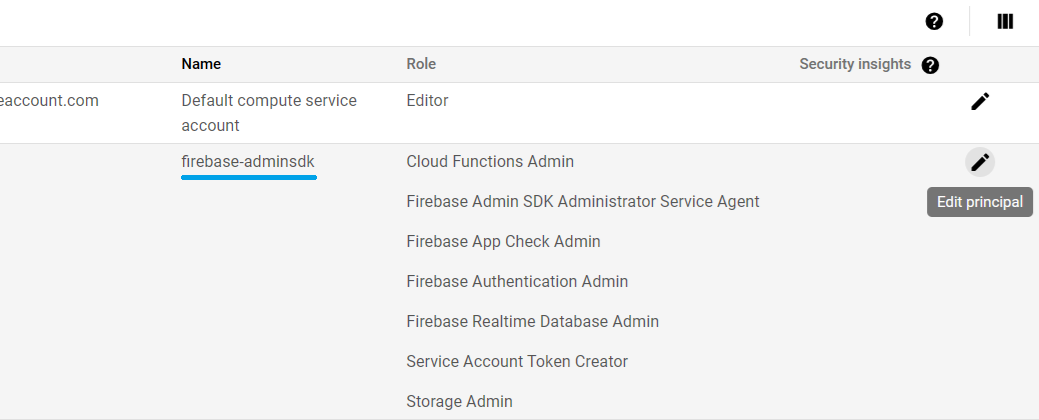
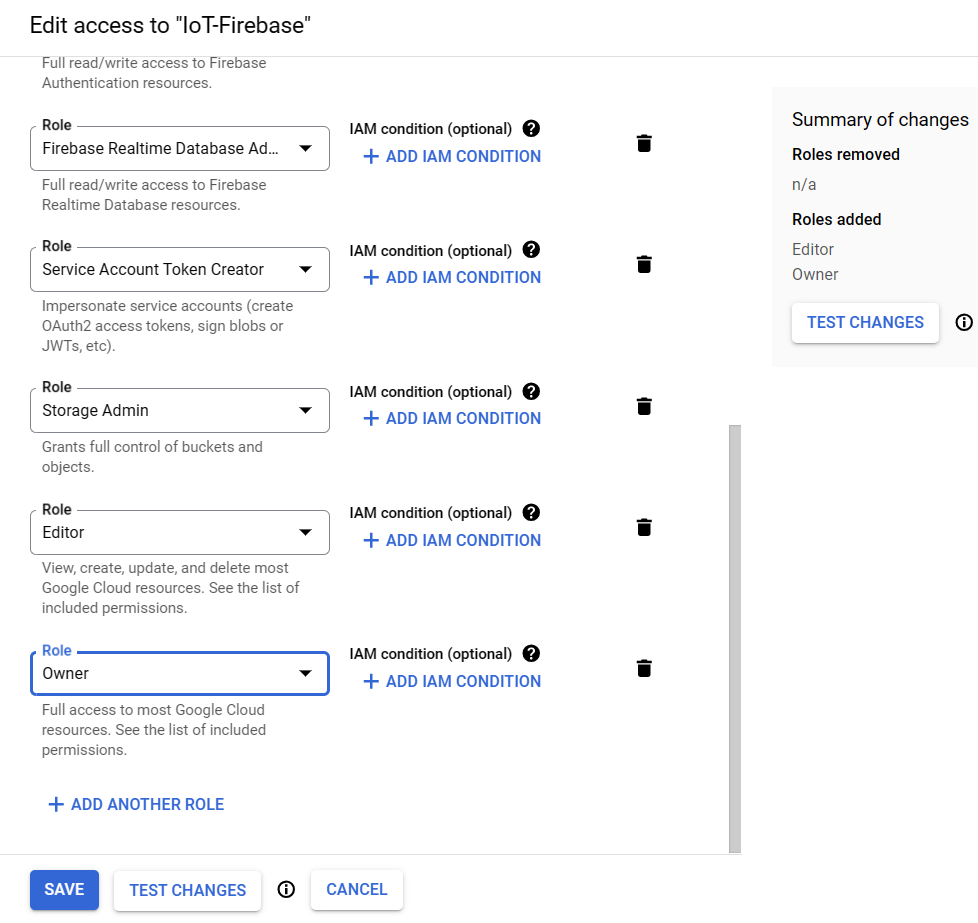
Add the role Editor and/or Owner under the Basic roles and click Save button.
Wait a few minutes for the action to propagate after adding roles.
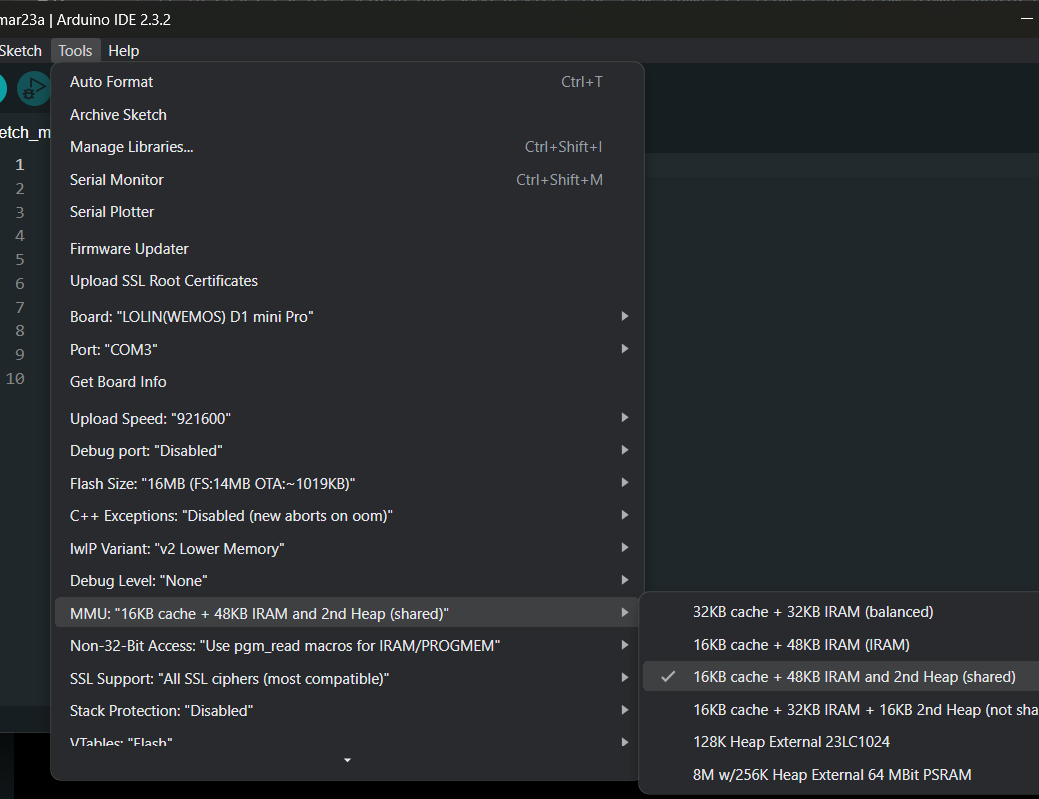
When you update the ESP8266 Arduino Core SDK to v3.x.x, the memory for Heap and stack can be choosen from the IDE.
You can choose the Heap memory between internal and external memory chip from IDE e.g. Arduino IDE and PlatformIO on VSCode or Atom IDE.
For ESP8266 devices that don't have external SRAM/PSRAM chip installed, choose the MMU option 3, 16KB cache + 48KB IRAM and 2nd Heap (shared).
For ESP8266 devices that have external 23LC1024 SRAM chip installed, choose the MMU option 5, 128K External 23LC1024.
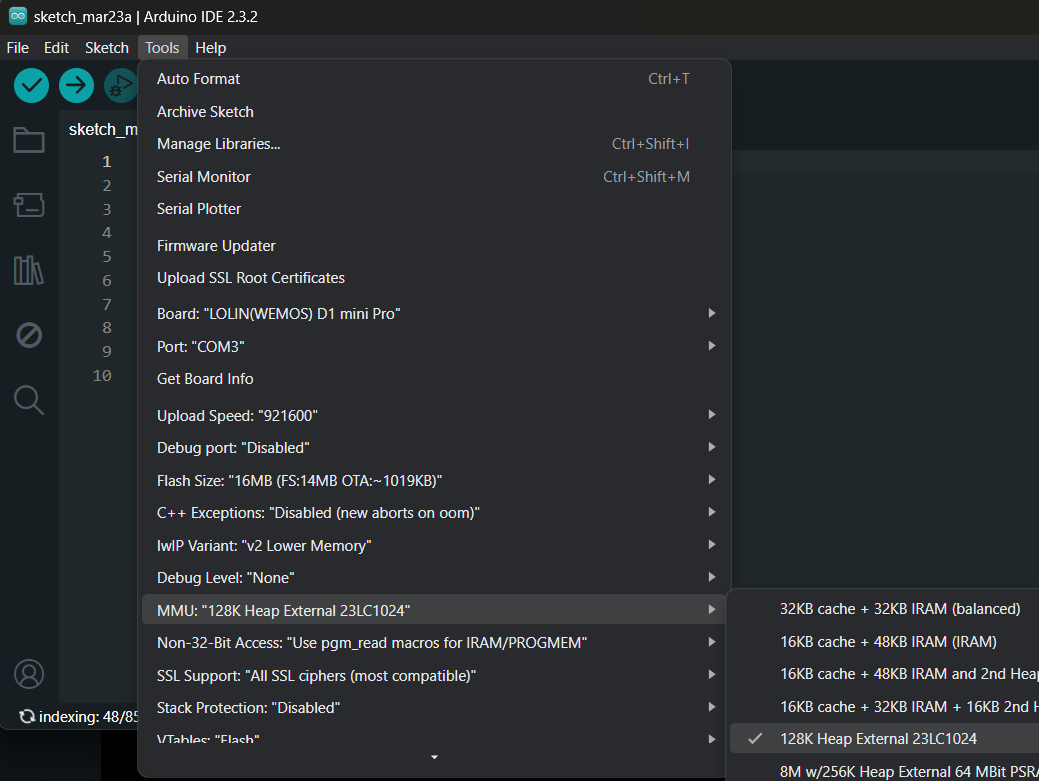
For ESP8266 devices that have external ESP-PSRAM64 chip installed, choose the MMU option 6, 1M External 64 MBit PSRAM.
The MMU options can be selected from build_flags in your project's platformio.ini file
For ESP8266 devices that don't not have external SRAM/PSRAM chip installed, add build flag as below.
[env:d1_mini]
platform = espressif8266
build_flags = -D PIO_FRAMEWORK_ARDUINO_MMU_CACHE16_IRAM48_SECHEAP_SHARED
board = d1_mini
framework = arduino
monitor_speed = 115200
For ESP8266 devices that have external 23LC1024 SRAM chip installed, add build flag as below.
[env:d1_mini]
platform = espressif8266
;128K External 23LC1024
build_flags = -D PIO_FRAMEWORK_ARDUINO_MMU_EXTERNAL_128K
board = d1_mini
framework = arduino
monitor_speed = 115200
For ESP8266 devices that have external ESP-PSRAM64 chip installed, add build flag as below.
[env:d1_mini]
platform = espressif8266
;1M External 64 MBit PSRAM
build_flags = -D PIO_FRAMEWORK_ARDUINO_MMU_EXTERNAL_1024K
board = d1_mini
framework = arduino
monitor_speed = 115200Most ESP8266 modules don't have the built-in SRAM/PSRAM on board. External memory chip connection can be done via SPI port as below.
23LC1024/ESP-PSRAM64                ESP8266

CS (Pin 1)                          GPIO15
SCK (Pin 6)                         GPIO14
MOSI (Pin 5)                        GPIO13
MISO (Pin 2)                        GPIO12
/HOLD (Pin 7 on 23LC1024 only)      3V3
Vcc (Pin 8)                         3V3
Vcc (Pin 4)                         GND
Once the external Heap memory was selected in IDE, to allow the library to use the external memory, you can define this macro in your sketch before including the library header file FirebaseClient.h.
#define ENABLE_PSRAMThis macro was defined by default when you installed or update the library.
In ESP32 module that has PSRAM installed, you can enable it and set the library to use this external memory instead.
To enable PSRAM in ESP32 module.
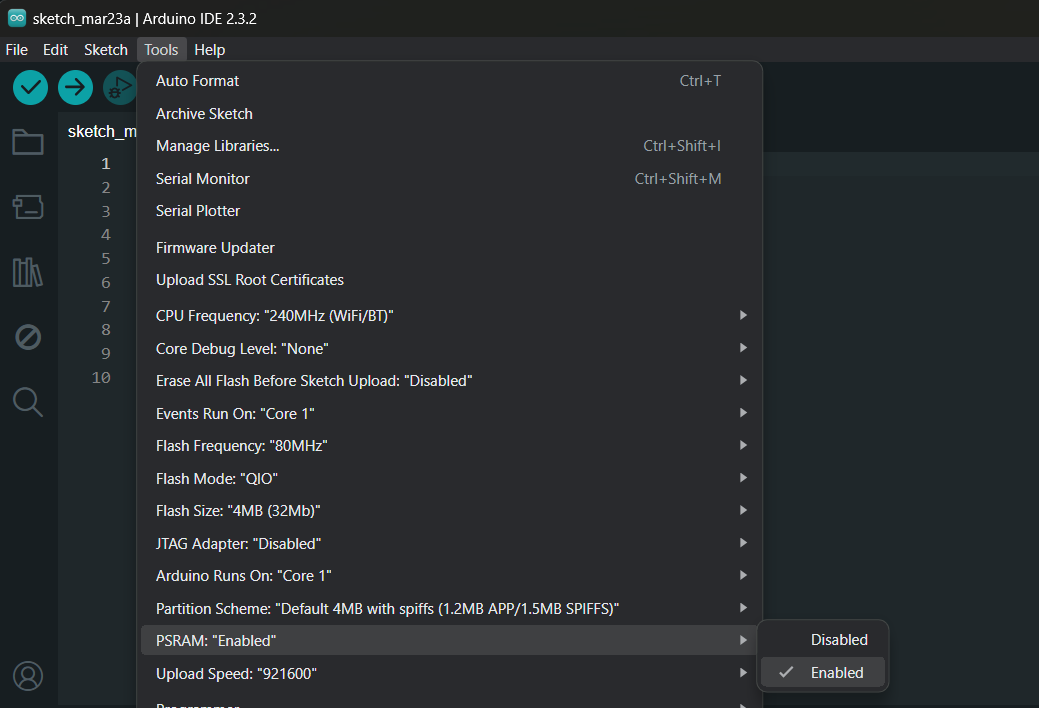
In PlatformIO on VSCode or Atom IDE, add the following build_flags in your project's platformio.ini file.
build_flags = -DBOARD_HAS_PSRAM -mfix-esp32-psram-cache-issueAs in ESP8266, once the external Heap memory was selected in IDE, to allow the library to use the external memory, you can define this macro in your sketch before including the library header file FirebaseClient.h.
#define ENABLE_PSRAMThe library build options are defined as preprocessor macros (#define name).
Since version 2.1.0, there are no predefined build options, user needs to define what he wants to use before compiling.
The build options can be defined before including the library header file FirebaseClient.h or as the compiler build flags.
The available options are the following.
ENABLE_DATABASE // For RTDB compilation
ENABLE_FIRESTORE // For Firestore compilation
ENABLE_FIRESTORE_QUERY // For Firestore Query feature compilation
ENABLE_MESSAGING // For Firebase Cloud Messaging compilation
ENABLE_STORAGE // For Firebase Storage compilation
ENABLE_CLOUD_STORAGE // For Google Cloud Storage compilation
ENABLE_FUNCTIONS // For Google Cloud Functions compilation
ENABLE_RULESETS // For RuleSets compilation
ENABLE_PSRAM // For enabling PSRAM support
ENABLE_OTA // For enabling OTA updates support
ENABLE_FS // For enabling Flash filesystem support

FIREBASE_ASYNC_QUEUE_LIMIT // For maximum async queue limit (number).
FIREBASE_PRINTF_PORT // For Firebase.printf debug port class object.
FIREBASE_PRINTF_BUFFER // Firebase.printf buffer size.

// For enabling authentication and token
ENABLE_SERVICE_AUTH
ENABLE_CUSTOM_AUTH
ENABLE_USER_AUTH
ENABLE_ACCESS_TOKEN
ENABLE_CUSTOM_TOKEN
ENABLE_ID_TOKEN
ENABLE_LEGACY_TOKENNormally this issue can be existed due to large anount of files to be compiled and anti virus software interference.
This library contains the large anount of C files from BearSSL engine used in the internal ESP_SSLClient library which will be used only when the ServiceAuth, CustomAuth and ESP_SSLClient classes are used. This can increase the compilation time.
If ServiceAuth, CustomAuth and ESP_SSLClient classes are not used in your code, you can remove or delete the src/client folder to reduce the Arduino IDE compilation time.
The codes and examples in this repository are licensed under the MIT License.
Copyright (c) 2025, Suwatchai K. All rights reserved.
Permission is hereby granted, free of charge, to any person obtaining a copy of this software and associated documentation files (the "Software"), to deal in the Software without restriction, including without limitation the rights to use, copy, modify, merge, publish, distribute, sublicense, and/or sell copies of the Software, and to permit persons to whom the Software is furnished to do so, subject to the following conditions:
The above copyright notice and this permission notice shall be included in all copies or substantial portions of the Software.
THE SOFTWARE IS PROVIDED "AS IS", WITHOUT WARRANTY OF ANY KIND, EXPRESS OR IMPLIED, INCLUDING BUT NOT LIMITED TO THE WARRANTIES OF MERCHANTABILITY, FITNESS FOR A PARTICULAR PURPOSE AND NONINFRINGEMENT. IN NO EVENT SHALL THE AUTHORS OR COPYRIGHT HOLDERS BE LIABLE FOR ANY CLAIM, DAMAGES OR OTHER LIABILITY, WHETHER IN AN ACTION OF CONTRACT, TORT OR OTHERWISE, ARISING FROM, OUT OF OR IN CONNECTION WITH THE SOFTWARE OR THE USE OR OTHER DEALINGS IN THE SOFTWARE.
Last updated 2025-11-02 UTC.