-
Notifications
You must be signed in to change notification settings - Fork 139
Grid layout
This page explains how to setup the terminal layout using the grid package which organizes the layout into a grid of Rows and Columns. This is one of the two available methods, see also the Binary tree layout.
Grid organizes the terminal terminal into Rows and Columns. Grid accepts Element An Element is one of the following:
- A horizontal Row.
- A vertical Column.
- A widget, see Widget API.
The grid package defines a Builder object which provides the options required to split the container into a grid layout. See the Binary tree layout for more details about splitting containers.
The grid package allows any combination of Rows and Columns, the following diagram demonstrates how this can be used to create a layout.

The developer first creates an instance of the grid.Builder object and then adds Rows, Columns or Widgets. Each Row or Column can contain:
- multiple sub-Rows and subColumns; OR
- exactly one Widget.
The grid.ColWidthPerc function defines a new Column of the specified width. The width is specified as a percentage of the parent's width. I.e. for the top-most Column, this will be percentage of the terminal's width. For a sub-Column, this will be a percentage of the parent's width. The parent is either a Row or a Column.
The sum of all Column widths on the same level cannot be more than 100%. If it is less than 100%, the last Column will stretch to the edge of the screen.
The grid.ColWidthPercWithOpts function is an alternative for grid.ColWidthPerc and allows the caller to also specify options for the intermediate container that represents the added column.
The grid.RowHeightPerc function defines a new Row of the specified height. The height is specified as a percentage of the parent's height. I.e. for the top-most Row, this will be percentage of the terminal's height. For a sub-Row, this will be a percentage of the parent's height. The parent is either a Row or a Column.
The sum of all Row heights on the same level cannot be more than 100%. If it is less than 100%, the last Row will stretch to the edge of the screen.
The grid.RowHeightPercWithOpts function is an alternative for grid.RowHeightPerc and allows the caller to also specify options for the intermediate container that represents the added row.
The grid.Widget function adds the specified widget into the current Row or Column. The developer can also specify any additional container options to be applied to the same container. See the Container API for more details about container options.
The grid.New function is used to construct a grid.Builder instance. The builder's Add method is used to add grid elements. When all the desired elements were added, the developer calls the Build methods which returns container options that correspond to the desired grid layout.
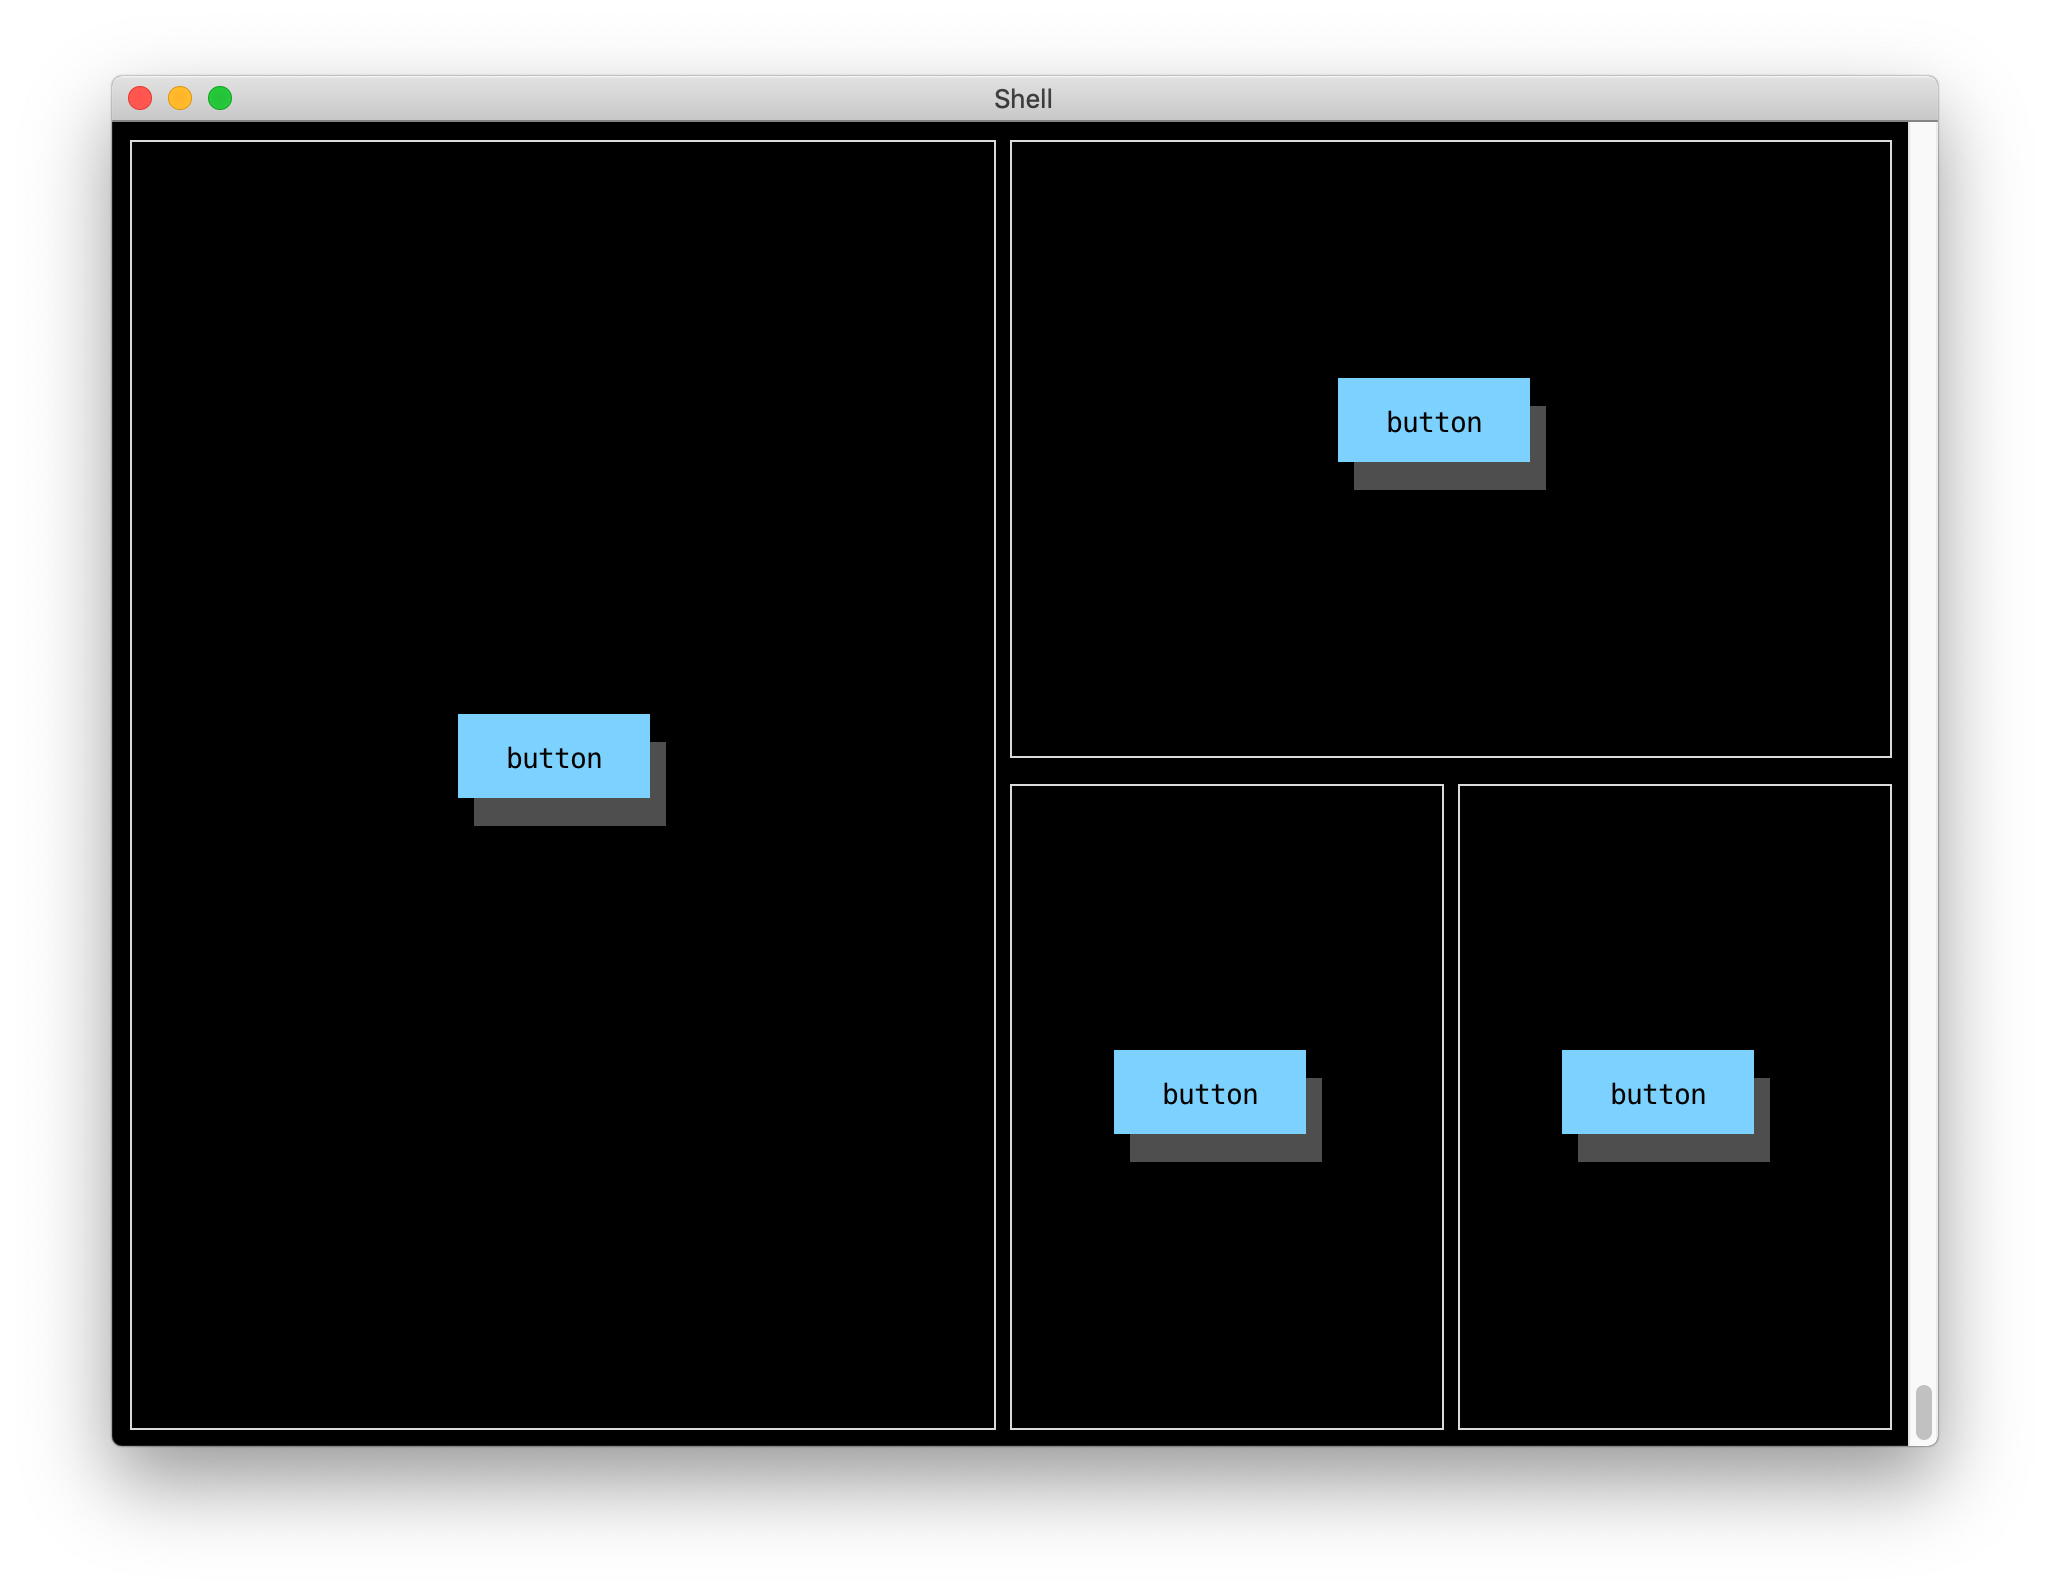
To create the terminal layout indicated in the diagram above, the developer can use the following code:
t, err := tcell.New()
if err != nil {
  return fmt.Errorf("tcell.New => %v", err)
}

b, err := button.New("button", func() error {
  return nil
})
if err != nil {
  return fmt.Errorf("button.New => %v", err)
}

builder := grid.New()
builder.Add(
  grid.ColWidthPerc(50,
    grid.Widget(addB,
      container.Border(linestyle.Light),
    ),
  ),
)
builder.Add(
  grid.RowHeightPerc(50,
    grid.Widget(addB,
      container.Border(linestyle.Light),
    ),
  ),
)
builder.Add(
  grid.ColWidthPerc(25,
    grid.Widget(addB,
      container.Border(linestyle.Light),
    ),
  ),
)
builder.Add(
  grid.ColWidthPerc(25,
    grid.Widget(addB,
      container.Border(linestyle.Light),
    ),
  ),
)

gridOpts, err := builder.Build()
if err != nil {
  return fmt.Errorf("builder.Build => %v", err)
}

c, err := container.New(t, gridOpts...)
if err != nil {
  return fmt.Errorf("container.New => %v", err)
}
When executed, this results in the following terminal layout:

See a typo, something missing or outright wrong? Feel free to edit the Wiki pages directly, alternatively talk to us.

