OpenWorm aims to build the first comprehensive computational model of Caenorhabditis elegans (C. elegans), a microscopic roundworm. With only a thousand cells, it solves basic problems such as feeding, mate-finding and predator avoidance. Despite being extremely well-studied in biology, a deep, principled understanding of the biology of this organism remains elusive.
We are using a bottom-up approach, aimed at observing the worm behaviour emerge from a simulation of data derived from scientific experiments carried out over the past decade. To do so, we are incorporating the data available from the scientific community into software models. We are also forging new collaborations with universities and research institutes to collect data that fill in the gaps.
You can earn a badge with us simply by trying out this package! Click on the image below to get started.

We have put together a Docker container that pulls together the major components of our simulation and runs it on your machine. When you get it all running it does the following:
- Run our nervous system model, known as c302, on your computer.
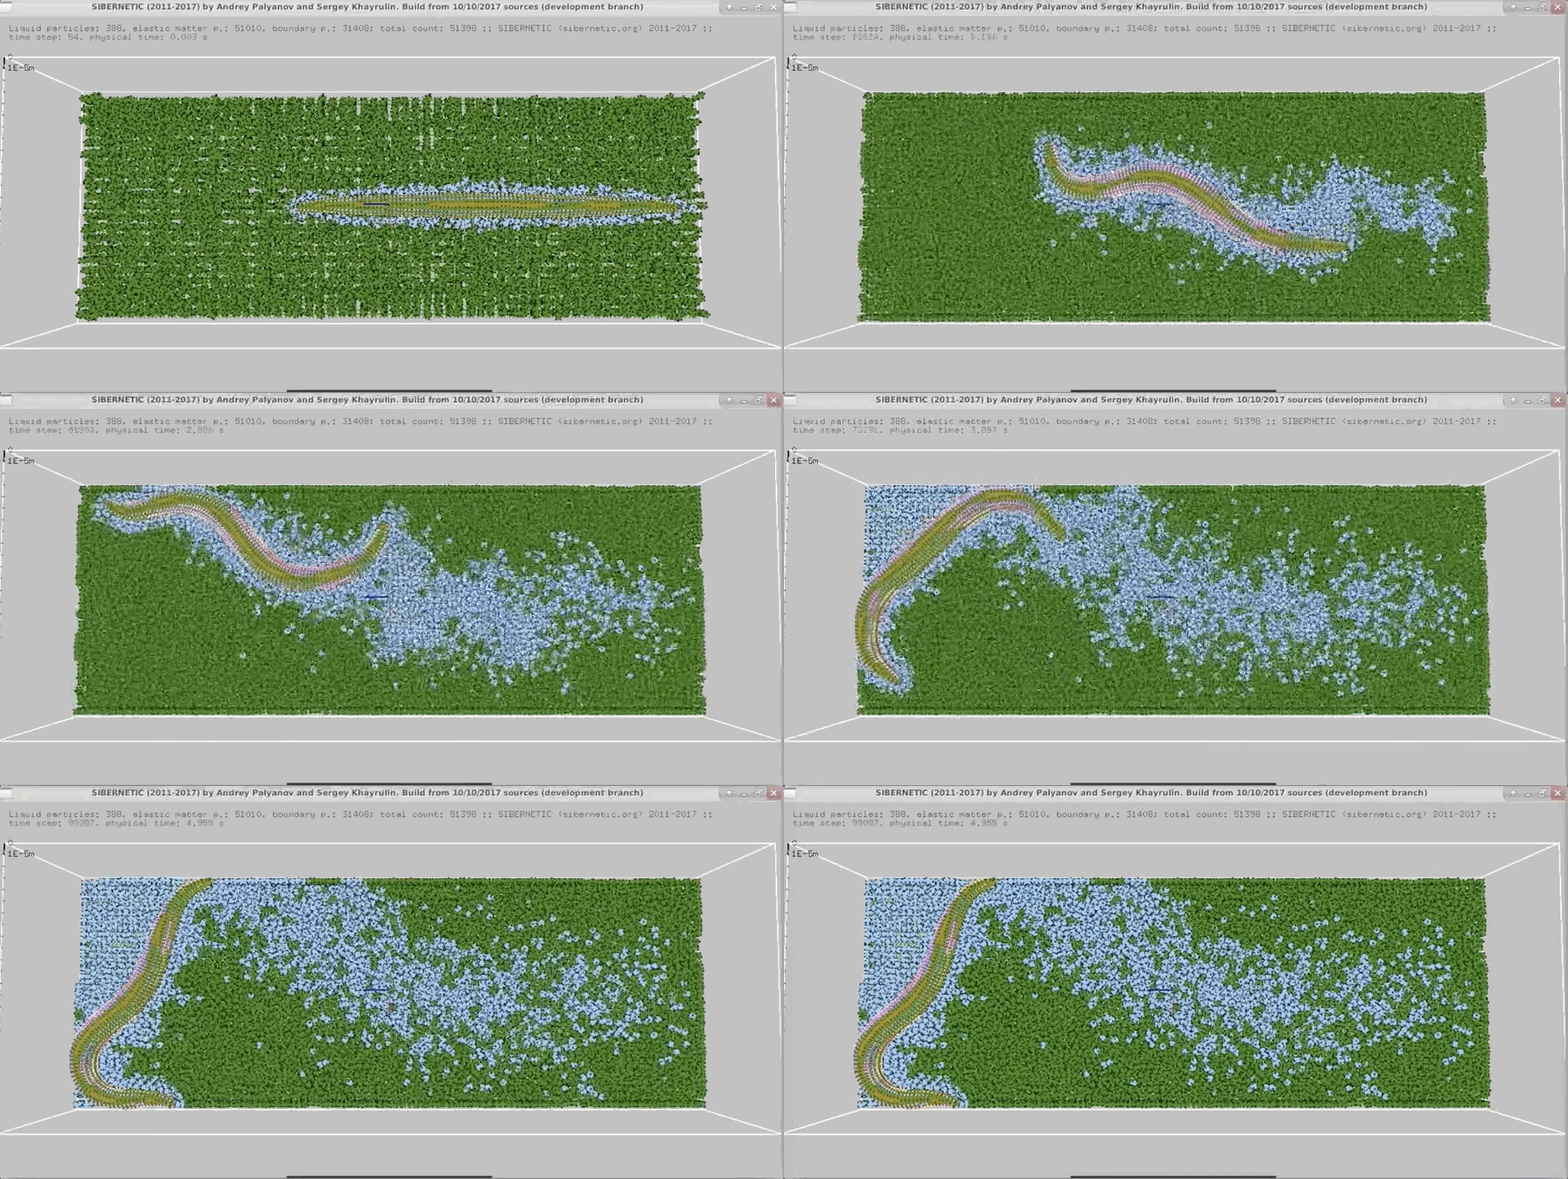
- In parallel, run our 3D worm body model, known as Sibernetic, on your computer, using the output of the nervous system model.
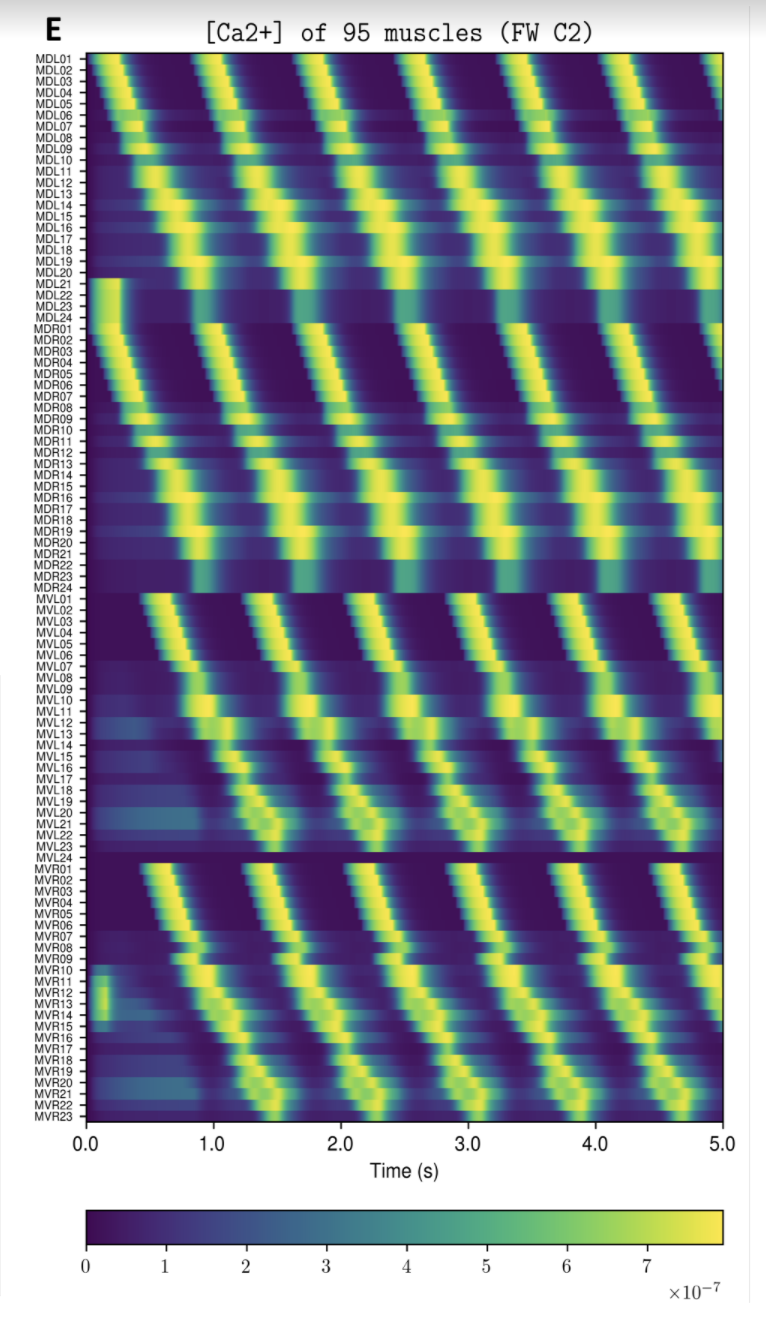
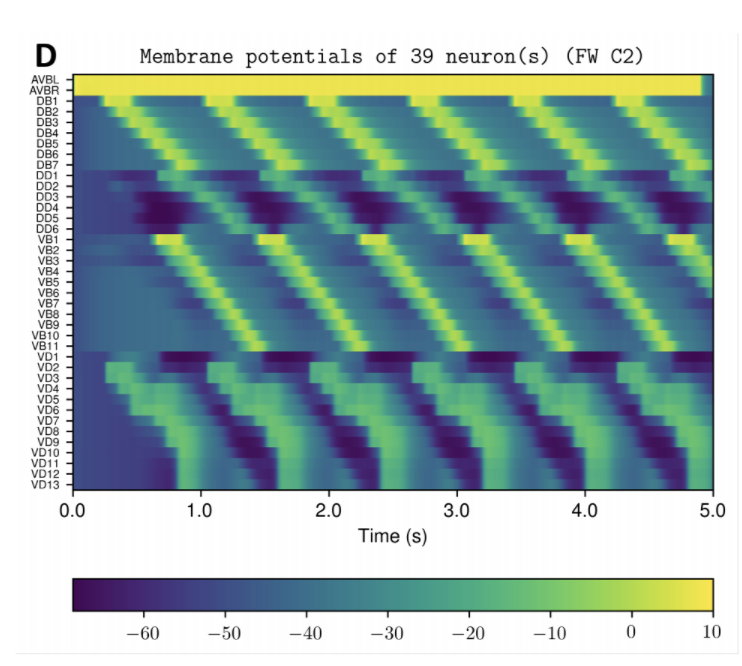
- Produce graphs from the nervous system and body model that demonstrate its behavior on your computer for you to inspect.
- Produce a movie showing the output of the body model.
Example Output
NOTE: Running the simulation for the full amount of time would produce content like the above. However, in order to run in a reasonable amount of time, the default run time for the simulation is limited. As such, you will see only a partial output, equivalent to about 5% of run time, compared to the examples above. To extend the run time, use the -d argument as described below.
Installation
Pre-requisites:
- You should have at least 60 GB of free space on your machine and at least 2GB of RAM
- You should be able to clone git repositories on your machine. Install git, or this GUI may be useful.
To Install:
- Install Docker on your system.
- If your system does not have enough free space, you can use an external hard disk. On MacOS X, the location for image storage can be specified in the Advanced Tab in Preferences. See this thread in addition for Linux instructions.
Running
- Ensure the Docker daemon is running in the background (on MacOS/Windows there should be an icon with the Docker whale logo showing in the menu bar/system tray).
- Open a terminal and run:
git clone http://github.com/openworm/openworm;cd openworm - Optional: Run
./build.sh(orbuild.cmdon Windows). If you skip this step, it will download the latest released Docker image from the OpenWorm Docker hub. - Run
./run.sh(orrun.cmdon Windows). - About 5-10 minutes of output will display on the screen as the steps run.
- The simulation will end. Run
stop.sh(stop.cmdon Windows) on your system to clean up the running container. - Inspect the output in the
outputdirectory on your local machine.
Advanced
Arguments
- -d [num] : Use to modify the duration of the simulation in milliseconds. Default is 15. Use 5000 to run for time to make the full movie above (i.e. 5 seconds).
Other things to try
- Open a terminal and run
./run-shell-only.sh(orrun-shell-only.cmdon Windows). This will let you log into the container before it has runmaster_openworm.py. From here you can inspect the internals of the various checked out code bases and installed systems and modify things. Afterwards you'll still need to run./stop.shto clean up. - If you wish to modify what gets installed, you should modify
Dockerfile. If you want to modify what runs, you should modifymaster_openworm.py. Either way you will need to runbuild.shin order to rebuild the image locally. Afterwards you can run normally.
The Docker container is a self-contained environment in which you can run OpenWorm simulations. It's fully set up to get you started by following the steps above. At the moment, it runs simulations and produces visualizations for you, but these visualizations must be viewed outside of the Docker container. While you do not need to know much about Docker to use OpenWorm, if you are planning on working extensively with the platform, you may benefit from understanding some basics. Docker Curriculum is an excellent tutorial for beginners that is straightforward to work through (Sections 1 - 2.5 are plenty sufficient).
Yes, but it is marginally more complex. The easiest way is to modify anything in the Docker container once you are inside of it - it will work just like a bash shell. If you want to modify any code in the container, you'll need to use an editor that runs in the terminal, like nano. Once you've modified something in the container, you don't need to re-build. However, if you run stop.sh once you exit, those changes will be gone.
The simulation by default outputs only a few figures and movies to your home system (that is, outside of the Docker container). If you want to access the entire output of the simulation, you will need to copy it from the Docker container.
For example, say you want to extract the worm motion data. This is contained in the file worm_motion_log.txt, which is found in the /home/ow/sibernetic/simulations/[SPECIFIC_TIMESTAMPED_DIRECTORY]/worm_motion_log.txt. The directory [SPECIFIC_TIMESTAMPED_DIRECTORY] will have a name like C2_FW_2018_02-12_18-36-32, and its name can be found by checking the output directory. This is actually the main output directory for the simulation, and contains all output, including cell modelling and worm movement.
Once the simulation ends and you exit the container with exit, but before you run stop.sh, run the following command from the openworm-docker-master folder:
docker cp openworm:/home/ow/sibernetic/simulations/[SPECIFIC_TIMESTAMPED_DIRECTORY]/worm_motion_log.txt ./worm_motion_log.txt
This will copy the file from the Docker container, whose default name is openworm. It is crucial that you do not run stop.sh before trying to get your data out (see below)
When you are in the Docker Container openworm, and are done interacting with it, you type exit to return to your system's shell. This stops execution of anything in the container, and that container's status is now Exited. If you try to re-start the process using run-shell-only.sh, you will get an error saying that the container already exists. You can choose, at this point, to run stop.sh. Doing so will remove the container and any files associated with it, allowing you to run a new simulation. However, if you don't want to remove that container, you will instead want to re-enter it.
If you run stop.sh you'll delete your data and reset the container for a new run. If, however, you don't want to do that, you can re-enter the Docker container like this:
docker start openworm                 # Restarts the container
docker exec -it openworm /bin/bash    # Runs bash inside the container
This tells Docker to start the container, to execute commands (exec) with an interactive, tty (-it) bash (bash) shell in the container openworm.
You'll be able to interact with the container as before.
to find out more about OpenWorm, please see the documentation at http://docs.openworm.org or join us on Slack.
This repository also contains project-wide tracking via high-level issues and milestones.


