-
Notifications
You must be signed in to change notification settings - Fork 6
Testing Guide Proposal 1
On a type 1 test, docker-build based, we will create a secondary container which is based on the container that we want to test. The tests will be executed in the build phase of this secondary container. The main advantage of this is that adding it to a Continous integration server is easy, and since you have already built containers in the past, there is nothing new in terms of complexity. For the sake of this tutorial, we will follow a defined example, the tests required for the midcor container.
To store this, we create a new repo under PhenoMeNal GitHub organization, named container-test-midcor for the sake of the example followed here. Name the container-test repo accordingly for your tool.
A natural thing to do here would be to create a secondary container with all the required logic for testing (that is, download test data files and run test):
FROM container-registry.phenomenal-h2020.eu/phnmnl/midcor:latest
MAINTAINER PhenoMeNal-H2020 Project ( phenomenal-h2020-users@googlegroups.com )

# get the data
RUN wget "https://drive.google.com/uc?export=download&id=0B2e3YmwhK4fkeW1ORld3ZVZ2ZDQ" -O midcor_outin_input.csv
RUN runMidcor.R -i midcor_outin_input.csv -o output.csv
# we are currently not testing for the correctness of the run, but at least we know that is running without issues.
This would give us the chance as well to obtain the wget tool through apt-get install -y wget if it wasn't available in the original container. This first approach is available at the container-test-midcor repo, on this Dockerfile.
Please note the directory structure where that Dockerfile is present:
type1/test1/Dockerfile
This directory structure is required for our Jenkins job, which we refer to later on in this tutorial. If you want to create a second test of the same type, please create it on type1/test2/Dockerfile.
A better approach, however, would be to include all this logic in the first container, but not execute it, leaving that to the secondary container (included the installation of whatever additional packages are needed).
Originally, the midcor container Dockerfile looked like this:
FROM r-base:3.3.1

MAINTAINER PhenoMeNal-H2020 Project ( phenomenal-h2020-users@googlegroups.com )

RUN apt-get -y update && apt-get -y --allow-downgrades install libssl-dev libcurl4-openssl-dev=7.50.1-1 git libssh2-1-dev

# Add scripts folder to container
ADD scripts/runMidcor.R /usr/bin/runMidcor.R
ADD scripts/installMidcor.R installMidcor.R

RUN echo 'options("repos"="http://cran.rstudio.com")' >> /etc/R/Rprofile.site
RUN Rscript install_midcor.R

# Clean up
RUN apt-get clean && apt-get autoremove -y && rm -rf /var/lib/{apt,dpkg,cache,log}/ /tmp/* /var/tmp/*

RUN chmod +x /usr/bin/runMidcor.R
# Define Entry point script
ENTRYPOINT ["runMidcor.R"]
After starting a new feature in the original container-midcor git repo through git-flow, named feature/createTest2, we could add the previously shown logic:
wget "https://drive.google.com/uc?export=download&id=0B2e3YmwhK4fkeW1ORld3ZVZ2ZDQ" -O midcor_outin_input.csv
runMidcor.R -i midcor_outin_input.csv -o output.csv
to a bash script runTest1.sh, which we add to the container-midcor git repo (the repo of the original tool container) on the scripts folder, as it has been done on this commit, and then add this file to the Dockerfile on that same original container repo (see commit), modifying the original Dockerfile like this:
# Add scripts folder to container
ADD scripts/runMidcor.R /usr/bin/runMidcor.R
ADD scripts/installMidcor.R installMidcor.R
# Add test scripts
ADD scripts/runTest1.sh /usr/bin/runTest1.sh
RUN chmod +x /usr/bin/runTest1.sh
Having added the runTest1.sh to the repo and to the Dockefile, and making sure it works
docker build -t midcor-provisional .
docker run -it --entrypoint=runTest1.sh midcor-provisional
we can close the git-flow feature and merge back to develop.
Please note that the mere addition of the runTest1.sh bash script doesn't imply its execution on the original container, hence none of the data or additionally required packages will be added to the container. Only the text file containing the script will be added, which is negible in terms of size.
From here, our secondary container, stored at the container-test-midcor repo would be simpler:
FROM container-registry.phenomenal-h2020.eu/phnmnl/midcor:latest
MAINTAINER PhenoMeNal-H2020 Project ( phenomenal-h2020-users@googlegroups.com )

# run the test file
RUN runTest1.sh
# we are currently not testing for the correctness of the run, but at least we know that is running without issues.
The Dockerfile is available here.
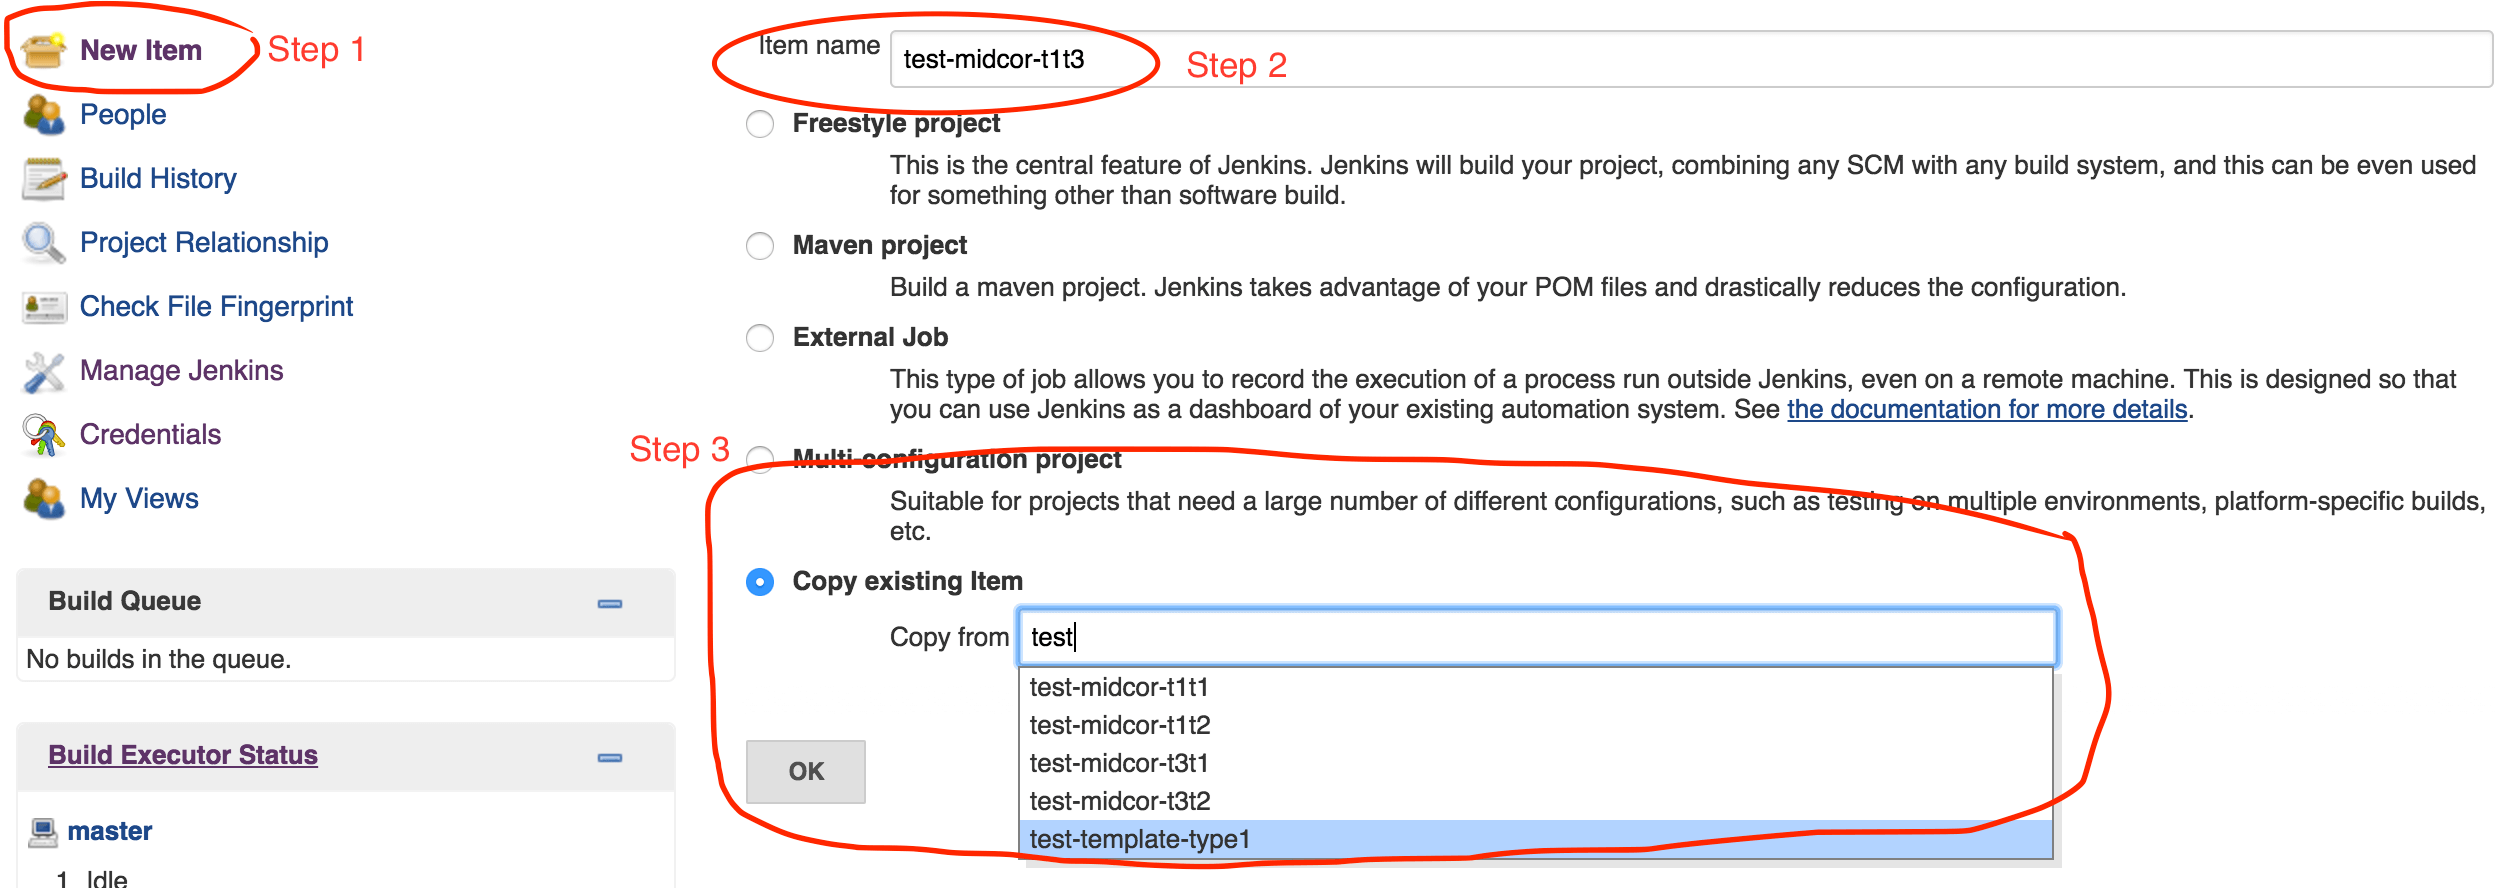
For a type 1 test, we create a new Jenkins item (Job) pressing New item to the upper left, giving it an name test-midcor-t1t3 (for type 1, test 3) and duplicating item test-template-type1, as shown in the screen shot below.

And press OK. Then, in the following screen, change the fields:
-
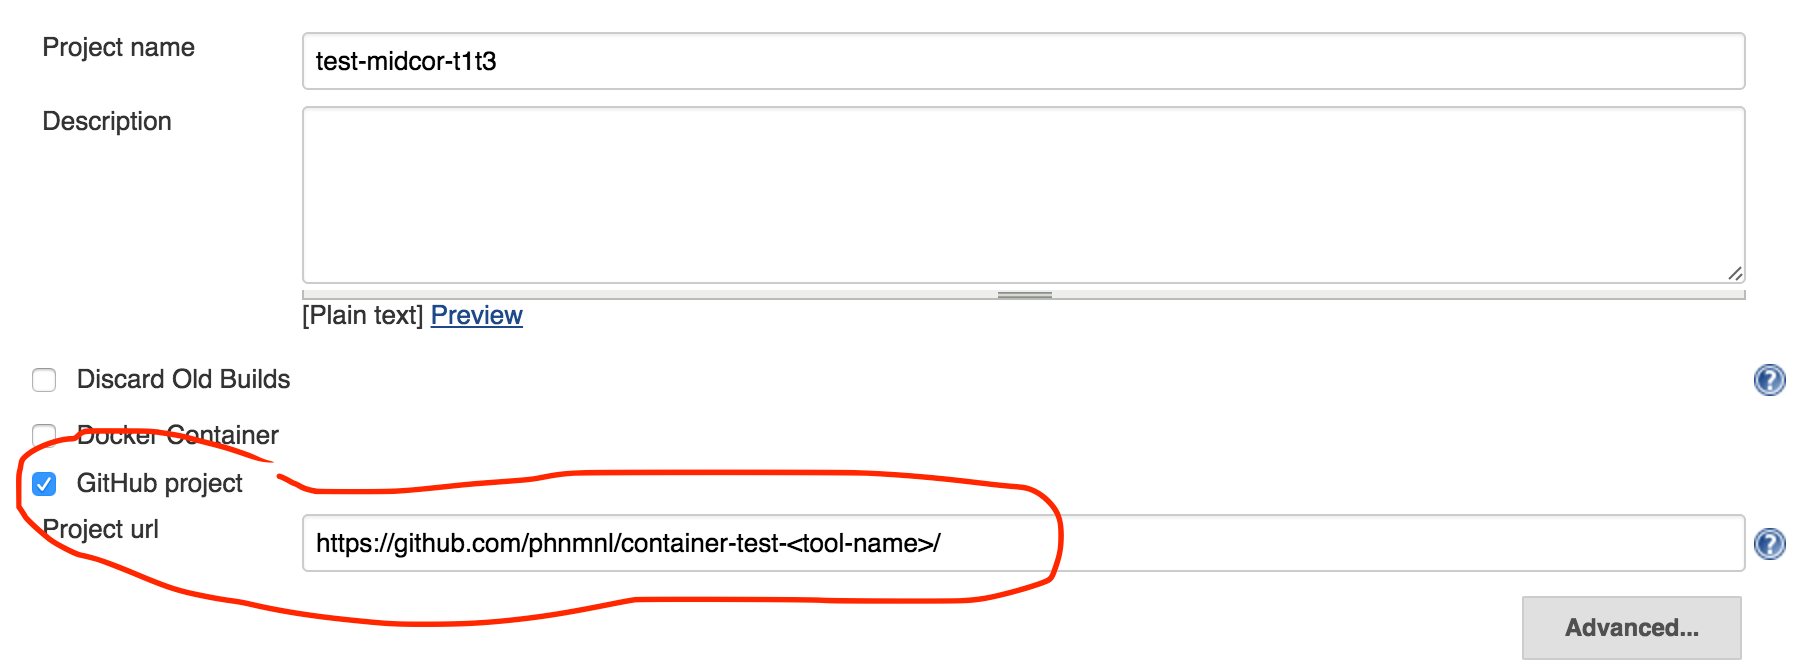
GitHub Project -> Project URLwhich has as valuehttps://github.com/phnmnl/container-test-<tool-name>/to reflect the URL of the git repo created for the container test, in this casehttps://github.com/phnmnl/container-test-midcor:

-
Source code Management -> Git -> Repository URL, to the same container repo URL that we used in the previous step. The red message below should go away.

- Check
Build Triggers -> Build after other projects are built -> Projects to watchand change it to reflect the name of the build in Jenkins that corresponds to the original tool that we are making the test for. For this example, that would becontainer-midcor.

-
Build -> Inject environment variablesset the three variables to adequate values to your test. In this case, we are creating a third test of type 1 for midcor, soTYPE=1,TESTNO=3,TOOL=midcor. Respecting these conventions is important as it will allow the timely execution of the test without you having to deal with more fields, supposing that you respected the mentioned directory hierarchytypeN/testM/Dockerfile.

Press the button Save at the end. If all is fine, the test should be able run through a build succesfully. The image created for the test will be deleted.
 |
Funded by the EC Horizon 2020 programme, grant agreement number 654241 |  |
|---|
