-
Notifications
You must be signed in to change notification settings - Fork 2
2 Authentication
We will access the user data in a simple way, super manually, using requests library from python.
You can download the source code to follow along.
We will be mentioning this three files: models.py, views.py & urls.py
Taking the code from our first Django demo, we had created a User Model.
From there, on our second meeting we explored the AbstractUser and implemented that, so our User model ended up looking a lot like this:
class User(AbstractUser):
	intra_username = models.CharField(max_length=30, unique=True)
	intra_id = models.IntegerField(unique=True, db_index=True)
	first_name = models.CharField(max_length=50)
	last_name = models.CharField(max_length=50)
	email = models.EmailField(max_length=130)
	bio = models.TextField(max_length=800)
	updated_at = models.DateTimeField(auto_created=True, auto_now=True)
	is_admin = models.BooleanField(default=False)

	REQUIRED_FIELDS = ["email", "intra_id", "first_name", "last_name"]
	USERNAME_FIELD = "intra_username"

	def __str__(self):
		return "@" + self.intra_username

	def wasUpdatedToday(self):
		return self.updated_at > date.yesterday()

	def serialize(self):
		return serialize('json', [self])[1:-1]
It will be a good idea to later implement a method to login users.
Bare in mind that we are not going to need to use the authenticate method from the django.contrib.auth module.
The 42Api is in charge of authenticating, as long as we get a code, we can exchange it with the 42Api, and upon success we can assume that the user has in fact authenticated successfully using 42Api, we then just need to login the user.
Now that we understand what we need to do in our backend we can start developing the logic to login the user upon a successful authentication 🔑
If you are not quite sure about the web flow on how to authenticate, please read this doc from the 42Api 📜
Let's write our callback, i.e; the endpoint that intra will request after the user grants permission, along with the code.
The code comes as a query parameter, so we will need to get it from the request
urls.py
urlpatterns = [
	...
	path('auth/intra_callback', views.intraCallback, name="intraCallback"),
]
Now let's add the intraCallback
You can return the list of parameters as a Dictionary as described
on the docs using
.GETand after that we can access the paramwhich we want, in this case code , so:
request.GET["code"],views.py
def intraCallback(request):
	get_token_path = "https://api.intra.42.fr/oauth/token"
	data = {
		'grant_type': 'authorization_code',
		'client_id': '<your_uid_here>',
		'client_secret': '<your_secret_here>',
		'code': request.GET["code"],
		'redirect_uri': 'http://localhost:8000/auth/intra_callback',
	}
	r = requests.post(get_token_path, data=data)
	return HttpResponse(r)
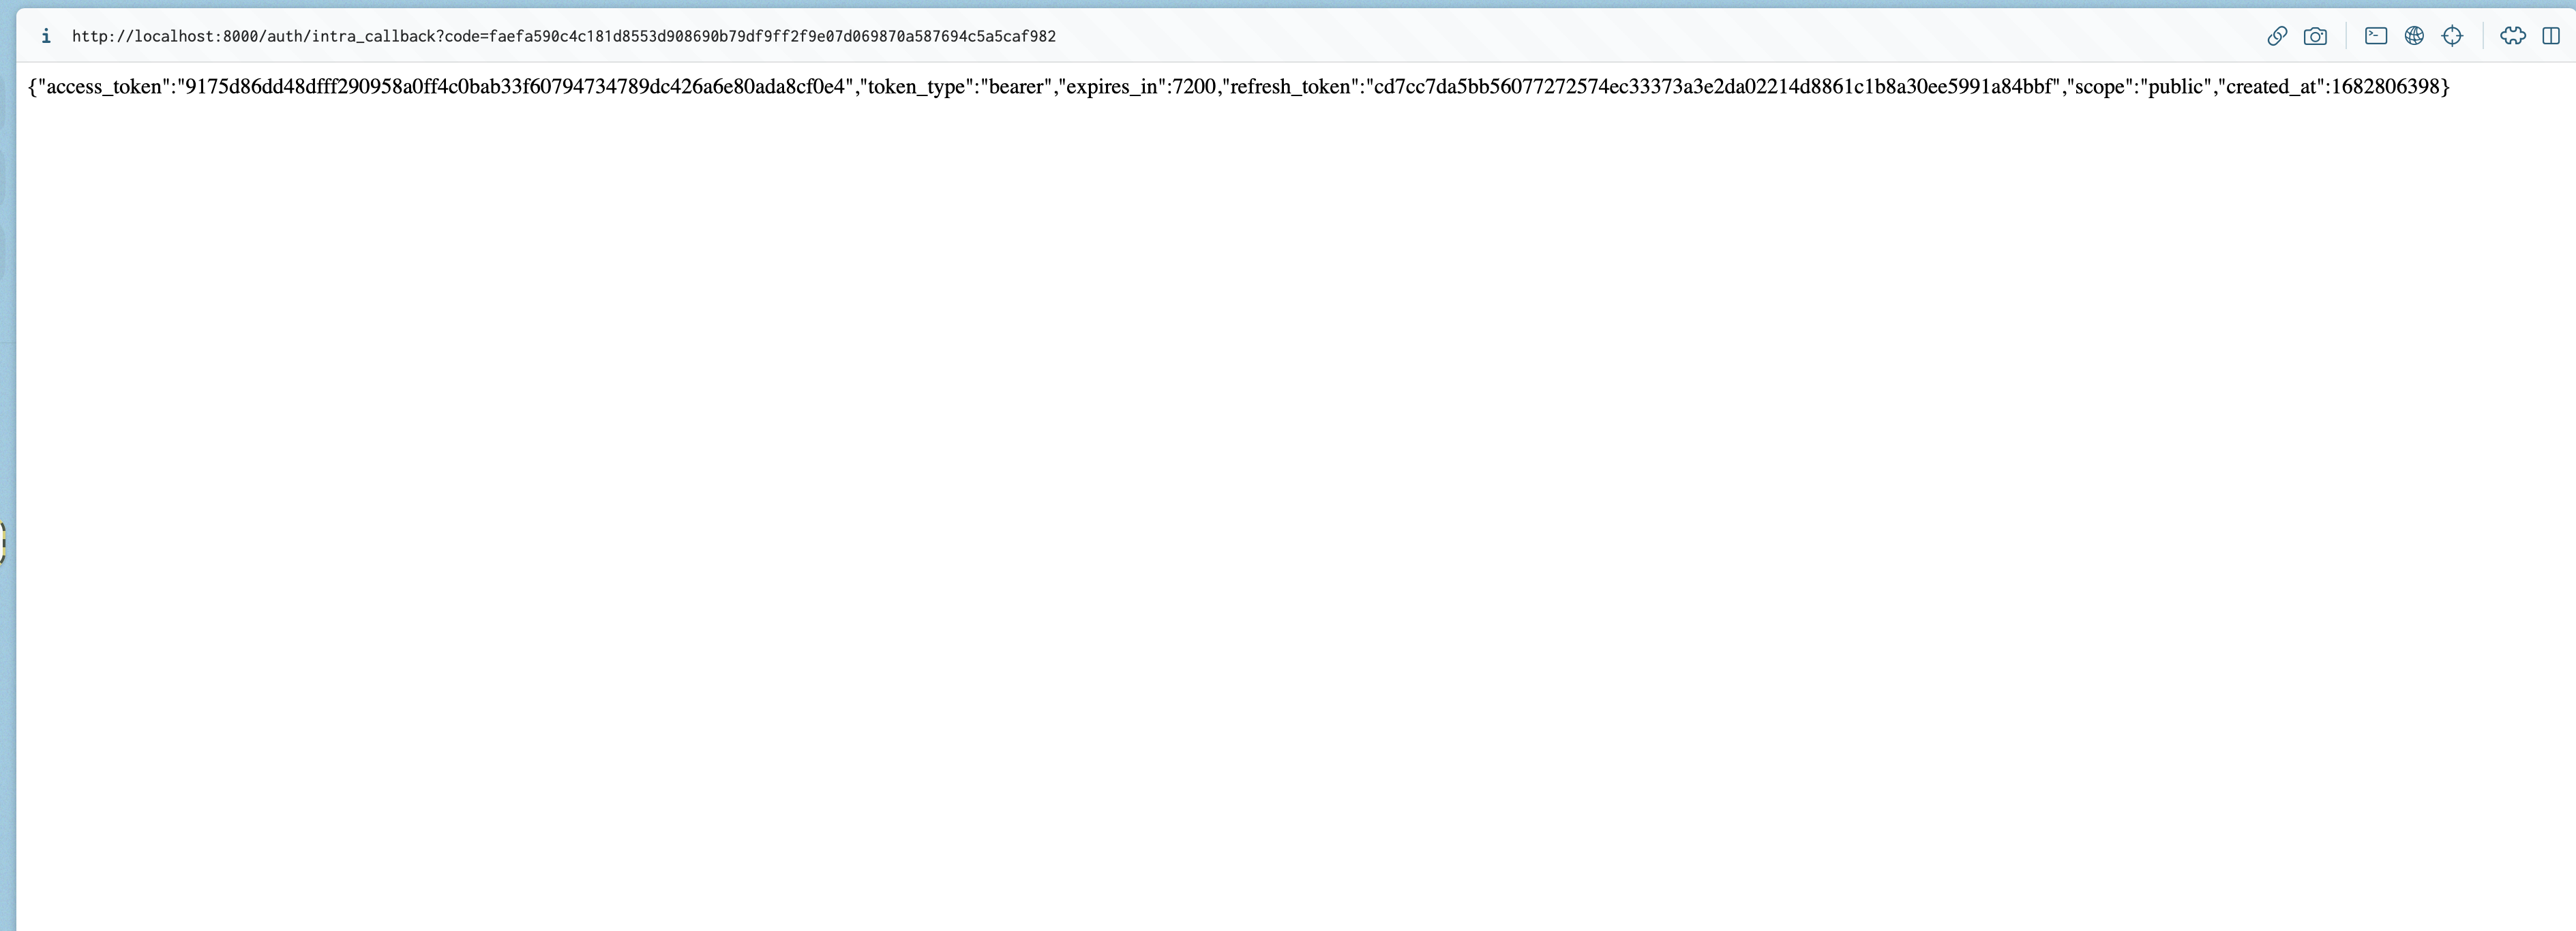
Upon testing this you will see something like this on your screen:
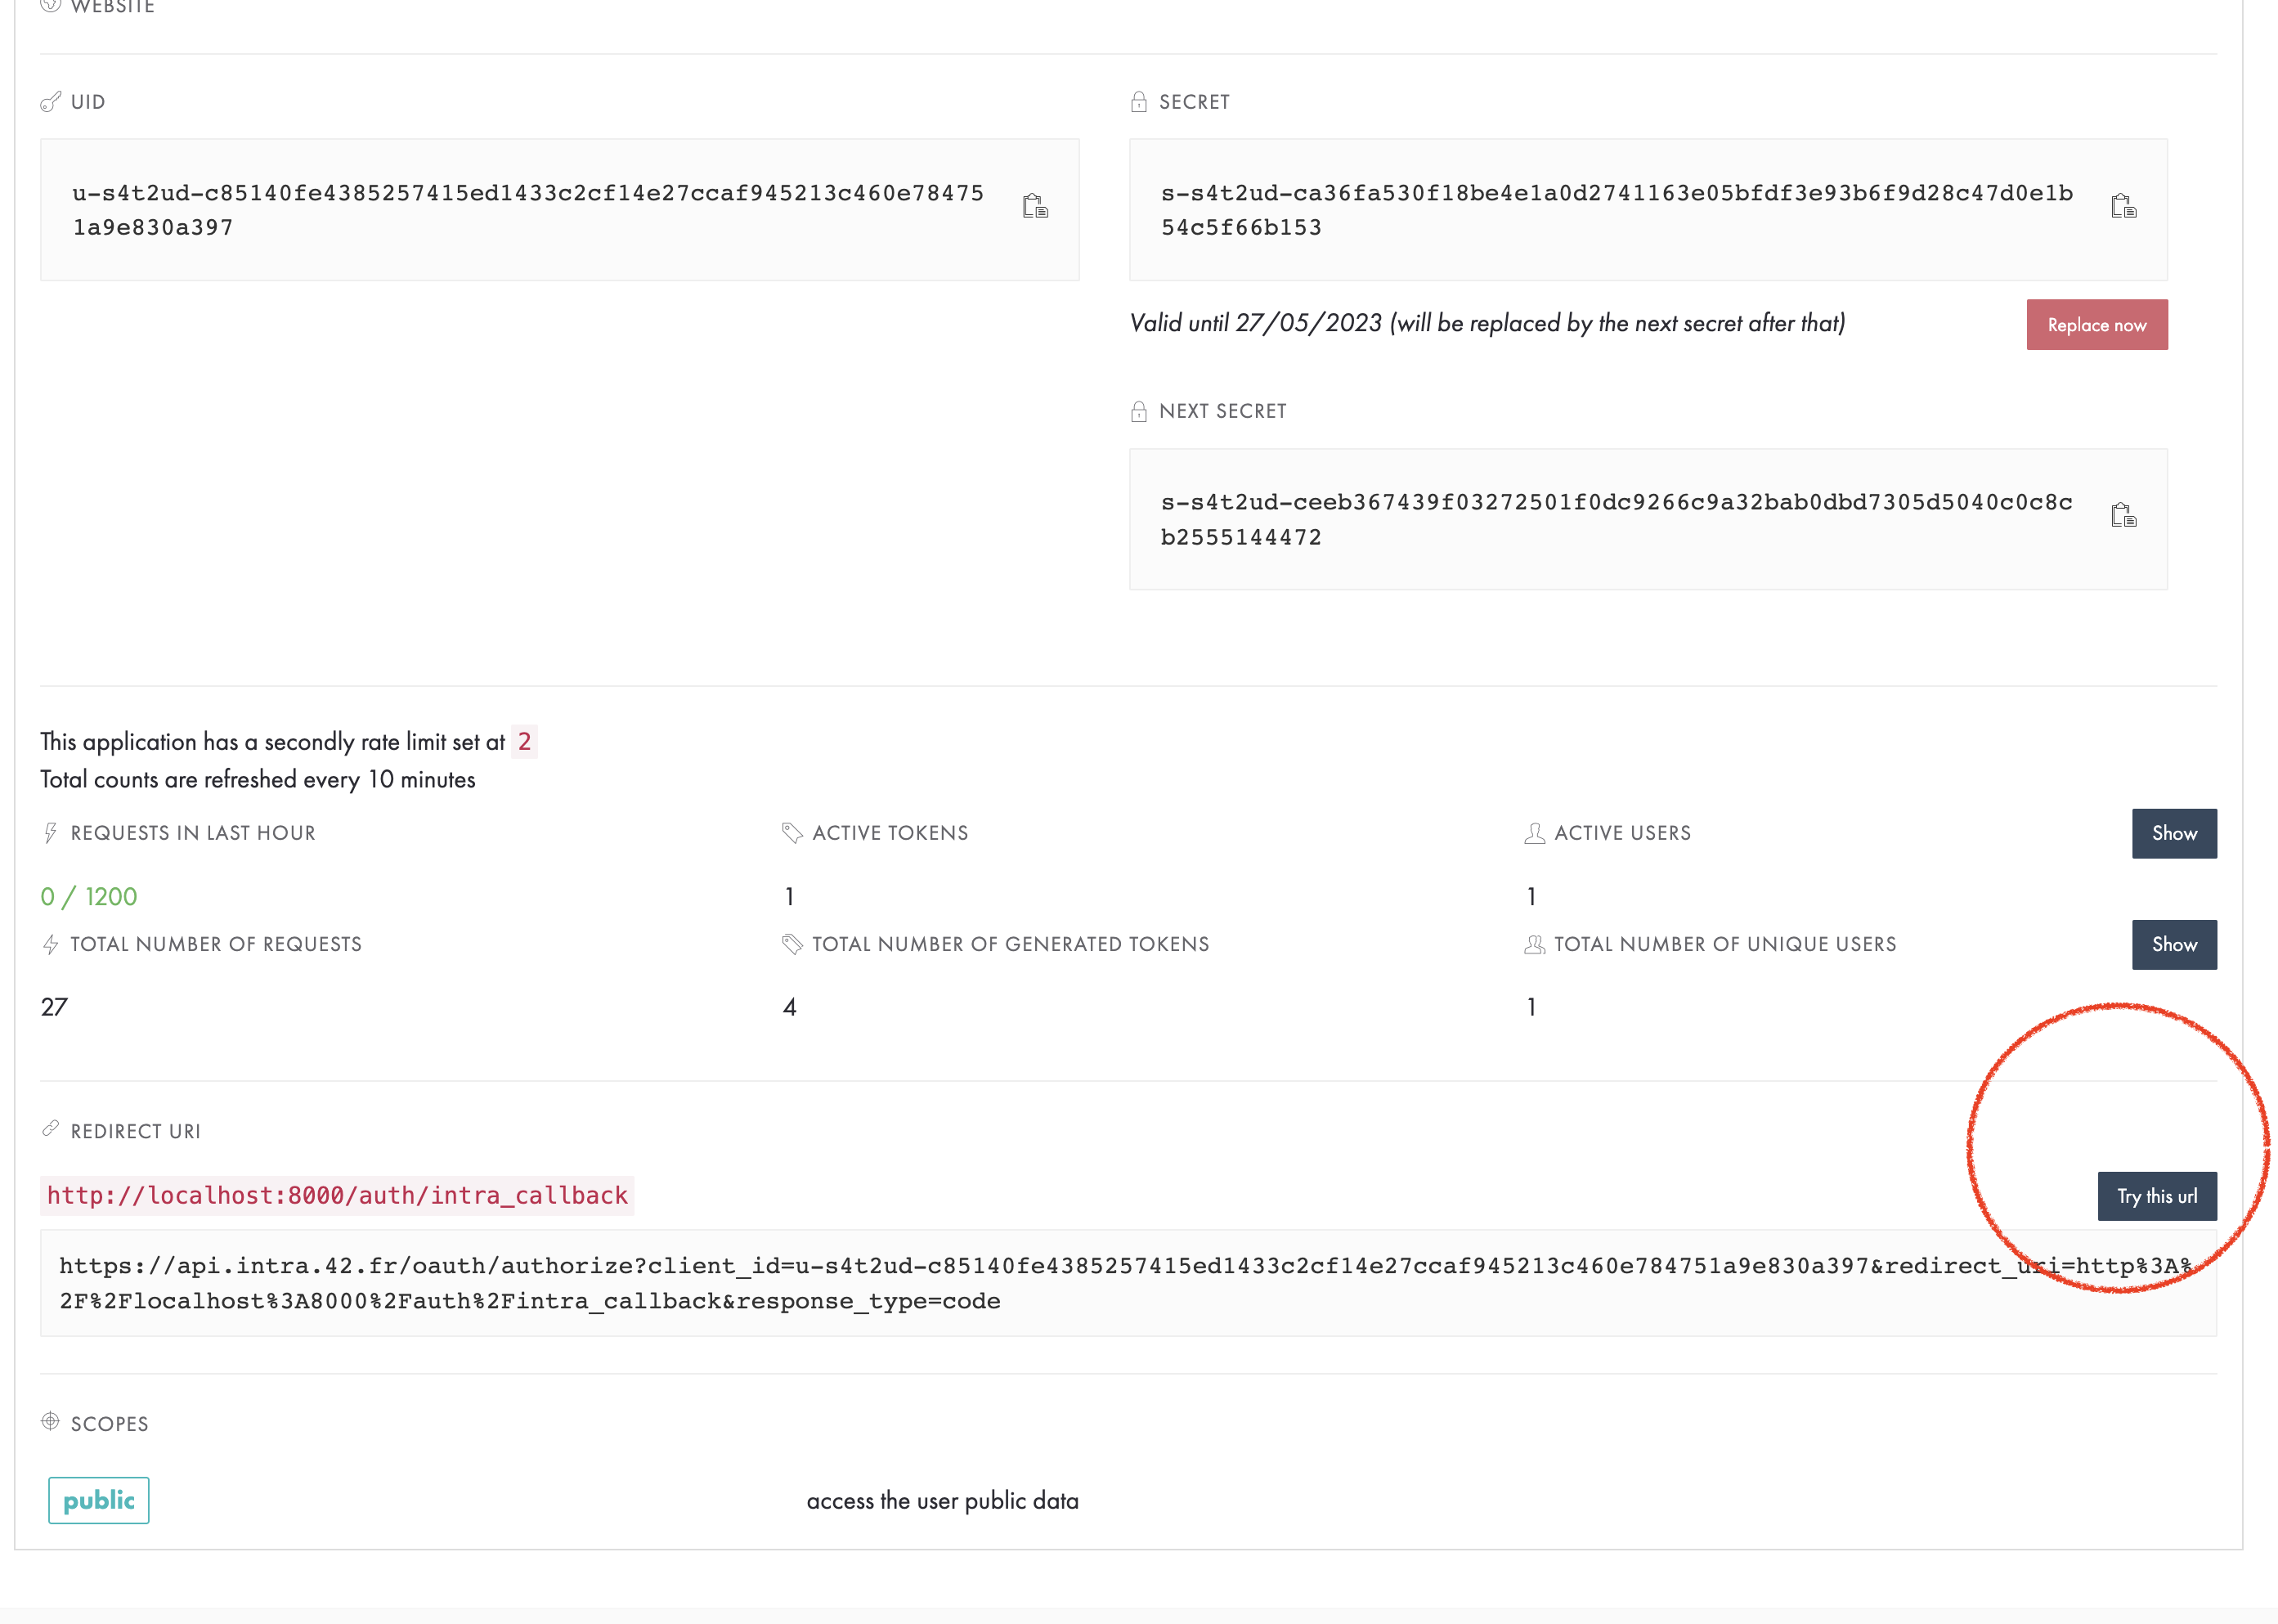
Steps to test & reproduce the image bellow
1 - Visit the intra login url which will redirect to your callback, if you go to your intra account:
2 - Settings --> API --> Choose your Api configuration --> on the bottom you can click **Try this url**
3 - IMG

4 - After authenticating you should be redirected to your callback and your callback should return the response as I share on the picture bellow.

Now we've exchanged our code for a token that expires in 2 hours (7200 seconds), we're safe to say we have plenty of time to use this token to login the user! But how can we know which user is this?
We just have to do one more fetch to intra with the authenticated user token, to: https://api.intra.42.fr/v2/me
curl -H "Authorization: Bearer YOUR_ACCESS_TOKEN" https://api.intra.42.fr/v2/me
For that, we can use again the request library:
The response that we got from the post, contains the token now we must fetch
this code comes as part of the response body as json, using the request library
we can interpret the response body (🤯 the library has this function ready): .json()
token = response_with_our_token.json()['access_token']views.py
def intraCallback(request):
	get_token_path = "https://api.intra.42.fr/oauth/token"
	data = {
		'grant_type': 'authorization_code',
		'client_id': 'u-s4t2ud-c85140fe4385257415ed1433c2cf14e27ccaf945213c460e784751a9e830a397',
		'client_secret': 'your_secret',
		'code': request.GET["code"],
		'redirect_uri': 'http://localhost:8000/auth/intra_callback',
	}
	r = requests.post(get_token_path, data=data)
	token = r.json()['access_token']
	headers = {"Authorization": "Bearer %s" % token}
	user_response = requests.get("https://api.intra.42.fr/v2/me", headers=headers)
	return HttpResponse(user_response.content)
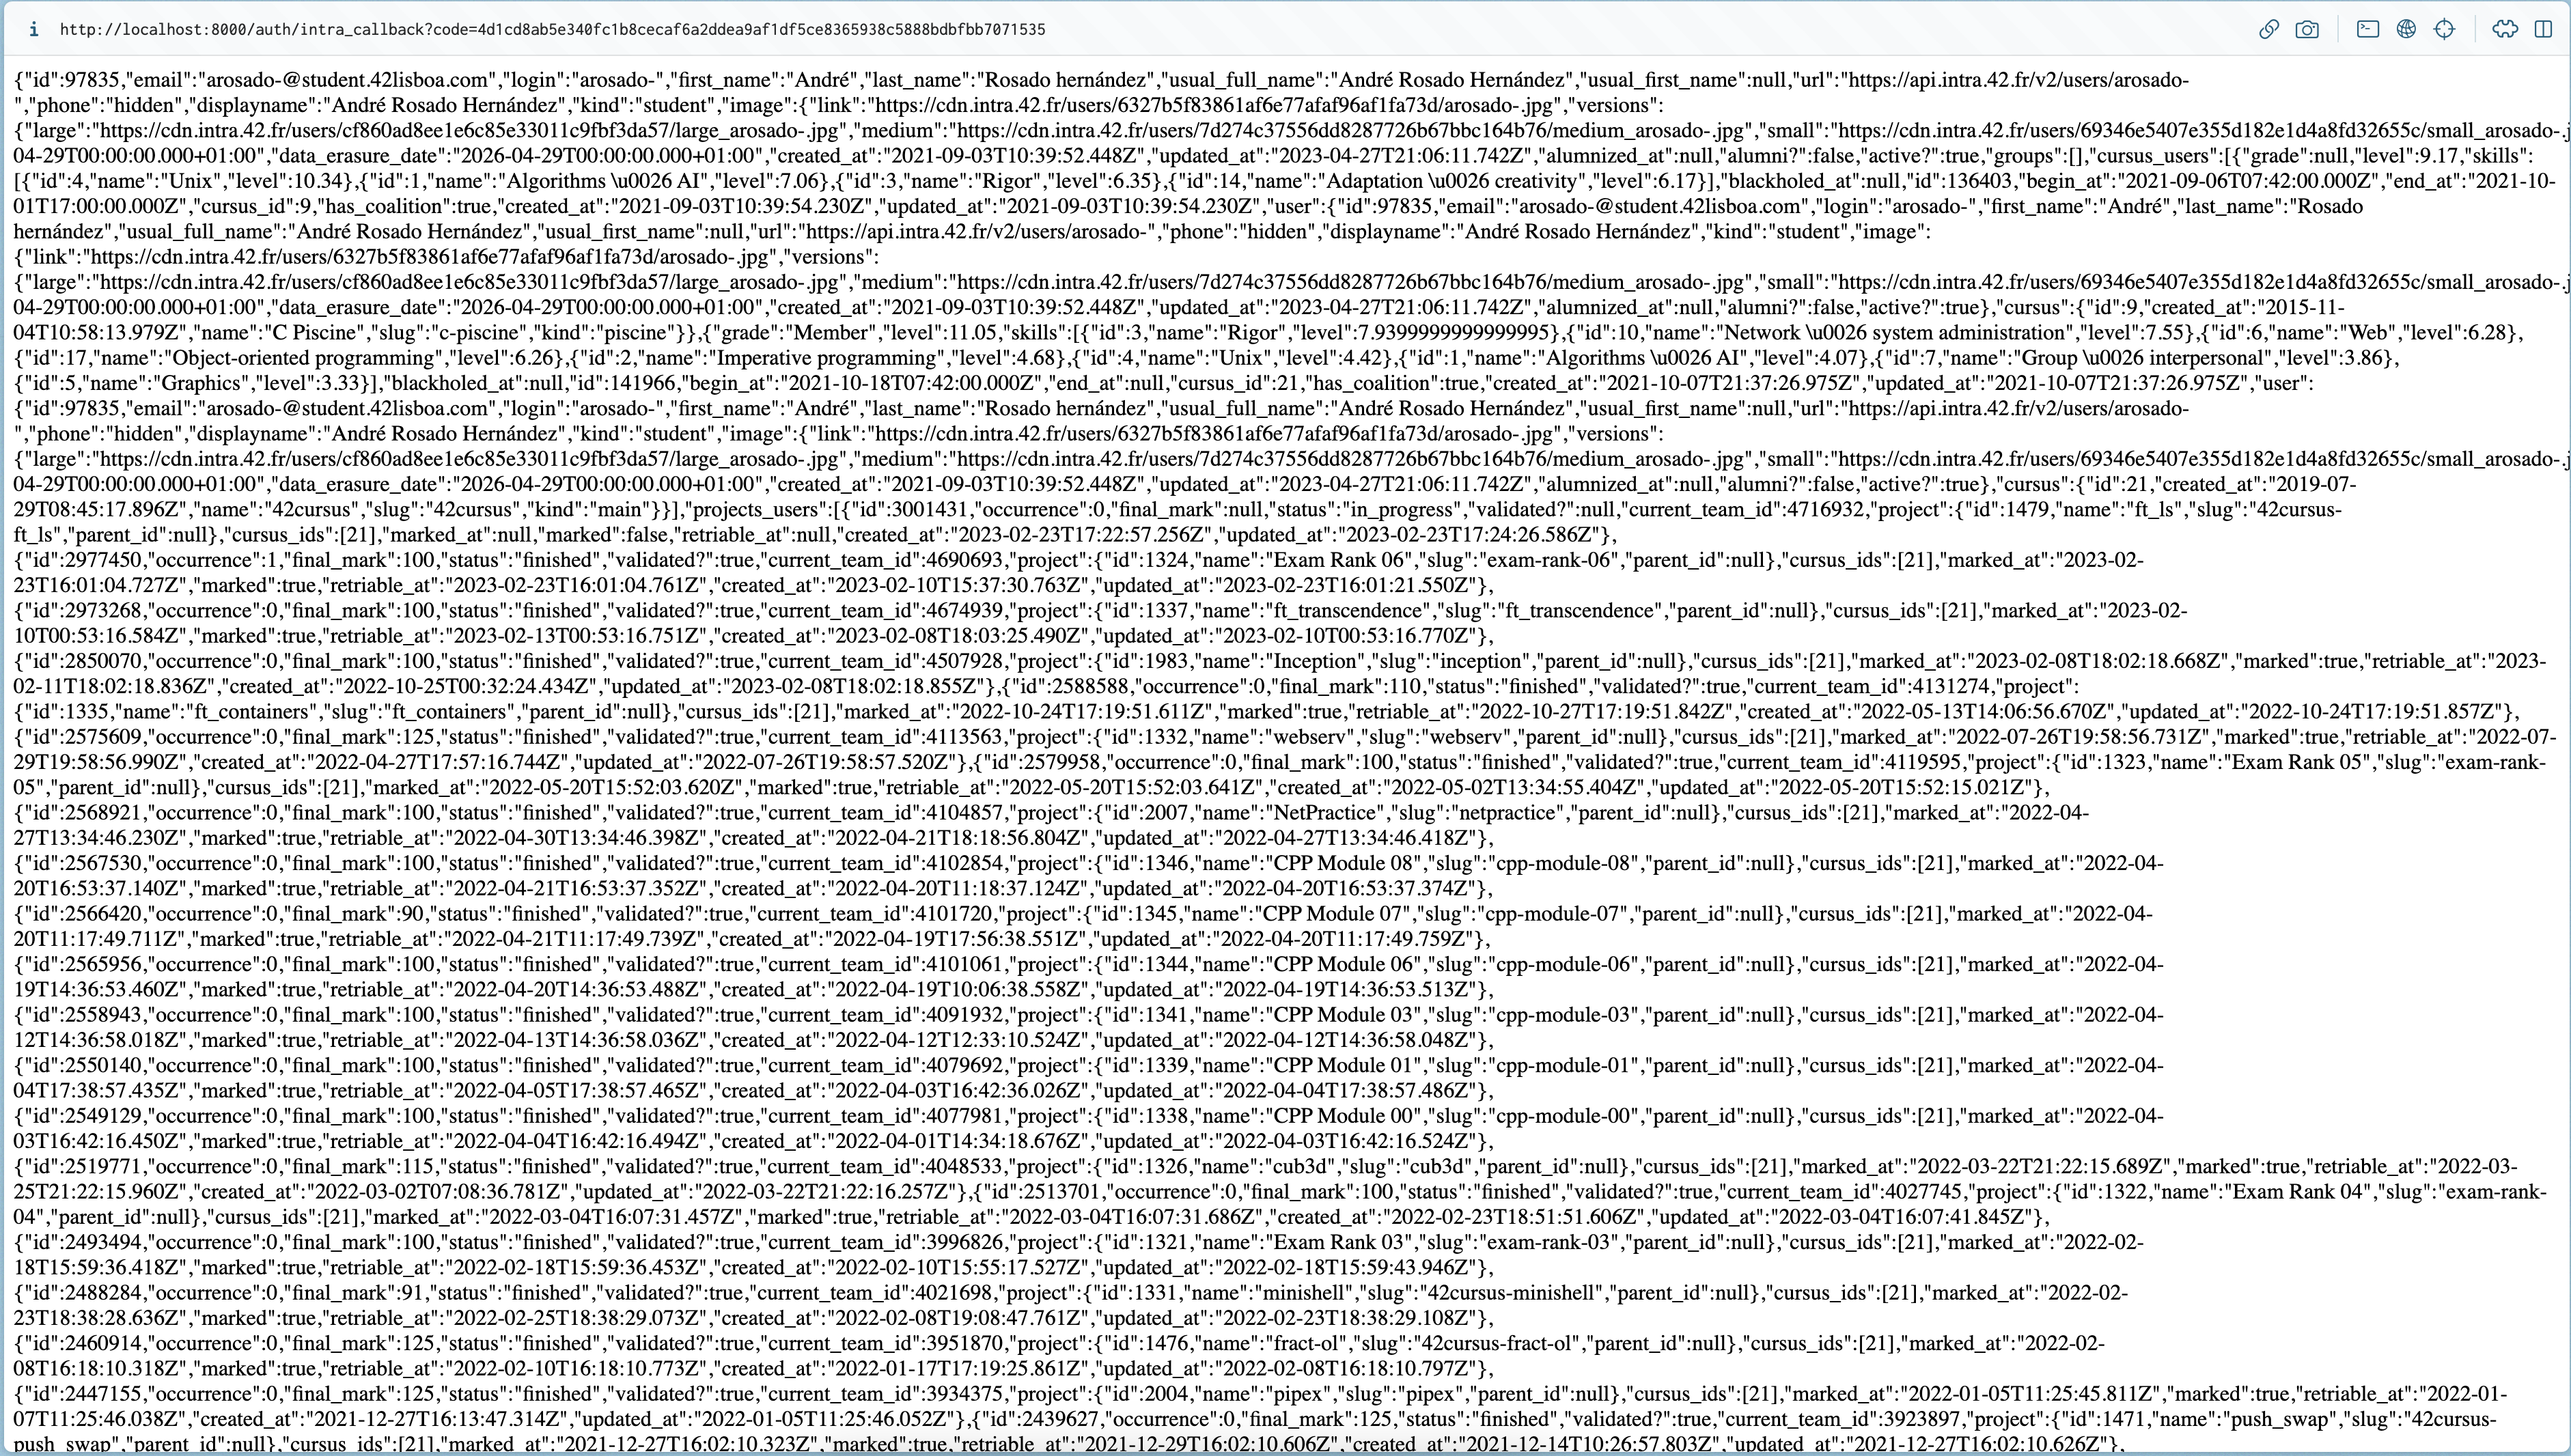
If you repeat the steps described above, now you should see something like this when you try to authenticate:

🍷 🥂 🎉 Awesome!!! Now we can create or login this user 😆
In this case the User has the following attributes which we can get from the 42Api
intra_username , intra_id, first_name, last_name, email
We could implement a method that returns an existing user or creates it given the params
Luckily there is actually a built-in method that does exactly that: Model.objects.get_or_create
Let's implement this, and also remember about how we can use the .json() to organize our response body
get_or_createwill return a tuple, where the first element is the object and the second is a boolean:[ModelObject, bool] -> The ModelObject is the object found or created, the bool indicates if it was created or not.
The boolean can help us know if it's a new user
views.py
def intraCallback(request):
	get_token_path = "https://api.intra.42.fr/oauth/token"
	data = {
		'grant_type': 'authorization_code',
		'client_id': 'u-s4t2ud-c85140fe4385257415ed1433c2cf14e27ccaf945213c460e784751a9e830a397',
		'client_secret': 'your_secret',
		'code': request.GET["code"],
		'redirect_uri': 'http://localhost:8000/auth/intra_callback',
	}
	print("Path", get_token_path)
	print("Data", data)
	r = requests.post(get_token_path, data=data)
	token = r.json()['access_token']
	headers = {"Authorization": "Bearer %s" % token}
	user_response = requests.get("https://api.intra.42.fr/v2/me", headers=headers)
	user_response_json = user_response.json()

	user, created = User.objects.get_or_create(
    		intra_id=user_response_json['id'],
    		intra_username=user_response_json['login'],
    		first_name=user_response_json['first_name'],
    		last_name=user_response_json['last_name'],
    		email=user_response_json['email'],
	)
	return HttpResponse("User %s %s" % (user, "created now" if created else "found"))
Then the HttpResponse will return the User object with a message depending if it was created or not.
Now to login, just add the import line on the top:
from django.contrib.auth import login
And at the end of the intra_callback method add the login:
	...
	...
	login(request, user)
	return HttpResponse("User %s %s" % (user, "created now" if created else "found"))
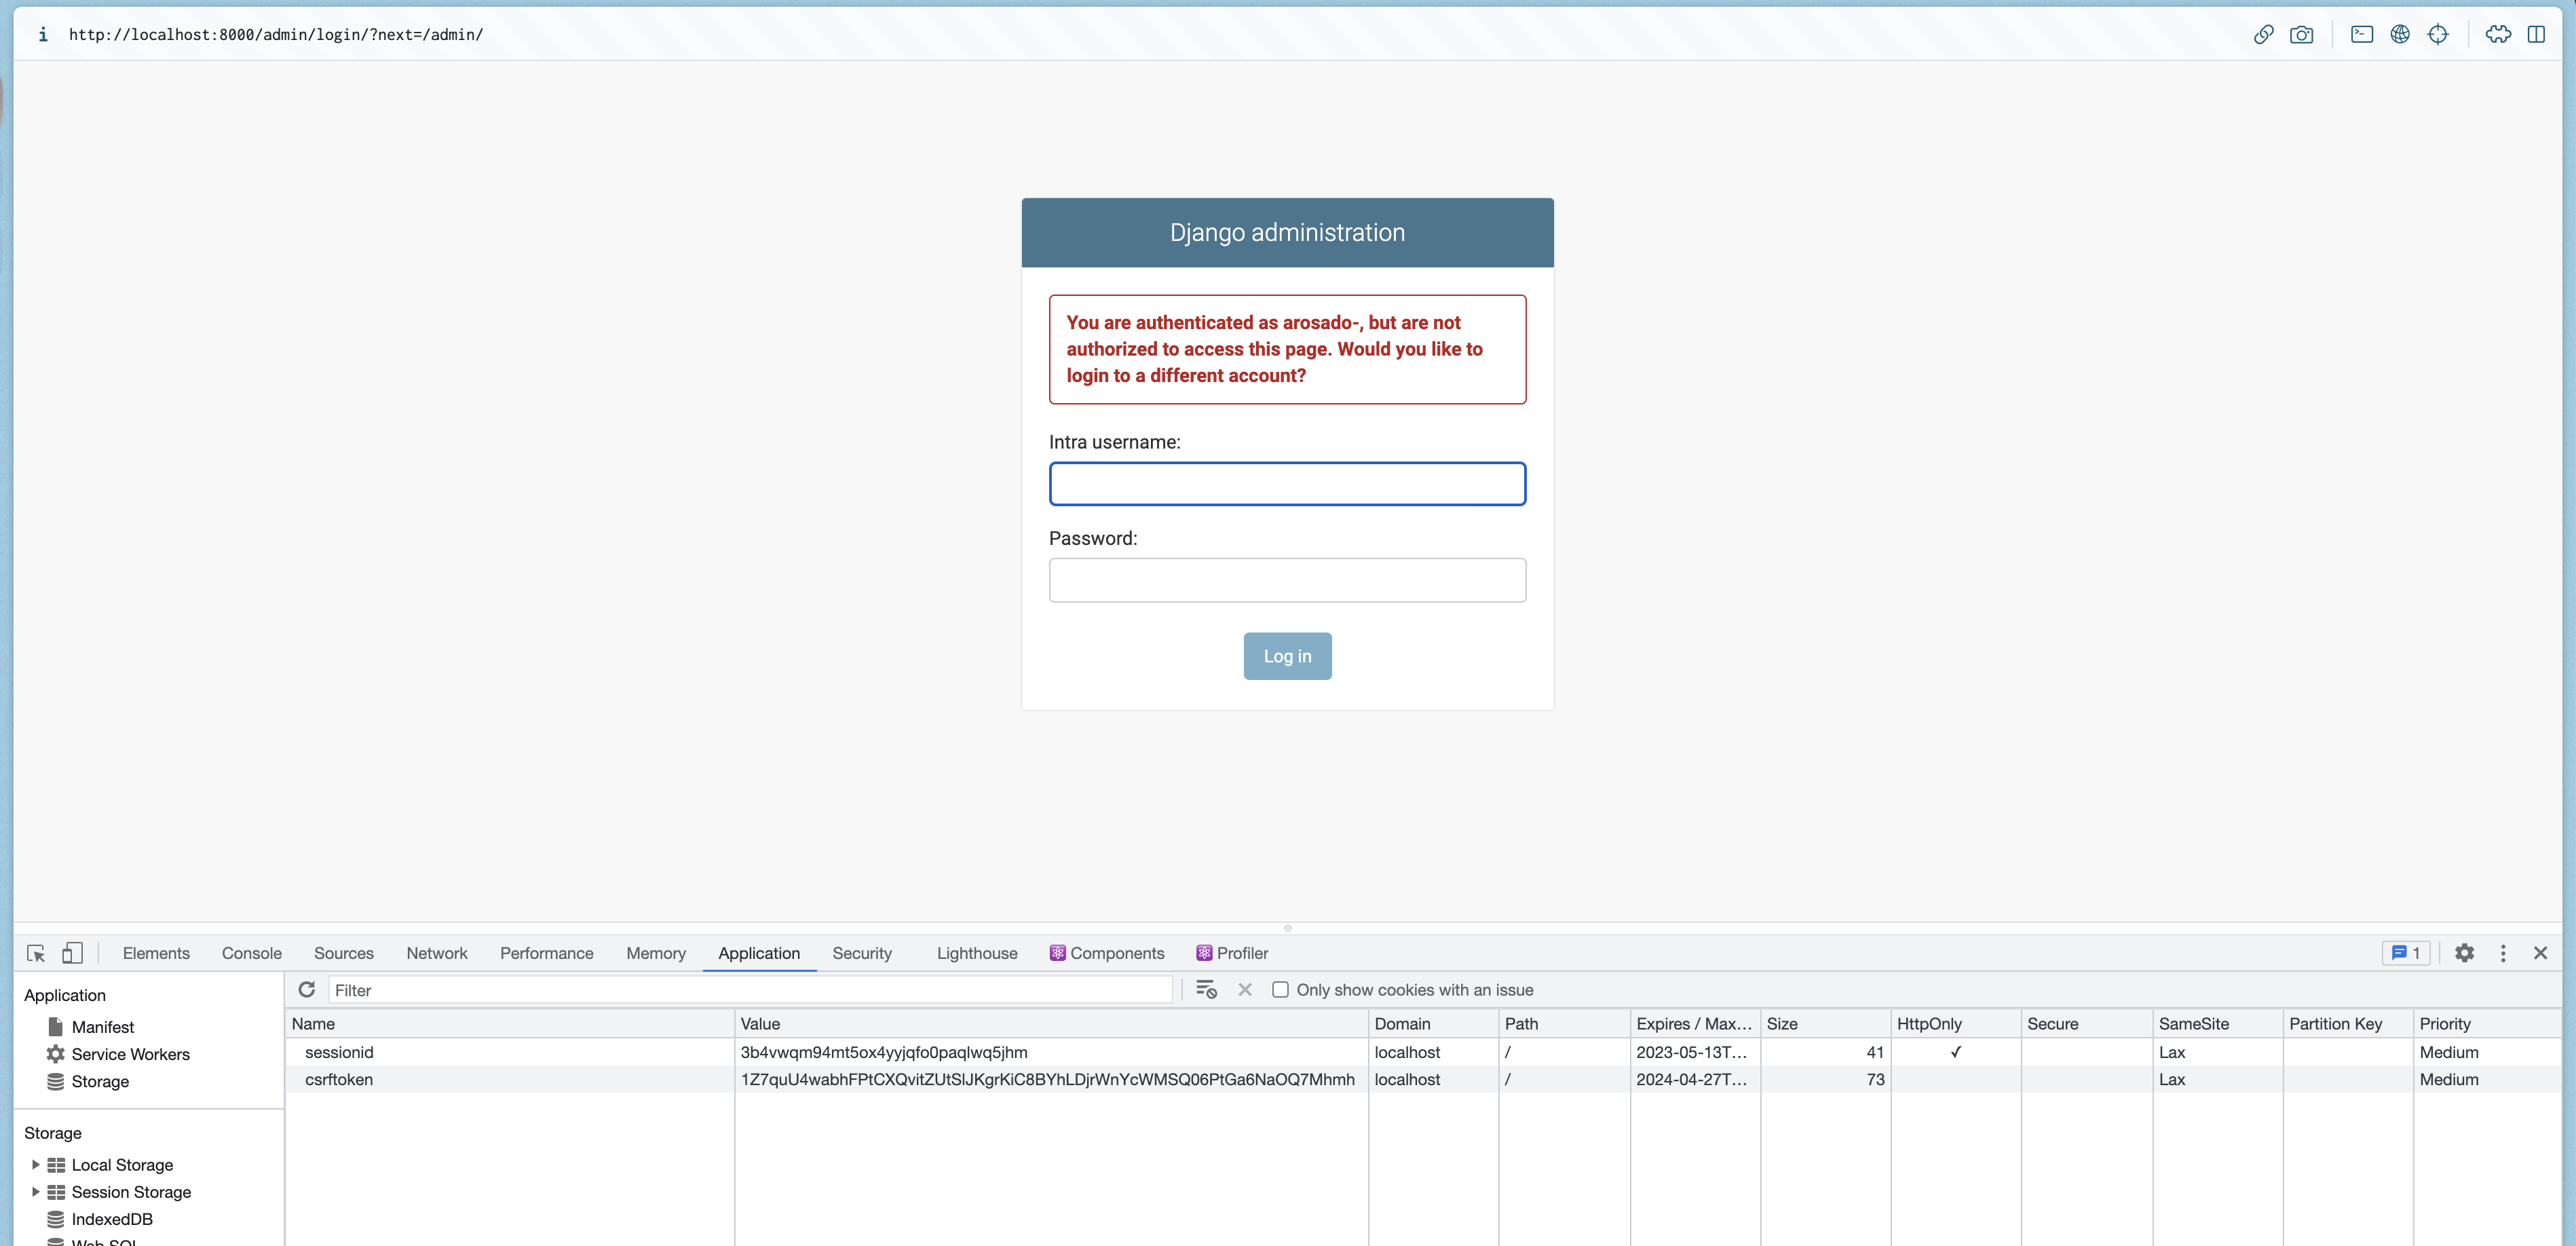
When you login, you will see that there is a cookie which will be setup by the session automatically
In this case, I am logged in with a user who has no permissions to access the admin, that's why it prompts that message

