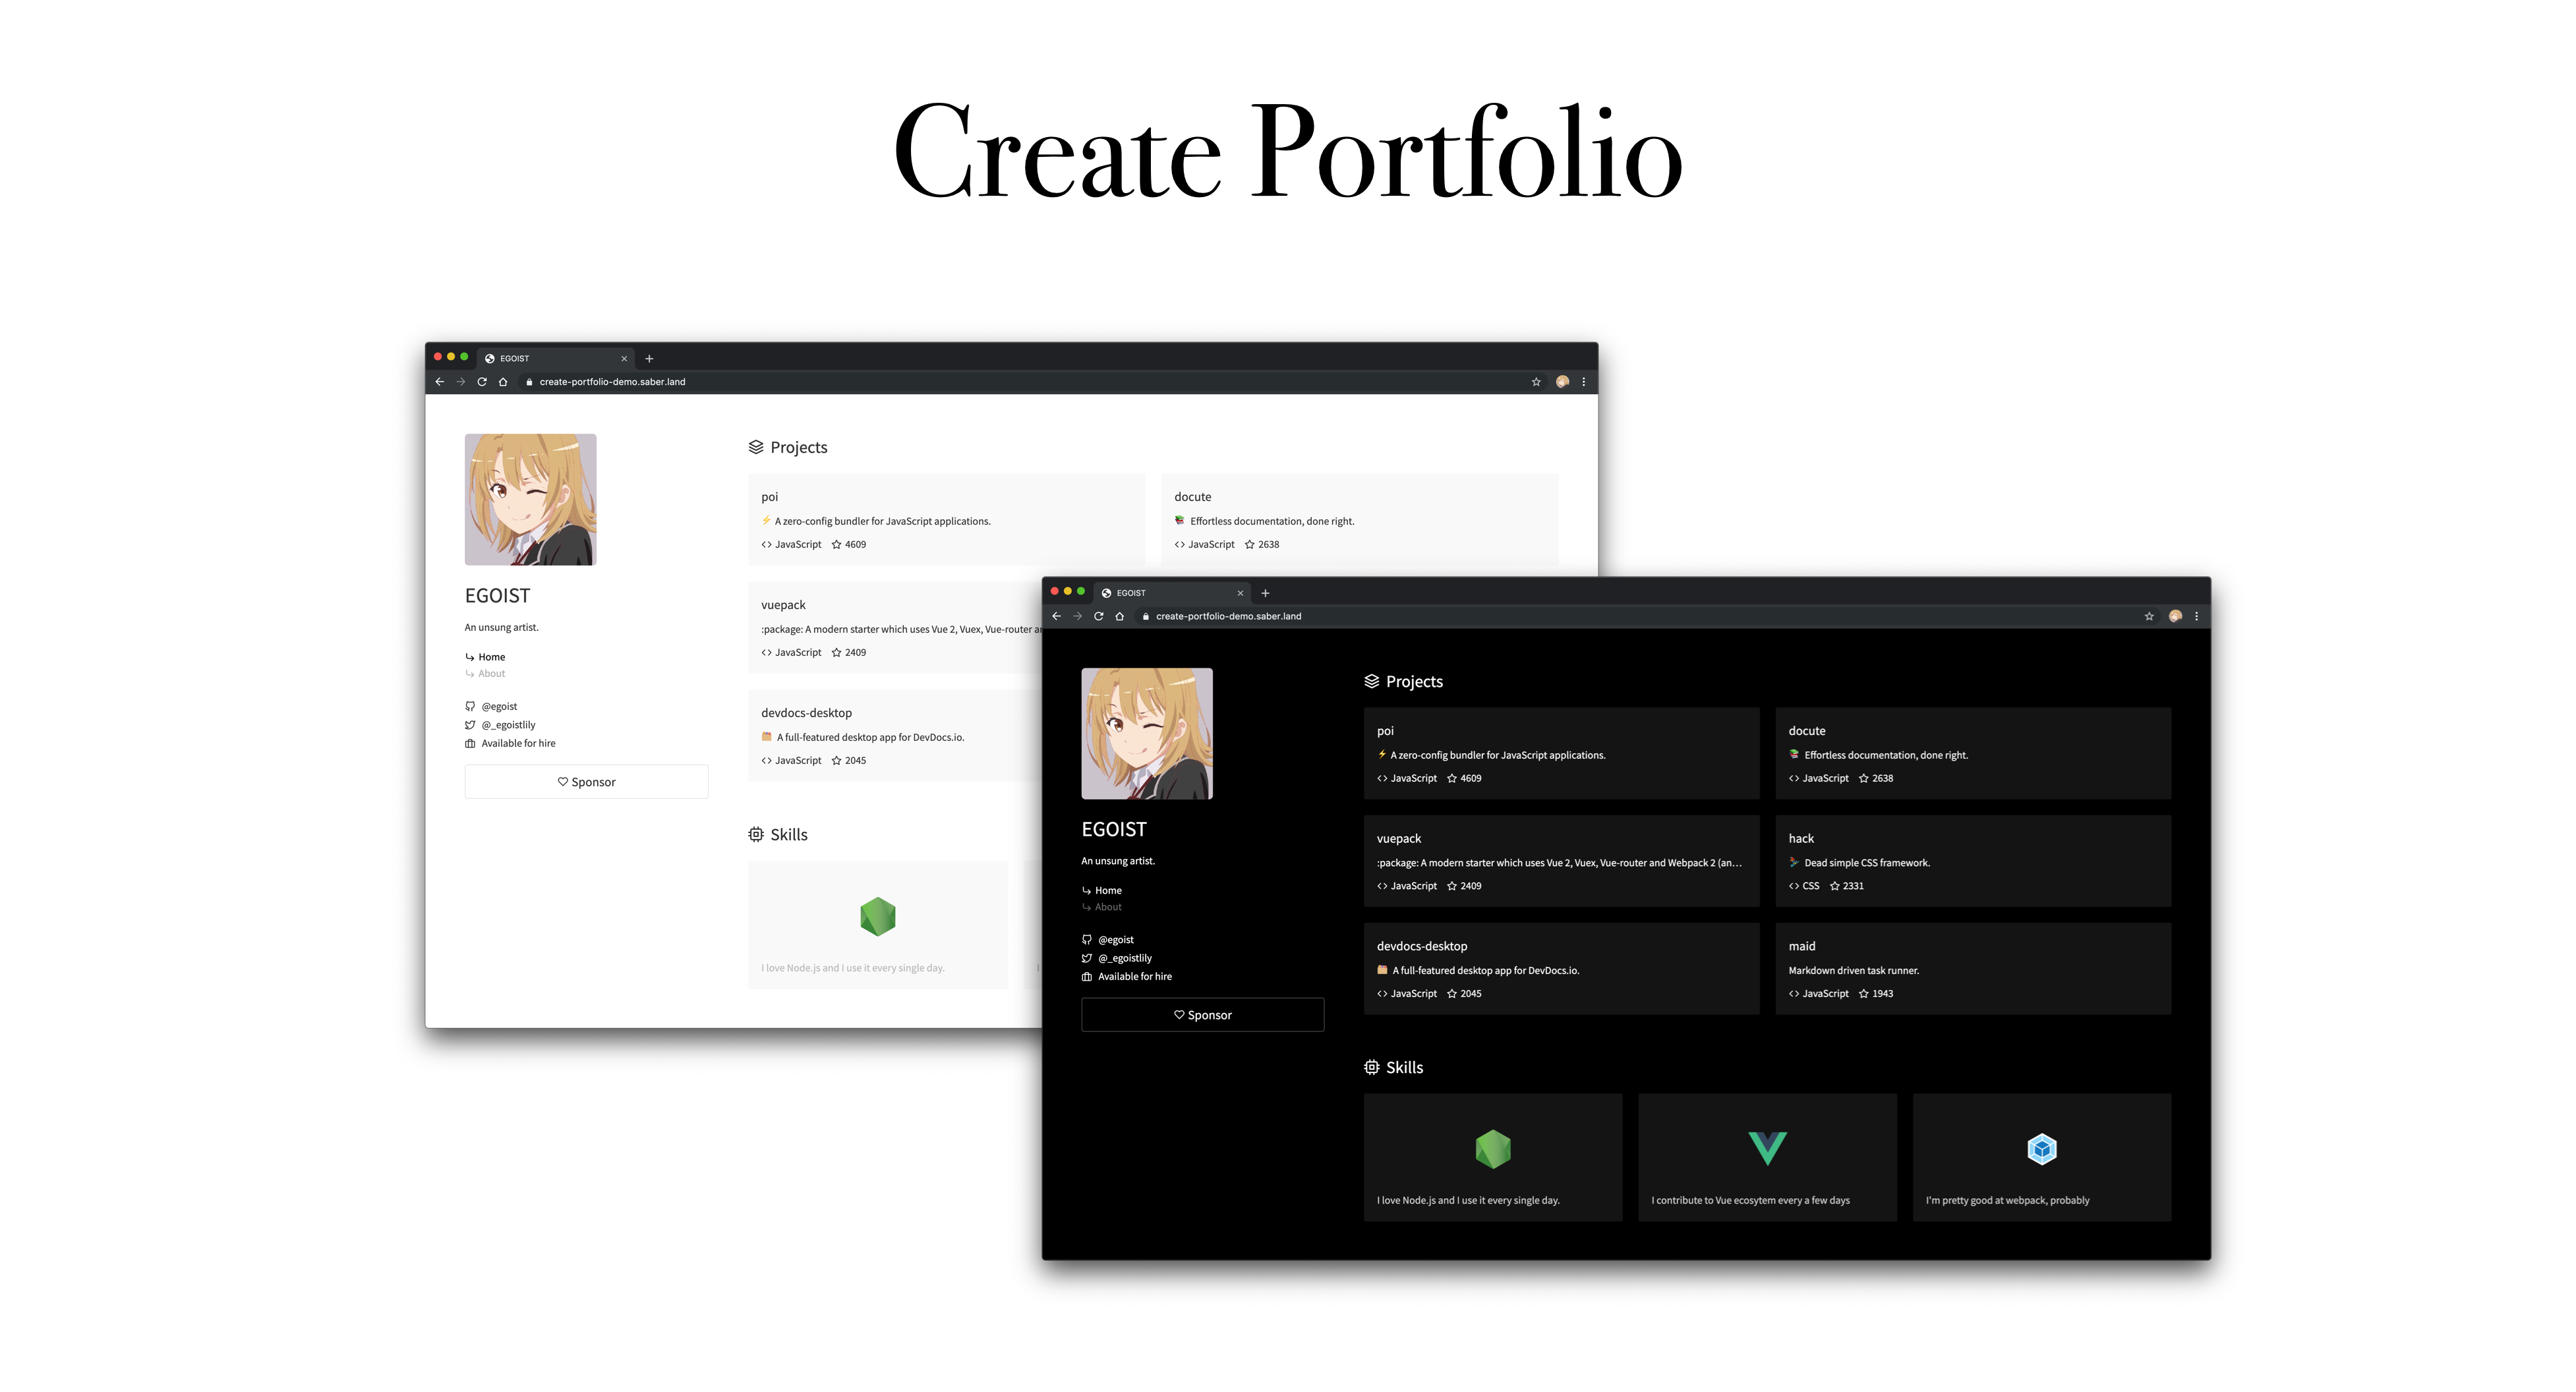
Create Portfolio helps you kickstart a personal website that showcases your work as a software developer. It will automatically render a webpage with the owner's profile information, including a photo, bio, and repositories.
Your personal website is waiting to be personalized, though. It includes space to highlight your specific areas of interest in software development, like languages or industries. And it's standing by to publish your next great blog post.
It's all possible using the combination of Saber (for building your website), and GitHub's API (for automatically populating your website with content).
You need Node.js installed on your machine.
Create a new project with a single command:
npx create-portfolio my-site
# OR Yarn
yarn create portfolio my-site
Alternatively, you can install create-portfolio globally:
npm i -g create-portfolio
create-portfolio my-site
Change into your new directory:
cd my-siteInstall dependencies:
npm installRun the website locally:
npm run devNow browse to http://localhost:3000 you should see your page.
Run npm run build to create a production build of your app, generated files can be found at ./public folder, then it can be deployed as a static website.
Check out the example post.
By default, all posts will use your GitHub profile picture when embedded on social media. Should you wish to use a different image you can add under assets.cover:
---
title: My First Post
layout: post
date: 2019-05-26 20:23:00
assets:
  cover: @/images/cover.png
tags:
  - life
---Use siteConfig option in saber-config.js for site configuration.
It defaults to your GitHub name, you can customize it in saber-config.js:
module.exports = {
  siteConfig: {
    title: 'A Custom Title'
  }
}It defaults to your GitHub bio, you can customize it in saber-config.js:
module.exports = {
  siteConfig: {
    description: 'Introduce yourself...'
  }
}Use themeConfig option in saber-config.js for theme configuration.
By default we fetch your top 6 starred repositories from GitHub, if set to pinned-project, it will use pinned repositories instead:
module.exports = {
  themeConfig: {
    projects: 'pinned-repos'
  }
}By default it uses dark style:
module.exports = {
  themeConfig: {
    style: 'dark'
  }
}
Available styles:
darklight
This is required, we fetch data for this user.
module.exports = {
  themeConfig: {
    // Your GitHub Username
    github: 'egoist'
  }
}Show the link to your Twitter profile.
module.exports = {
  themeConfig: {
    // Twitter handle
    twitter: '_egoistlily'
  }
}Add a Sponsor button:
module.exports = {
  themeConfig: {
    // Link to the donation page
    sponsorLink: 'https://patreon.com/egoist',
    // The tip to show when you hover the sponsor button
    sponsorTip: 'Support me'
  }
}Showcase your skills:
module.exports = {
  themeConfig: {
    skills: [
      {
        topic: 'nodejs',
        description: `I'm a Node.js core contributor`,
        // `image` is optional, by default we load from GitHub
        image: 'https://...'
      }
    ]
  }
}
The topic should be a valid GitHub topic, if the topic doesn't have a image by default on GitHub, you need to provide one yourself.
You can check if the image exists by visiting https://github.com/github/explore/tree/master/topics/{topic} (replace {topic} with actual topic).
You can use Disqus for comments:
themeConfig:
  disqus: disqus-short-name

# Note that `siteConfig.url` is required for Disqus
siteConfig:
  url: https://example.com
Comments are only enabled for post layout, to disable comments in specific page, you can use the page attribute comments:
---
title: Hello
layout: post
date: 2018-08-12
comments: false
---

Hello World!MIT © EGOIST