Golang-Gorm-Postgres-Gqlgen-Graphql-gRPC is a project showcasing the implementation of a system using various technologies and frameworks.
- DevContainer: Provides a consistent and reproducible development environment.
- Gorm: A powerful Go ORM framework for simplifying database interactions and enabling efficient data access.
- Postgres: An open-source, scalable, and reliable relational database management system.
- Gqlgen: A Go library that simplifies the development of GraphQL servers by automatically generating code based on the GraphQL schema.
- GraphQL: A modern query language and runtime for APIs, enabling efficient and flexible data retrieval.
- gRPC: A high-performance, language-agnostic framework for building distributed systems with efficient communication.
- Protobuf: A language-agnostic data serialization format for structured data communication.
Whether you use this project, have learned something from it, or just like it, please consider supporting it by buying me a coffee, so I can dedicate more time on open-source projects like this :)
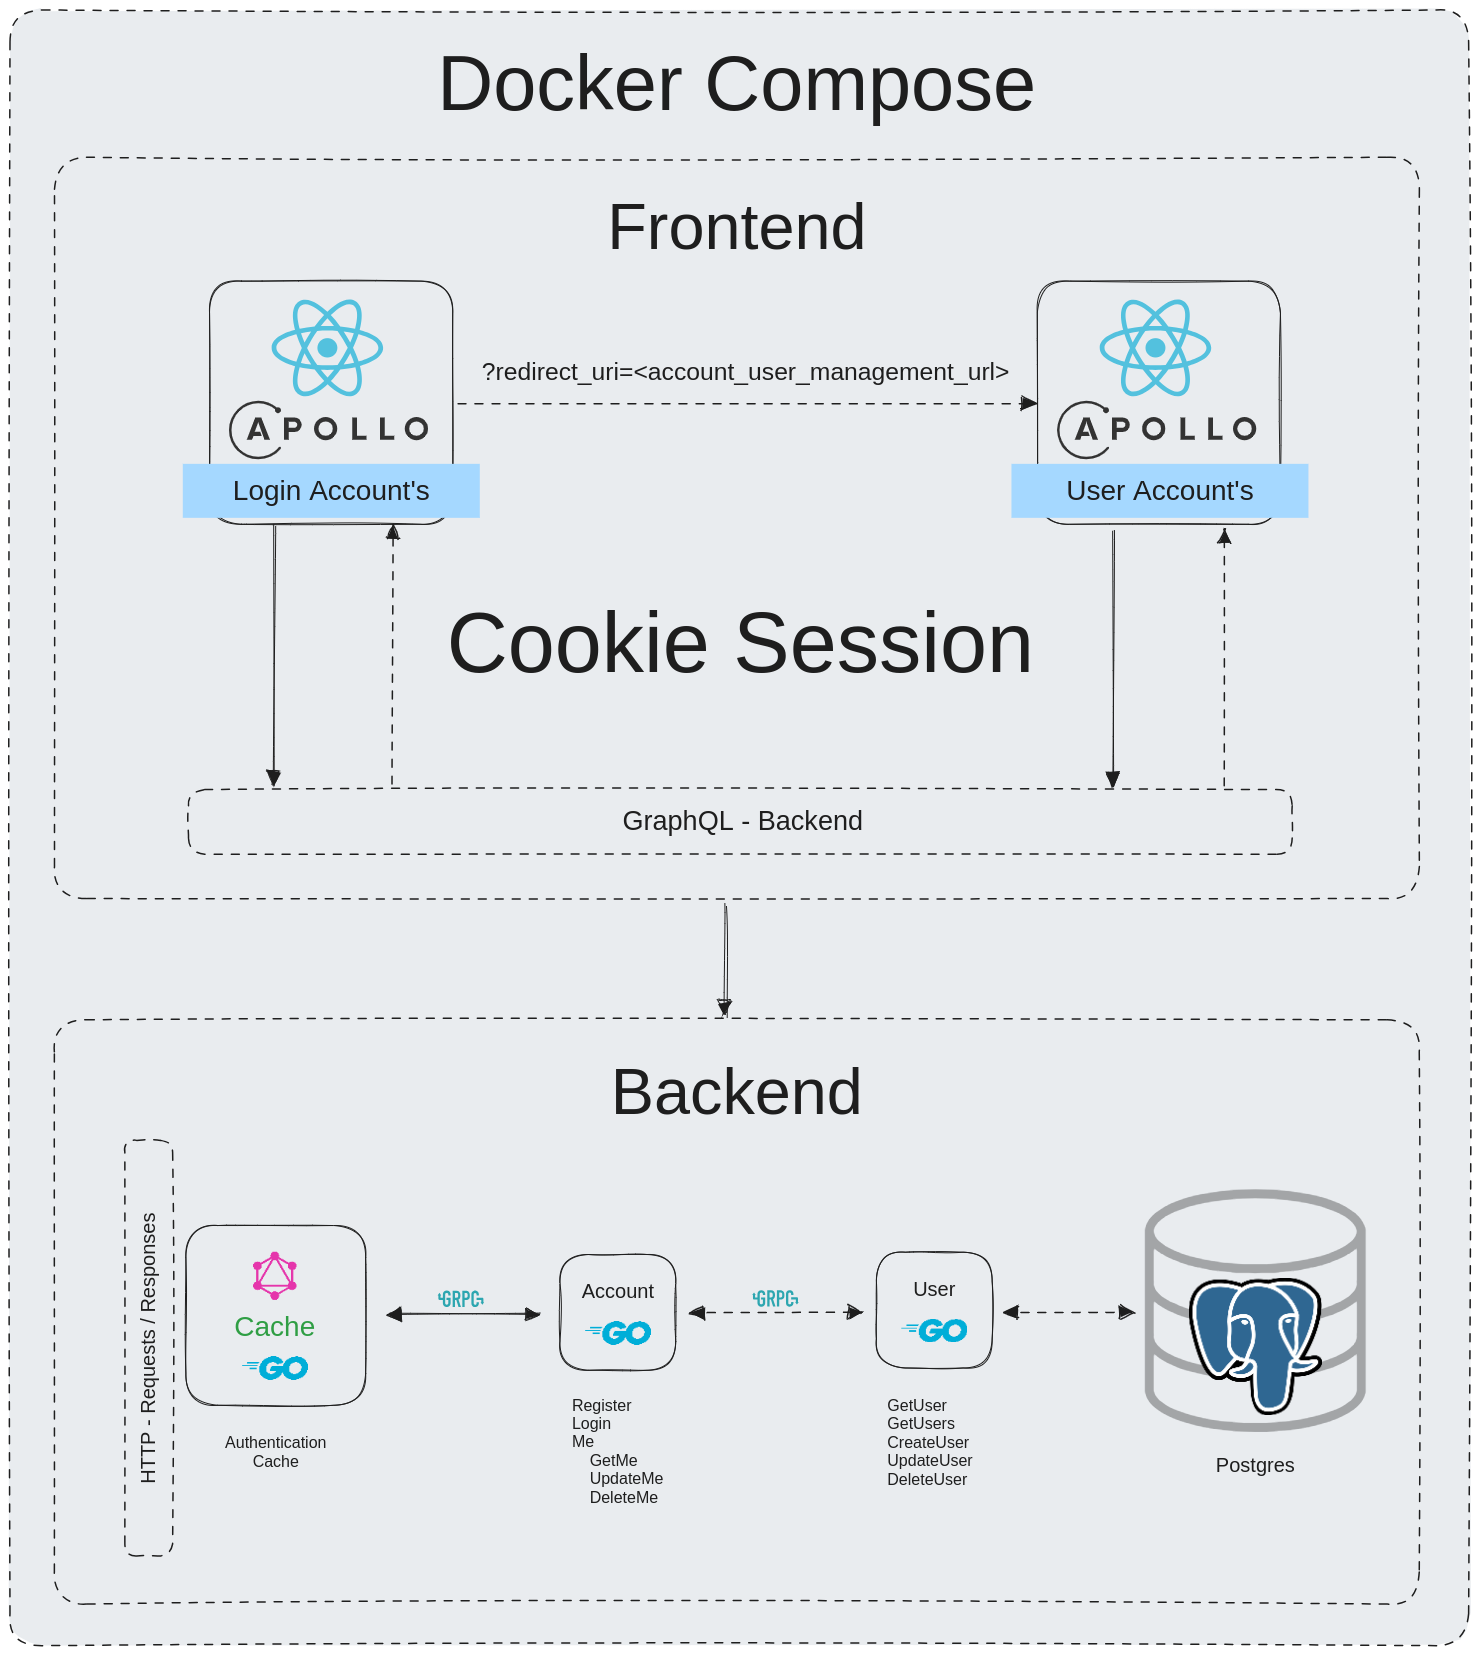
The project consists of the following components:
-
GraphQL Service: Acts as an entry point for receiving GraphQL requests from clients. It handles incoming requests and forwards them to the appropriate resolver functions for processing.
-
Account Service: Serves as an intermediary between the GraphQL service and the User service. It handles account-related functionality, such as authentication, authorization, and account management.
-
User Service: Responsible for managing user-specific operations. It handles user-related business logic, such as user creation, retrieval, updates, and deletion. The User service interacts with the database to perform these operations.
-
Database: Stores user information and provides persistent storage for the system. The User service interacts with the database to store and retrieve user data.
The data flow starts with a GraphQL request coming into the GraphQL service. The request is then forwarded to the Account service, which handles authentication and authorization. Once authenticated and authorized, the Account service communicates with the User service to perform user-related operations. The User service interacts with the database to store or retrieve user data as needed. The response follows the reverse path, with the User service providing the response to the Account service, which returns the response to the GraphQL service for final delivery to the client.
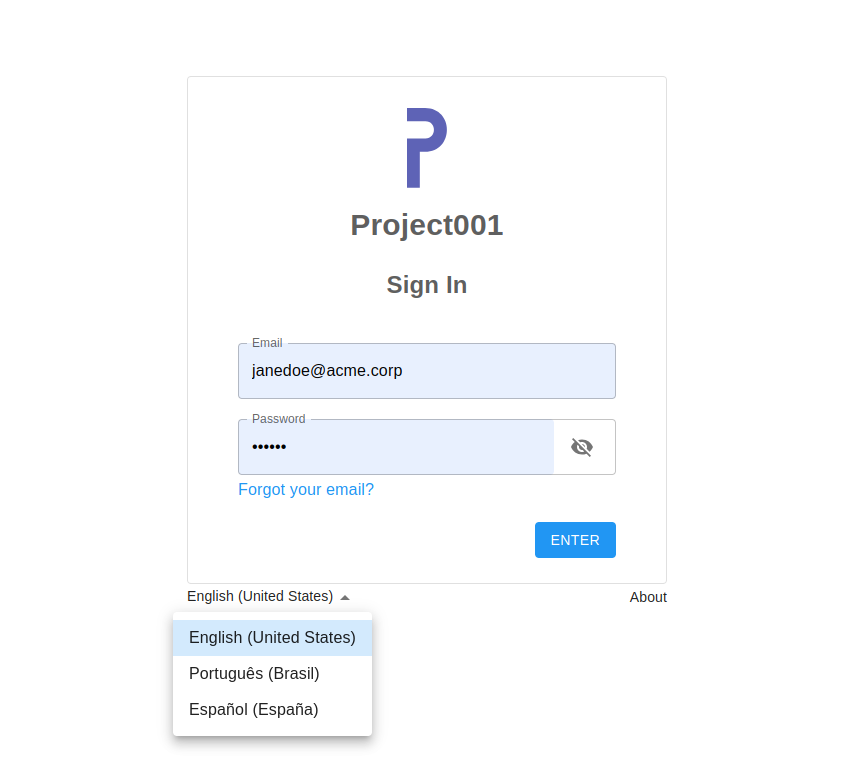
Access Login Page at url: http://localhost:4050/
This login system functions similarly to Google Single Sign-On, allowing for a single sign-in across all applications. It uses a server-generated Cookie Session that respects the domain using the wildcard "*". For example, a cookie generated with "*.example.com" will allow requests from app-test.example.com to share the same login information with the main domain. This provides a seamless, integrated, and consistent login experience across different applications within the same domain.
When accessing the URL, after processing, it will include a parameter called "redirect_uri". Upon successful authentication, the user will be redirected to the URI specified in the "redirect_uri" parameter. If no URI is provided, it will default to the URI that redirects to the default application user settings, e.g.:
http://localhost:4050/signin/v1/identifier?redirect_uri=http%3A%2F%2Flocalhost%3A4000
Login test data:
Email:
janedoe@acme.corp

Password:
123456
To generate Protobuf files, run the following command if there have been changes in the *.proto files:
$ ./generate-protobufs.sh
Note: Run this command inside the devcontainer terminal.
To generate/regenerate GraphQL files, run the following command if there have been changes in the schema.graphql file:
$ ./generate-graphql.sh
Note: Run this command inside the devcontainer terminal.
The main GraphQL server can be accessed at: http://localhost:8080/
Adminer, a database management tool, can be accessed at: http://localhost:8088/
Redis Commander, a Redis management tool, can be accessed at: http://localhost:8081/
To get started, run the following command:
$ docker-compose up -d --build
Note: Run this command in host terminal. This command will start the necessary services and set up the environment inside a Docker container.
Feel free to explore the code and make any improvements or modifications to suit your needs!


