-
Notifications
You must be signed in to change notification settings - Fork 131
Cloud installation on Azure
The primary way to run the Mynt bot is by hosting it on Windows Azure. This is how it was originally designed to work but there are other ways to run it as well. This article describes setting up the bot to run on Windows Azure. If you don't have an Azure account yet, create one for free now!

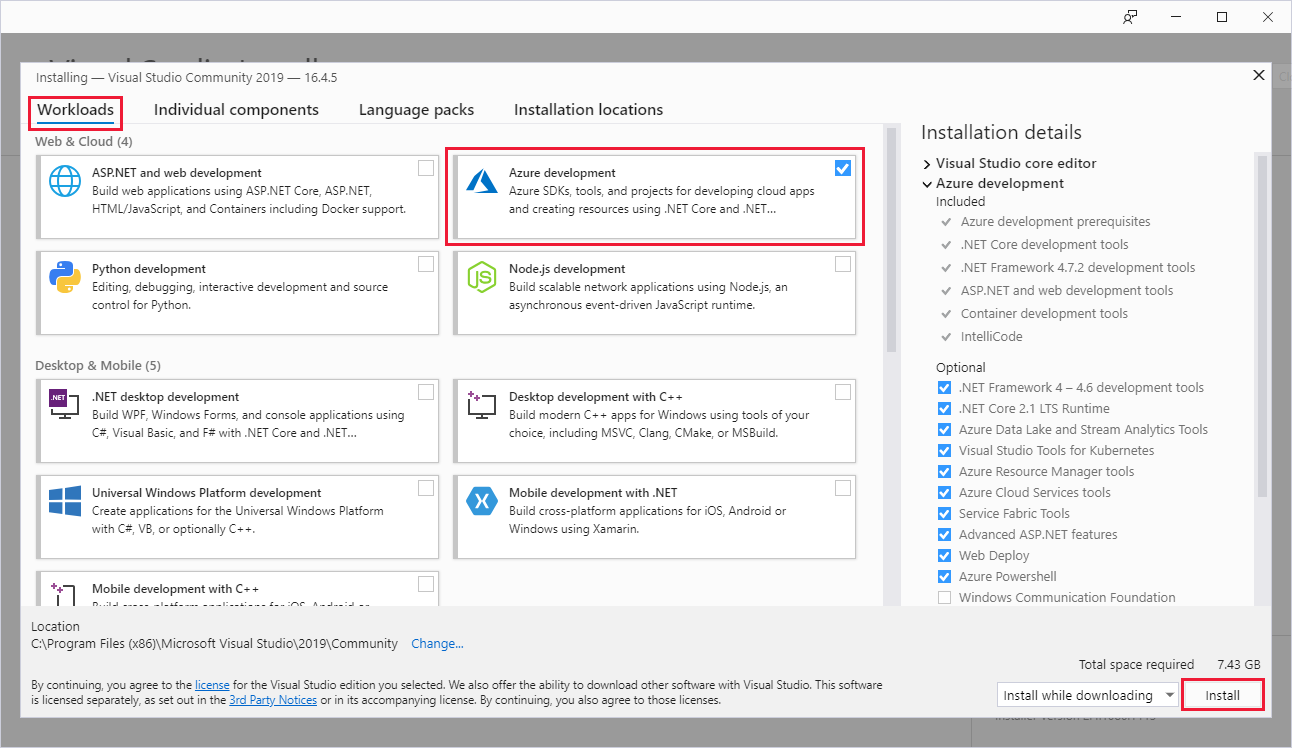
Azure Functions Tools is included in the Azure development workload of Visual Studio 2017 version 15.5, or a later version. Make sure you include the Azure development workload in your Visual Studio 2017 installation:
Make sure that your Visual Studio is up-to-date and that you are using the most recent version of the Azure Functions tools.
To create and deploy functions, you also need:
- An active Azure subscription. If you don't have an Azure subscription, free accounts are available.
- An Azure Storage account. To create a storage account, see Installation.
- From the Tools menu, choose Extensions and Updates. Expand Installed > Tools and choose Azure Functions and Web Jobs Tools.
- Note the installed Version. You can compare this version with the latest version.
- If your version is older, update your tools in Visual Studio as shown in the following section.
- In the Extensions and Updates dialog, expand Updates > Visual Studio Marketplace, choose Azure Functions and Web Jobs Tools and select Update.
- After the tools update is downloaded, close Visual Studio to trigger the tools update using the VSIX installer.
- In the installer, choose OK to start and then Modify to update the tools.
- After the update is complete, choose Close and restart Visual Studio.
When your account is activated you can visit the Azure Portal and start using your subscription! To run the Mynt bot it is advised to run it in a Resource Group. This is a grouping that enables you to separate different things you're running in Azure into logical groups.

To create a Resource Group you need to provide a unique name. You can also decide where in this big world we live in your bot is running. Pick a location that matches your actual location and create the resource group.

Next up we need to create a few additional things:
- A Functions App that will hold our Azure Functions code
- A Storage Account that will hold our logging and serve as a data storage for our trade data
Hit the add button in your Resource Group and add a Functions App. When creating the Functions App you are also able to create the Storage Account right there on the spot. The Service Plan you see in the screenshot above is also created as soon as you create a Functions App. This should be everything you need to set up on the Azure side of things.

I'm no fan of letting people right click > Publish in Visual Studio, however it is one of the simpler methods of deploying an Azure Functions project.
- In Solution Explorer, right-click the project and select Publish. Choose Create New and then Publish.
-
If you haven't already connected Visual Studio to your Azure account, select Add an account....
-
In the Create App Service dialog, use the Hosting settings as specified in the following table:
-
Click Create to create a function app and related resources in Azure with these settings and deploy your function project code.
-
After the deployment is complete, make a note of the Site URL value, which is the address of your function app in Azure.
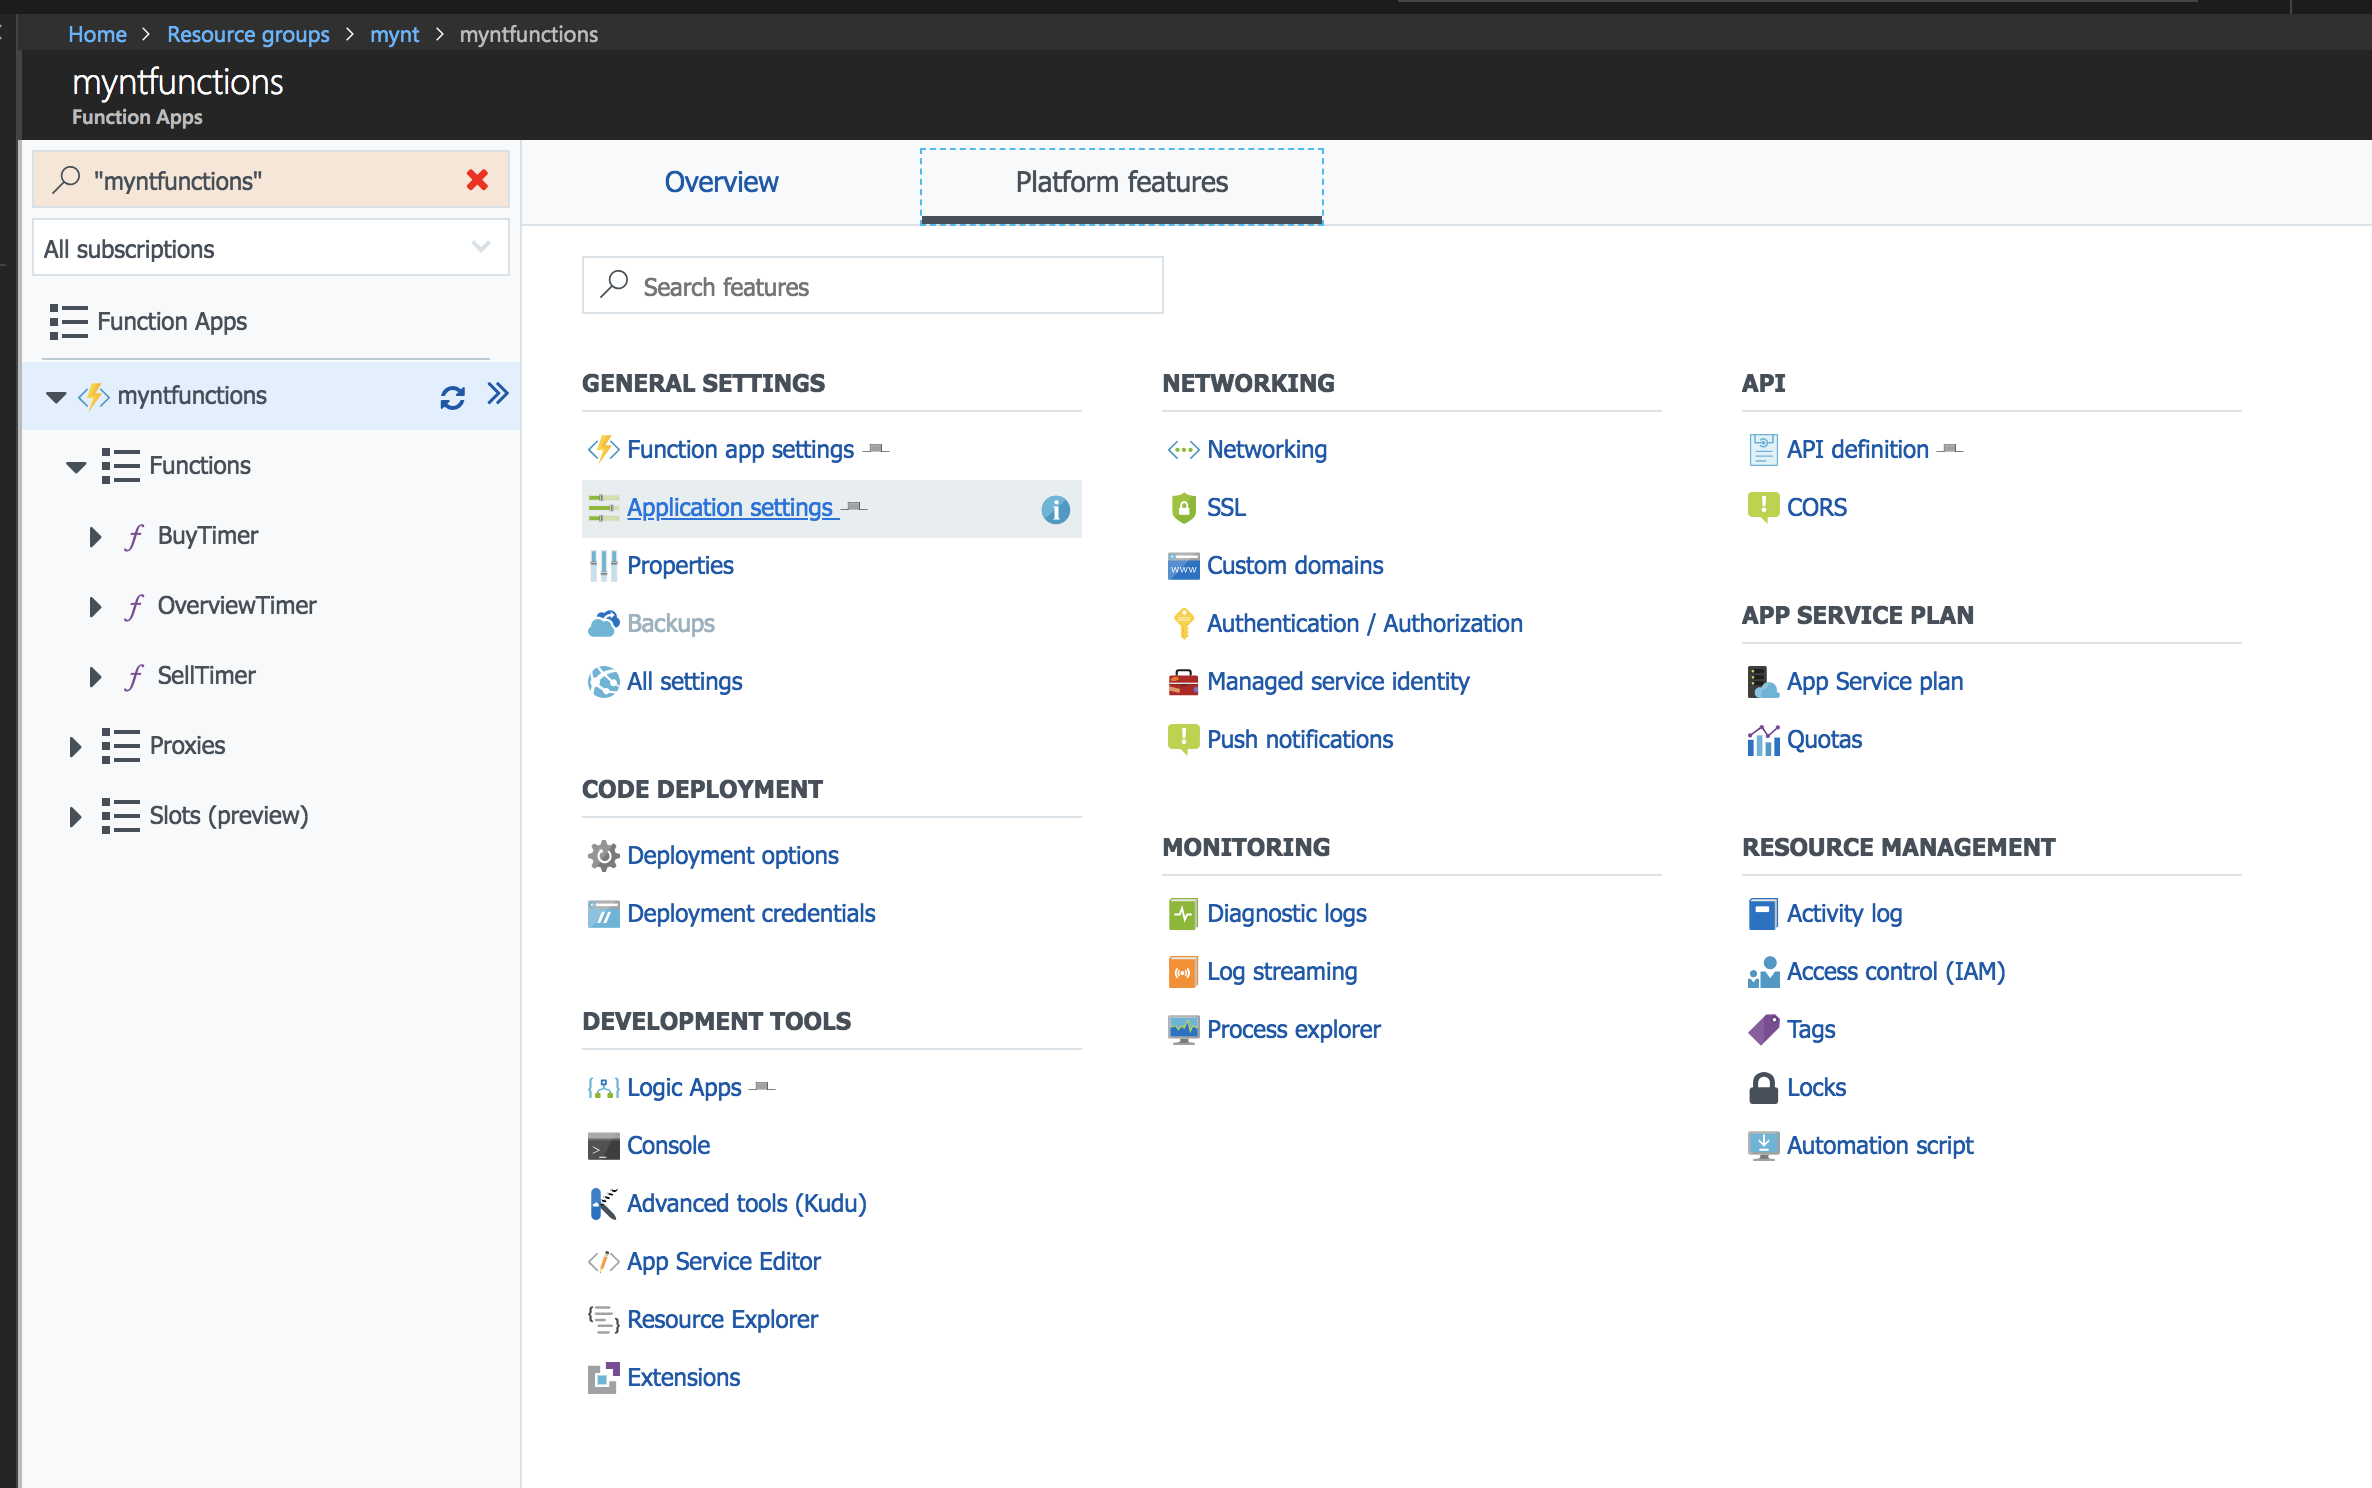
When running on Azure you do not have a configuration file at your disposal. In the project there is a local.settings.json file available that holds your settings but when deployed to Azure this file is no longer used. Instead the Application Settings part of the Azure Functions hub is used to store your settings. You can reach this by going to your Azure Functions > Platform Features > Application Settings.

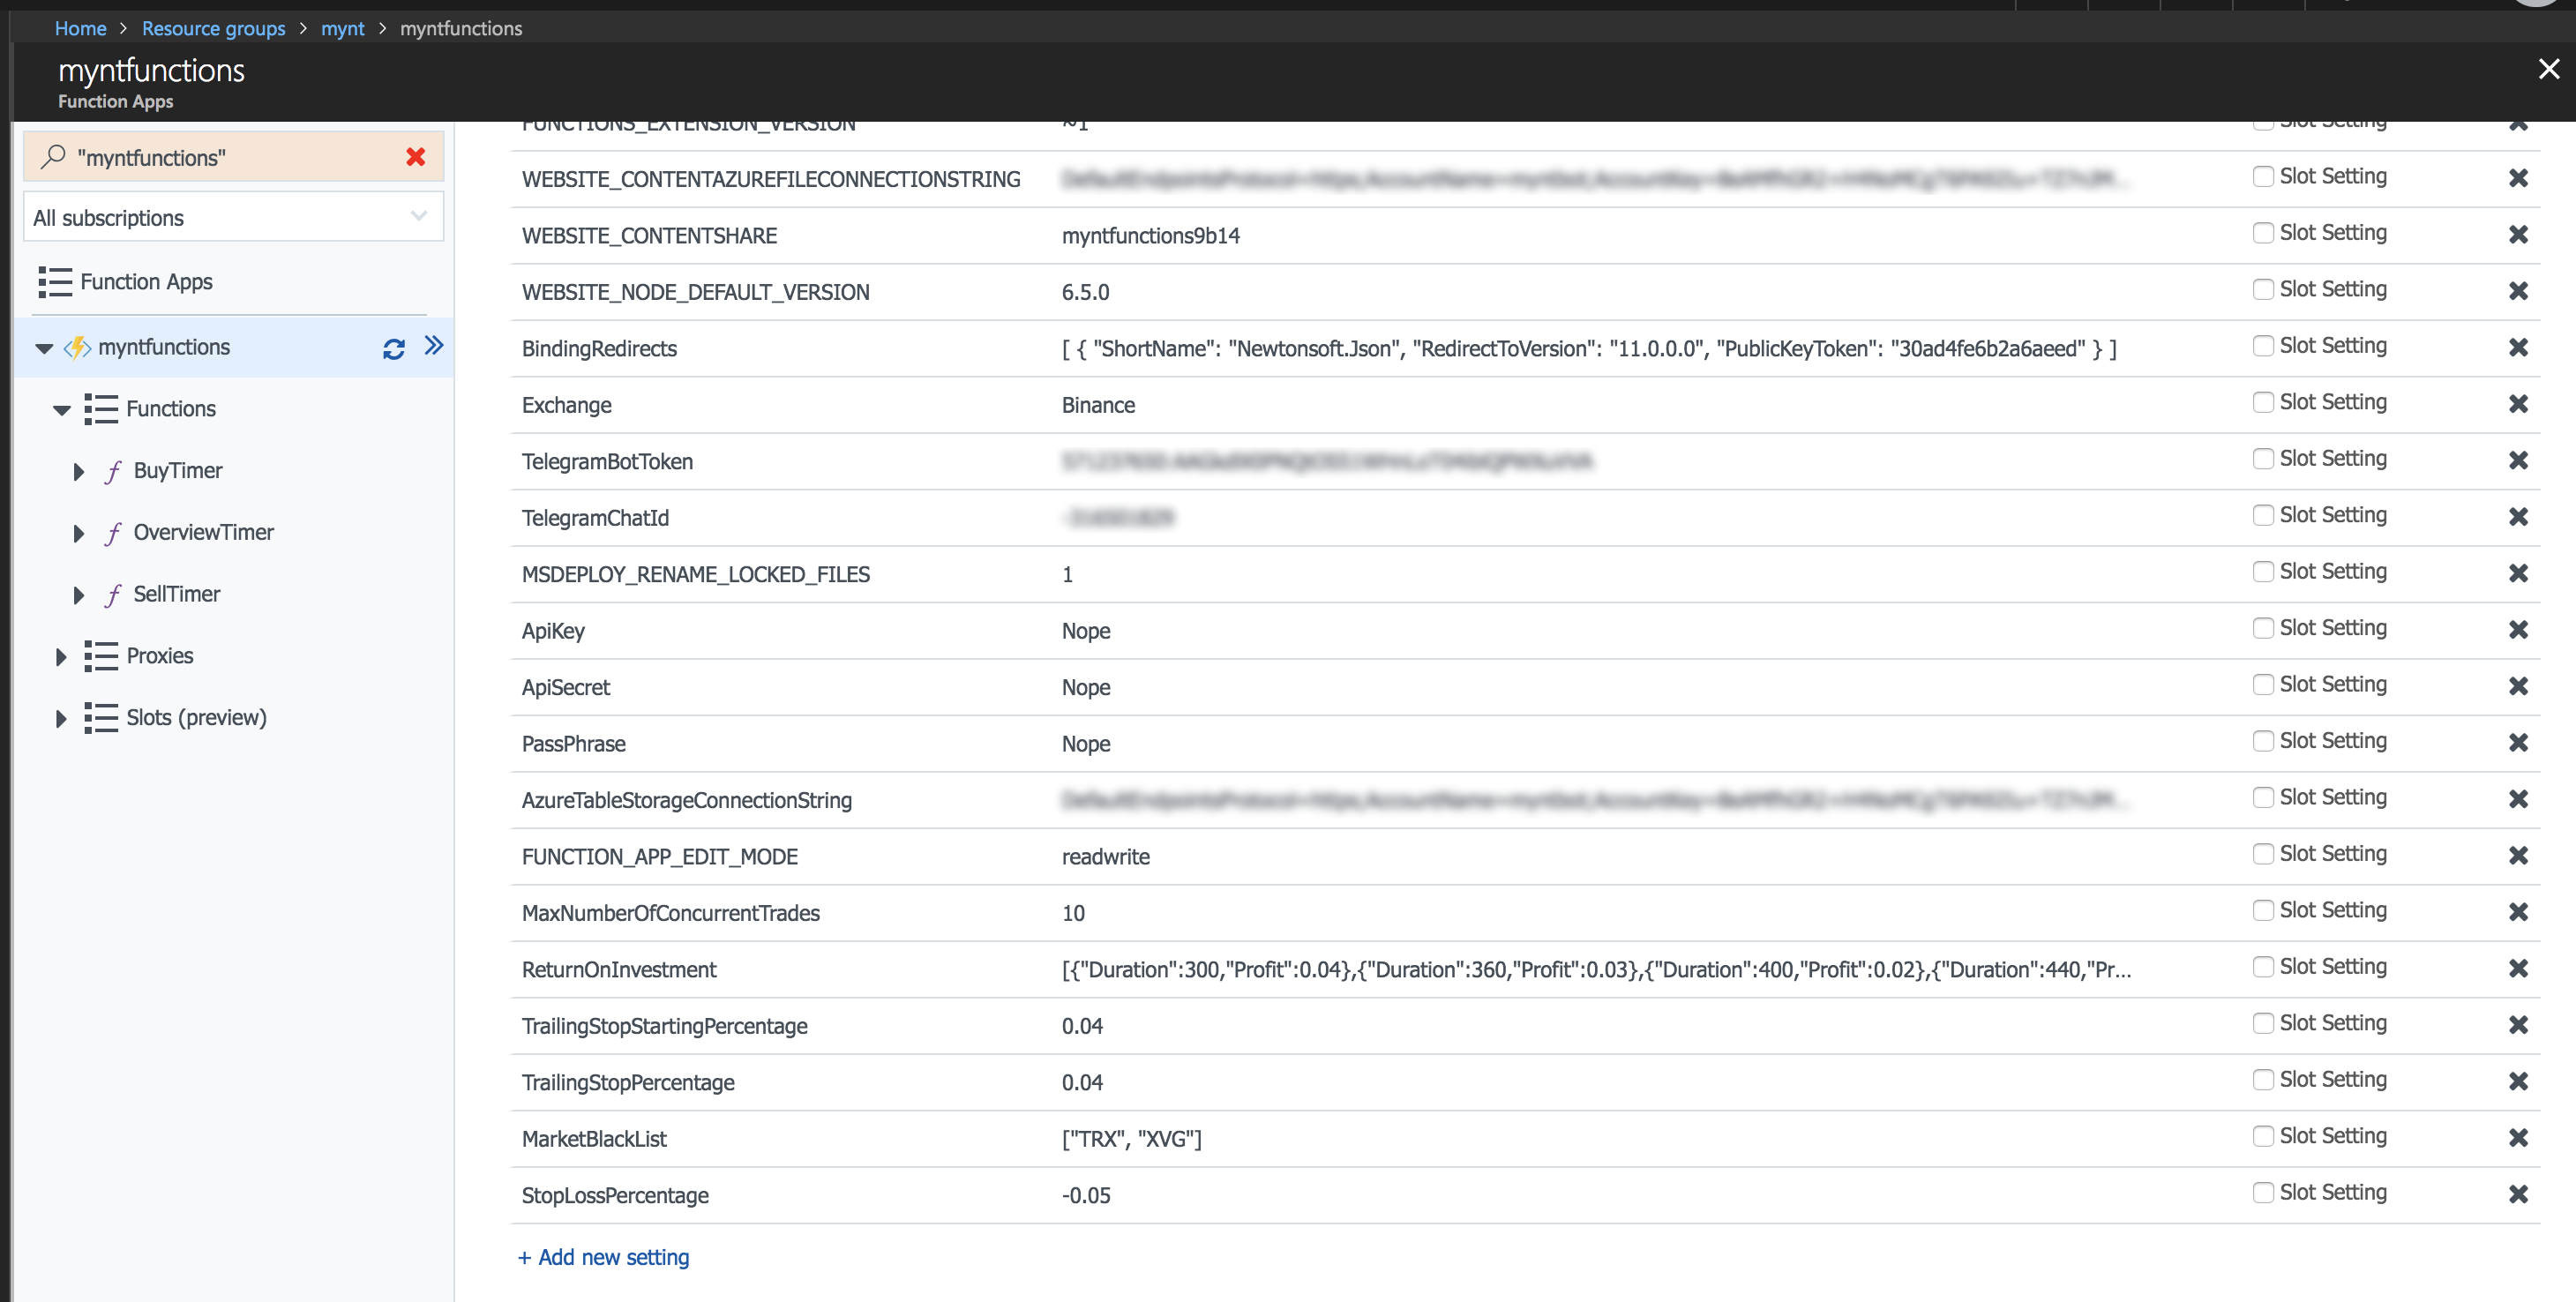
When you get to the application settings you see a list of current available settings. This is where you manually have to add the settings that you have set in your local.settings.json.
Not all the settings you have in your
local.settings.jsonneed to be added here. You only need to specify the settings that you want to change from the default values provided in the Options classes throughout the project.
One setting that you have to add for the bot to work is the BindingRedirects setting. Set it to the following value:
[ { "ShortName": "Newtonsoft.Json", "RedirectToVersion": "11.0.0.0", "PublicKeyToken": "30ad4fe6b2a6aeed" } ]Another required setting is the Exchange you want to use. These have to be paired with the appropriate ApiKey, ApiSecret and PassPhrase. Set these to the values you received from the exchange you're using. Not all exchanges need a PassPhrase, so set it to a dummy value if you don't receive this from your exchange. The available exchanges are listed in the Exchange enumeration in the project.


