Monitoring_Setup
Business process monitoring is real-time tracking of an activity or set of activities linked together that serve to accomplish specific organisational goals. Monitoring is an important tool that allows organisations to measure and analyse process performance. In doing so, process problems can be identified and steps can be taken towards improving the speed, quality and efficiency of an enterprise's business processes.
This tutorial will go through the steps required to configure a custom monitoring solution that will track the time required to fill out a form and view the submitted information.
Step 1: Complete Assignment 3 SubProcess
Step 2: Enable auto-tracking so that the information being captured when the BPD is executed is stored to the database. The screenshot below depicts how to enable auto-tracking. Please ensure that the checkbox for "Enable Autotracking" is checked:
![]()
Step 3: Create intermediate tracking events that will capture custom performance data. Three tracking events will be inserted into the BPD in order to capture performance information. The steps required to create an intermediate tracking node is shown below:
a) Select the intermediate tracking event in the right pane:

b) Name the tracking event SubmitRequest:

c) In the bottom properties tab, select the Implementation section and set the Intermediate Event Details to "Tracking".
Step 4: Once the tracking event is created, it needs to be associated with a tracking group. As shown below, a new tracking group can be created from the Implementation section of the intermediate tracking event. Select new beside the tracking group and name it TrackRequests.
![]()
Once you click Finish, the tracking group will be created and will have been associated with the tracking event.

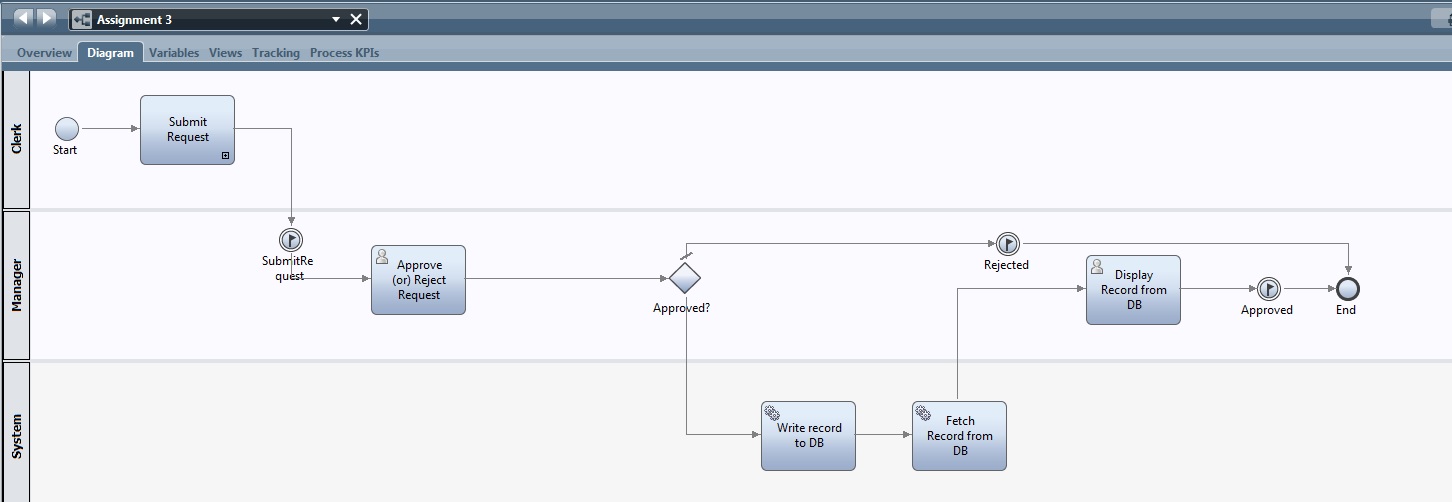
Step 5: Repeat the steps in order to create the second and third tracking events called Rejected and Approved. The image below illustrates where these two new tracking events should be located:
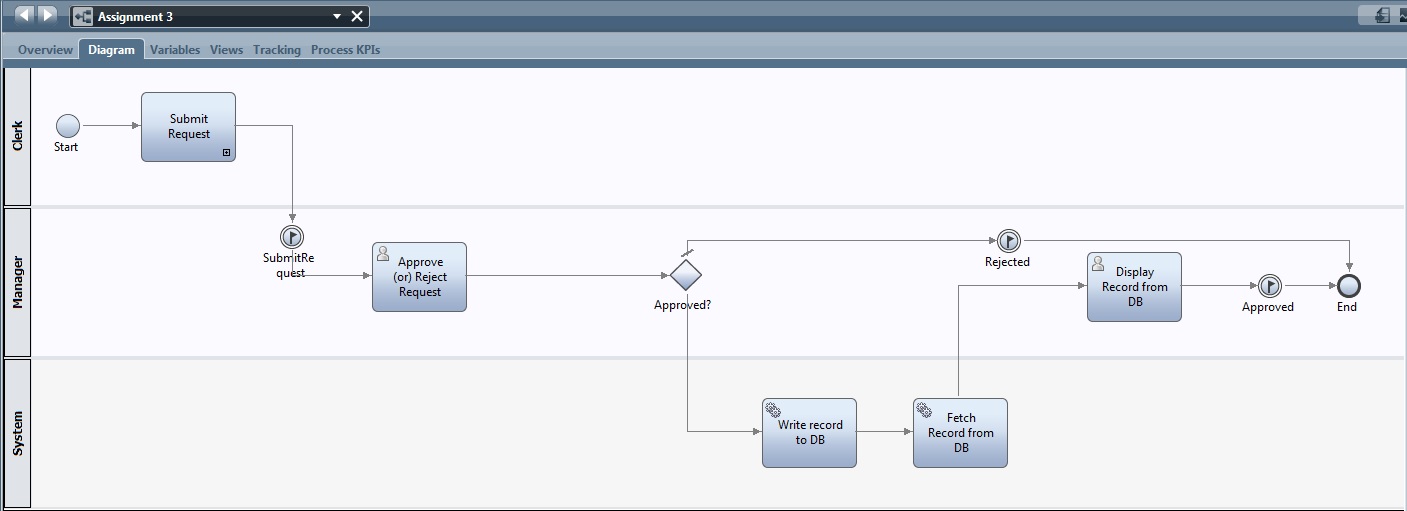
This time, instead of creating a new tracking group, select the tracking group that was just created in order to associate it with the tracking event, as shown below:
![]()
Step 6: Create 2 timing intervals that will capture the duration of time that elapses between the two tracking events (ex. SubmitRequest and Approved) when the process is executed. As shown below, create a new timing by selecting timing interval under the Performance option. Name it TimeForApprovedRequests.


Do the same thing and create a TimeForRejectedRequests Timing Interval as well.

Save it.
Step 7: The final step is the upload the tracking definitions that were just created to the database. This is accomplished by selecting File/Upload Tracking Definitions as illustrated below:
![]()
This step is required to push all of the configurations done in this section to the Performance Data Warehouse tables. These tables will store the performance data collected by the tracking events.