User Guide
WiseGui is an Browser-based client for the WISEBED experimental facility and WISEBED compatible testbeds. It is completely written in HTML5 + JavaScript.
This user guide is a step-by-step introduction into the basic functionalities of WiseGui and aims to help first time users of the software.
WiseGui is providing access to multiple testbeds in parallel. To access a testbed using WiseGui visit WISEBED's Testbed overview.
On the first screen that is displayed the user may select a testbed of his choice. In this example we'll go for the testbed at the University of Lübeck.

There are two ways to get an overview over the available nodes. The first, a Google maps-based view, allows the user to get an impression of the area or building the testbed is located. By clicking on the individual node icons a message box will pop up, displaying additional information about the selected node.

The second view is a table which offers a clearer view of the nodes in the testbed. The table can additionally be filtered by:
- typing in a search string (or regular expression) in the text box above the actual table, or
- selecting one of the available node types from the select box, or
- typing an "advanced" search expression. Usually the first two options should suffice. The "advanced mode" allow to enter a search expression that will be interpreted as JavaScript against the data model of every table line. A detailed explanation can be found by clicking on the tiny question mark right next to the "Advanced" checkbox.
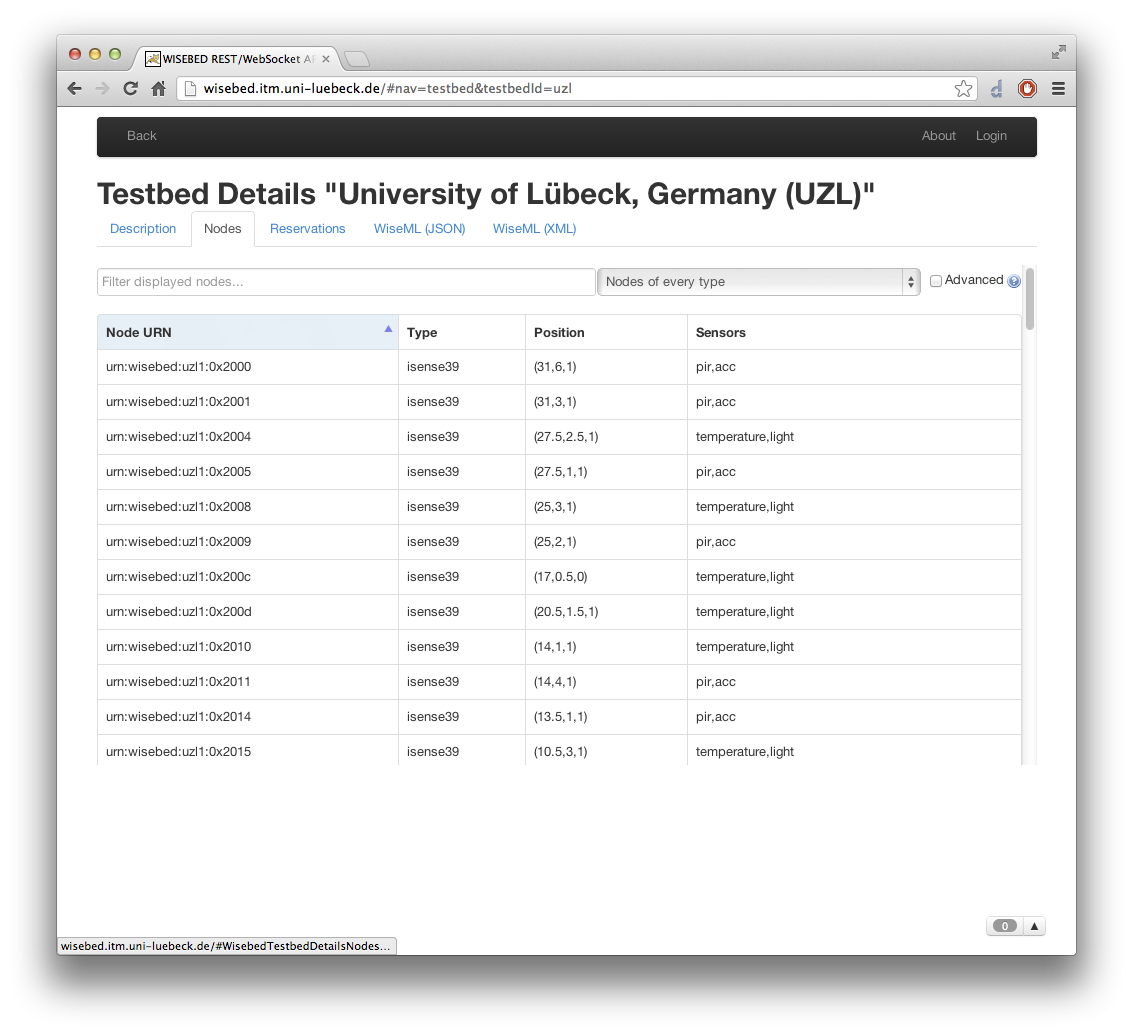
Please also note the reservations tab that gives an overview over the upcoming reservations and the "WiseML" tabs that display the machine-readable self-description of the testbed in either JSON or XML.
In order to make reservations and conduct experiments on the testbed of your choice you'll have to login. If you haven't done so yet, you'll have to first register on wisebed.eu to get an account. Let's assume your username is chas. Then, in the username field your login username will be chas@wisebed1.itm.uni-luebeck.de.

After logging in you'll have the chance to make a reservation of a (sub-)set of nodes on the testbed of your choice. To reserve, please click on "Make reservation" in the navigation bar. There, you can select individual nodes, using the (filtered) table view we already know from the testbed overview. The only difference is that you'll have to check the checkbox on the left for each node that shall be part of your reservation. Alternatively you can also select the nodes for the reservation by clicking or click-and-drag in the map view.

After making the reservation we are now able to "connect" to it. Please note that this is currently only possible during the reservation time period! To connect click on the "My Reservations" link in the upper left of the navigation bar and select the reservation of your choice (typically, this is the one you just created).

Now that you're connected with your reservation you'll be presented with a large textbox displaying the output data of the sensor nodes in the experiment. This is typically the data that is written to the nodes serial port (UART). As you can see in the screenshot below the view displays the timestamp of the node output in the first column, the node identifier in the second and the actual message in the third column.
Please note that the timestamp displayed is not taken in your browser when receiving the message but on the gateway machine in the testbeds backend. Typically the gateways clock is synchronized via the Network Time Protocol (NTP) so the timestamps should give you a sufficiently precise information about the actual order in which these messages of different nodes on different gateways have been written to the serial port, also indicating the order of events in the sensor network.
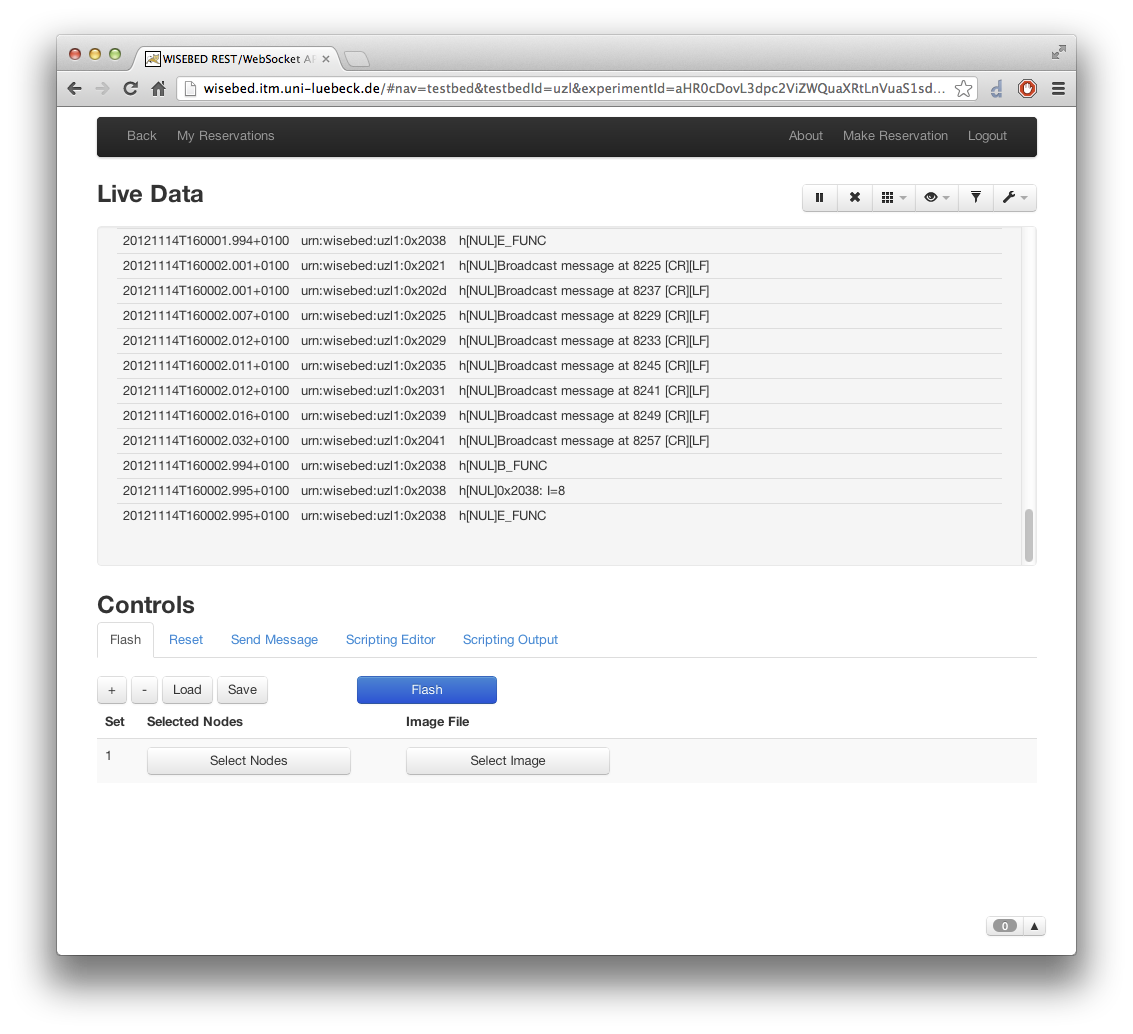
Well, being connected to the sensor nodes is a nice thing but you'll actually wonder what the weird messages might mean. Most of the time you connect to your reservation you'll get the node outputs of somebody elses experiment that has been running right before you came along. We typically don't flash the nodes to a "clean" state after a reservation is over in order to save flash cycles...
In order to run our own experiment we have to flash (reprogram) the sensor node with our own application binary. To do so you'll have to first select the set of nodes to be flashed (with the now already well-known node selection dialog) and afterwards the image to flash.
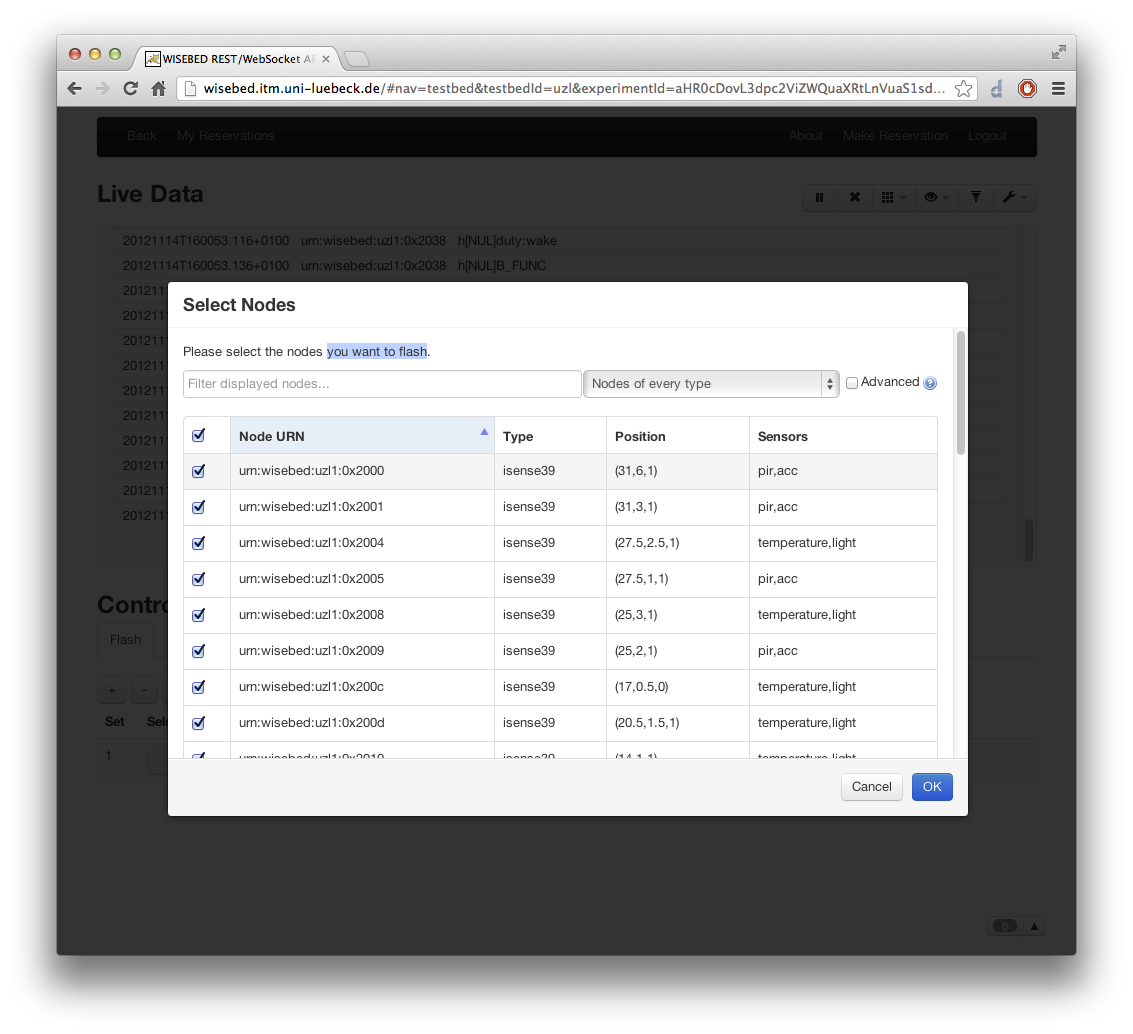
If the selection of nodes and of the image to be flashed succeeded your application state should look something like this:

Now, as soon as you press the "flash" button the reprogramming process starts. All nodes will be flashed in parallel. In order to see the progress of the flash process (which might take multiple minutes, depending on the type of hardware) you can click on the small box in the lower right of the window. This opens the notification area in which you can find all kinds of notifications as well as progress bars for all kinds of activities you run in WiseGui.
Sometimes operations (like flashing) fail and you'll be able to see this in the notification area, too, together with an error message that often helps to trace the root cause of the failure. Sometimes it might tell you that a node is simply not connected (i.e. it is unplugged), sometimes it is something different less helpful indicating that the cause is actually unknown (see below).

In case you want to restart your program from the beginning you have the option to simply reset it in the "Reset" tab. The dialog basically works similar to the flash dialog: you first select the set of nodes you want to reset, then you press the reset button. As before with the flash process, all notifications (be it errors or success messages) will be displayed in the notification area at the bottom of the application window.

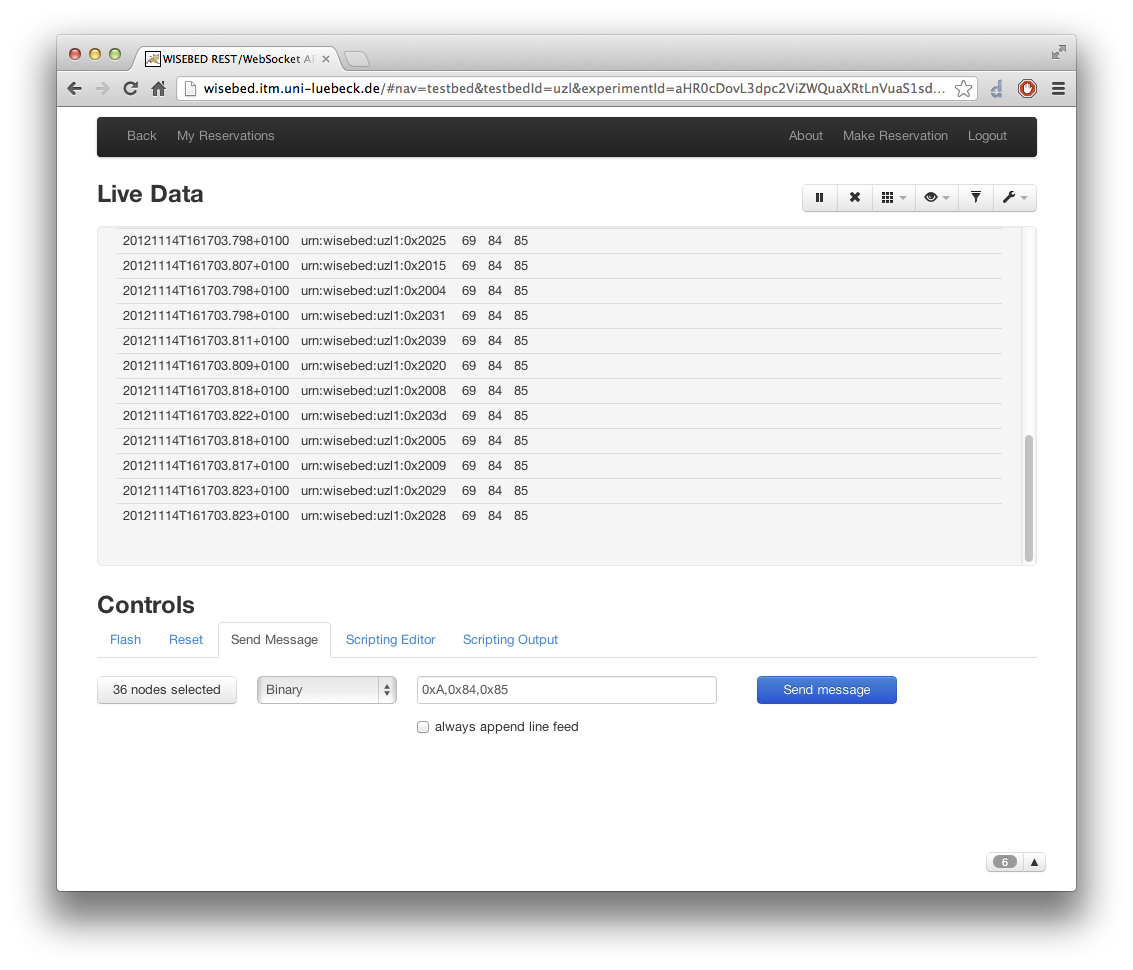
In order to send messages to you sensor nodes you select a set of nodes to which it shall be sent, type in the message into the textbox and press the "send" button. A message is always a byte array that will be written to the nodes serial port. There are two ways to input the message:
- ASCII mode: the byte value of every character is looked up according to the ASCII table and put into the resulting byte array. Therefore the string "ABC" will result in a byte array with the value [0x41, 0x42, 0x43].
- Binary mode: the string given in this mode is a comma-separated sequence of byte-wise values, either in binary, decimal or hexadecimal. Example: the string "0xB,10,0b00000001" will result in the byte array [0xB, 0xA, 0x1].
The WiseGui scripting environment allows you to actually interact with your experiment at runtime! All you have to for this to happen is to make yourself familiar with the environments documentation (press the "help" button) and write or paste a little JavaScript application right into the scripting editor! The script will then be able to process the sensor node outputs as they arrive, will be able to flash, reset the nodes or send messages to them. All this is possible without having to install any additional software!

As the JavaScript you provide to WiseGui will be executed right in your browser it is also possible for you to manipulate the document object model (DOM) of it. This e.g., allows you to build rich realtime visualizations of what's happening in the sensor network! In order to provide you with an environment suitable for this the WiseGui already provides the "Scripting Output" tab which can be used to display the "results" of your script, be it a highly complex realtime visualization or just some println()-statements.

The WiseGui live data view has several customization options that you can find on the various buttons right above the view on the right hand side. You can
- pause the view,
- clear it,
- select columns to be shown,
- select a different output format,
- filter by node URN(s), and
- customize performance-related options like redraw-rate or number of messages to be displayed (which might come in handy if the machine or browser you're running WiseGui in doesn't have the best JavaScript performance).

Per default the WiseGui tries to display node outputs as string messages, interpreting the individual bytes read from the nodes serial port as ASCII characters. In this mode, if a byte can not be printed because it doesn't correspond to a printable ASCII character this byte will be converted to a printable representation. E.g., the byte array [0x0, 0x41] will be printed as "[NUL]A" where "[NUL]" is the printable substition for the zero byte.
Alternatively you can select the binary, decimal or hexadecimal output mode so that you can see every byte as it has been read from the serial port, interpreted as a positive integer value between 0 and 255 (in binary between 00000000 and 11111111, in hex between 0x00 and 0xFF).