Add breadboard element #434
Comments
|
can I have it? |
|
I was about to request this! Super super handy for just simply messing with connections and creating tidier wiring configurations |
|
Thanks for the feedback! It got 2 votes so far, so let's see how it goes |
|
how do we add the breadboard here https://wokwi.com/arduino/projects/313984585996173888 ? |
|
There's no breadboard yet :-) |
|
We definitely need a breadboard. I tend to not use this platform when I need more number of components in my project just because of the fact that there is no breadboard and use tinkercad where only aurdino is available even though I am instructed to use esp32 primarily in my university |
|
Thanks for the feedback, @lzzy12! Which university is that? The breadboard still has 2 votes, seems like other features are more important for people right now |
Understandable. Especially, Wifi support seems pretty interesting if it works in the future |
|
WiFi will probably be usable in a few weeks from now |
Does that mean we will be able to run webservers and run standard IOT simulations? |
|
Adding breadboard should be pretty straightforward. Is there documentation how to create objects and offer to the group? |
|
The graphics is pretty straightforward, but there are some issues that need to be nailed down before it can be integrated into Wokwi:
As for naming the pins: the simulator has a convention that pins which are internally connected share the name, followed by a dot and index. e.g. GND.1, GND.2, GND.3 If we want to follow this convention, and not make a special case for the breadboard, then this is one possibility:
However, I am not sure how intuitive these names are. The breadboard has got 3 votes so far. However, people keep asking for it. It's possible that the more experienced users, who are probably the one who vote for features, care more about features that unlock new functionality. |
|
A minibreadboard is probably plenty. If more are needed, they can add multiples. Here is a reasonable choice? https://www.prayogindia.in/product/170-pin-mini-breadboard/ I think the attraction is "Build Virtual" as you would in real life. From a teaching/learning point of view, users should learn to use a breadboard and duplicate what they see in projects. (It also helps with things like joining wires/grounds/etc If browser resources are a concern, maybe there is a way to active/deactive pinpoints on the breadboard? All that being said, only so much can be done at one time. Hopefully you can make quick work of this long list. |
|
You could scale this back so it is a single rail. The user can place as many connection rails as they want and chain them together with wires if they wanted to. I am thinking something like this:
Here is what it would look like with parts on it:
I think for a breadboard (or rail) to work you would need to be able to rotate parts on the canvas. |


|
Thanks for the suggestion Chris! As far as I can tell, people want the breadboard so they can reuse the same design as in real life. So I'm not sure how many users will be happy to connect many rails instead of using an off-the-shelf breadboard part. I mentioned some of the open questions on this comment. The breadboard is technically possible - it's just unclear what's a good way to represent it in diagram.json. |
|
No reason we can't have a 1x5 and a 2x10? That should give options. |
|
For me the solution is only when you finish moving (ondrop) a component (a component that is not a breadboard) to check if the component is above a breadboard, (an approximation by coordinates, knowing that the breadboard is rectangular and fixed in size). Adding connections in diagram.json orienting yourself by (as in real breadboards)
Example, the LED below is on H21 and H22 To help avoid placing a 'leg' of the component between two connections, the grids can be mandatory activated by hovering an element/mouse over the breadboard. And when loading the page, or manually entering the information, the system will accept the information as it is in the diagram.json["connections"] without validating each connection to the breadboard. With the logic I described, moving a breadboard under other components will not make the connections in the diagram.json diagram.jsonComplete conceptual example
As I used an automatic translator, I know there must be some errors, so I'll keep my original text (in Portuguese) below####################
Para mim a solução é somente ao terminar de mover (ondrop) um componente (não protoboard) verificar se o mesmo está acima de uma protoboard, (uma aproximação pelas coordenadas, sabendo que a protoboard é retangular e tamanho fixo).
E caso esteja acima da protoboard, então verifica em qual trilha estão as "pernas" de cada componente.
Adicionando as conexões no diagram.json se orientando por (como nas protoboards reais)

* Colunas = Números
* Linhas = Letras
Exemplo, o LED abaixo está em H21 e H22

Para ajudar a evitar posicionar uma 'perna' do componente entre duas conexões, as grades podem ser obrigatoriamente ativadas ao passar um elemento/mouse sobre a protoboard.
E ao carregar a página, ou inserir manualmente as informações o sistema vai aceitar as informações do jeito que estão no diagram.json["connections"] sem validar cada conexão com a protoboard.
(isso faria com que se fosse preenchido as informações de conexão com o elemento fora da protoboard, ou em lugar não lógico com as conexões, ele vai ignorar esse erro e interpretar como se tivesse um fio invisível conectando o componente a trilha da protoboard) [ O melhor de tudo é que atualmente já acontece isso, então menos trabalho para programar]
Com a lógica que descrevi, ao mover uma protoboard para baixo de outros componentes não fará as conexões no diagram.json
(Dependendo do custo computacional poderia ser implementado essa lógica também)
# diagram.json
```
{
"version": 1,
"author": "DjEdu28",
"editor": "wokwi",
"parts": [
{ "type": "wokwi-arduino-uno", "id": "uno", "top": 212.91, "left": 0, "attrs": {} },
{ "type": "wokwi-breadboard", "id": "breadboard", "top": 0, "left": 0, "attrs": {} },
{ "type": "wokwi-led", "id": "led2", "top": 48.06, "left": 46.96, "attrs": { "color": "red" }}
],
"connections": [
[ "led2:C", "breadboard:H22", null, [ ] ],
[ "led2:A", "breadboard:H21" ],
[ "uno:13", "breadboard:J21", "green", [ ] ],
[ "uno:GND.1", "breadboard:J22", "black", [ ] ]
]
}
```
Exemplo conceitual completo

|


|
Very early prototype (you can't even wire it yet):
|
|
Whoo-hoo! |
|
Note: #375 requested half/mini breadboard. Once we have the breadboard infrastructure in place, mini/half should be trivial to implement. |
|
Just discovered this project looking for a simulator to teach electronics and the Raspberry Pico - breadboards is what our girls are using, so the plan is to simulate and then build. These are middle schoolers :) So this will get my 14votes/month from now until it is done 🥳 |
|
Thank you for your support @tproffen ! |
|
hey i would also like to see this! how do i vote? |
|
Thanks to @AriellaE, the breadboard is now functional: https://wokwi.com/projects/328952970765926995 You still need to manually connect parts to the breadboard pins - placing an LED or a resistor on top of pins won't automatically connect them. But @AriellaE is on it! |
|
Does this not work for Raspberry Pi Pico with MicroPython? I can't get it to work! |
In general, the breadboard is still considered in beta. You can share a link to the project, and we'll try to help. |
Wow thanks for the fast reply! https://wokwi.com/projects/346043917808960084 I can't figure out how to add the component to the palette. Do I need to enable beta mode? |
Right now, the only way is to copy-paste it from a different project, e.g. this one https://wokwi.com/projects/328952970765926995 |
Hmm, I copy pasted into my project with no luck: |
|
When you paste in the line, make sure you have a valid JSON file - I had an
extra comma in the wrong place and nothing showed up. Once I fixed it it
showed up as expected.
|
Thanks, but I already checked that! The pane will not render if the JSON is invalid. The Pico and other components render but not the breadboard. |
|
It should read But instead of copying the JSON itself, you can select the part in one project, Ctrl+C, go to the diagram of the other project, Ctrl+V and have the part copied. See here for more details |
What an obvious mistake... thank you so much. I will make a donation now ;) |
|
We have a beta of the breadboard. It works if you manually connect wires from the parts to the breadboard. What doesn't work yet?
Should we release what we have now and gradually add the missing features? Or are these show-stoppers and we should first implement them and then release the breadboard? You can vote with reactions: and feel free to elaborate in a comment! |
|
Love the progress :) We are planning to use this for electronics classes. We will wait until the connection to the breadboard is automatic after placing a component. Adds too much confusion for the kids otherwise 😎 |
|
Agreed, could happily work around 2, but 1 and 3 are show-stoppers :) |
|
Update: we added most of the missing breadboard functionality - parts now attach automatically to the breadboard, they move together with the breadboard, and when you add a breadboard, it goes behind the other parts. Still missing: we need to fix an issue with the spacing between the top and bottom part of the breadboard. Also, rotating either the breadboard or parts interferes with the auto attach functionality. |
|
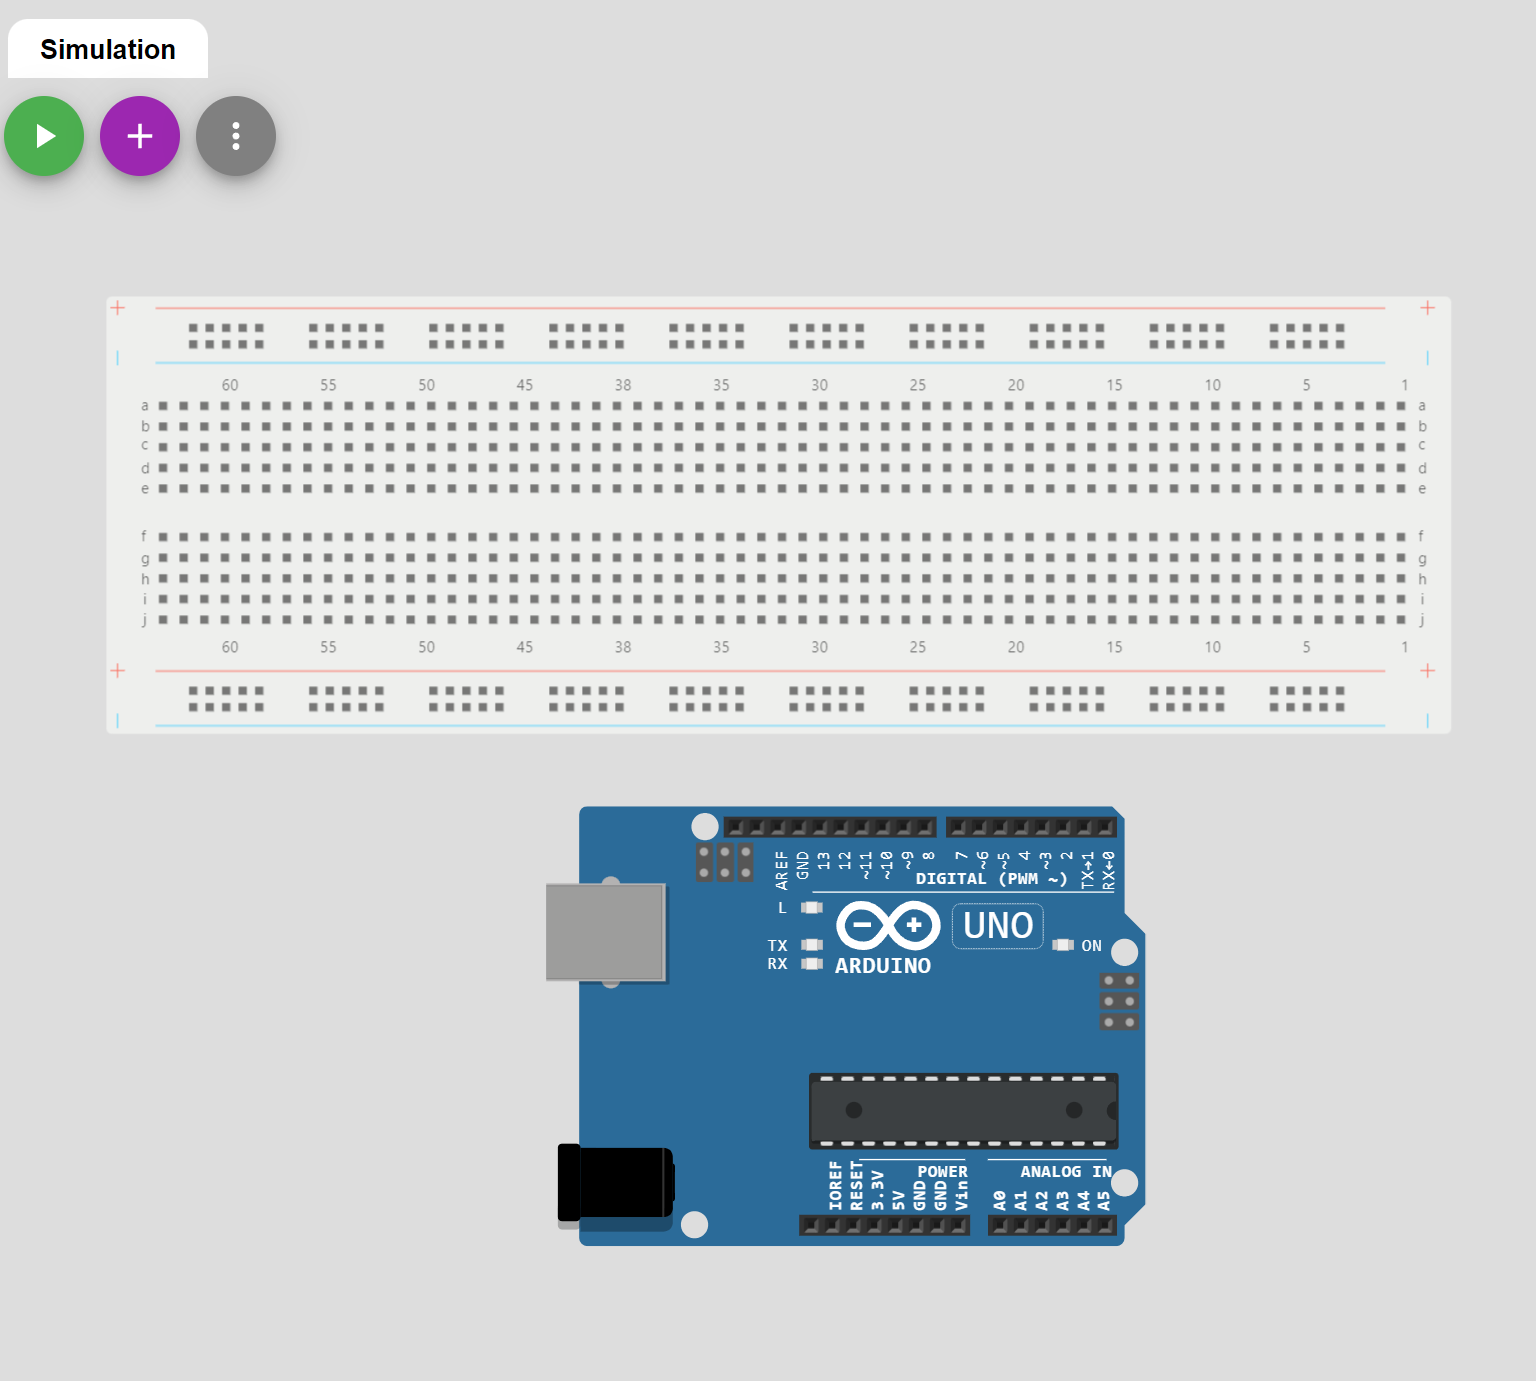
The breadboard is now ready for mass consumption! https://wokwi.com/projects/328952970765926995 I'm keeping this issue open still as we are also working on half-breadboard and mini breadboard for you. |
|
Half breadboard: https://wokwi.com/projects/349109488710582866 |
|
Mini breadboard: https://wokwi.com/projects/349124282187514451 and we're good to go! |
|
Thank you so much - love it ❤ |
a Solderless breadboard is a matrix of electrical connection points, in a plastic enclosure.
They come in various sizes. The common sizes are:
Ideally, our element will support at least these 3 standard configurations, selectable via the "size" attribute. e.g.:
Full breadboard
Half Breadboard
Mini breadboard
The text was updated successfully, but these errors were encountered: