-
Notifications
You must be signed in to change notification settings - Fork 408
SAML
Note: This feature is available in Enterprise, AWS, Team editions only.
If your Identity Provider uses SAML (Security Assertion Markup Language), follow this guide.
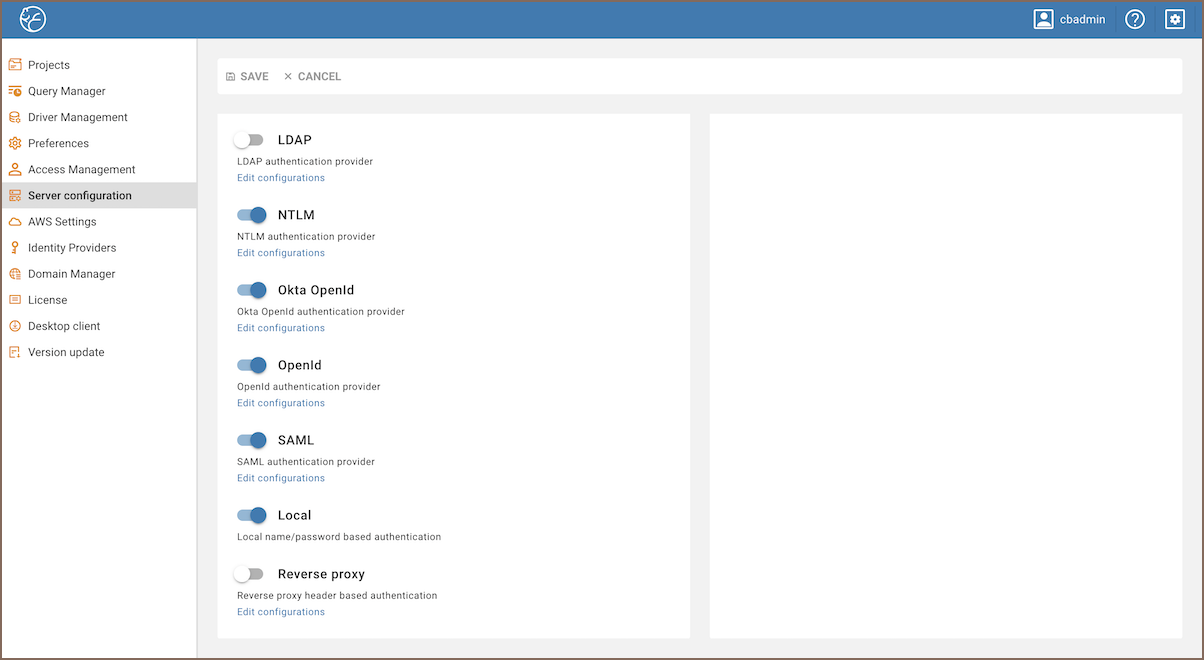
Go to the Administration menu and enable SAML in the Server configuration tab.

-
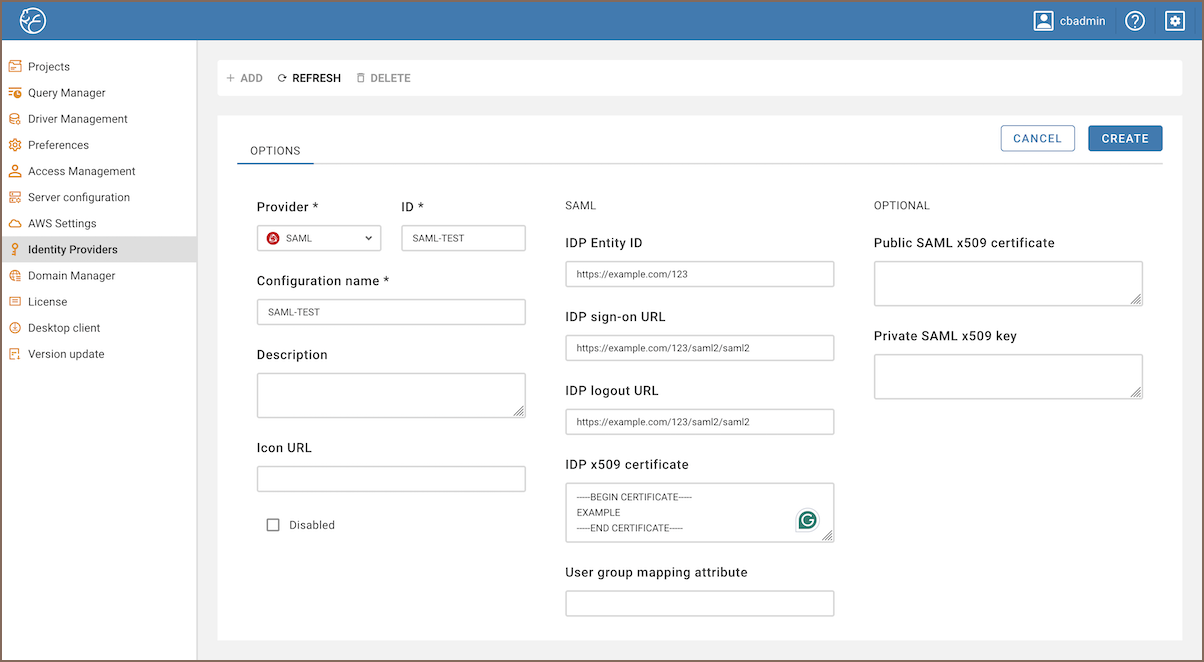
Go to the Identity Providers tab and create a new configuration using the SAML IdP details.

-
Add details from your SAML IdP into the new configuration in CloudBeaver.
-
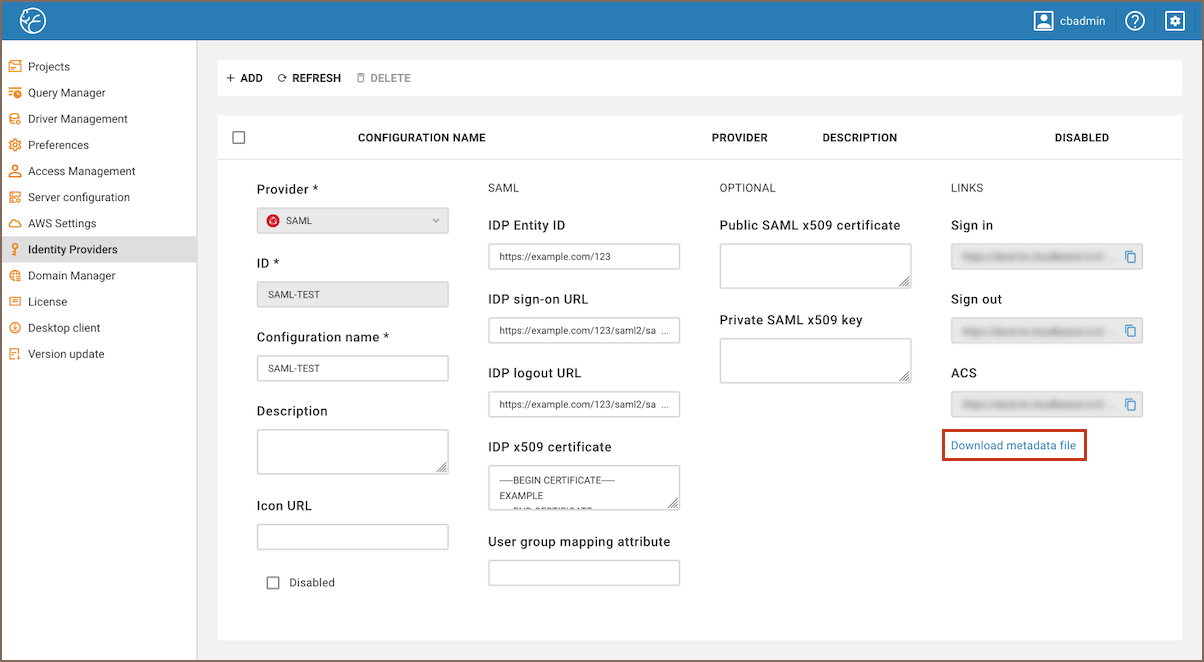
Open the created configuration in CloudBeaver and copy the ACS and Entity ID links.

-
Go to the SAML IdP website and add the ACS and Entity ID links to the SSO access settings, assign users and add the attribute mappings according to the SAML IdP requirements.
Each identity provider has its own configuration procedure, we will show how to do it in AWS in the next chapter.
Configuration
-
Go to the Identity Providers tab and create a new configuration using the SAML IdP details as it is described above.
-
Add details from your SAML IdP into the new configuration in CloudBeaver.
Configuration in Amazon Configuration in CloudBeaver AWS SSO sign-in URL IDP sign on URL AWS SSO sign-out URL IDP logout URL AWS SSO issuer URL IDP Entity ID -
Specify parameters:
Parameter Value Application ACS URL ACS link from CloudBeaver Application SAML audience Entity ID link from CloudBeaver
Attributes
Attributes explanation:
| Attribute | Value | Meaning |
|---|---|---|
| Subject | ${user:email} | User unique identifier (nameId). It is usually an email address. |
| https://aws.amazon.com/SAML/Attributes/SessionDuration | 1800 | Session duration in seconds. 1800 (30 minutes) is the default value |
| https://aws.amazon.com/SAML/Attributes/Role | roleARN, idpARN | IAM role identifier |
Role is the most important attribute, it defines which IAM role will be used for user federation session. Role format: roleARN, idpARN. You can get role ARN in AWS IAM section https://console.aws.amazon.com/iamv2/home#/roles. Role ARN looks like this: arn:aws:iam::123678087624:role/RoleForSAMLAccess.
You can get IDP ARN in AWS identity providers page https://console.aws.amazon.com/iamv2/home#/identity_providers. IDP ARN looks like this: arn:aws:iam::123678087624:saml-provider/GSuiteSAML.
The Federated tab becomes available in the CloudBeaver authentication dialog after creating the configuration. The user can select the configuration and thereafter login into the application using SSO.
- Application overview
-
License Management

- Demo Server
- Supported databases
- Administration
- Server configuration
- Create Connection
- Network configuration settings
- Connection Templates Management
- Access Management
-
Authentication methods
-
Local Access Authentication

- Anonymous Access Configuration
- Reverse proxy header authentication
- LDAP
-
Single Sign On

-
SAML

-
OpenID

-
AWS OpenID

-
AWS SAML

-
AWS IAM

-
AWS OpenId via Okta

-
Snowflake SSO

-
Okta OpenId

-
Cognito OpenId

-
JWT authentication

-
Kerberos authentication

-
NTLM

-
Microsoft Entra ID authentication

-
Google authentication

-
Local Access Authentication
- User credentials storage
- Cloud databases configuration
-
Query Manager

-
Drivers Management

- Accessibility
- Keyboard shortcuts
- Features
- Server configuration
-
Domain manager

- Product configuration parameters
- Command line parameters
- Local Preferences
- API
- Deployment options
- Additional setup and management