-
Notifications
You must be signed in to change notification settings - Fork 56
Flashing AVR boards
Supported operating system for flashing AVR boards is Ubuntu 22.04 only.
Follow this page up to the "Building the firmware section".
Important: Before continuing, make sure that the target board you intend to program with the programmer board is not connected to the computer.
Any AVR-based Arduino board can be used as an programmer for the target board hosting the OpenDeck firmware (Arduino Mega, Uno, Pro Micro, Leonardo etc.). Even though Arduino Uno/Pro Micro/Leonardo can be used as an programmer which will load OpenDeck firmware to a supported target board, those boards cannot run OpenDeck firmware. The reason for this is that those boards lack the necessary resources required for the OpenDeck firmware to run (flash/RAM/EEPROM).
To start with, make sure Arduino IDE is installed first. Arduino IDE can be downloaded from official Arduino website. Once the Arduino is downloaded, installed and started, under Tools>Board select the board you are intending to use as an programmer (not the target board on which you will flash the firmware). Also make sure to select the right port on which the board is enumerated under Tools>Port. Next, under File>Examples select 11.ArduinoISP>ArduinoISP. Upload the sketch to Arduino programmer board.
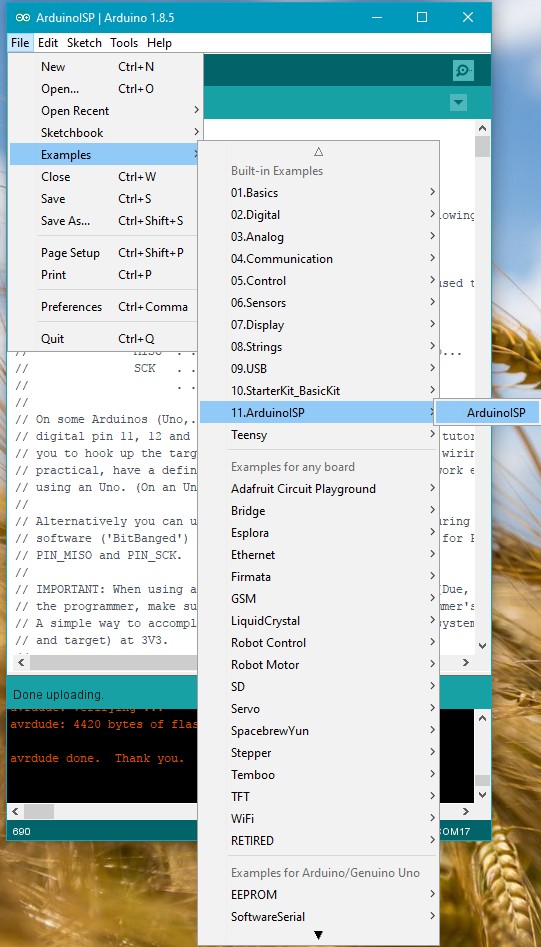
AVR flashing uses a total of 6 pins which need to be connected between two devices:
- MOSI
- MISO
- SCK
- GND
- 5V
- Reset
MOSI from programmer board goes to MOSI on target board, MISO from programmer board goes to MISO on target board etc. All listed pins need to be connected between programmer and target board. For connecting the signals standard breadboard cables can be used (shown on the picture below).
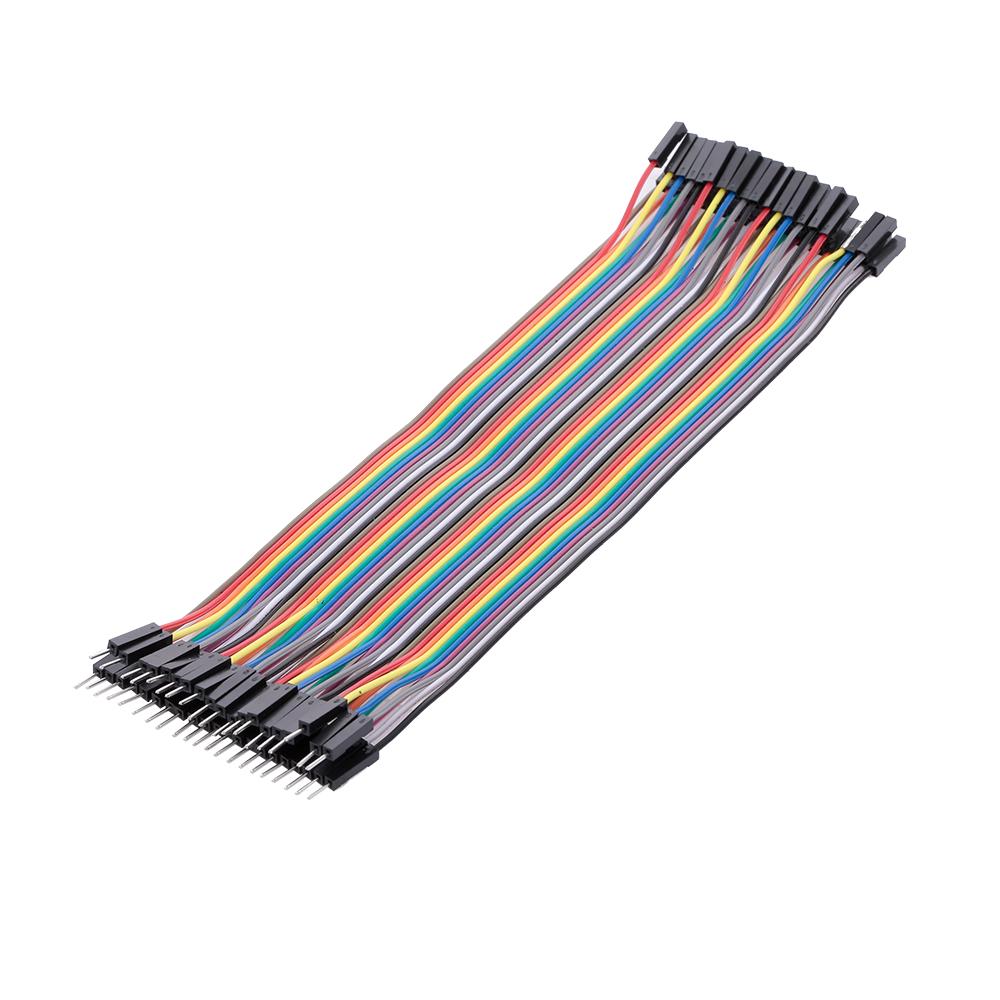
Next sections will show where the required pins are located on each supported programmer and target board.
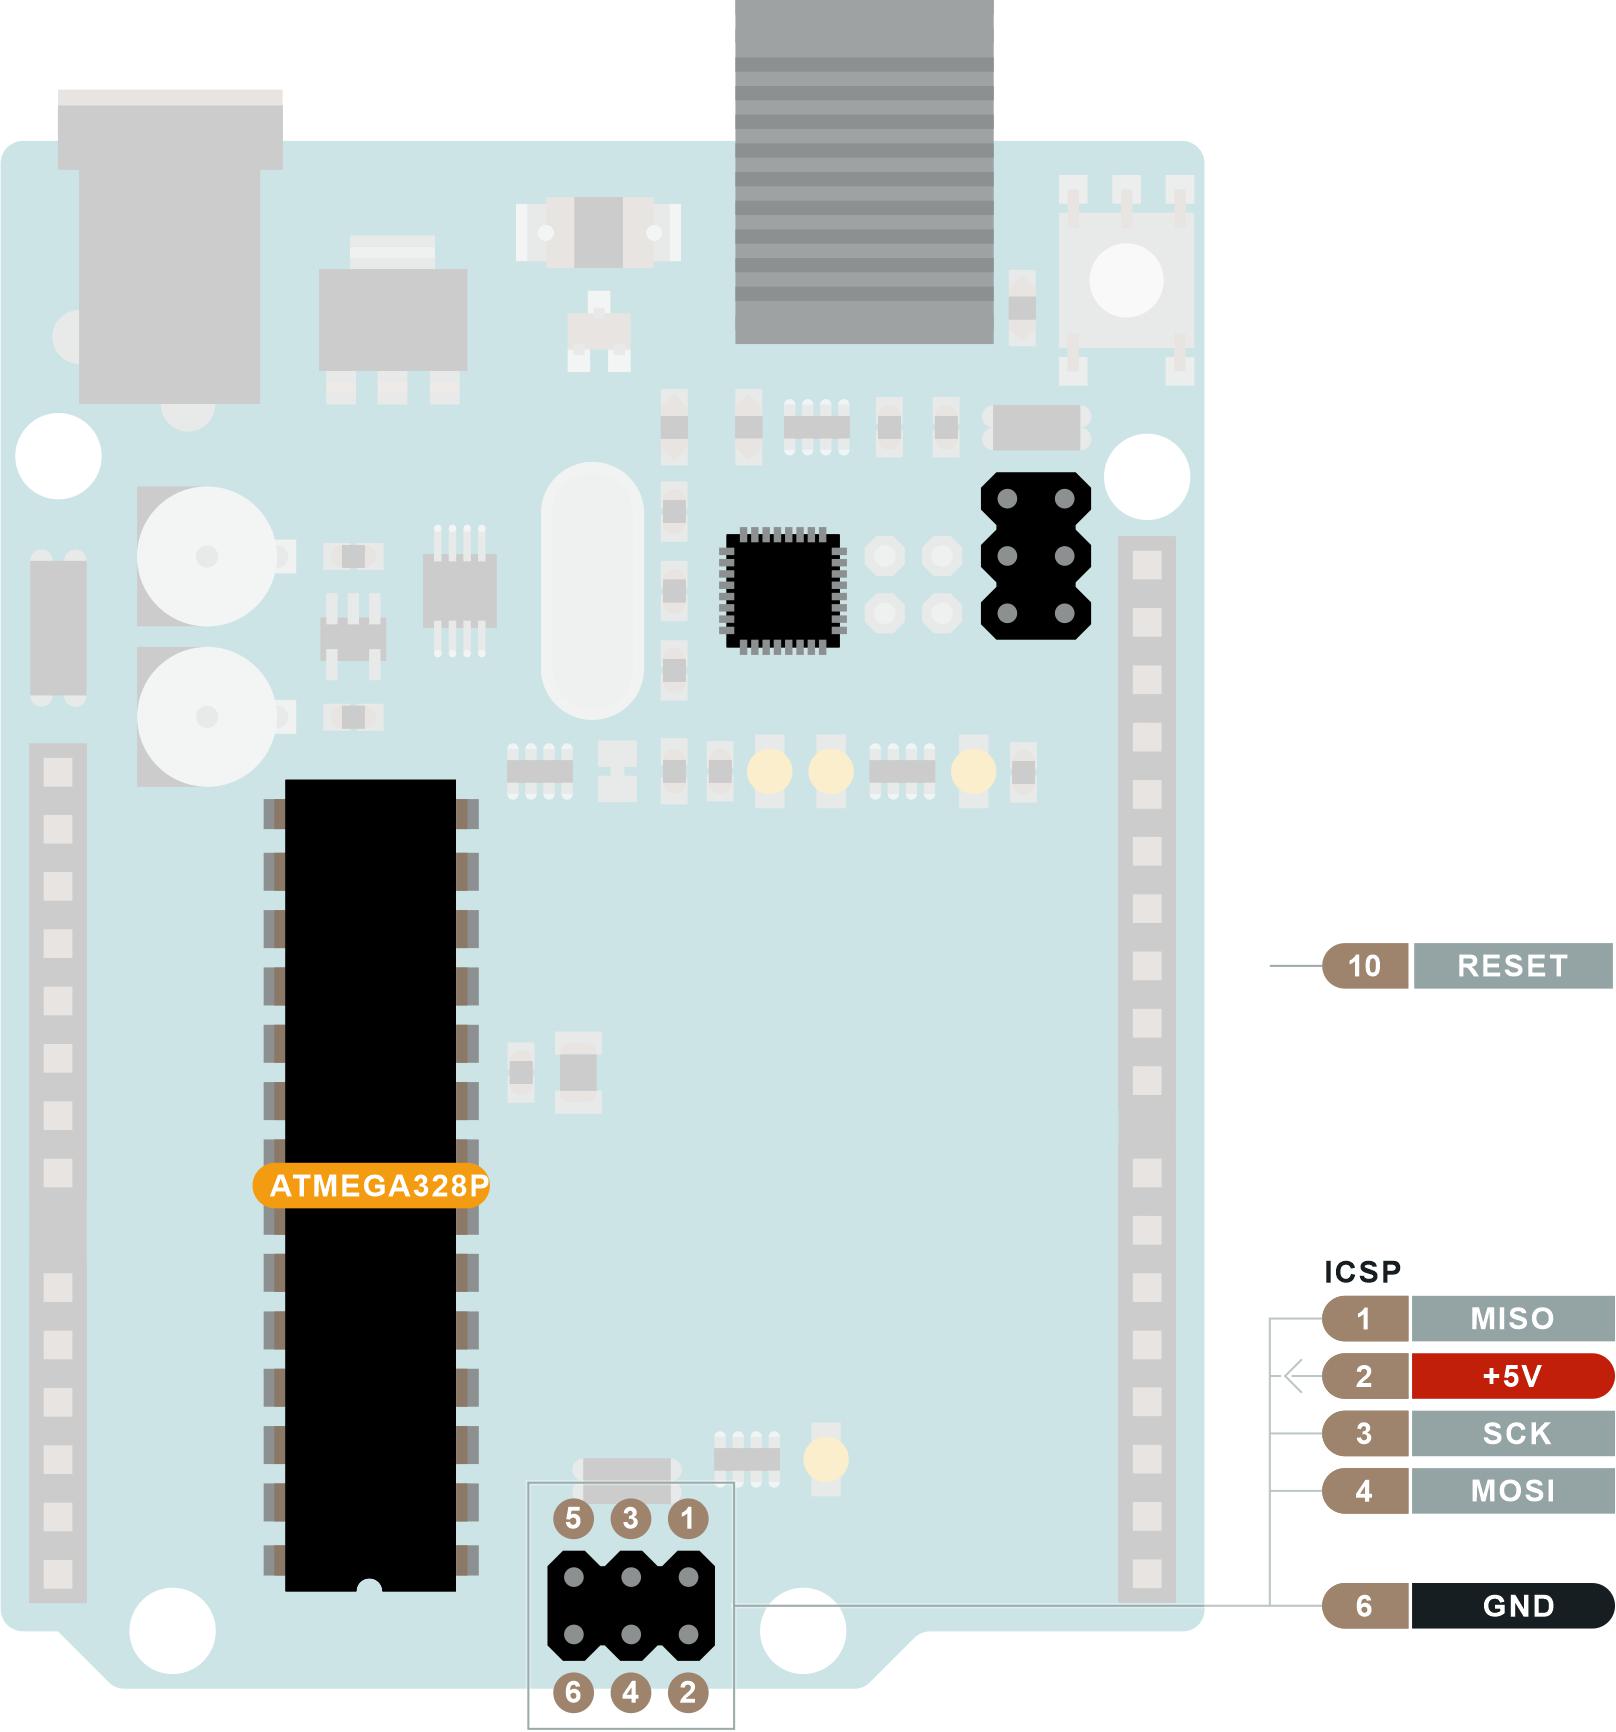
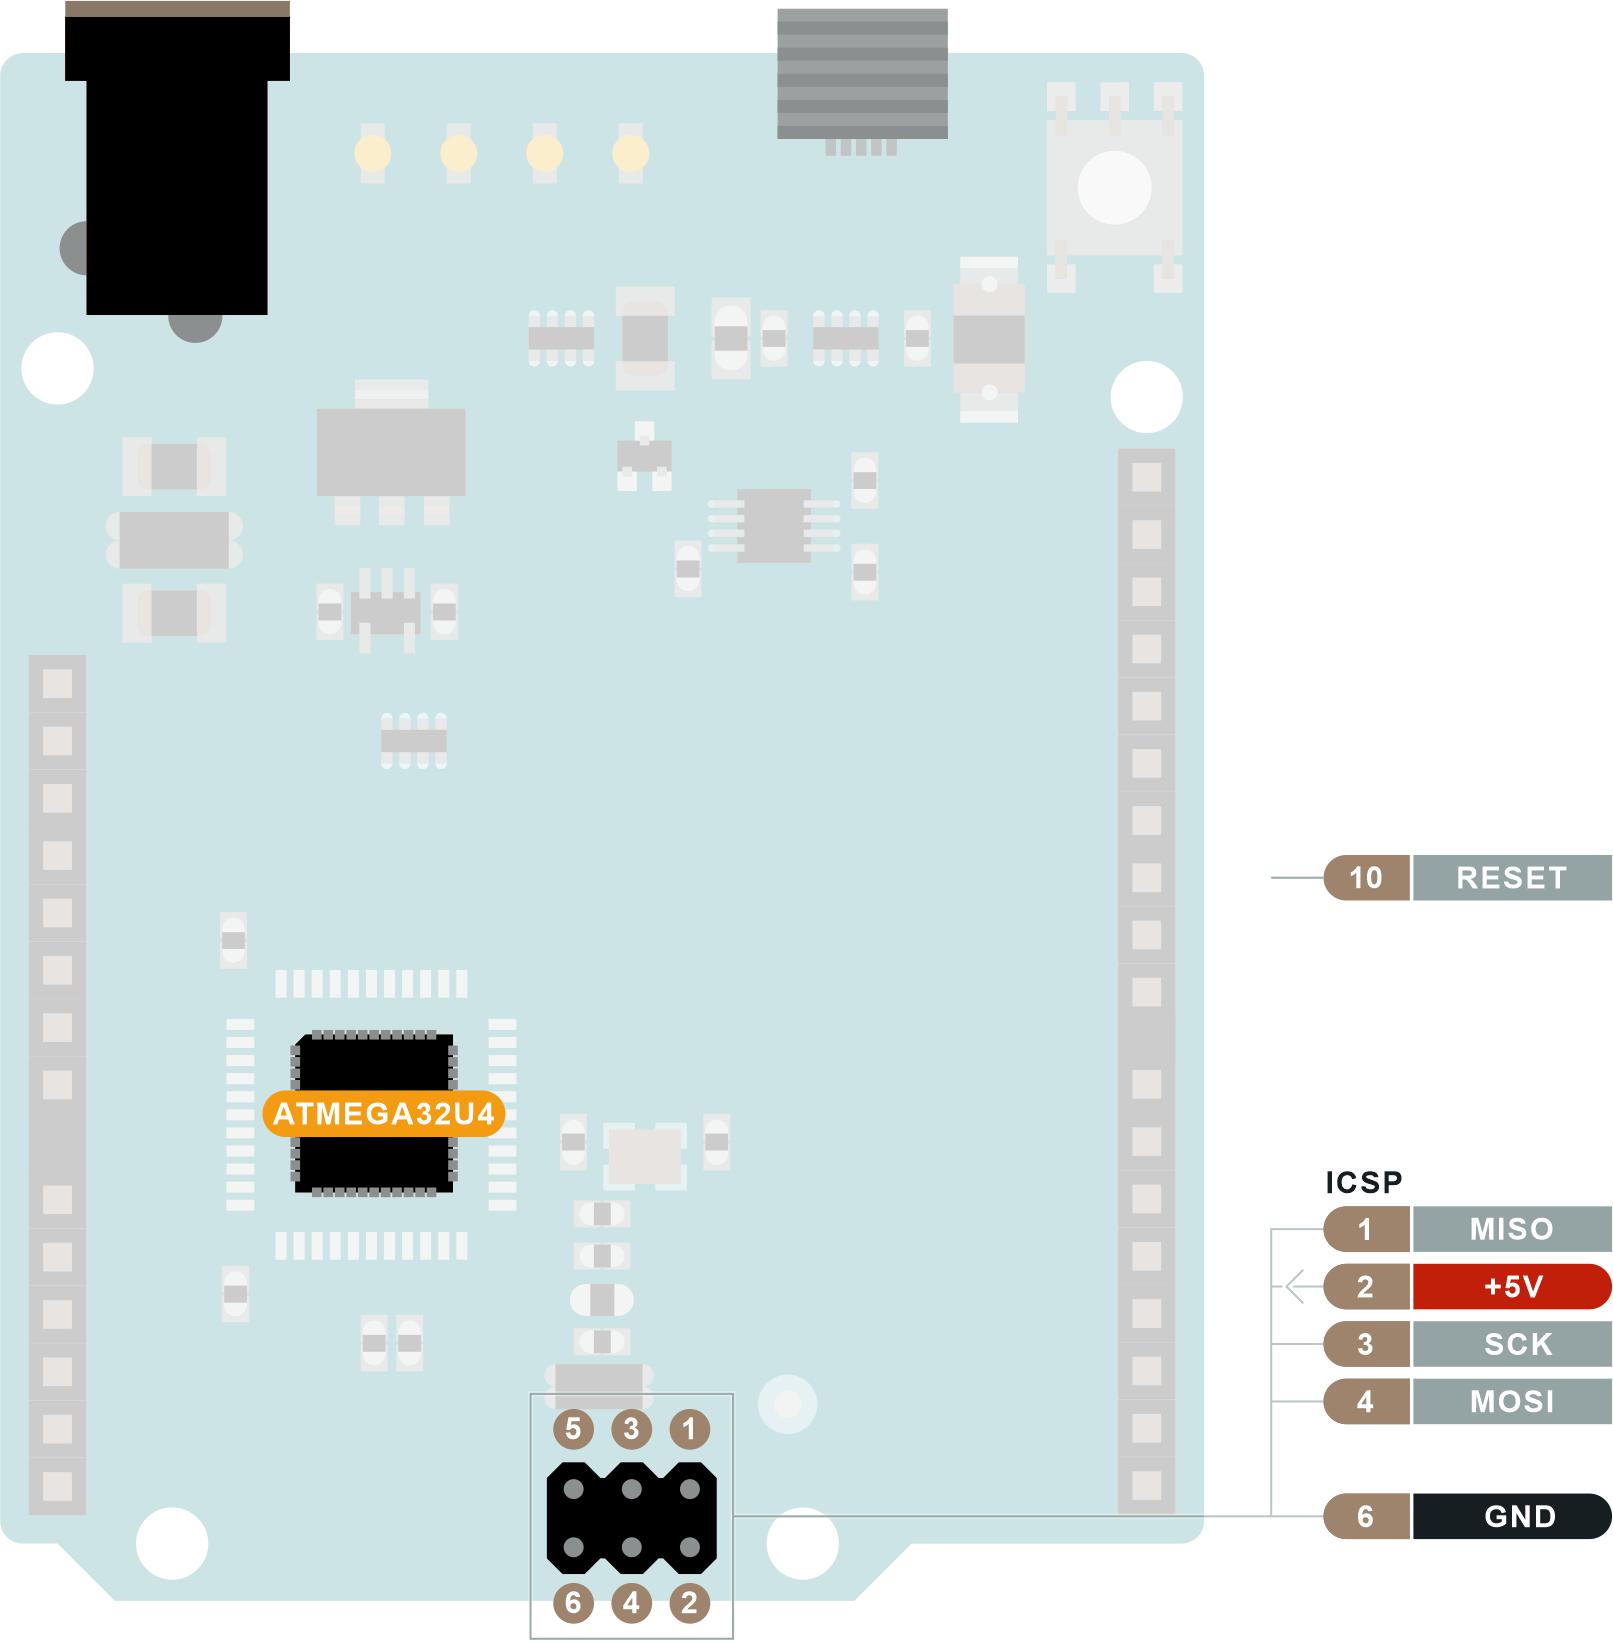
Pictures below have marked required signals on each supported programmer board.
Note 1: There is a difference in Reset signal on programmer board with Reset signal on target board! On all programmer boards pin 10 is used as Reset signal which then connects to actual Reset pin on target board.
Note 2: Arduino Mega2560 and Arduino Uno require extra 10µF capacitor between Reset pin and GND (as shown on the picture below) when used as programmer board. Important: If you're using electrolytic capacitor like the one in the picture below, make sure to connect positive (longer) pin to to "Reset" and negative (shorter) to GND.

Note 3: All pinouts below are modified to show only the required signals from their official documentation. For Arduino boards that's store.arduino.cc and sparkfun.com and for Teensy that's pjrc.com
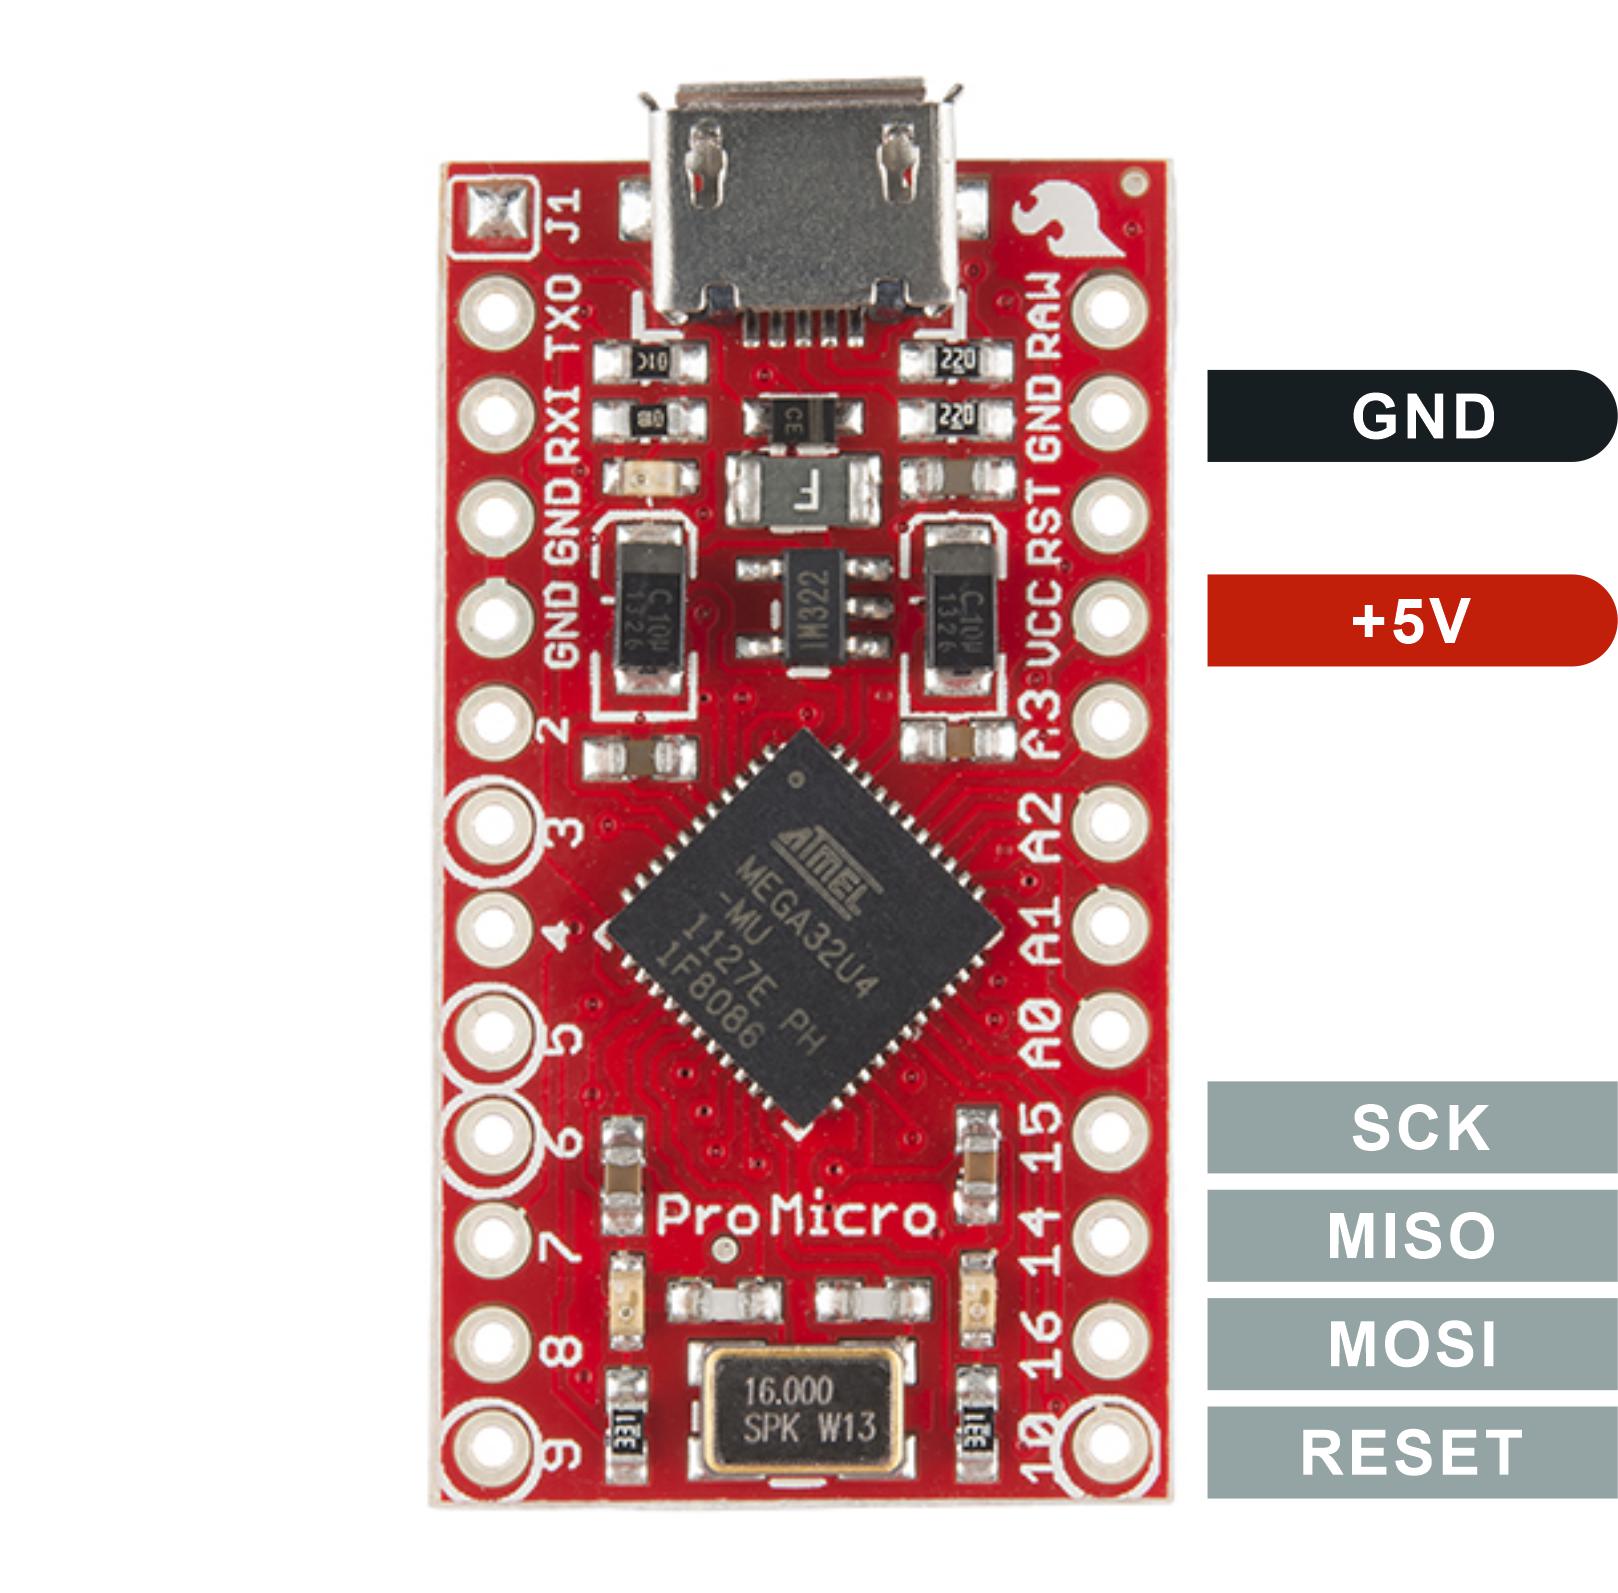
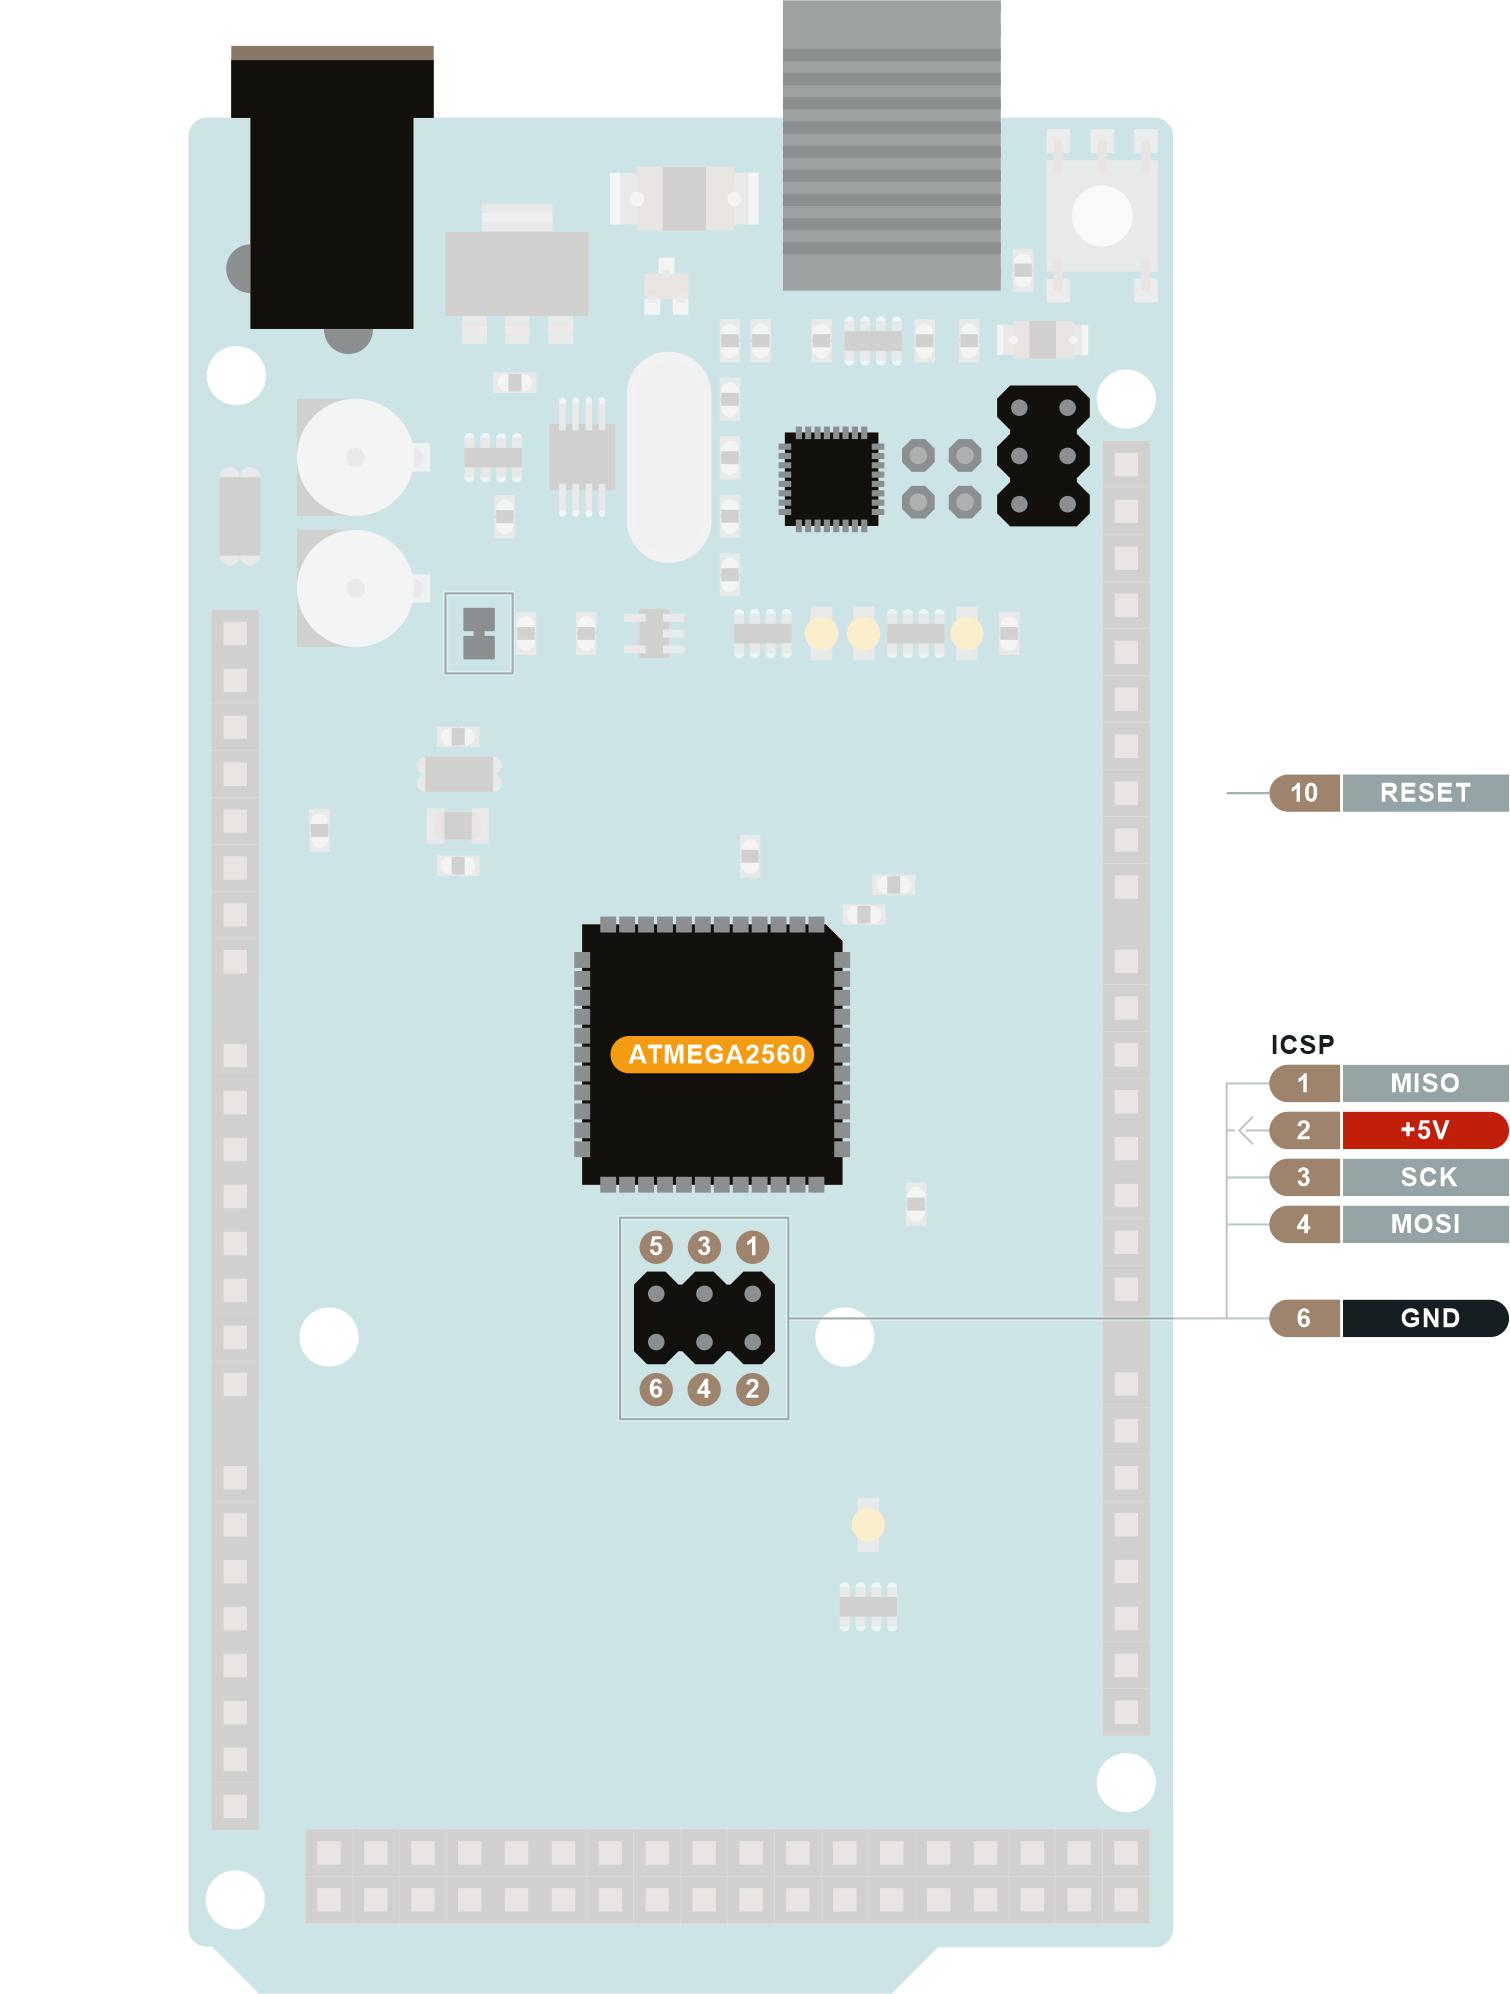
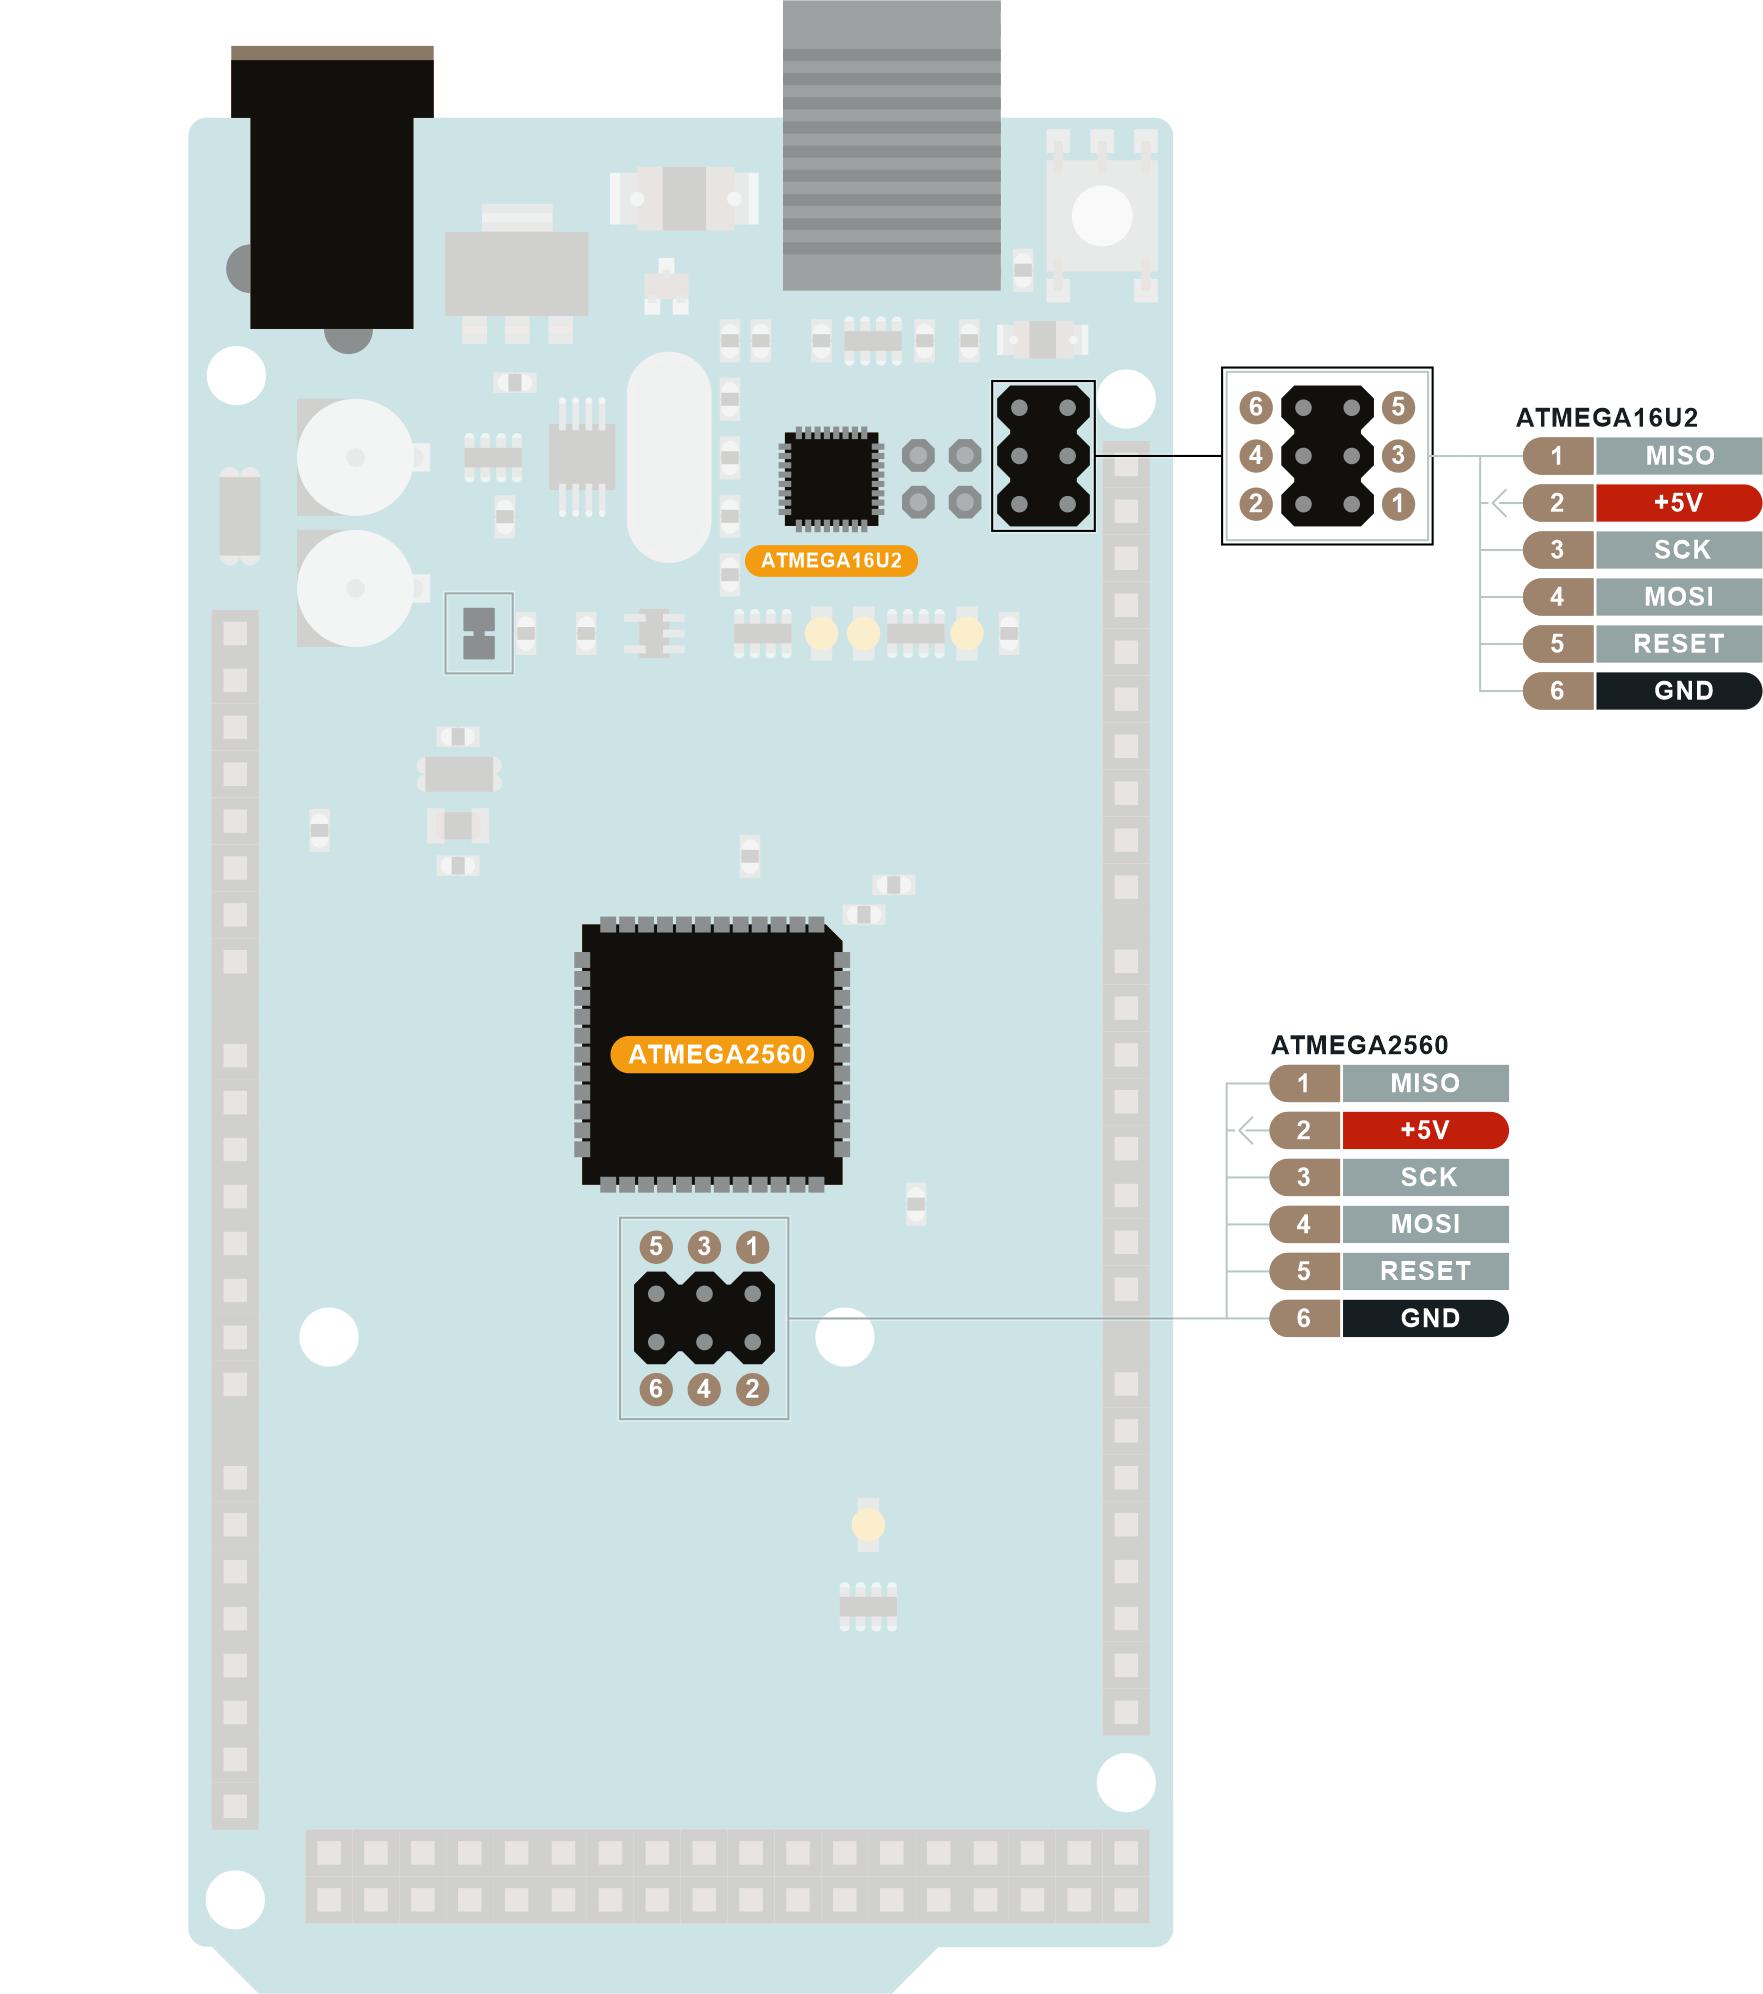
Pictures below have marked required signals on each supported target board.
Arduino Mega has two microcontrollers. Each microcontroller has its own programming header. The lower one in the picture below is for ATmega2560 which is main MCU on Arduino Mega2560 board. Header in the upper right is for ATmega16u2. This MCU is responsible for USB communication between computer and main MCU. Both MCUs need to be flashed in order for OpenDeck firmware to work. If your board has ATmega8u2 as USB MCU or it uses chip like CH340 USB-to-serial, you cannot load OpenDeck firmware to that board.

Once the development environment is ready, the firmware can be built and flashed.
For the Mega board, first, connect the programmer to the ATmega16u2 MCU and then execute the following command inside the container:
make flash TARGET=mega16u2 FLASH_TOOL=arduino PORT=ttyXYZ
Replace ttyXYZ with the port on which the Arduino programmer is connected. This is usually ttyACM0 (also in the command below).
Next, connect the programmer to the ATmega2560 MCU and then execute the following command inside the container:
make flash TARGET=mega2560 FLASH_TOOL=arduino PORT=ttyXYZ
The same procedure should be followed for the Arduino mega variant with the mux shield, just with different target name (mega2560_muxsh2).
Connect the programmer to the required pins and then execute the following command inside the container:
make flash TARGET=teensy2pp FLASH_TOOL=arduino PORT=ttyXYZ
Replace ttyXYZ with the port on which the Arduino programmer is connected. This is usually ttyACM0.
Hardware
- Supported microcontrollers
- Supported components
- Pinouts for supported boards
- Recommended components and where to get them
- LED indicators
Configuration and usage
Advanced