-
Notifications
You must be signed in to change notification settings - Fork 2
SolarNet Development Guide
This guide explains how to setup a development environment for contributing to or modifying the SolarNet application code. If you haven't already read the general Build Guide then quickly go read that, especially the SolarNet section which explains how to get the SolarNet code and database setup scripts.
Note the Developer VM guide provides a streamlined way to get a SolarNetwork development environment set up, using a pre-configured virtual machine. This guide is useful if you would like to use Eclipse on your native development machine, instead of relying on a virtual machine.
The SolarNet project consists of a set of applications, here are the main ones:
- SolarIn - for collecting data from nodes, and providing instructions to them
- SolarJobs - for running batch jobs like data export and data aggregation and maintenance
- SolarQuery - provides the API for querying collected node data
- SolarUser - provides a web UI and API for managing SolarNet user accounts
When all applications are deployed they form a complete SolarNet platform. Although Eclipse is not actually required, this guide will describe setting up Eclipse for viewing and running the code for development purposes.
SolarNet requires a PostgreSQL database, version 12, and some specific extensions. Please note that newer versions of Postgres may work, but have not been tested.
You can use the SolarNetwork Postgres Docker image as a fully configured Postgres development database for amd64 and arm64 platforms:
docker pull snmatt/sndev:solarnetwork-postgres-12For other platforms you can build the Docket image yourself with the solarnetwork-postgres-docker project. The steps to build the image are:
# clone repo
git clone https://github.com/SolarNetwork/solarnetwork-postgres-docker.git

# build image
cd solarnetwork-postgres-docker
make build

# run image in new container
make run
Once running, Postgres will be available at localhost:5432. Two databases will be available,
the first for application development:
| Username | Password | Database name |
|---|---|---|
solarnet |
solarnet |
solarnetwork |
The second database is designed for tests to run against:
| Username | Password | Database name |
|---|---|---|
solartest |
solartest |
solarnetwork_unittest |
If you use this container, you can skip the next section and jump to application settings .
On macOS, Postgres can be installed via Homebrew (brew install postgresql@12) or
Postgres.app is very convenient.
The following extensions are required:
- citext
- pgcrypto
- uuid-ossp
- timescaledb
- aggs_for_vecs
The citext, pgcrypto, and uuid-ossp are standard Postgres "contrib" extensions that can often
be installed from a -contrib package, or might already just come with your Postgres distribution.
See the Timescale docs for information on installing that. On macOS if you are using Postgres.app then you can build Timescale from source lke this:
# install cmake and openssl from Homebrew
brew install cmake openssl

# clone Timescale Git repo
git clone https://github.com/timescale/timescaledb.git

# checkout version tag
cd timescaledb
git checkout 2.10.1

# perform build with Postgres.app psql on path and Homebrew OpenSSL
export PATH=/Applications/Postgres.app/Contents/Versions/12/bin:$PATH
OPENSSL_ROOT_DIR=/usr/local/opt/openssl ./bootstrap -DREGRESS_CHECKS=OFF
cd build && make
make install
Be sure to update postgresql.conf to include timescaledb in the shared_preload_libraries
setting:
shared_preload_libraries = 'timescaledb'
See the Timescale docs for more information.
See the aggs_for_vecs docs for information on installing that (you will need a working compiler installed). On macOS if you are using Postgres.app then a command like this would be used:
cd aggs_for_vecs
make clean install PG_CONFIG=/Applications/Postgres.app/Contents/Versions/12/bin/pg_config
If Postgres is running on a non-standard port then you can add PGPORT=x to the end of that.
Do not forget to restart Postgres after installing any extensions!
Once Postgres and the required extensions are installed and Postgres is running, the
solarnetwork-central/solarnet-db-setup/postgres/bin/setup-db.sh script can be used to create
(or recreate) the SolarNetwork database tables. For example to create a database user solarnet
and a database owned by that user named solarnetwork:
cd solarnetwork-central/solarnet-db-setup/postgres
./bin/setup-db.sh -mrv -u solarnet -d solarnetwork
To create a unit test user named solartest and a database owned by that user named
solarnetwork_unittest:
cd solarnetwork-central/solarnet-db-setup/postgres
./bin/setup-db.sh -mrv -u solartest -d solarnetwork_unittest
⚠️ Note that the-margument creates the given database user. If you already have created the database user, you can omit the-margument.
MQTT is not technically required by SolarNetwork, but many features like real-time message flows depend on it. At some point during SolarNet development you'll probably want to set up a MQTT broker.
The solarnetwork-vernemq-docker project provides a fully configured VerneMQ broker in a Docker image. The steps to use this image are:
# clone repo
git clone https://github.com/SolarNetwork/solarnetwork-vernemq-docker.git

# build image
cd solarnetwork-vernemq-docker
make build

# run image in new container
make run
Once running, the broker will be available at localhost:1883. Three users will have been
configured:
| User | Password |
|---|---|
admin |
admin |
solarnet |
solarnet |
solarinstr |
solarinstr |
See the MQTT settings for details on configure SolarNet application settings to connect to the broker.
☝️ Note that SolarNet applications will not use MQTT unless a
mqttprofile is active. See the README in each application's directory for information on each application's available profiles.
The SolarNet applications have default settings configured in their respective
src/main/resources/application.yml files. For example the SolarIn settings are in the
solarnetwork-central/solarnet/solarin/src/main/resources/application.yml.
By default the applications are configured in "unit test" mode. For example, the default database
connection settings use a database user solartest and a database named solarnetwork_unittest.
You won't want to use those settings to run the applications, however. For that, the SolarNet
applications make use of profiles and specifically a profile named development. To tweak the
settings to match your development environment, you can create a application-development.yml file
in each application's project directory. In those files you can copy/paste settings from the
application.yml file and modify them to whatever you need.
solarnetwork-central/solarnet/solarin/
├── README.md
├── application-development.yml            # local SolarIn configuration
├── build/
├── build.gradle
├── docs/
└── src/
solarnetwork-central/solarnet/solarjobs/
├── README.md
├── application-development.yml            # local SolarJobs configuration
├── build.gradle
├── docs/
└── src/
solarnetwork-central/solarnet/solarquery/
├── README.md
├── application-development.yml            # local SolarQuery configuration
├── build.gradle
└── src/
solarnetwork-central/solarnet/solaruser/
├── README.md
├── application-development.yml            # local SolarUser configuration
├── build.gradle
└─ src/
The most common settings you will need to configure are the database connection and logging
settings.For example, if you wanted to tweak the logging levels in SolarIn, in the
solarnetwork-central/solarnet/solarin/application-development.yml file you could have:
logging:
    level:
        net.solarnetwork.central: "DEBUG"
        net.solarnetwork.mqtt: "TRACE"
        net.solarnetwork.central.in.web.BulkJsonDataCollector: "TRACE"
If you wanted to tweak the database connection because you have Postgres on a non-standard port, or running on a remote machine, you could add:
app:
  datasource:
    url: "jdbc:postgresql://localhost:5412/solarnetwork"
The default configuration for the SolarNet applications will be to connect to an MQTT broker at
mqtt://localhost:1883. You must configure appropriate credentials, however. Typically this would
be done by creating a development profile configuration file application-development.yml in the
directory of the application, for example for SolarIn this would be
solarnetwork-central/solarnet/solarin/application-development.yml. The MQTT settings you'd
configure look like this:
app:
  solarqueue:
    connection:
      mqtt-config:
        username: "solarnet"
        password: "solarnet"
Also each SolarNet application that can use MQTT will need to have the mqtt profile active when launched,
for example by passing an argument like -Dspring.profiles.active=development,mqtt. See the next section
for more details on running the applications.
The SolarNet applications are Spring Boot applications. To
enable the development runtime profile, be sure to launch the application with a
spring.profiles.active argument like -Dspring.profiles.active=development. The main application
classes to run are:
| Application | Main Class |
|---|---|
| SolarIn | net.solarnetwork.central.in.SolarInApp |
| SolarJobs | net.solarnetwork.central.jobs.SolarJobsApp |
| SolarQuery | net.solarnetwork.central.query.SolarQueryApp |
| SolarUser | net.solarnetwork.central.reg.SolarUserApp |
During development, each application should be launched from it's project directory. For example the
SolarIn application should launch from the solarnetwork-central/solarnet/solarin directory.
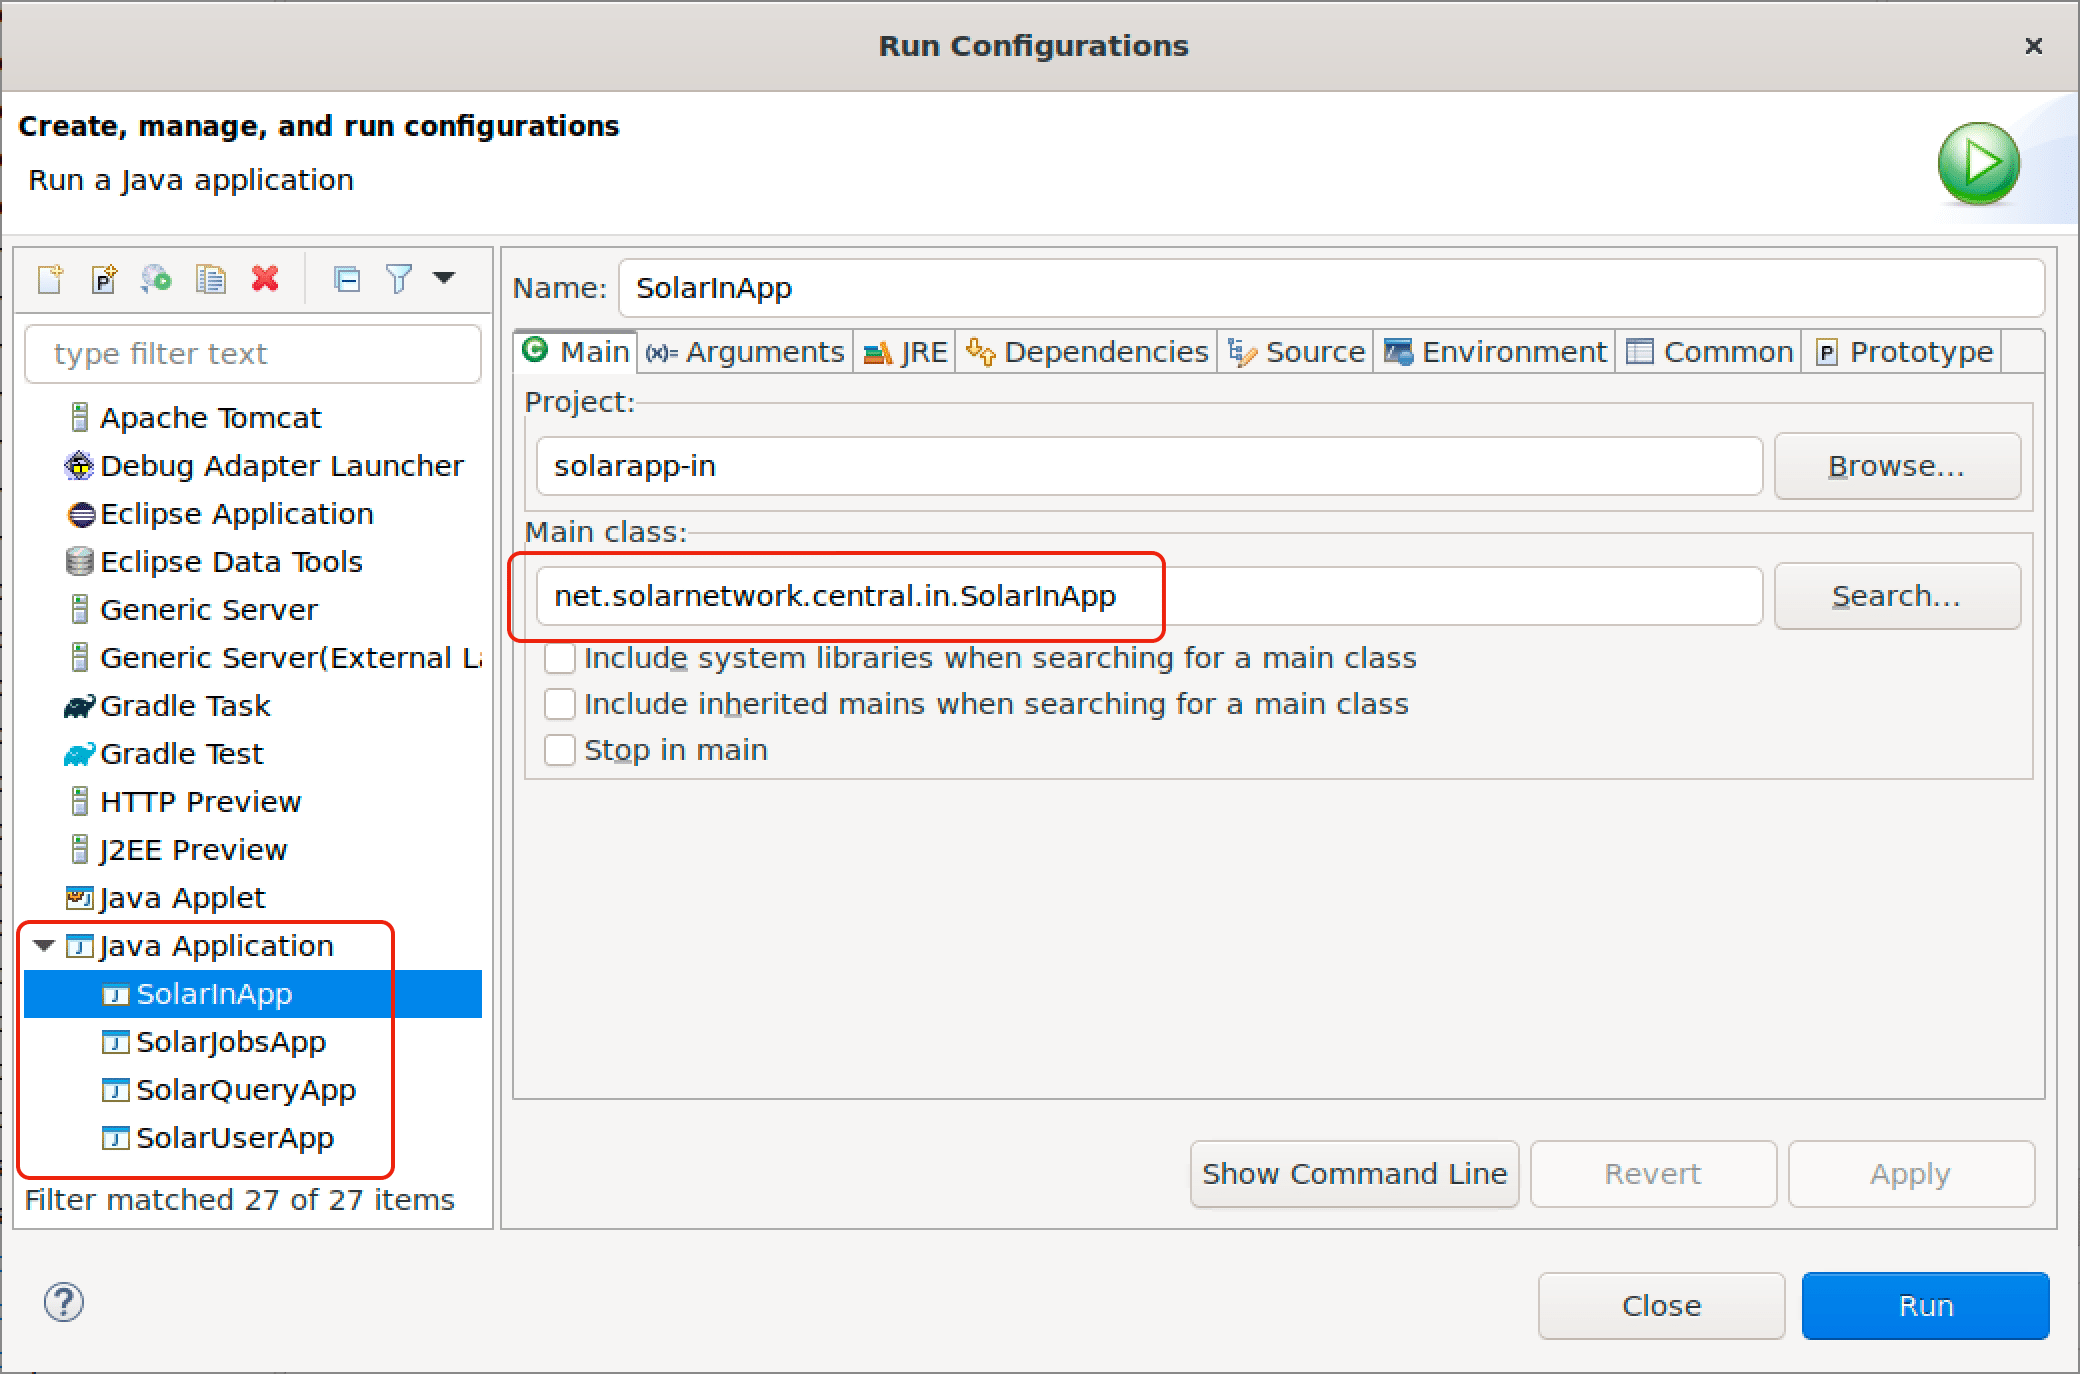
The SolarNet applications are all normal Java applications that can be launched in Eclipse using the Java Application type. View the launch configurations by going to Run > Run Configurations... in Eclipse. For example here is the SolarIn launch configuration:

The solarnetwork-dev repository has launch configurations that you can import into Eclipse. Download the Solar*App.launch files and then in Eclipse go to Import > Run/Debug > Launch Configurations and you will be able to select those files and import them.
Once you have the launch configurations set up, you can run them by go to Run > Run Configurations... and selecting the application you want to launch and then click the Run button.
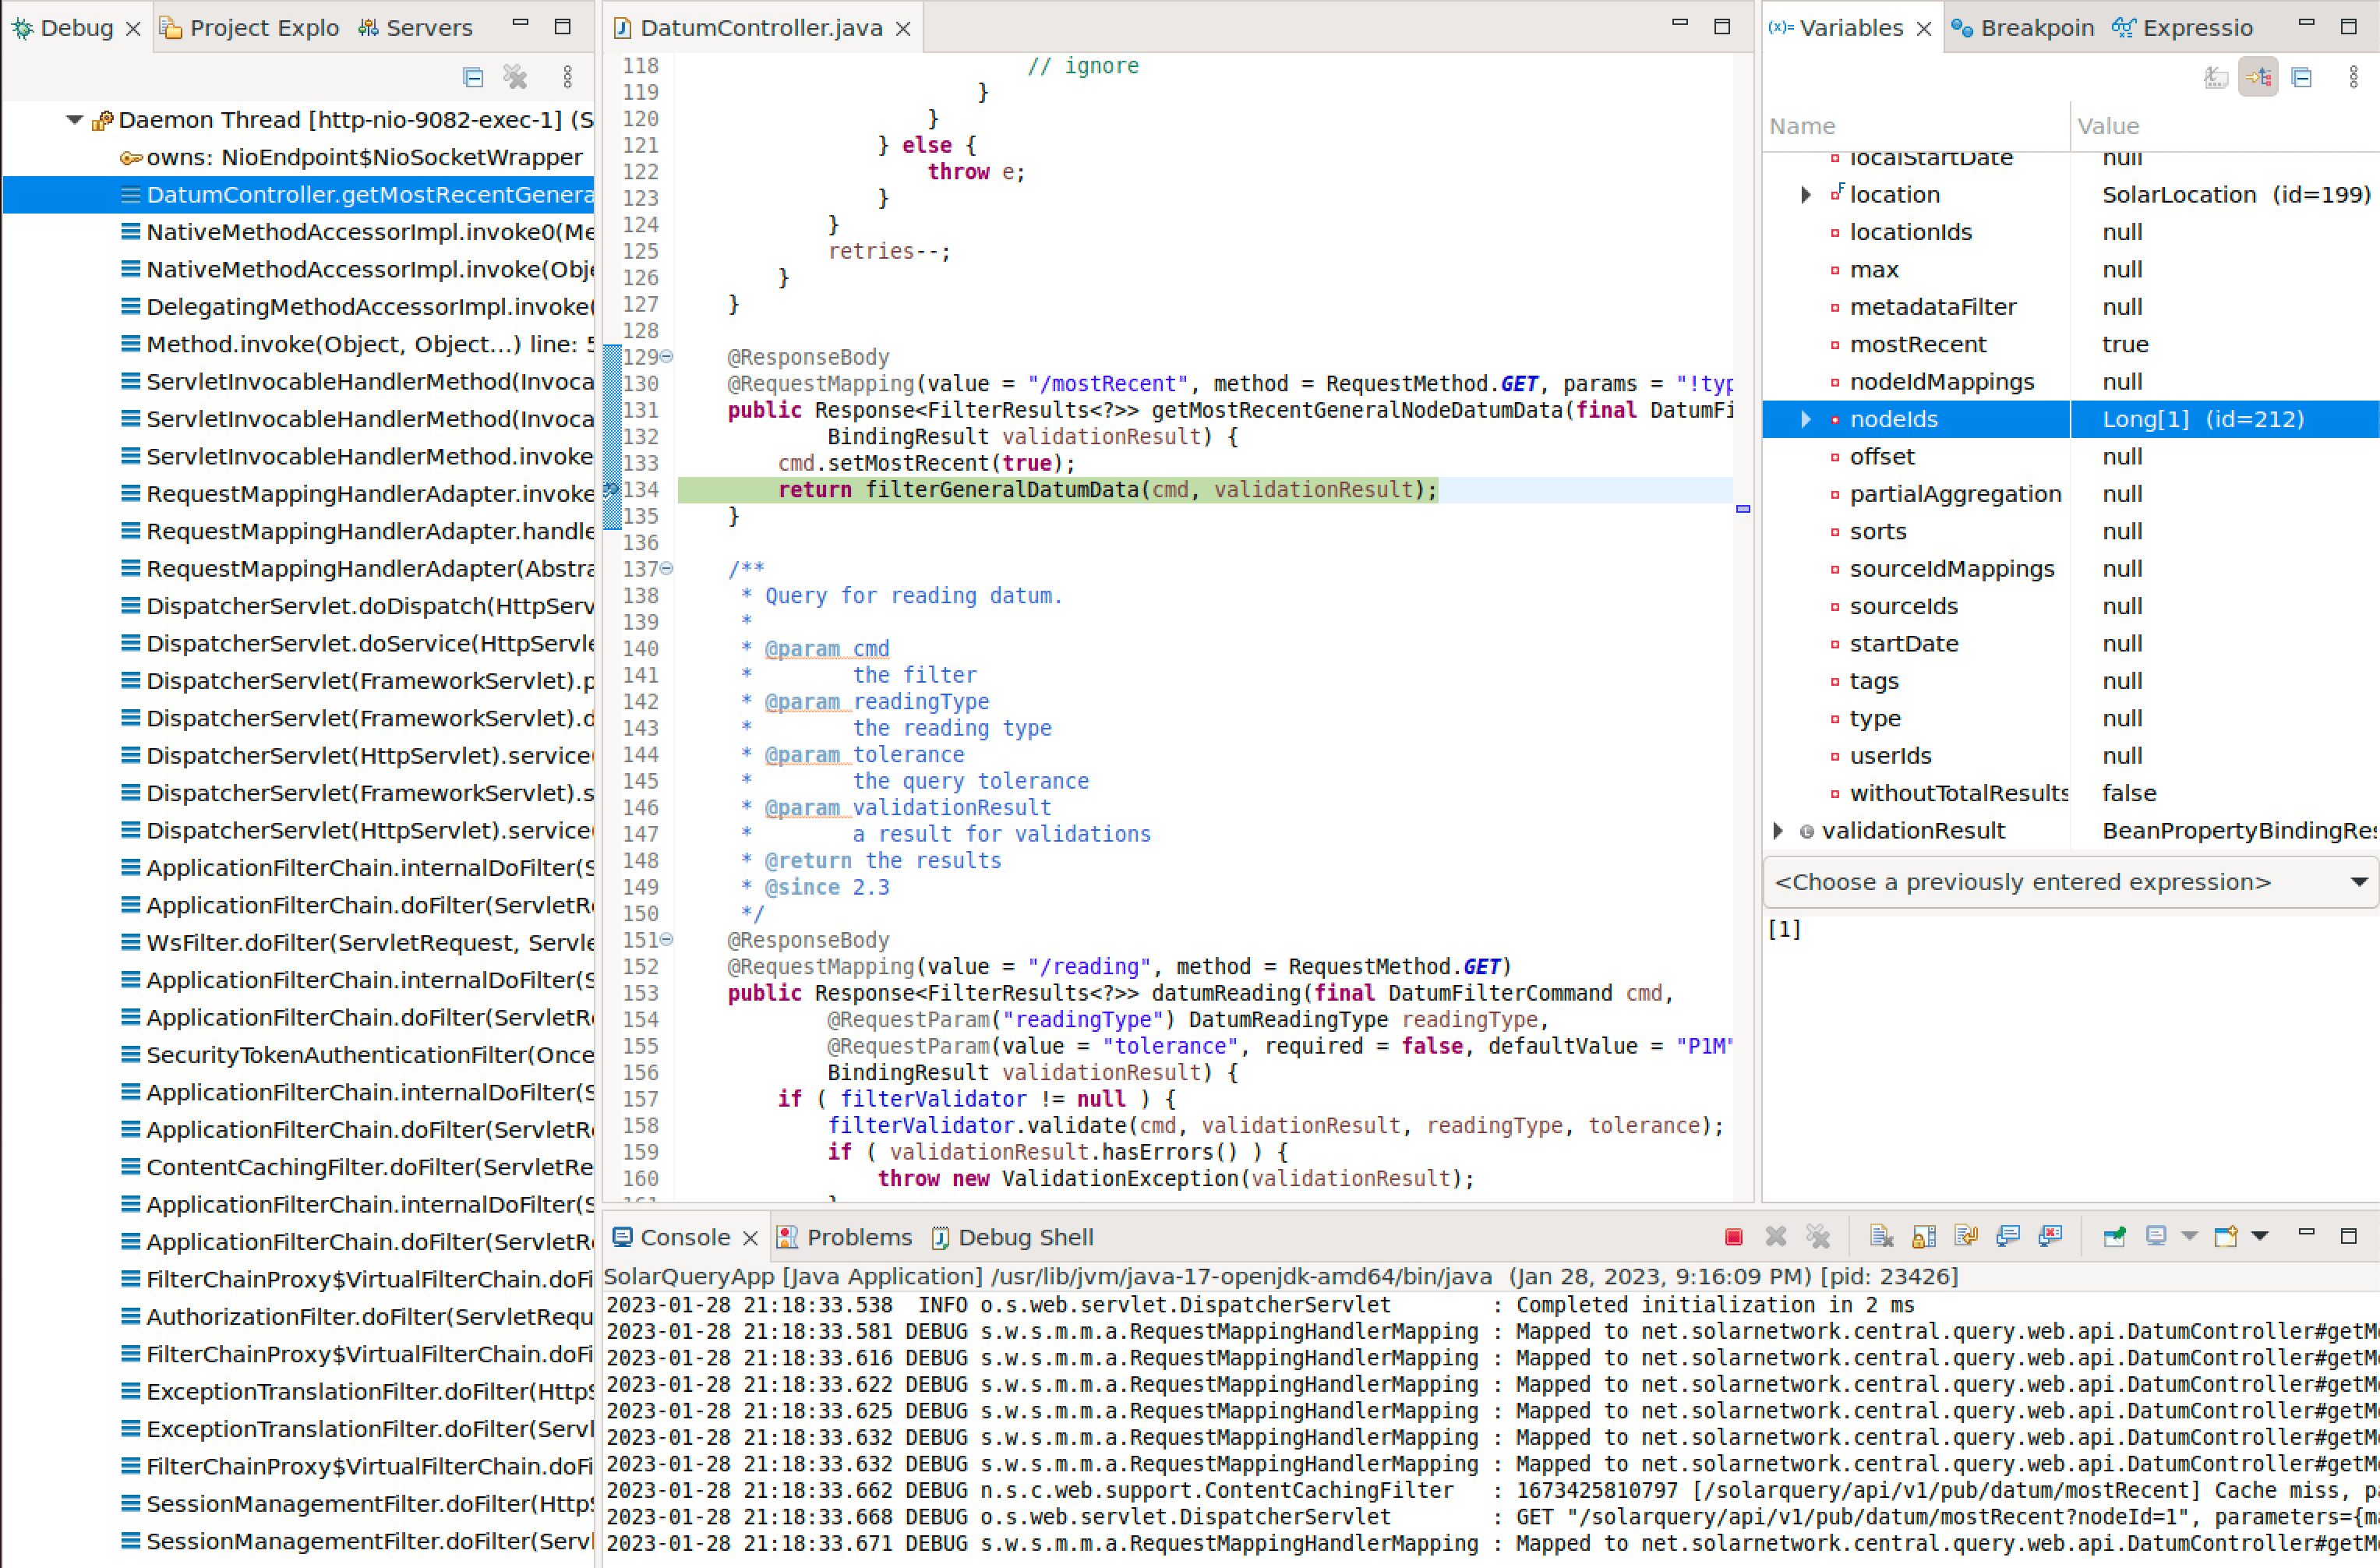
You can use the Eclipse debugger by instead going to Run > Debug Configurations... and selecting the application you want to debug and then click the Debug button. You can then set break points in any source file to step through the code in the debugger.
Here is a screen shot of debugging the SolarQuery app in Eclipse:
